
Free Flight: Scale-Sport
Ralph D. Kuenz
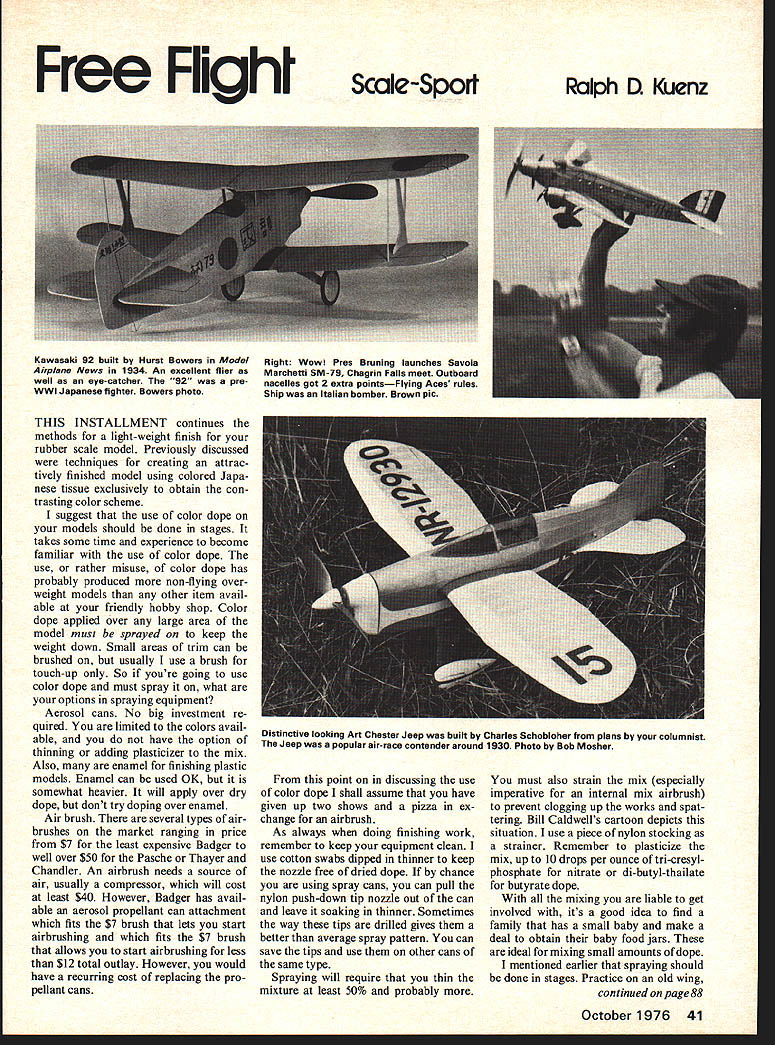
THIS INSTALLMENT continues the methods for a light-weight finish for your rubber scale model. Previously discussed were techniques for creating an attractively finished model using colored Japanese tissue exclusively to obtain the contrasting color scheme.
I suggest that the use of color dope on your models should be done in stages. It takes some time and experience to become familiar with the use of color dope. The use, or rather misuse, of color dope has probably produced more non-flying over-weight models than any other item available at your friendly hobby shop. Color dope applied over a large area of the model must be sprayed on to keep the weight down. Small areas of trim can be brushed on, but usually I use a brush for touch-up only. So if you're going to use color dope and must spray it on, what are your options in spraying equipment?
Aerosol cans. No big investment required. You are limited to the colors available, and you do not have the option of thinning or adding plasticizer to the mix. Also many enamels are fine for finishing plastic models. Enamel can be used OK, but it is somewhat heavier. It will apply over dry dope, but don't try doping over enamel.
Air brush. There are several types of airbrushes on the market ranging in price from $7 for the least expensive Badger to well over $50 for the Pasche or Thayer and Chandler. An airbrush needs a source of air, usually a compressor, which will cost at least $40. However, Badger has available an aerosol propellant can attachment which fits the $7 brush and lets you start airbrushing for less than $12 total outlay. However, you would have a recurring cost of replacing the propellant cans.
Let's start airbrushing. As always doing finishing work remember to keep equipment clean. Use cotton swabs dipped in thinner to keep the nozzle free of dried dope. If by chance you are using spray cans, you can pull the nylon push-down tip nozzle out of the can and leave it soaking in thinner. Sometimes the way the tips are drilled gives them a better-than-average spray pattern. You can save the tips and use them on other cans of the same type.
Spraying will require that you thin the mixture at least 50% and probably more. You must also strain the mix (especially imperative for an internal-mix airbrush) to prevent clogging up the works and spattering. Bill Caldwell's cartoon depicts this situation. I use a piece of nylon stocking as a strainer. Remember to plasticize the mix — up to 10 drops per ounce of tri-cresyl phosphate for nitrate or di-butyl phthalate for butyrate dope. With all the mixing you are liable to get involved with, it's a good idea to find a family that has a small baby and make a deal to obtain their baby food jars. These are ideal for mixing small amounts of dope.
I mentioned earlier that spraying should be done in stages. Practice on an old wing until you get the feel of the spray. Start by spraying on a sheet of tablet paper — first the dark color, then the light color — and you will notice how the dark takes cover when followed by the light. Now take a good look at the area you have just sprayed. If this is the very first time you have sprayed anything you will probably see uneven color. Brush a coat of the same color dope onto another sheet of tablet paper and compare results. Quality and weight will graphically illustrate the advantage spraying has over brushing dope.
Also evident is the fact that you will need an open area covered with newspaper to catch overspray. Paint misses the model and settles in the area you are working. Begin with a simple paint scheme — fuselage one color, struts another, wings and empennage another. Remember, as mentioned earlier, beauty is skin deep; spray a solid color over a wing and just watch where bumps in the structure or wrinkles in the covering stand out. You'll find it necessary to take care in sanding things smooth that you intend to spray over. A see-through, busy structure visible underneath a clear-doped model tends to take the eye off surface imperfections. Whenever possible apply opaque color dope; opaque finishes tend to hide surface flaws. Don't try for a glossy finish — shiny surfaces are less forgiving and tend to magnify wrinkles.
For example, let's say the model has a red fuselage and silver wings. If the basic components are still separated and you haven't glued wings and tail, to avoid overspray on the fuselage mask off the cabin area with drafting-grade masking tape — a type that has less aggressive adhesive. adhesive. The mask which you are going to lay on the wing does not necessarily have to cover the whole wing. Newspaper can be taped to the edges of the mask to provide complete shielding from overspray. When the mask is in position (do the bottom first for the experience) gently press down the edges. The mask should seal off the background from every edge.
Spray head on at the mask. Any angle might tend to lift the mask and give you a fuzzy edge. The mask should be removed immediately after spraying to avoid the adhesive tearing the tissue. If the mask doesn't want to come off try dabbing on a little Ronsonol lighter fluid to cut the adhesive.
You may have to cut the mask into several individual masks when doing the top wing to conform with the droop between ribs. It will take some practice. If your model is of a later vintage airplane you will need to put registration numbers on the fuselage. The contrasting color here would be silver. Surprisingly, silver covers some other colors very well. In fact, when spraying a light color over dark, an initial coat of silver blocks out the dark color and highlights the lighter color.
I'll get further into the use of masks and appliqués for sprayed finishes in the next installment.
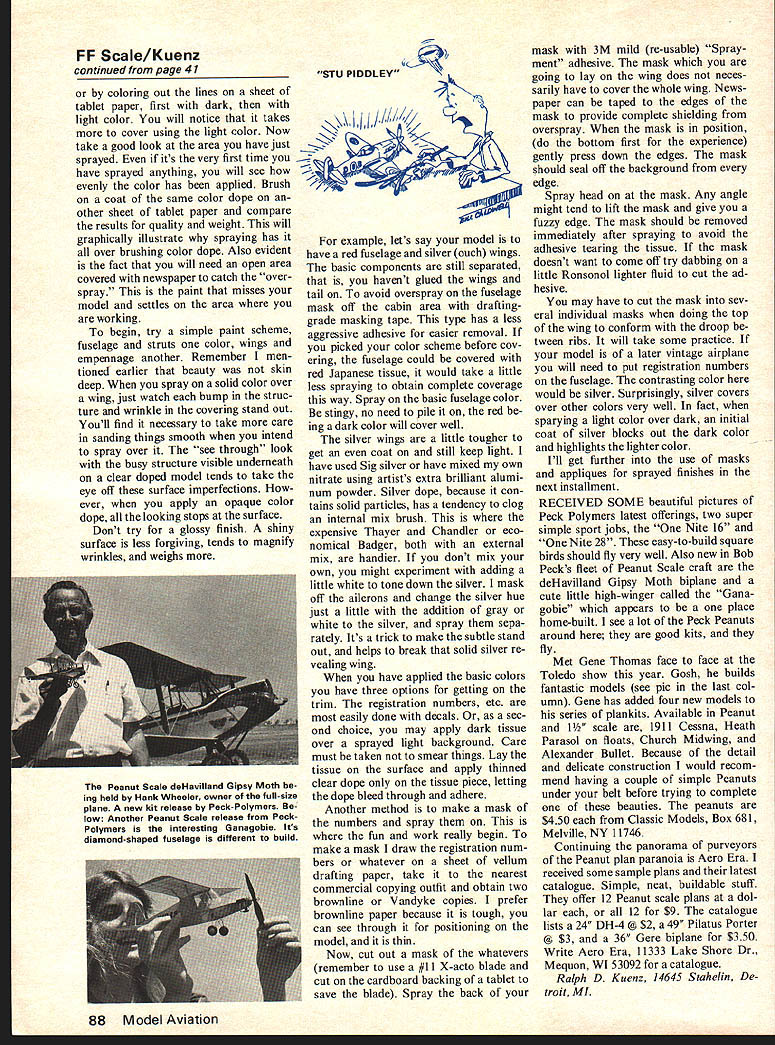
RECEIVED SOME beautiful pictures of Peck Polymers' latest offerings, two super simple sport jobs, the "One Nite 16" and the "One Nite 28." These easy-to-build square birds should fly very well. Also new in Peck's fleet of Peanut Scale craft are the deHavilland Gipsy Moth biplane and a cute little high-winger called the "Ganagobie" which appears to be a one-place home-built. I see a lot of the Peck Peanuts around here; they are good kits, and they fly.
Met Gene Thomas face to face at the Toledo show this year. Gosh, he builds fantastic models (see pic in the last column). Gene has added four new models to his series of plankkits. Available in Peanut and 1/2A sizes are 1911 Cessna, Heath Parasol on floats, Church Midwing, and Alexander Bullet. Because of the detail and delicate construction I would recommend having a couple of simple Peanuts under your belt before trying to complete one of these beauties. The Peanuts are $4.50 each from Classic Models, Box 681, Melville, NY 11746.
Continuing the panorama of purveyors of the Peanut plan paranoia is Aero Era. I received some sample plans and their latest catalogue. Simple, neat, buildable stuff. They offer 12 Peanut scale plans at a dollar each, or all 12 for $9. The catalogue lists a 24" DH-4 @ $2, a 49" Pitcairn Porter @ $3, and a 36" Gee Bee racer for $3.50. Write Aero Era, 13333 Lake Shore Dr., Mequon, WI 53092 for a catalogue.
Ralph D. Kuenz, 14645 Stahelin, Detroit, MI.
Transcribed from original scans by AI. Minor OCR errors may remain.

