
FREE FLIGHT SPORT and SCALE
Bill Warner, 1370 Monache Ave., Porterville, CA 93257
TRY 35mm projection:
Anyone can draw scale model plans with a minimum of trouble using the following easy method. Proportional dividers, opaque projectors, and drafting expertise are nice—but not essential—to get you from a three-view drawing or small plan reproduction in a magazine into a plan you can build from.
First, snap a half-dozen or so pictures of your three-view drawing, bracketing (i.e., using larger and smaller lens openings than normal) the exposure. Take some at close range, and back up on others to get different-sized images on film. If you are making a large model (36-inch or larger wingspan) get as close as you can to reduce the distance it will need to be projected.
Taking different exposures and shooting from different distances should ensure that you’ll get that one slide that is just right. Shoot outdoors in bright light, or, as I do, on a copy stand with floodlamps. If you’re not into shooting slides, a color print negative will work when it’s mounted in a slide frame. You’ll just be tracing white lines instead of black ones. Bill Hannan’s idea of using a black-and-white negative is great, as it reduces glare. Shoot in line with the center, so that you don’t accidentally distort your image.
Mount a 35mm projector on one side of the room, and tape a large sheet of white paper to the opposite wall (the back of a model plan will do nicely). Make a couple of marks on the paper at the wingspan you want, and move the projector until the image matches. If you have a zoom lens, adjusting size will be easy. The projector should be even with the center of your paper and squared from side to side, or you may get distortion. An image projected slightly from the side will make one wing larger, and the ribs won’t fit. Keystoning the image with the projector on a low table will spread the top of the picture. This could be used to enhance stab size if you are looking for a good-flying model.
If the three-view you shot had a nice border, a quick side-to-side and top-to-bottom check with a yardstick will show you if you are getting any distortion.
Trace the lines with a pencil. A yardstick can be used, but a quick hand sketch can be firmed up with your straightedge and drafting triangle when you get the plan back on the table.
Before you take the plan off the wall, stand in front of it to block out the projected image and see if you have left off any lines. Adding the rib spacings, bulkhead locations, leading edge (LE) and trailing edge (TE), etc., is a piece of cake once you have the plan on your drawing board.
Putting in the structure:
If you are doing your own plan for the first time, looking at another plan that is similar to what you want will help when it comes to rib spacing, number and placement of spars, attaching the parts, doing a nose block, etc. Rib spacing is usually determined by the location of the aileron. Make a light line at the rib end and the aileron to see how many ribs can get between—it gives a feel. If you want to divide wing spaces to fit spacing, a little pocket calculator and dividers should make getting the spacing easy enough. Move the location of the end aileron a bit to get the spacings needed; a hinged part ending between two ribs looks downright stupid.
Place key bulkheads and landing gear attachments showing respect for forces hard landings will later transmit to the airframe. When drawing the structure, remember it’s nice to have little hard points, extra facing or backup where built-in struts or other parts will attach. Otherwise you’ll have to modify structure later.
Make sure the stab is set a couple degrees negative to start; allow some adjusting movement later if it isn’t quite right. Building movable control surfaces makes adjusting the model easier in the field. Getting the thrust and downthrust right may save shimming the nose block or engine much later when adjusting power.
Finally, don’t forget you need to put wood behind tissue ends or have something for the tissue to stick to where it spans a space. Golden Rule: If you’re having trouble getting a model to fly in a stable manner, have you checked flying surfaces for warps? Move the center of gravity (CG) forward—adding a little clay to the nose as far forward as possible will get the effect; at least start with a little clay. Most free-flight scale rubber models should balance near the high point of the airfoil. Walt Mooney, the old professor fond of reminding us, says moving CG can improve stability more than anything else in the bag of tricks. Don’t forget you may have to add a little negative stab or up elevator.
Sport Aviation for Kids is the name of an all-color EAA magazine aimed at the younger set. Headed up by Henry Frautschy, an FF Scale modeler for many years, this is something worth looking into. Issue number two features a fold-out plan for a couple of models by Burt Rutan. Subscription is $15/year to EAA, P.O. Box 3086, Oshkosh, WI 54903-3086.
Cottage wings guide:
The number of suppliers of such stuff as plans, supplies, clubs, and information of interest to FF Scale modelers continues to grow, and I just don't have room to give 'em the attention they deserve in this column. My daily-updated, annotated list with more than 160 entries can be yours for a large self-addressed stamped envelope and a dollar. This is a nonprofit deal, and I hope that people will copy and circulate the list to support the guys who help make this the greatest hobby on earth.
FF Sport & Scale/Warner
"Micro-Kicker"
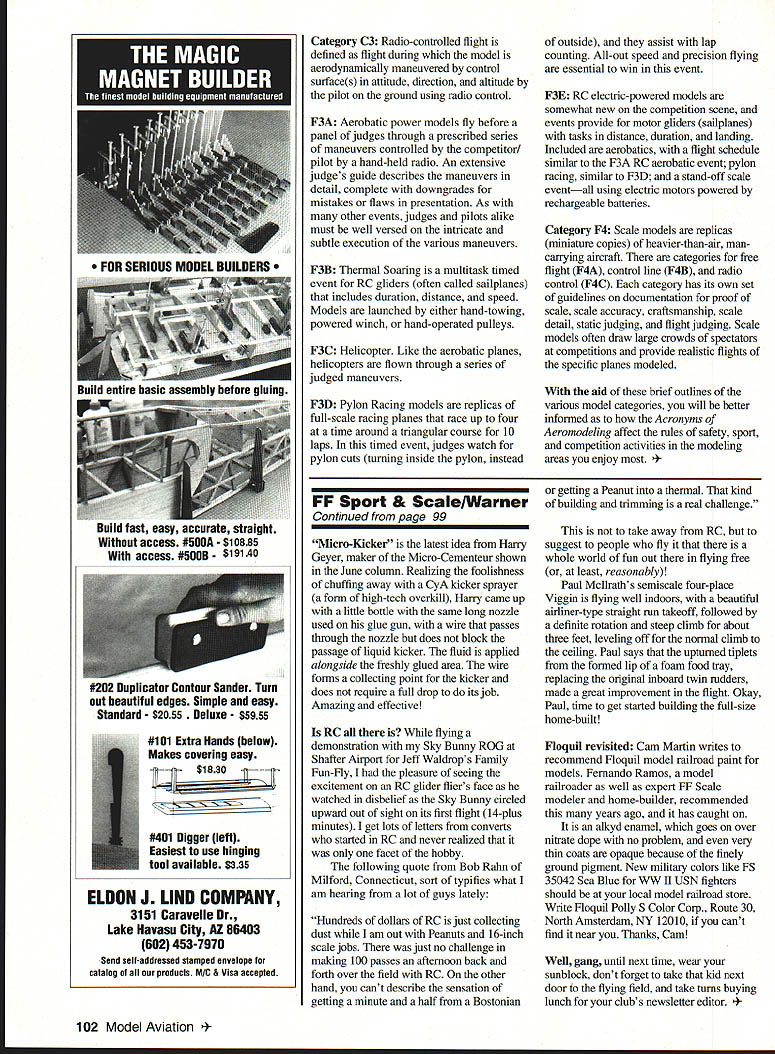
"Micro-Kicker" is the latest idea from Harry Geyer, maker of the Micro-Cementeer shown in the June column. Realizing the foolishness of chuffing away with a CA kicker sprayer (a form of high-tech overkill), Harry came up with a little bottle with the same long nozzle used on his glue gun, with a wire that passes through the nozzle but does not block the passage of liquid kicker. The fluid is applied alongside the freshly glued area. The wire forms a collecting point for the kicker and does not require a full drop to do its job. Amazing and effective!
Is RC all there is?
While flying a demonstration with my Sky Bunny ROG at Shafter Airport for Jeff Waldrop's Family Fun-Fly, I had the pleasure of seeing the excitement on an RC glider flier's face as he watched in disbelief as the Sky Bunny circled upward out of sight on its first flight (14-plus minutes). I get lots of letters from converts who started in RC and never realized that it was only one facet of the hobby.
The following quote from Bob Rahn of Milford, Connecticut, sort of typifies what I am hearing from a lot of guys lately:
"Hundreds of dollars of RC is just collecting dust while I am out with Peanuts and 16-inch scale jobs. There was just no challenge in making 100 passes an afternoon back and forth over the field with RC. On the other hand, you can't describe the sensation of getting a minute and a half from a Bostonian or getting a Peanut into a thermal. That kind of building and trimming is a real challenge."
This is not to take away from RC, but to suggest to people who fly that there is a whole world of fun out there in flying free (or, at least, reasonably)!
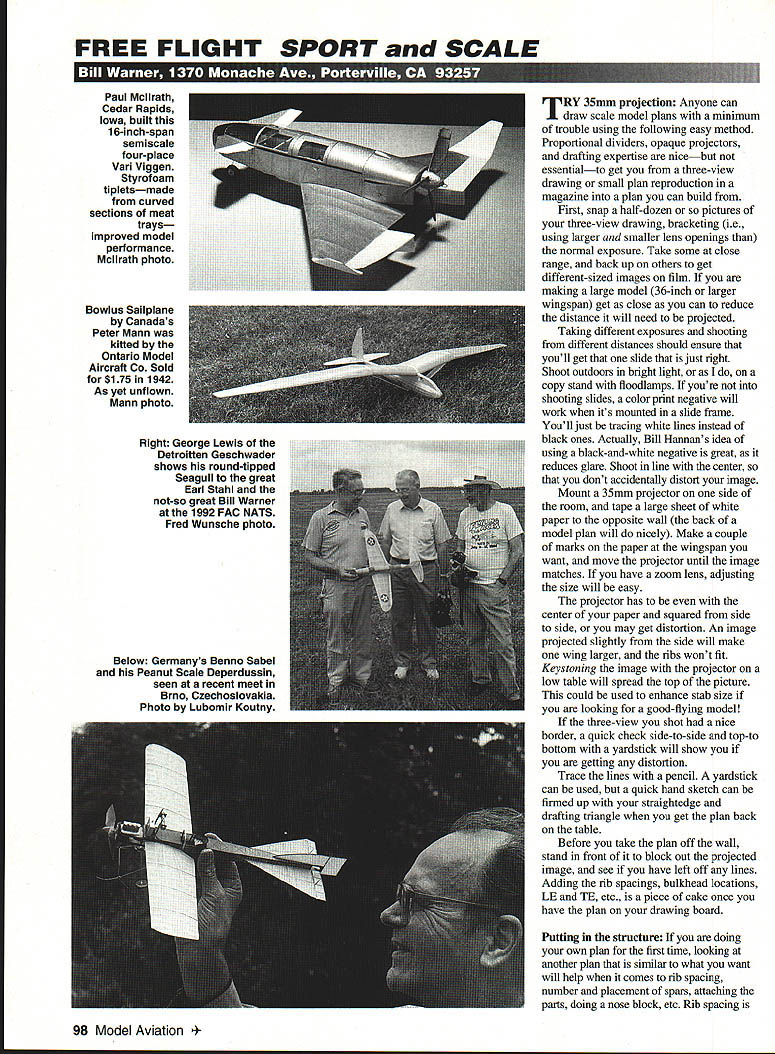
Paul McIlrath's semiscale Van Viggen
Paul McIlrath's semiscale four-place Van Viggen is flying well indoors, with a beautiful airliner-type straight run takeoff, followed by a definite rotation and steep climb for about three feet, leveling off for the normal climb to the ceiling. Paul says that the upturned tips on the formed lip of a foam food tray, replacing the original inboard twin rudders, made a great improvement in the flight. Okay, Paul, time to get started building the full-size home-built!
Floquil revisited
Cam Martin writes to recommend Floquil model railroad paint for models. Fernando Ramos, a model railroader as well as expert FF Scale modeler and home-builder, recommended this many years ago, and it has caught on. It is an alkyd enamel, which goes on over nitrocellulose dope with no problem, and even when thinned coats are opaque because of the finely ground pigments. New military colors like FS 35042 Sea Blue for WWII USN fighters should be at your local model railroad store. Write Floquil, Polly-S Color Corp., Route 30, North Amsterdam, NY 12010, if you can't find it near you. Thanks, Cam!
Well, gang, until next time, wear your sunblock, don't forget to take that kid next door to the flying field, and take turns buying lunch for your club's newsletter editor.
Transcribed from original scans by AI. Minor OCR errors may remain.

