
FREE FLIGHT SPORT and SCALE
Bill Warner, 1370 Monache Avenue, Porterville CA 93257
FALLING IN LOVE WITH A DIMPLE
"Many a young man who falls in love with a dimple makes the mistake of marrying the whole girl." Would you buy a kit just because it has laser-cut parts or a colorful decal? Sure. A kit is a motivational device—it gets you fired up to build. If it inspires you with a gimmick, at least you will be launched on a project that you can modify after you get going. It makes sense to look at the whole girl before you commit your hard‑earned cash, but if it takes laser‑cut ribs or fancy decals to get you building, go for it!
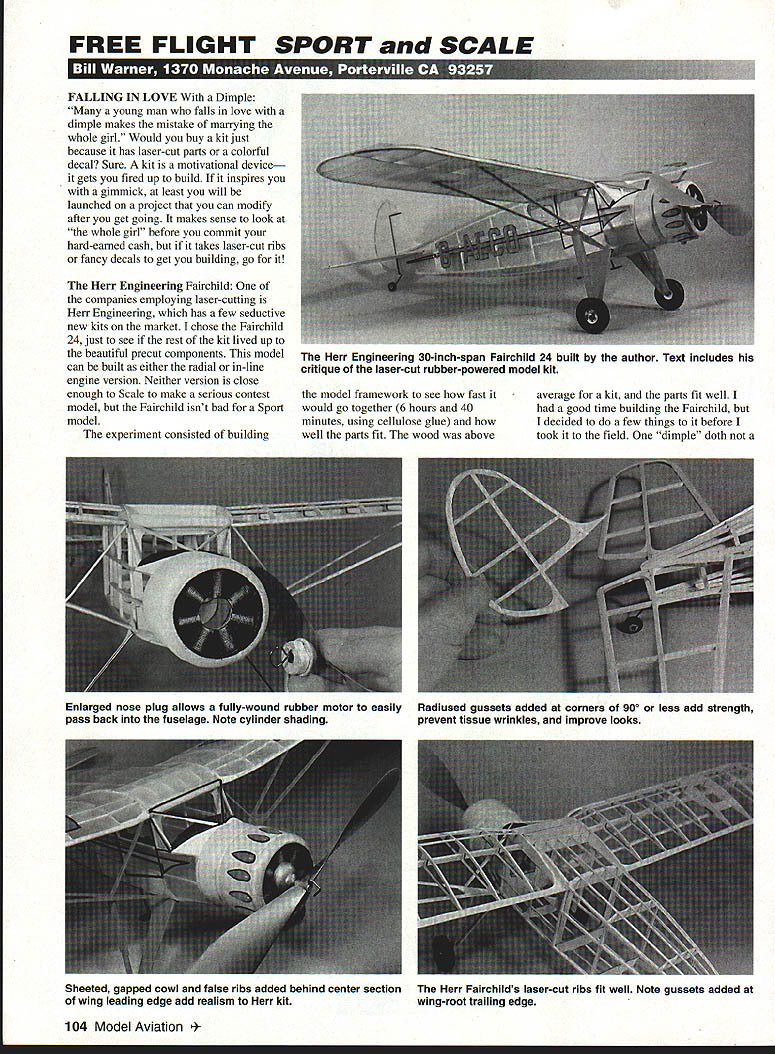
The Herr Engineering Fairchild: One of the companies employing laser‑cutting is Herr Engineering, which has a few seductive new kits on the market. I chose the Fairchild 24 just to see if the rest of the kit lived up to the beautiful precut components. This model can be built as either the radial or inline engine version. Neither version is close enough to scale to make a serious contest model, but the Fairchild isn't bad for a sport model.
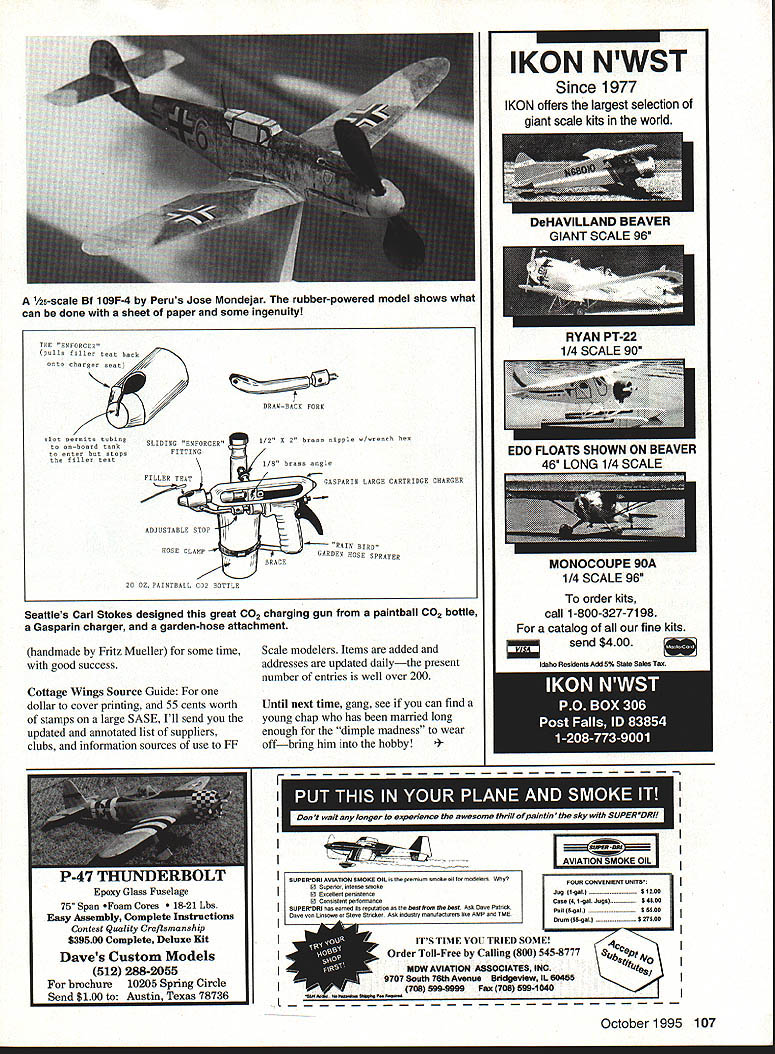
The experiment consisted of building the model framework to see how fast it would go together (6 hours and 40 minutes, using cellulose glue) and how well the parts fit. The wood was above average for a kit, and the parts fit well. I had a good time building the Fairchild, but I decided to do a few things to it before I took it to the field. One dimple doth not a happy marriage make, in and of itself.
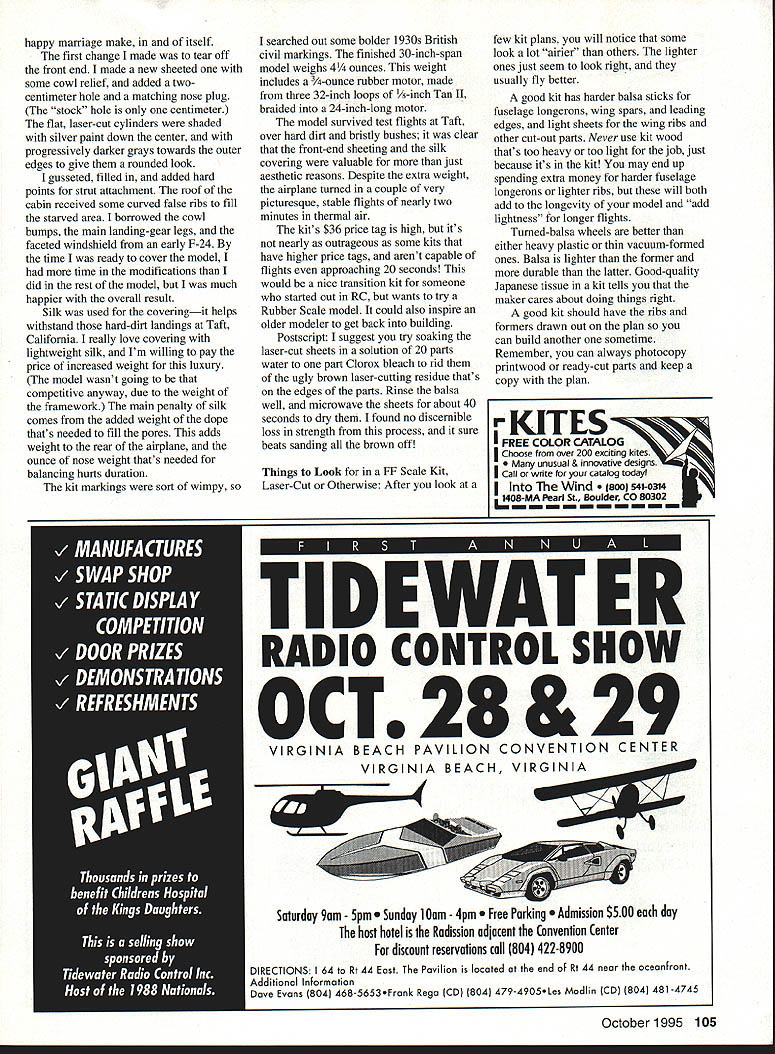
The first change I made was to tear off the front end. I made a new sheeted one with some cowl relief, and added a two‑centimeter hole and a matching nose plug. (The stock hole is only one centimeter.) The flat, laser‑cut cylinders were shaded with silver paint down the center and with progressively darker grays toward the outer edges to give them a rounded look.
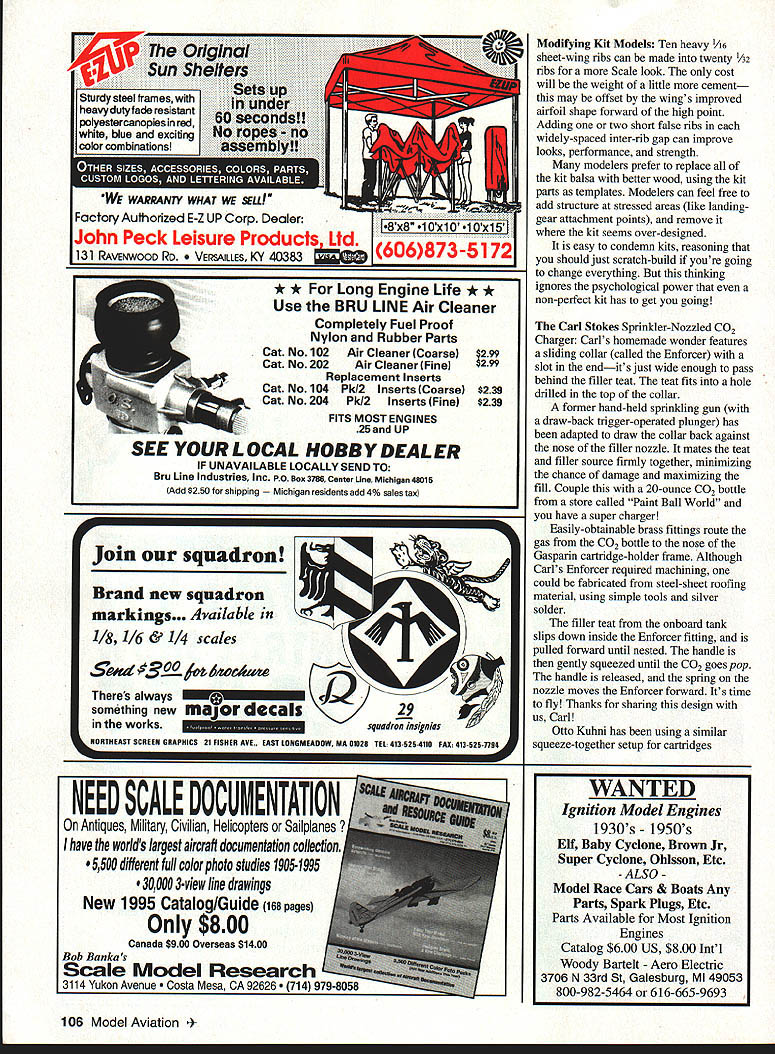
I suggested, filled in, and added hard points for strut attachment. The roof of the cabin received some curved false ribs to fill the starved area. I borrowed the cowl bumps, the main landing‑gear legs, and the faceted windshield from an early F‑24. By the time I was ready to cover the model, I had more time in the modifications than I did in the rest of the model, but I was much happier with the overall result.
Silk was used for the covering—it helps withstand those hard‑dirt landings at Taft, California. I really love covering with lightweight silk, and I'm willing to pay the price of increased weight for its luxury. The model wasn't going to be that competitive anyway, due to the weight of the framework. The main penalty of silk comes from the added weight of the dope that's needed to fill the pores. This adds weight to the rear of the airplane, and the ounce of nose weight that's needed for balancing hurts duration.
The kit markings were sort of wimpy, so I searched out some bolder 1930s British civil markings. The finished 30-inch-span model weighs 4 1/4 ounces. This weight includes a 3/4-ounce rubber motor, made from three 32-inch loops of 5/16-inch Tan II, braided into a 24-inch-long motor.
The model survived test flights at Taft, over hard dirt and bristly bushes; it was clear that the front‑end sheeting and the silk covering were valuable for more than just aesthetic reasons. Despite the extra weight, the airplane turned in a couple of very picturesque, stable flights of nearly two minutes in thermal air.
The kit's $36 price tag is high, but it's not nearly as outrageous as some kits that have higher price tags and aren't capable of flights approaching 20 seconds! This would be a nice transition kit for someone who started out in RC but wants to try a rubber scale model. It could also inspire an older modeler to get back into building.
Postscript: Try soaking the laser‑cut sheets in a solution of 20 parts water to one part Clorox bleach to rid them of the ugly brown laser‑cutting residue on the edges of the parts. Rinse the balsa well, and microwave the sheets for about 40 seconds to dry them. I found no discernible loss in strength from this process, and it sure beats sanding all the brown off!
THINGS TO LOOK FOR IN A FF SCALE KIT, LASER‑CUT OR OTHERWISE
After you look at a few kit plans, you will notice that some look a lot airier than others. The lighter ones just seem to look right, and they usually fly better.
- A good kit has harder balsa sticks for fuselage longerons, wing spars, and leading edges, and light sheets for the wing ribs and other cut‑out parts. Never use kit wood that's too heavy or too light for the job just because it's in the kit. You may end up spending extra money for harder fuselage longerons or lighter ribs; both will add longevity to the model and add lightness for longer flights.
- Turned‑balsa wheels are better than either heavy plastic or thin vacuum‑formed ones. Balsa is lighter than the former and more durable than the latter.
- Good‑quality Japanese tissue in a kit tells you that the maker cares about doing things right.
- A good kit should have the ribs and formers drawn out on the plan so you can build another one sometime. Remember, you can always photocopy printwood or ready‑cut parts and keep a copy with the plan.
MODIFYING KIT MODELS
- Ten heavy 1/16" sheet wing ribs can be made into twenty 1/32" ribs for a more scale look. The only cost will be the weight of a little more cement — this may be offset by the wing's improved airfoil shape forward of the high point. Adding one or two short false ribs in each widely spaced inter‑rib gap can improve looks, performance, and strength.
- Many modelers prefer to replace all of the kit balsa with better wood, using the kit parts as templates.
- Modelers can feel free to add structure at stressed areas (like landing‑gear attachment points) and remove it where the kit seems over‑designed.
It is easy to condemn kits, reasoning that you should just scratch‑build if you're going to change everything. But this thinking ignores the psychological power that even a non‑perfect kit has to get you going!
THE CARL STOKES SPRINKLER‑NOZZLED CO2 CHARGER
Carl's homemade wonder features a sliding collar (called the Enforcer) with a slot in the end—it's just wide enough to pass the filler teat. The teat fits into a hole drilled in the top of the collar.
A former handheld sprinkling gun (with a draw‑back trigger‑operated plunger) has been adapted to draw the collar back against the nose of the filler nozzle. It mates the teat and filler source firmly together, minimizing the chance of damage and maximizing the fill. Couple this with a 20‑ounce CO2 bottle from a store called "Paint Ball World" and you have a super charger!
Easily obtainable brass fittings route the gas from the CO2 bottle to the nose of the Gasparin cartridge‑holder frame. Although Carl's Enforcer required machining, one could be fabricated from steel‑sheet roofing material, using simple tools and silver solder.
The filler teat from the onboard tank slips down inside the Enforcer fitting and is pulled forward until nested. The handle is then gently squeezed until the CO2 goes pop. The handle is released, and the spring on the nozzle moves the Enforcer forward. It's time to fly! Thanks for sharing this design with us, Carl!
Otto Kuhni has been using a similar squeeze‑together setup for cartridges. Seattle's Carl Stokes designed this great CO2 charging gun from a paintball CO2 bottle, a Gasparin charger, and a garden‑hose attachment (handmade by Fritz Mueller) with good success.
COTTAGE WINGS SOURCE GUIDE
For one dollar to cover printing and 55 cents worth of stamps on a large SASE, I'll send you the updated and annotated list of suppliers, clubs, and information sources of use to FF scale modelers. Items are added and addresses are updated daily—the present number of entries is well over 200.
Until next time, gang, see if you can find a young chap who has been married long enough for the "dimple madness" to wear off—bring him into the hobby!
Transcribed from original scans by AI. Minor OCR errors may remain.

