
FREE FLIGHT SPORT and SCALE
Fernando Ramos 19361 Mesa Dr., Villa Park CA 92861 E-mail: fkramos@att.net
Opening
Egads! Here we are, starting another new year. What happened to 2000? I don't know about you, but last year was nothing more than a blur for me.
Even though you will be reading this knee-deep in 2001, I wish you all a very happy new year. I hope 2001 brings you the time you need to build all those models that have been waiting in the "wings."
Bringing in new members
I received an e-mail from Dave Smith, the top stalwart of the FAC (Flying Aces Club) Cactus Squadron, regarding what he has done to bring new members into the club.
It is clever enough that other clubs might consider a similar approach. It is a good way to bring Juniors into our declining hobby.
Dave designed a flyer about their model club, which points out the joy and challenge of building and flying rubber-scale models. The handbill also points out that a free copy of the club's newsletter is available, and it offers help on trimming and flying a new model.
Dave distributes these flyers at hobby shops, and the best part is that he gets permission from the shop owners to fold and rubber-band flyers onto rubber-powered model kits. I think this is a terrific idea, and one that will bring modelers, young and old, into the fold. Dave is fortunate to have several hobby shops in his proximity to help pursue his idea. I hope you do too!
You might be wondering why only rubber-powered models are given this treatment. The Cactus Squadron flies on American Indian–owned land, and the Indians are not receptive, in general, to having their land used for power models other than electric and CO2.
Wheels — often neglected, but important
One area in scale modeling that is too often neglected is the wheels. It seems that to many they are just something to hang on after everything else has been completed.
I realize it is impossible for us to go to a model shop and ask for wheels for the specific model we are building, let alone for a given size. I have some ideas that will make your model look a bit more realistic by taking more care with the wheels.
The radio-control (RC) fraternity (not RC scale) has no regard for wheels and their attachment. There is nothing less appealing than using a wheel collar for attaching a wheel to an axle. It is quick and simple, but awful in appearance. Soldering can look okay if done properly, but it is too much work for many, and (surprisingly) many don't know how to solder.
The following is a method I use for scale and old-time free flight (FF) models.
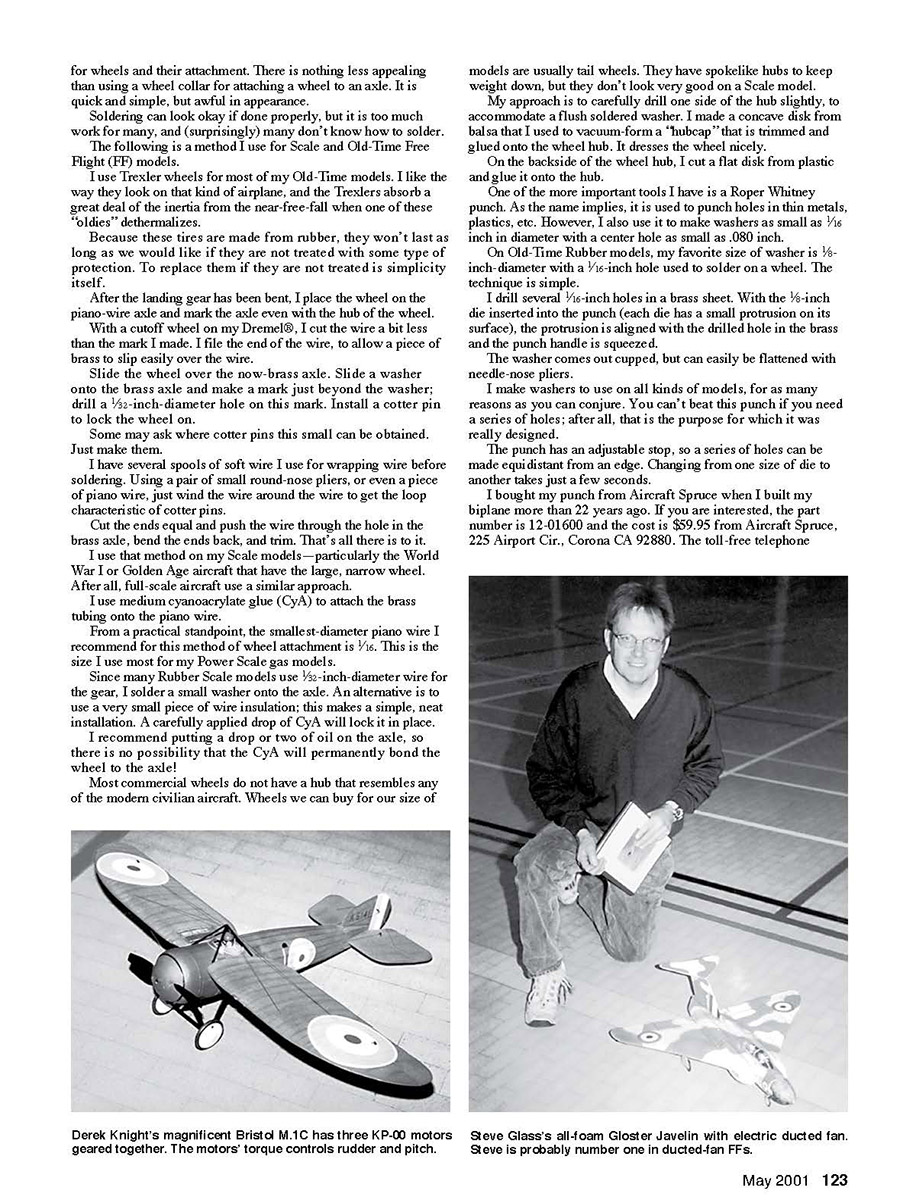
I use Trexler wheels for most of my old-time models. I like the way they look on that kind of airplane, and the Trexlers absorb a great deal of the inertia from the near-free-fall when one of these "oldies" dethermalizes. Because these tires are made from rubber, they won't last as long as we would like if they are not treated with some type of protection. To replace them, if they are not treated, is simplicity itself.
Wheel-attachment method (my preferred technique)
- Bend the landing gear to shape. Place the wheel on the piano-wire axle and mark the axle even with the hub of the wheel.
- With a cutoff wheel on a Dremel®, cut the wire a bit less than the mark you made. File the end of the wire so a piece of brass tubing will slip easily over the wire.
- Slide the wheel over the now-brass-covered axle. Slide a washer onto the brass tubing.
- Make a mark just beyond the washer; drill a 1/32-inch-diameter hole on this mark.
- Install a cotter pin to lock the wheel on.
Some may ask where cotter pins this small can be obtained. Just make them. I have several spools of soft wire I use for wrapping wire before soldering. Using a pair of small round-nose pliers, cut the ends equal, push the wire through the hole in the brass tubing, bend the ends back, and trim. That's all there is to it.
I use that method on my scale models—particularly the World War I or Golden Age aircraft that have the large, narrow wheel. After all, full-scale aircraft use a similar approach.
I use medium cyanoacrylate glue (CyA) to attach the brass tubing onto the piano wire.
From a practical standpoint, the smallest-diameter piano wire I recommend for this method of wheel attachment is 1/16 inch. This is the size I use most for my power-scale gas models.
Since many rubber-scale models use 3/32-inch-diameter wire for the gear, I solder a small washer onto the axle. An alternative is to use a very small piece of wire insulation; this makes a simple, neat installation. A carefully applied drop of CyA will lock it in place.
I recommend putting a drop or two of oil on the axle so there is no possibility that the CyA will permanently bond the wheel to the axle!
Most commercial wheels do not have a hub that resembles any of the modern civilian aircraft. Wheels we can buy for our size of models are usually tail wheels. They have spoke-like hubs to keep weight down, but they don't look very good on a scale model.
My approach is to carefully drill one side of the hub slightly to accommodate a flush-soldered washer. I made a concave disk from balsa that I used to vacuum-form a "hubcap" that is trimmed and glued onto the wheel hub. It dresses the wheel nicely.
On the backside of the wheel hub, I cut a flat disk from plastic and glue it onto the hub.
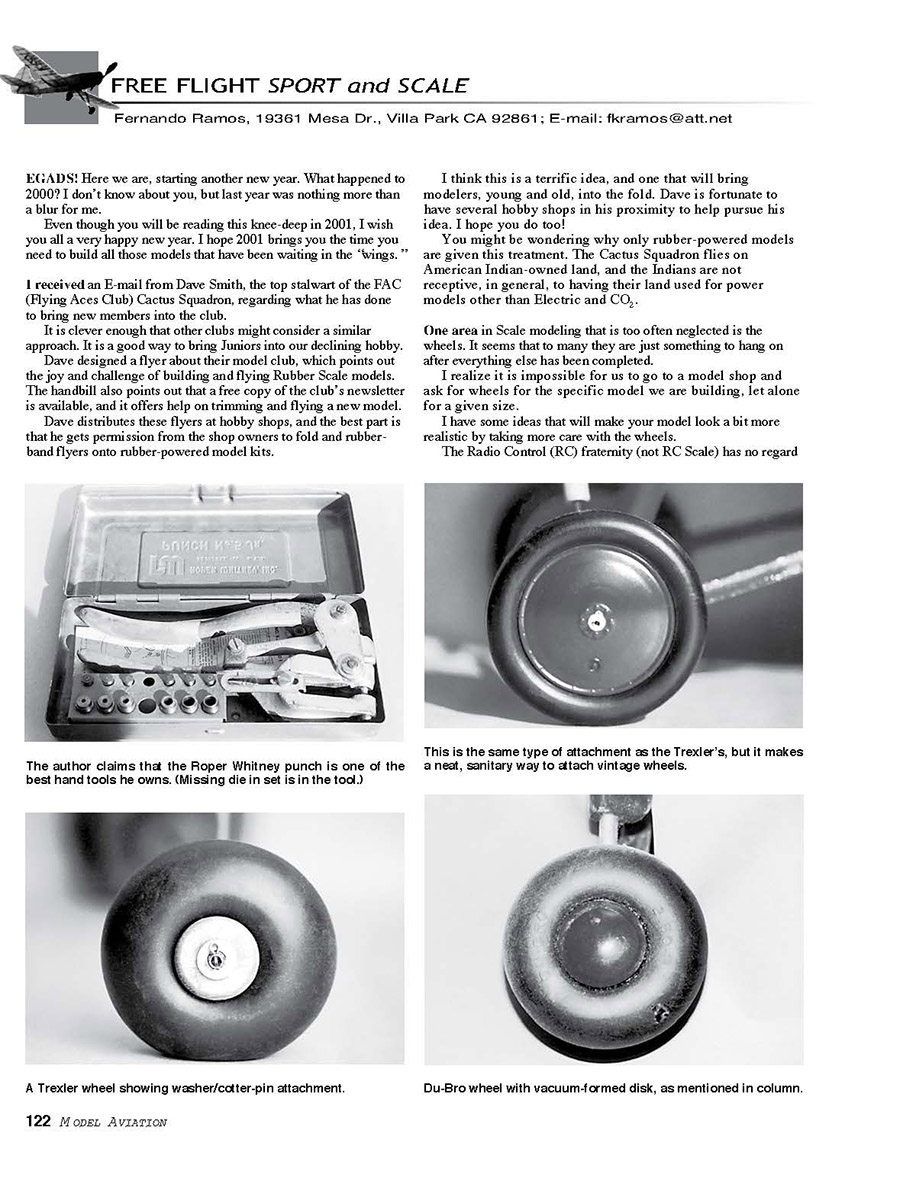
Making small washers — Roper Whitney punch
One of the more important tools I have is a Roper Whitney punch. As the name implies, it is used to punch holes in thin metals, plastics, etc. However, I also use it to make washers as small as 5/16 inch in diameter with a center hole as small as .080 inch.
On old-time rubber models, my favorite size of washer is 5/32 inch diameter with a 1/16-inch hole used to solder on a wheel. The technique is simple:
- Drill several 1/16-inch holes in a brass sheet.
- With the 1/16-inch die inserted into the punch (each die has a small protrusion on its surface), align the protrusion with the drilled hole in the brass and squeeze the punch handle.
The washer comes out cupped but can easily be flattened with needle-nose pliers.
I make washers to use on all kinds of models, for as many reasons as you can conjure. You can't beat this punch if you need a series of holes; after all, that is the purpose for which it was really designed.
The punch has an adjustable stop, so a series of holes can be made equidistant from an edge. Changing from one size of die to another takes just a few seconds.
I bought my punch from Aircraft Spruce when I built my biplane more than 22 years ago. If you are interested, the part number is 12-01600 and the cost is $59.95 from Aircraft Spruce, 225 Airport Cir., Corona CA 92880. The toll-free telephone number is (877) 477-7823. Don't forget to request a catalog.
Check plans carefully — one more common error
I thought I had found each mistake often made on the plans from which we work. I found one more, which has never cropped up in my many years of modeling.
I had just finished building a Swiss Compte from a British drawing, and I was getting ready to make the wing struts. I cut a scrap piece of balsa the length shown on the drawing for the struts. I put the strut up against the model to see how much change I would have to make, and it was way too short! The distance from the fuselage to the strut fittings on the wings didn't jibe.
I checked the three-view I had, to see whether the struts or attach fittings were in error. The plan showed the wing-strut attachment one bay too far toward the wingtip. Since I had never encountered this situation, I installed them as shown.
I can make a change fairly easily, but it is aggravating.
Don't leave anything to chance; study the drawings, and use the errors previously mentioned to check before you start cutting wood.
Quick-build kits and Mylar rigging
The Czech Republic has been making great strides in all areas of aeromodeling, one of which is partially made scale FF kits. I mention this not to get you to quit building, but to pass on a hint I saw incorporated in one of these quick-build kits.
The model was a World War I biplane, and the way the flying and landing wire attachment was done was simple and functional.
Instead of using fishhook eyes or an equivalent, fine strips of Mylar™ were incorporated. I read an article that evaluated this particular kit, and that's where I saw this hint.
The builder did not trim the Mylar, but left each piece rectangular in shape. A small piece of 1/32 or 9/64 plywood, cut to a nice shape, was used as a template to cut out all the Mylar pieces.
This is done to ensure that all the pieces look alike. It's not very scale, but it will definitely speed up the rigging process and it looks pretty nice.
Closing remarks — scale activity
I want to thank all of you who have taken time to e-mail me regarding this column. And thanks to those hardworking newsletter editors who send me their fine publications, letting me know what is going on in different parts of this country.
I live in the largest state in the continental US, and there is absolutely no scale FF activity worth mentioning.
Yes, the Blacksheep Squadron holds a scale event and some of the old-timer clubs include scale, but it is usually an endurance event. I don't know if there is any scale activity in the Bay Area, so most activity seems to be on the East Coast.
If I am wrong, let me know so I can pass this info on to readers. My e-mail address is at the top of the column.
MA
Transcribed from original scans by AI. Minor OCR errors may remain.

