
Free Flight: Sport and Scale
Fernando Ramos 19361 Mesa Dr., Villa Park CA 92861
Introduction
I have a bunch of hints to pass on that I hope will prove useful in your scale modeling efforts.
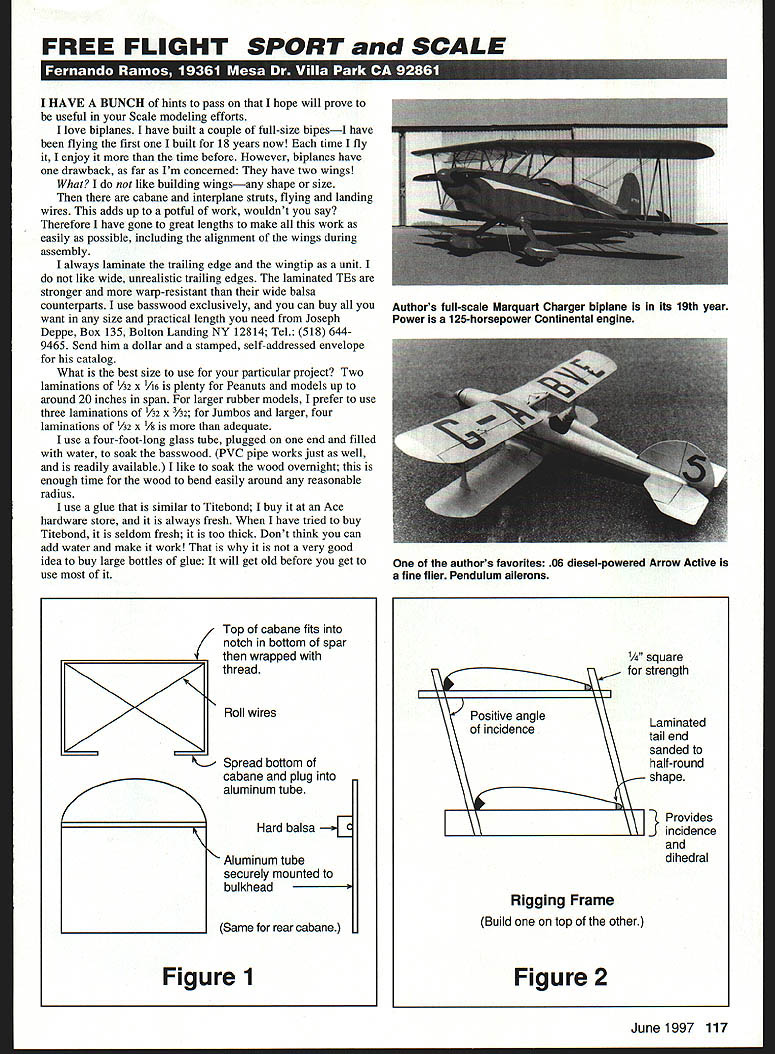
I love biplanes. I have built a couple of full-size bipes — I have been flying the first one I built for 18 years now! Each time I fly it, I enjoy it more than the time before. However, biplanes have one drawback as far as I'm concerned: they have two wings. I do not like building wings — any shape or size. Then there are cabane and interplane struts, flying and landing wires. This adds up to a potful of work, wouldn't you say? Therefore I have gone to great lengths to make all this work as easily as possible, including alignment of the wings during assembly.
Trailing edges and laminations
I always laminate the trailing edge and the wingtip as a unit. I do not like wide, unrealistic trailing edges. The laminated trailing edges are stronger and more warp-resistant than their wide balsa counterparts. I use basswood exclusively, which you can buy in any size and practical length from Joseph Deppe, Box 135, Bolton Landing NY 12814; Tel.: (518) 644-9465. Send him a dollar and a stamped, self-addressed envelope for his catalog.
Recommended lamination sizes by model type:
- Peanuts and models up to ~20" span: two laminations of 3/32" x 1/16".
- Larger rubber models: three laminations of 3/32" x 3/32".
- Jumbos and larger: four laminations of 1/32" x 1/8".
Soaking:
- I use a four-foot glass tube (PVC works as well), plugged on one end and filled with water, to soak the basswood.
- Soak overnight; this is enough time for the wood to bend easily around any reasonable radius.
Glue:
- I use a glue similar to Titebond, bought fresh at Ace hardware. Titebond is often too thick on the shelf. Don't expect to thin old glue with water — buy amounts you will use before it gets old.
Laminating methods
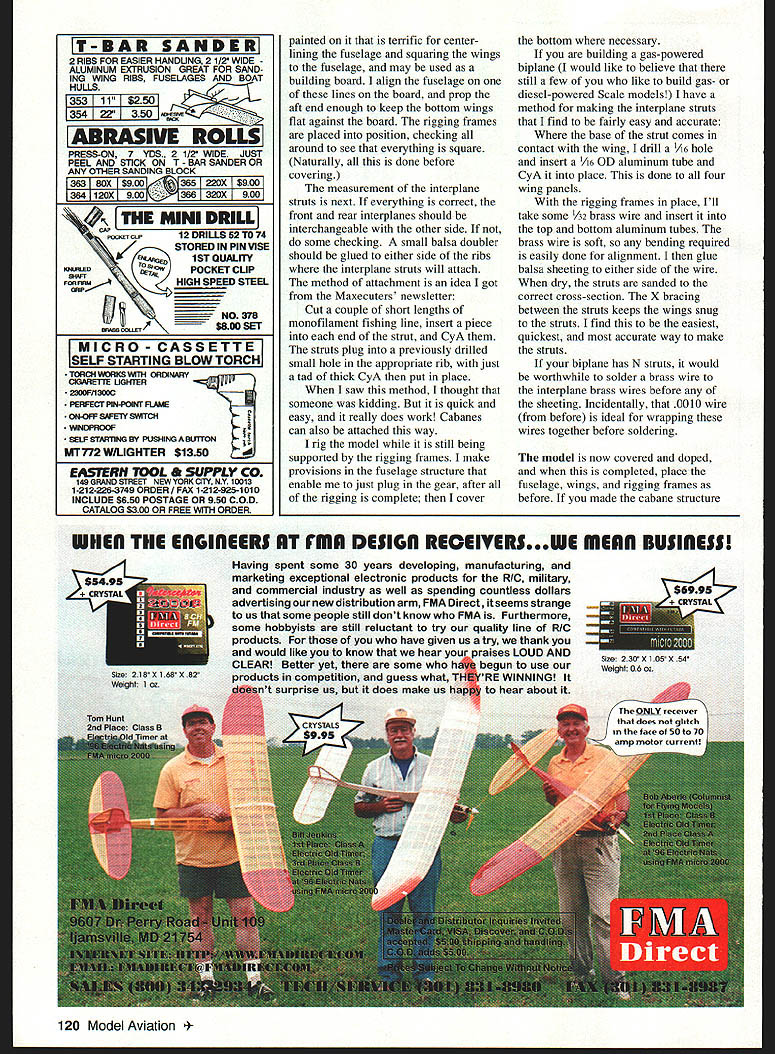
- Template method
- Remove sticks from the water and wipe off excess water.
- Glue the sticks together and pull them around a waxed cardboard template. The wax prevents laminates from adhering to the template.
- Pin everything down and allow to dry thoroughly.
- Plan method (no template)
- Pin soaked sticks directly onto the plan, allowing the wood to flow with no kinks.
- Let wood dry, then hit the laminations with thin cyanoacrylate (CyA).
- After the glue and wood are dry, sand the laminations to shape completely before pinning them to the workboard for wing construction.
Finishing:
- Sand the trailing edge to a half-round shape and round the tip as much as possible.
- If you waxed the template before laminating, sand the inside of the lamination to remove any transferred wax.
Cabane and interplane struts
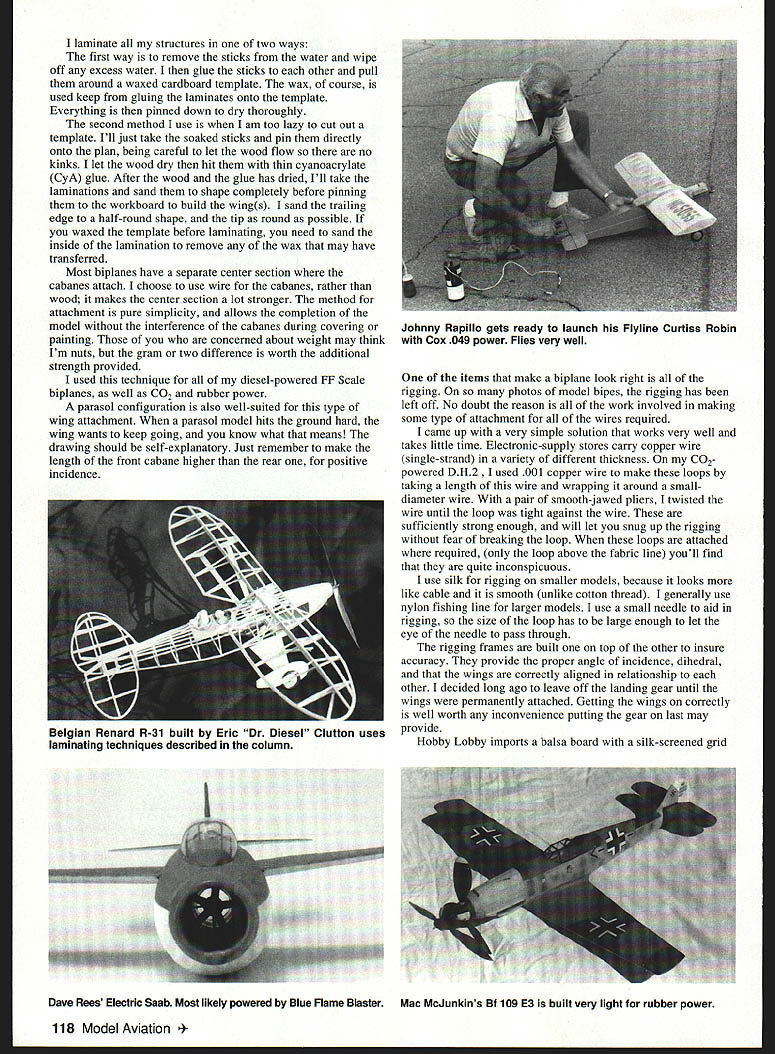
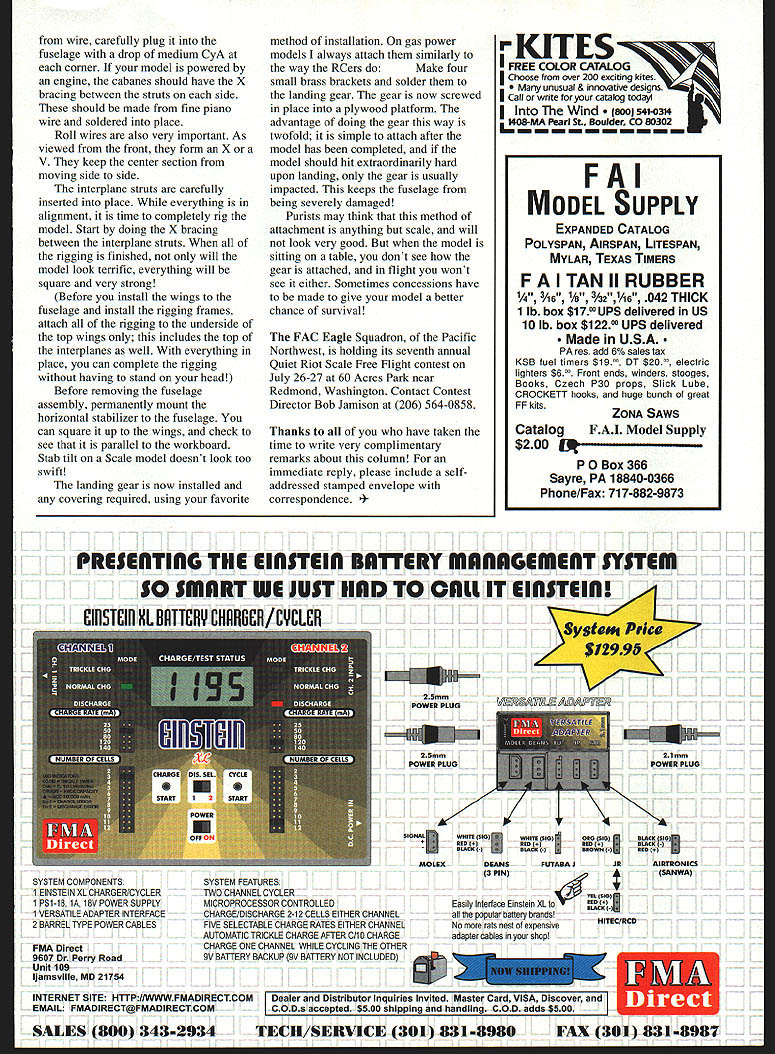
Most biplanes have a separate center section where the cabanes attach. I prefer wire cabanes rather than wood; they make the center section a lot stronger and allow completion of the model without interference from cabanes during covering or painting. The gram-or-two extra weight is worth the increased strength. This technique works well for diesel-powered FF scale bipes and for CO2- and rubber-powered models. Parasol models are also well-suited to this type of wing attachment — just remember to make the front cabane longer than the rear to provide positive incidence.
From wire, plug the cabanes into the fuselage with a drop of medium CyA at each corner. If your model is engine-powered, cabanes should have X-bracing between the struts on each side, made from fine piano wire and soldered into place. Roll wires (viewed from the front forming an X or a V) are important to keep the center section from moving side to side.
Interplane strut method for gas models (aluminum-tube method)
- At the base of each strut location, drill a 1/16" hole and insert a 1/16" OD aluminum tube; CyA it in place. Do this for all four wing panels.
- With the rigging frames in place, insert 1/32" brass wire into the top and bottom aluminum tubes. The brass wire is soft and easy to bend for alignment.
- Glue small sheeting to the strut side of the wire. When dry, sand the struts to the correct cross-section.
- X bracing between the struts keeps the wings snug to the struts.
If your biplane has N-struts, consider soldering a brass wire to the interplane brass wires before sheeting. The very fine copper wire (see rigging section) is ideal for wrapping these wires together prior to soldering.
Rigging
Rigging makes a biplane look right, but many models lack it because attachments are tedious. I devised a simple, quick method.
Making loops:
- Electronic-supply stores carry single-strand copper wire in various thicknesses. I used .001" copper wire on my CO2-powered D.H.2 to make rigging loops.
- Make a loop by wrapping a length of wire around a small-diameter mandrel, then twist with smooth-jawed pliers until the loop is tight against the mandrel. These loops are strong and let you snug up the rigging without fear of breaking the loop.
- Only the loop above the fabric line is required; they are inconspicuous when in place.
Rigging material:
- Silk for smaller models (it looks more like cable and is smooth).
- Nylon fishing line for larger models.
- Use a small needle to aid rigging; make the loop large enough to pass the needle eye through.
Sequence and technique:
- Build the rigging frames one on top of the other to ensure accuracy — incidence, dihedral, and wing-to-wing alignment.
- Leave off landing gear until the wings are permanently attached; getting the wings on correctly is worth the inconvenience.
- With the rigging frames supporting the assembly, attach rigging to the underside of the top wings first (including the tops of the interplanes). This lets you complete rigging without contortions.
- Start the complete rigging by doing the X-bracing between interplane struts; when finished, the model will be square and strong.
Attaching rigging fittings:
- For interplane strut attachment, glue a small balsa doubler to either side of the rib where the strut will attach.
- A quick method: cut short lengths of monofilament fishing line, insert a piece into each end of the strut, and CyA them. Plug the strut into a previously drilled hole in the rib and add a tad of thick CyA.
Building and alignment
- Hobby Lobby imports a balsa board printed with a silk-screened grid that is terrific for center-lining the fuselage and squaring the wings to the fuselage; it may be used as a building board.
- Align the fuselage on one of the grid lines, prop the aft end enough to keep the bottom wings flat against the board, then place rigging frames into position checking all around for squareness. Do this before covering.
- Measure interplane struts so that front and rear interplanes are interchangeable; if not, re-check.
- I rig the model while it is supported by the rigging frames and make provisions in the fuselage so the gear can be plugged in after rigging is complete; then cover the bottom where necessary.
- Before removing the fuselage assembly, permanently mount the horizontal stabilizer. Square it to the wings and check that it is parallel to the workboard — stab tilt on a scale model doesn't look good.
Landing gear attachment
I mount landing gear similarly to how many R/C builders do:
- Make four small brass brackets and solder them to the landing gear.
- Screw the gear into place into a plywood platform.
Advantages:
- Simple to attach after the model is completed.
- If the model hits hard on landing, usually only the gear is impacted, protecting the fuselage from severe damage.
Purists may object that this is not scale, but when the model is sitting on a table or in flight, the attachment details are not visible. Sometimes concessions improve a model's chance of survival.
Events and contact
The FAC Eagle Squadron of the Pacific Northwest is holding its seventh annual Quiet Riot Scale Free Flight contest on July 26–27 at 60 Acres Park near Redmond, Washington. Contact Contest Director Bob Jamison at (206) 564-0858.
Thanks to all who have written complimentary remarks about this column! For an immediate reply, please include a self-addressed stamped envelope with correspondence.
Transcribed from original scans by AI. Minor OCR errors may remain.

