
FREE FLIGHT SPORT and SCALE
Fernando Ramos, 19361 Mesa Dr., Villa Park, CA 92861
I'm going to discuss a couple areas of construction that I hope you will find informative and useful.
Fuselage sheeting to simulate metal
On smaller rubber scale models, stringers are often used instead of sheeting, but they don't look nearly as good for representing metal on the full-size aircraft. Another common option is stringers with balsa sandwiched between them (a Guillow), which I consider the least desirable—achieving a smooth contour is virtually impossible because of all the glue joints. The glue, being harder than the balsa, doesn't allow for uniform sanding.
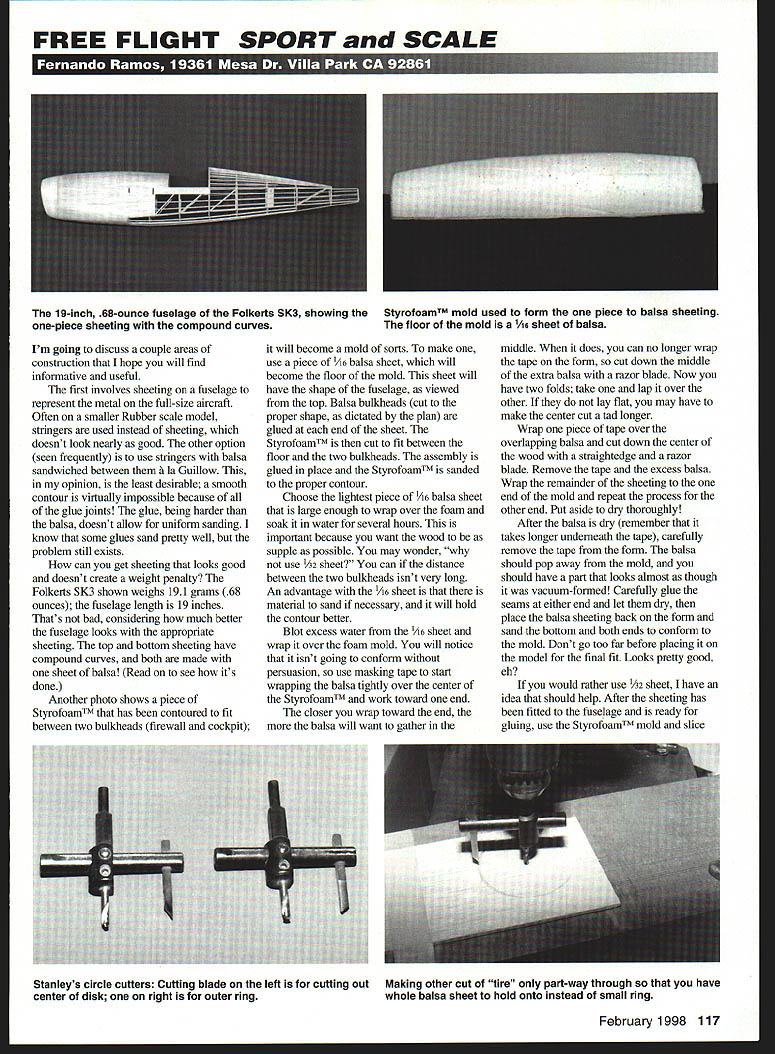
How can you get sheeting that looks good without a weight penalty? The Folkerts SK3 shown weighs 191 grams (6.8 ounces); the fuselage length is 19 inches. That's not bad, considering how much better the fuselage looks with proper sheeting. The top and bottom sheeting have compound curves, and both are made with one sheet of balsa. Read on to see how it's done.
Making a foam mold and forming one-piece balsa sheeting
One method is to use a piece of Styrofoam™ contoured to fit between two bulkheads (firewall and cockpit) to become a mold. Steps:
- Use a piece of 1/16" balsa sheet for the mold floor; this sheet will have the fuselage shape as viewed from the top.
- Glue balsa bulkheads (cut to the proper shape from the plan) at each end of the sheet.
- Cut a Styrofoam™ block to fit between the floor and the two bulkheads, glue the assembly, and sand the Styrofoam™ to the proper contour.
- Choose the lightest piece of 1/16" balsa sheet large enough to wrap over the foam and soak it in water for several hours (this makes the wood supple). You can use 1/32" sheet if the distance between bulkheads is short, but 1/16" gives material to sand and holds the contour better.
- Blot excess water from the 1/16" sheet and wrap it over the foam mold. Use masking tape to start wrapping the balsa tightly over the center of the Styrofoam™ and work toward one end.
- As you wrap toward an end, the balsa will tend to gather in the middle. When it does, cut down the middle of the extra balsa with a razor blade so you have two folds; lap one over the other. If they don't lay flat, extend the center cut a bit.
- Wrap one piece of tape over the overlapping balsa, cut down the center of the wood with a straightedge and razor blade, remove the tape and the excess balsa. Repeat for the other end.
- Put the wrapped sheeting aside to dry thoroughly (remember it dries slower under the tape). Carefully remove the tape—the balsa should pop away from the mold and look almost as though it was vacuum-formed.
- Carefully glue the seams at either end and let dry. Place the balsa sheeting back on the form and sand the bottom and both ends to conform to the mold. Don't over-sand before placing it on the model for the final fit.
Using 1/32" sheet and stabilizing with a ring / sealing with Hobbypoxy
If you prefer 1/32" sheet, try this to help prevent distortion after doping:
- Fit the sheeting to the fuselage and mark where it will be glued.
- Using the Styrofoam™ mold and a circle cutter, cut a "tire" (ring) from a balsa sheet. Cut the center disk part-way through first so you retain the full sheet as a handle, then finish the cut to free the ring.
- Glue the ring in place to act as a support and help prevent distortion.
I also mixed clear Hobbypoxy and heated it with a light source (do not use an open flame!). The heat from the light thins the material, then it can be brushed onto the underside of the sheeting in one even coat. The weight gain is negligible, but it locks the balsa so distortion will not occur.
Rocker-arm covers
Rocker-arm covers can be tedious to make when several identical pieces are needed. A simple solution:
- From a piece of shim brass, carefully cut the correct shape of the rocker arm as viewed from the top (plan view), and file to remove burrs. Use brass thick enough that it won't bend easily while serving as a sanding platform.
- Solder a piece of brass tubing (5/32" or 3/16" diameter) at right angles to the brass shape.
- Cut balsa pieces of the correct length and height to become the rocker arms.
- Place a drop of thick CyA (cyanoacrylate) glue on the brass and attach a balsa piece.
- Sand around the edge to get the proper plan-view shape, sand the correct profile, then round the overall shape.
- Carefully remove the balsa with a razor blade, scrape the excess CyA from the brass form, and repeat for additional parts.
Depending on the cowl radius, you may want to radius the flat bottoms of the covers so they sit flat. Tape a small piece of sandpaper to the cowl and sand sideways to achieve the radius. Some builders form rocker-arm covers as part of multi-section cowls (hand-forming into a female mold or hydraulic dies); others make them separately and rivet them on. After gluing covers to the cowl, use a small amount of balsa filler around them to create the look that they were formed, not butt-jointed.
Simulated wire wheels
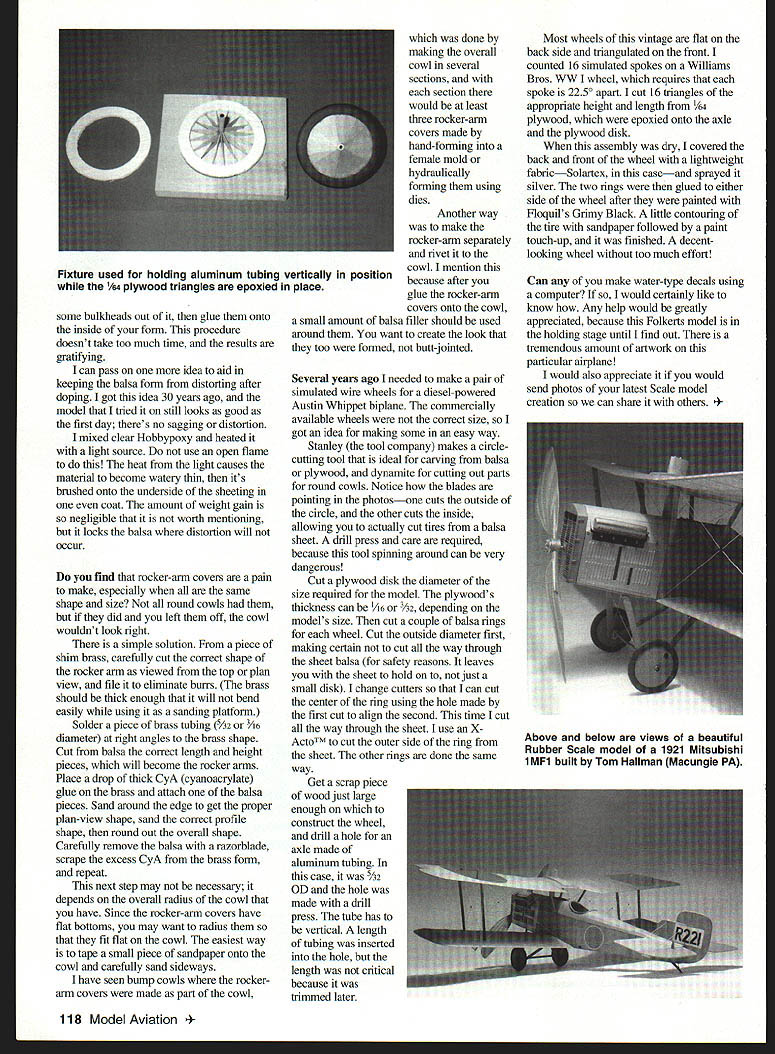
I once needed simulated wire wheels for a diesel-powered Austin Whippet biplane and made them when commercial wheels were the wrong size. The Stanley circle-cutting tool is ideal for carving from balsa or plywood (exercise extreme care—use a drill press; the spinning tool is dangerous).
Procedure:
- Cut a plywood disk to the required diameter (plywood thickness 1/16" or 3/32", depending on model size).
- Cut a couple of balsa rings for each wheel. Cut the outside diameter first without cutting all the way through the sheet for safety (this leaves the sheet to hold onto). Then cut the inner diameter, aligning with the first cut, and finish so rings are free.
- Prepare a scrap block, drill a vertical hole for an axle (I used 5/32" OD aluminum tubing) and insert a length of tubing.
- Most wheels of that vintage are flat on the back and triangulated on the front. For a Williams Bros. WWI wheel I counted 16 simulated spokes (22.5° apart). Cut 16 triangles of the appropriate height and length from 1/64" plywood and epoxy them onto the axle and plywood disk.
- When dry, cover the back and front of the wheel with a lightweight fabric such as Solartex™ and spray silver.
- Paint the balsa rings Floquil Grimy Black, then glue them to either side of the wheel.
- Contour the tire with sandpaper and touch up the paint.
This produces a decent-looking wheel without too much effort.
Decals and photos
Can any of you make water-slide decals using a computer? If so, I would certainly like to know how. Any help would be greatly appreciated—this Folkerts model is in the holding stage until I find out, as there is a tremendous amount of artwork on this airplane.
Please also send photos of your latest scale model creations so we can share them with others.
Transcribed from original scans by AI. Minor OCR errors may remain.

