
Free Flight: Sport & Scale
Bill Warner 1370 Monache Ave. Porterville, CA 93257
Part of the fun of building models is in the language often found on plans and in articles about modeling. A couple of years ago at the Flying Aces Nats, Bill Miller and I got to kicking around some of our favorite model clichés.
Here are some of the best on our list:
- "Stringers omitted for clarity" (the draftsman got tired of drawing them in)
- "use plenty of glue" (no wonder some models are too heavy to fly)
- "the model is of classic construction" (this will certainly help the rank beginner)
- "never fly near power lines" (without an explanation, one usually considers trees a greater risk)
- "the model flew right off the drawing board" (must have been a gust of wind that came through the window?)
- "make from scrap" (I have plenty of that around from the last time I went flying)
- "add ballast as required" (the words "as required" are less-than-explanatory to most of us younger than 70)
- "always test over tall grass" (where I live, I'm lucky to find a 7-11 parking lot)
- "It flies as good as it looks!" (Take that any way you wish.)
If you have a favorite model cliché, send it to me and I'll share it with others who find model-speak intriguing.
Is your electric motor a little tired?
Despite adequate battery power, some electrics just don't seem to put out enough oomph. Tom Schmitt, of HiLine Ltd., suggests that you use a shot of tuner cleaner on the armature to revive it. He says the rpms usually go right up. Seems worth a try. Thanks, Tom!
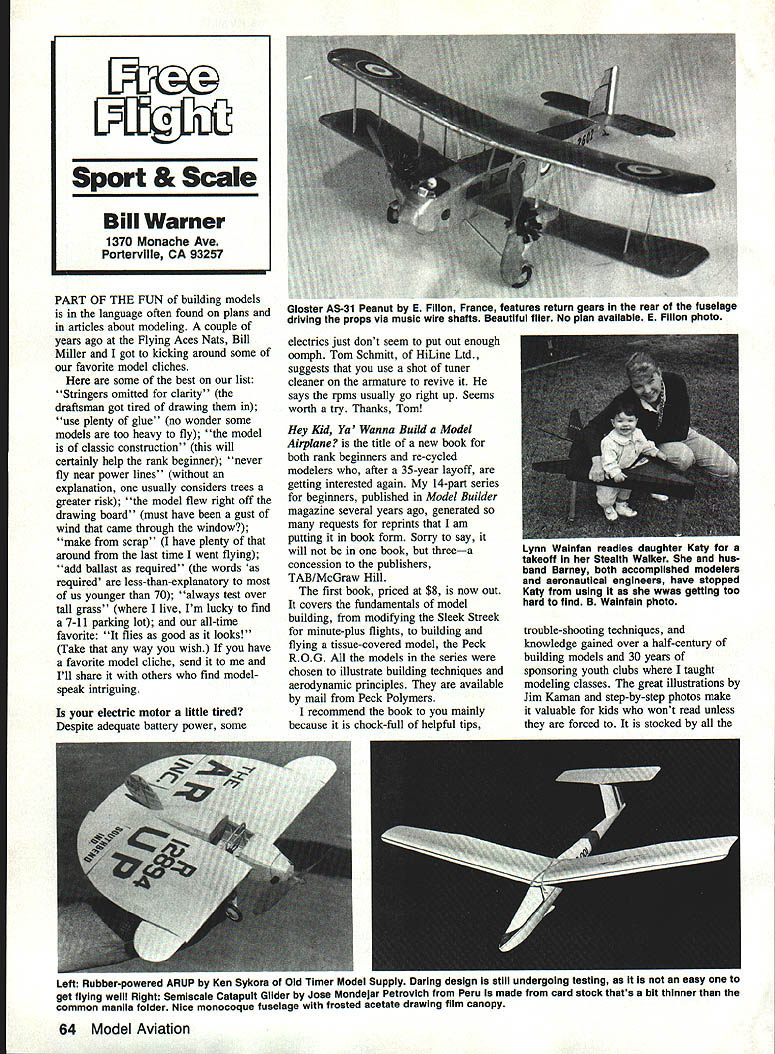
Hey Kid, Ya' Wanna Build a Model Airplane?
This is the title of a new book for both rank beginners and re-cycled modelers who, after a 35-year layoff, are getting interested again. My 14-part series for beginners, published in Model Builder magazine several years ago, generated so many requests for reprints that I am putting it in book form. Sorry to say, it will not be in one book, but three—a concession to the publishers, TAB/McGraw Hill.
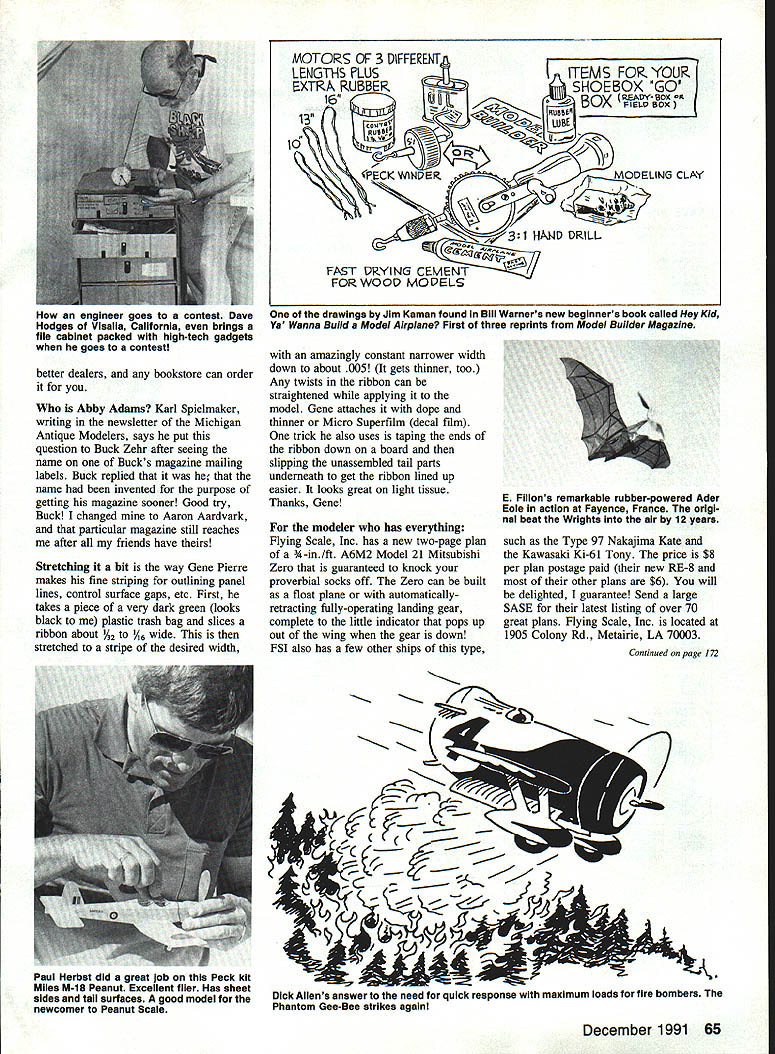
The first book, priced at $8, is now out. It covers the fundamentals of model building, from modifying the Sleek Streak for minute-plus flights to building and flying a tissue-covered model, the Peck R.O.G. All the models in the series were chosen to illustrate building techniques and aerodynamic principles. They are available by mail from Peck Polymers.
I recommend the book mainly because it is chock-full of helpful tips, troubleshooting techniques, and knowledge gained over a half-century of building models and 30 years of sponsoring youth clubs where I taught modeling classes. The great illustrations by Jim Kaman and step-by-step photos make it valuable for kids who won't read unless they are forced to. It is stocked by all the better dealers, and any bookstore can order it for you.
Who is Abby Adams?
Karl Spielmaker, writing in the newsletter of the Michigan Antique Modelers, says he put this question to Buck Zehr after seeing the name on one of Buck's magazine mailing labels. Buck replied that it was he; that the name had been invented for the purpose of getting his magazine sooner! Good try, Buck! I changed mine to Aaron Aardvark, and that particular magazine still reaches me after all my friends have theirs!
Striping technique
Stretching it a bit is the way Gene Pierre makes his fine striping for outlining panel lines, control surface gaps, etc. First, he takes a piece of a very dark green (looks black to me) plastic trash bag and slices a ribbon about 1/32 to 1/16 inch wide. This is then stretched to a stripe of the desired width, with an amazingly constant narrower width down to about .005 inch (it gets thinner, too). Any twists in the ribbon can be straightened while applying it to the model. Gene attaches it with dope and thinner or Micro Superfilm (decal film). One trick he also uses is taping the ends of the ribbon down on a board and then slipping the unassembled tail parts underneath to get the ribbon lined up easier. It looks great on light tissue. Thanks, Gene!
For the modeler who has everything
Flying Scale, Inc. has a new two-page plan of a 3/4-in./ft. A6M2 Model 21 Mitsubishi Zero that is guaranteed to knock your proverbial socks off. The Zero can be built as a float plane or with automatically retracting fully-operating landing gear, complete to the little indicator that pops up out of the wing when the gear is down! FSI also has a few other ships of this type, such as the Type 97 Nakajima Kate and the Kawasaki Ki-61 Tony. The price is $8 per plan, postage paid (their new R.E. and most of their other plans are $6).
You will be delighted, I guarantee! Send a large SASE for their latest listing of over 70 great plans. Flying Scale, Inc. is located at 1905 Colony Rd., Metairie, LA 70003.
Glue the rudder to the stabilizer and the stabilizer to the fuselage at the offset and angle shown. Be careful to get this accurate. Put the model in a jig, and measure the stabilizer tilt before gluing.
Silly Putty Dethermalizer (SDT)
I have been developing this device since the mid-1970s. There are no fuses to cut or burnt fuses to dig out, no fuse lighter, and no snuffer tube. The SDT weighs about three grams, takes only a few seconds to reset, can be set for a range of 10 seconds to three minutes-plus, is activated simply by pulling a pin, and is accurate to within about 15 seconds. With it you need never again launch and lose a glider because it's a bother to use the dethermalizer, and you can practice fly on small fields without worries. In competition flying, the frustration of watching the thermal go by while you fumble with fuses can be a thing of the past.
The SDT is available from Gary Buddenbohm, 5652 Meinhardt Road, Westminster, CA 92683. The cost is $5 plus $1 shipping and handling. It can also be ordered from F.A.I. Model Supply. Instructions are included.
Pop-up spring and hold-down line
- Push the short length of the pop-up spring into the cavity until the coils are just below the surface and the spring arm is centered. If the arm is not centered, check whether the coils are wound backwards.
- Use twenty-pound braided Dacron fishing line for the hold-down line. Monofilament line or any other type that stretches will not serve.
- Tie a loop in one end of the Dacron, and thread a No. 8 rubber band back upon itself through the loop.
- Place the rubber band over the timer release arm, and pull the line so that the rubber band is stretched about double.
- Pull the line to the leading edge of the wing, opposite the finger rest, and then down. Wrap the line around the fuselage, and glue it to the body where it meets the bottom a second time.
Flying
Be sure to add wash-in as shown on the plan; it's essential for stability in turbulent lift. The center-of-gravity (CG) location depends on how hard you throw. The harder you throw, the less incidence you should use—and the farther aft the CG should be. A balance point 55% from the leading edge is about right if you throw hard. On the first few flights, however, move the CG forward about 1/8 inch to provide enough incidence for a level glide. If the throw is off, the model will have a better chance of pulling out before hitting the ground. Zenith should turn in 50- to 70-foot-diameter circles in the glide.
The high speed of launch increases the effects of rudder and wash-in while reducing the effect of stabilizer tilt. Enough rudder offset is needed to counter the bank of the launch, but too much will make the model spin from a bad launch or turbulent lift. The stabilizer tilt produces the turn in the glide and also improves the roll at the top of the launch. If there's too little turn in the glide, adding wing tip weight will help.
Zenith is best launched at about 20° right bank and a 60°–70° up angle. Enough incidence should be warped into the trailing edge of the stabilizer so that the glider will be just past vertical—about 95°—at maximum height. That way it will roll to horizontal and glide without stalling.
Fliers commonly misjudge in adjusting the incidence. If the model never gets past vertical in the launch and then dives, it has too little incidence. If the model speeds past the 95° angle before slowing, it has too much incidence. When a plane banks too much in the launch, pilots often add opposite rudder instead of decreasing the incidence to straighten the climb and overcome the bank with the proper roll.
If you build and fly a Zenith, I'd be delighted to hear of your experiences. Write to me at 5652 Meinhardt Road, Westminster, CA 92683 (the same address as for my brother Gary).
Bill Hannan has sent me a copy of another list, including about 110 items, which Jim O’Reilly has been doing for about five years. Jim does not get into recommendations and thereby makes fewer enemies than I do! Also, his is a more general Free Flight listing, whereas I try to be fairly FF-Scale specific. For his list, send $1 and a large SASE to: Jim O’Reilly, 4760 N. Battin, Wichita, KS 67220. Take my word for it, gang, either or both of these lists are worth their weight in gold when you are trying to find stuff that is not in the abundant RC sector.
Glue of the Month: RC-56
This unusual white glue has great potential for modelers. I have long used it where a tackier adhesive than regular white glue is preferred, such as in sticking on windshields. It dries fast and clear. Dave Smith of the Cactus Squadron uses it to glue on paper fairings, since it does not shrink or get the paper as wet as other glues do. He also uses it to glue on detail items such as exhaust stacks, air scoops, etc. Some clubsters, Dave reports, use it on wings and tail attachments, as it comes apart easily in a crash, saving the balsa structure.
Free Flight: Sport & Scale
Well, gang, that wraps it up for another couple of months. Remember, this is National Help-a-Junior and Avoid-Flying-Near-Power-Lines Month. Happy landings!
Transcribed from original scans by AI. Minor OCR errors may remain.

