
FREE FLIGHT: SPORT & SCALE
Bill Warner, 1370 Monache Ave., Porterville, CA 93257
Places to visit
The U.S. Naval Museum at Pensacola, Florida, may be worth adding to your winter vacation itinerary. Fred Komlosy reports the museum was upgraded about a year ago and now has over 100 aircraft — including the first Curtiss flying boat, an NC-4, and a number of World War I planes such as the Sopwith Camel, Hanriot, Nieuport 28, Thomas Morse Scout, and a Fokker D-VII — all in pristine condition. Thanks, Fred!
Toy lovers passing through Stanton, Missouri, shouldn't miss the Antique Toy Museum. It's only a half-hour visit, and if you're over 50, I'll guarantee it'll be a nostalgic experience. Lots of stamped-metal cars and trucks, as well as some fine metal aircraft toys. Wyandotte — fantasy twin-engined autogyro transports to airplane-style pedal cars. Get your kicks on Route 66!
International Stick and Tissue, Vol. II
There are some things a true model nut cannot be without. If you're already hooked, you know Bill Hannan's publications about Peanut Scale, Pistachios, and the like. ISAT, Vol. II, includes more about Penaud, a David Jones Pitts plan, lots of 10-cent Fokker D-VII stuff, a Spitfire solid model, 1923 Avia drawings from Czechoslovakia, 1933 ARUP drawings by Mark Allison, and more. For more information, write Hannan's Runway, Box 210, Magalia, CA 95954. You'll hate yourself if you don't.
Making Scale Model Airplanes Fly
Can't seem to get that scale job flying right? The leading book on the subject, Making Scale Model Airplanes Fly, by Bill McCombs, has just been revised and lengthened. Send $14.95 to Aircraft Data, P.O. Box 763576, Dallas, TX 75224 to bring this valuable resource to your door.
Helpful hints
Paul Boyanowski's white Lockheed Vega sports a very nice finish. According to Dave Smith of the Cactus Squadron, Paul's secret is that he uses Windsor & Newton artist's gouache squeezed from the tube, mixed with water and then sprayed on. Interesting. Anyone else out there using unconventional finishing methods?
Braiding rubber motors
You're never too old to learn new ways of doing things. Braiding rubber motors is definitely one way to solve the bunching problem.
Most fliers know that if you use a really long motor (two to three times the hook-to-peg distance within the model), you're going to get bunching up when it runs down. The tail is the natural place for this to happen, since it isn't turning as the hook in front is. As power falls off the model starts to stall, usually messing up the glide.
Rupert Moore (England) used a bulkhead about two-thirds of the way back in his big Tiger Moth with a secondary bearing like a removable nose block and a double-ended hook sticking out either end. A shorter motor went from that bulkhead to the rear of the model; the idea was that the rear motor length, being shorter, would run out first, thereby confining any bunching to the longer front section.
Another approach is to break the motor down into shorter, separate loops and have them drive the prop through a common crank system or gears. This gets complicated, so the simplest expedient is to braid the long motor.
Bob Thompson winds a two-loop motor by winding up the first a little way, keeping the other looped around his finger, then hooking both together and continuing to wind. Usually he puts about the same number of winds in each loop, then hooks them together and continues winding clockwise, letting them unwind and braid themselves together.
A common method used today is to make up a loop double the length needed, put a few winds in, attach the motor to a stooge and stretch it to full length (twice the finished motor length; finished length may be about 1½ times the fuselage). Unhook the motor from the winder, grasp the right-hand end, hold the midpoint with the left hand, double back the end that had been on the winder and hook it on the stooge together with the far end. Reattach the winder at what used to be the midpoint (now the near end), crank a couple of times and allow the halves to braid together. Wrap a rubber band (or the rolled neck from a balloon if you want to color-code motors) around each end of the braided motor, then remove the stooge and install the motor in the model.
Tom Arnold (Scale Staffel) notes that if you wind so the braids stay neat even after several flights, you're doing them wrong. If you wind in the right direction the motor will look scruffy, with lots of little pigtails sticking out after the first flight — and this is good, as it shortens the motor nicely. Try clockwise winding; reverse on the far side if you're flying a twin with contrarotation.
Driving one prop with multiple motors
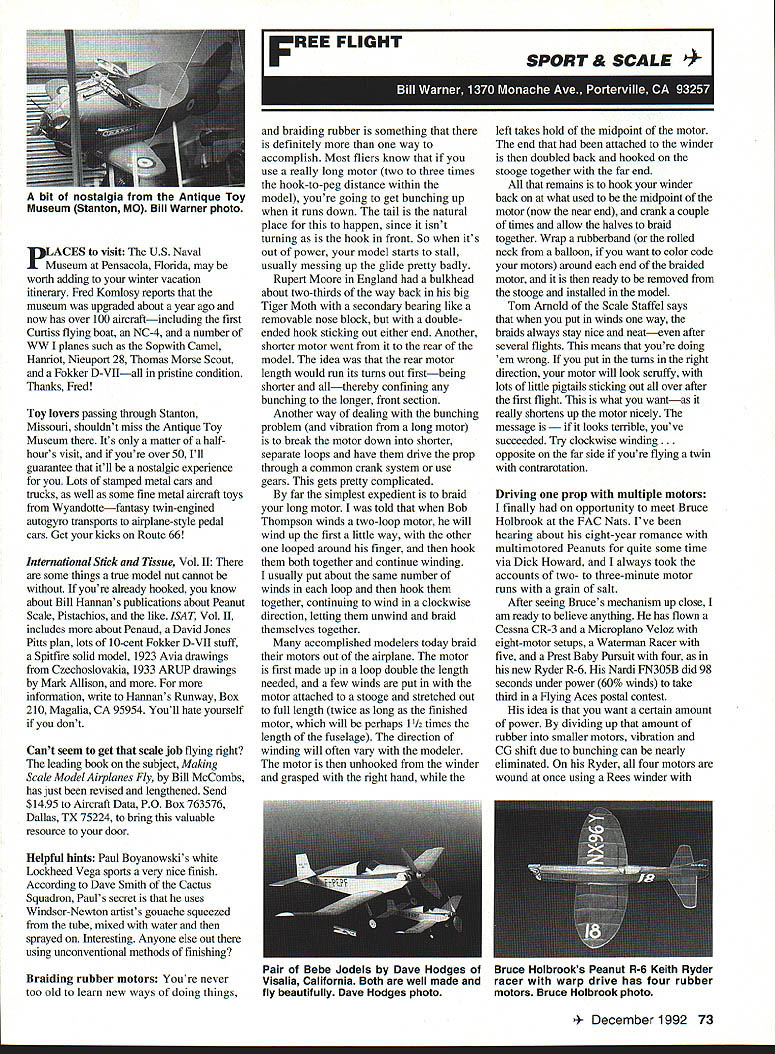
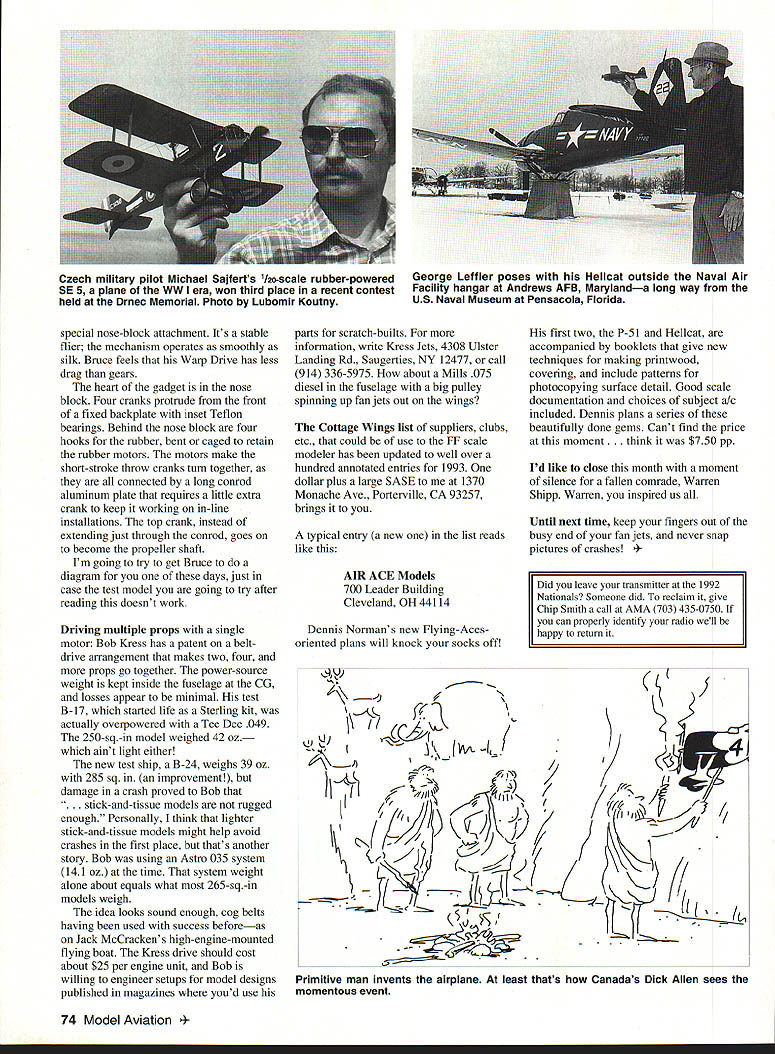
I met Bruce Holbrook at the FAC Nats. His eight-year romance with multimotored Peanuts produces two- to three-minute motor runs that are believable after seeing his mechanism. He has flown a Cessna CR-3 and a Monoplane Velox with eight-motor setups, a Waterman Racer with five, and a Prest Baby Pursuit with four, as in his Ryder R-6. His Nardi FN305B did 98 seconds under power (60% winds) to take third in a Flying Aces contest.
His idea is to divide desired power into smaller motors to nearly eliminate vibration and CG shift from bunching. On his Ryder, all four motors are wound at once using a Rees winder with a special nose-block attachment. The mechanism operates smoothly and Bruce feels his Warp Drive has less drag than gear drives.
The heart of the gadget is the nose block. Four cranks protrude from the front of a fixed backplate with inset Teflon bearings. Behind the nose block are four hooks for the rubber, bent or caged to retain the motors. The motors turn the short-stroke throw cranks together; they are all connected by a long conrod to an aluminum plate that needs a little extra crank to keep it moving in in-line installations. The top crank continues on to become the propeller shaft.
I'll try to get Bruce to provide a diagram one of these days in case your test model doesn't behave.
Driving multiple props with a single motor
Bob Kress has a patent on a belt-drive arrangement that drives two, four, or more props from a single power source. The power-source weight is kept inside the fuselage at the CG, and losses appear minimal. His test B-17 (started as a Sterling kit) was actually overpowered with a Tee Dee .049. The 250 sq. in. model weighed 42 oz. The new test ship, a B-24, weighs 39 oz. with 285 sq. in., but a crash showed Bob that "stick-and-tissue models are not rugged enough." Lighter stick-and-tissue models might help avoid crashes in the first place, but that's another story.
Bob was using an Astro .035 system (14.1 oz.) at the time; that system weight alone about equals what most 265-sq.-in. models weigh. Cog belts have been used successfully before (e.g., Jack McCracken's high-engine-mounted flying boat). The Kress drive should cost about $25 per engine unit, and Bob is willing to engineer setups for model designs published in magazines where you'd use his parts for scratch builds. For more information, write Kress Jets, 4308 Ulster Landing Rd., Saugerties, NY 12477, or call (914) 336-5975. How about a Mills .075 diesel in the fuselage with a big pulley spinning fan jets out on the wings?
Cottage Wings list
The Cottage Wings list of suppliers, clubs, etc., useful to the free-flight scale modeler has been updated to well over a hundred annotated entries for 1993. One dollar and a large SASE to me at 1370 Monache Ave., Porterville, CA 93257 brings it to you.
A typical entry (a new one) in the list reads like this:
- AIR ACE Models
- 700 Leader Building
- Cleveland, OH 44114
- Dennis Norman's new Flying-Aces-oriented plans will knock your socks off!
Dennis Norman's first two (the P-51 and Hellcat) are accompanied by booklets that give new techniques for making printwood, covering, and include patterns for photocopying surface detail. Good scale documentation and choices of subject are included. Dennis plans a series of these beautifully done gems. Can't find the price at this moment... I think it was $7.50 p.p.
I'd like to close this month with a moment of silence for a fallen comrade, Warren Shipp. Warren, you inspired us all.
Until next time, keep your fingers out of the busy end of your fan jets, and never snap pictures of crashes!
Transcribed from original scans by AI. Minor OCR errors may remain.

