
Free Flight: Sport/Scale
Bill Warner
Weathering your models
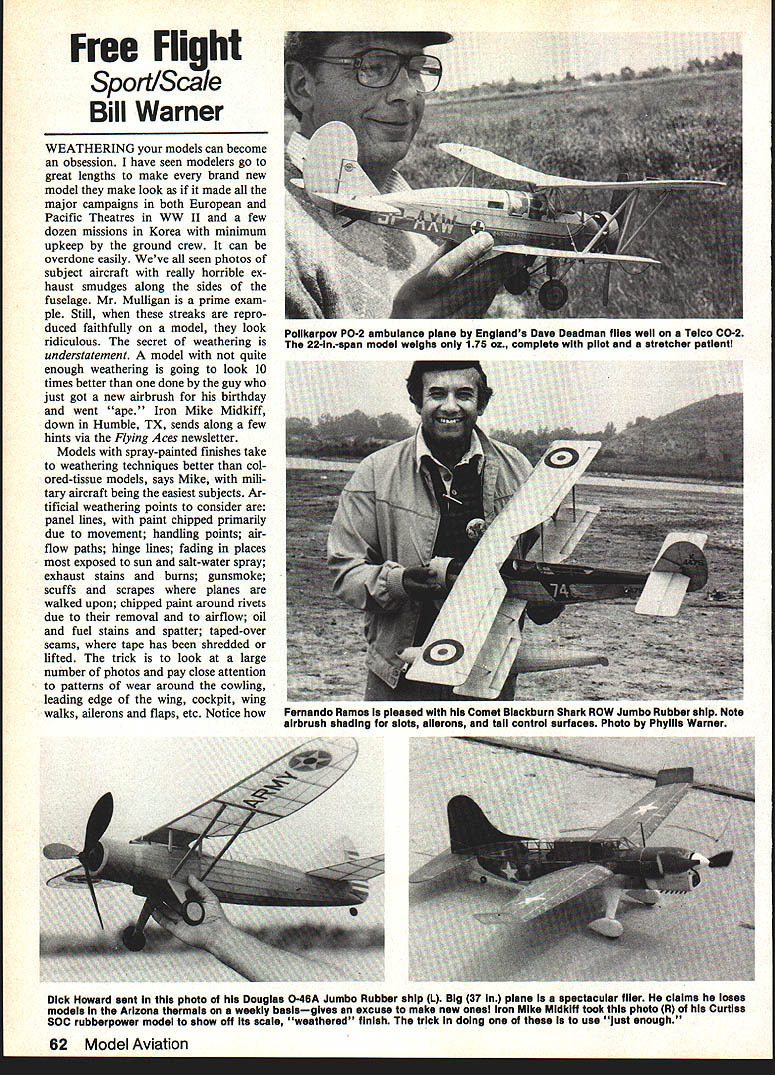
Weathering your models can become an obsession. I have seen modelers go to great lengths to make every brand-new model look as if it had flown all the major campaigns in both the European and Pacific Theatres in WWII and a few dozen missions in Korea with minimum upkeep by the ground crew. It can be overdone easily. We've all seen photos of subject aircraft with really horrible exhaust smudges along the sides of the fuselage—Mr. Mulligan is a prime example. Still, when these streaks are reproduced faithfully on a model, they look ridiculous. The secret of weathering is understatement. A model with not quite enough weathering is going to look ten times better than one done by the guy who just got a new airbrush for his birthday and went "ape."
Iron Mike Midkiff, down in Humble, TX, sends along a few hints via the Flying Aces newsletter. Models with spray-painted finishes take weathering techniques better than colored-tissue models, Mike says, with military aircraft being the easiest subjects.
Artificial weathering points to consider are:
- Panel lines, with paint chipped primarily due to movement.
- Handling points.
- Airflow paths and hinge lines.
- Fading in places most exposed to sun and salt-water spray.
- Exhaust stains and burns.
- Gunsmoke.
- Scuffs and scrapes where planes are walked upon.
- Chipped paint around rivets due to removal and airflow.
- Oil and fuel stains and spatter.
- Taped-over seams, where tape has been shredded or lifted.
The trick is to look at a large number of photos and pay close attention to patterns of wear around the cowling, leading edge of the wing, cockpit, wing walks, ailerons and flaps, etc. Notice how the leading edge is worn. See how the exhaust fans out and fades.
Mike's approach to a model is the ideal way to "weather" your first model: grab an old standby whose flying days are about over and try it. Save that new beauty until you've developed the touch.
- Do your normal paint job, color scheme, and insignia as if the plane were brand new.
- Draw on the various lines, keeping in mind that they represent shadows due to butt-up or overlap of sheets or forms. For example, the line representing typical stab/elevator separation is really a shadow which fades to represent the convex surface of the leading edge of the elevator. Fabric covering will sometimes show highlights and shadows representing fabric over structure; the structure causes a highlight with a shadow next to it. This can be reproduced by a grey line with a black line next to it to give the impression of a 3-D fabric sag.
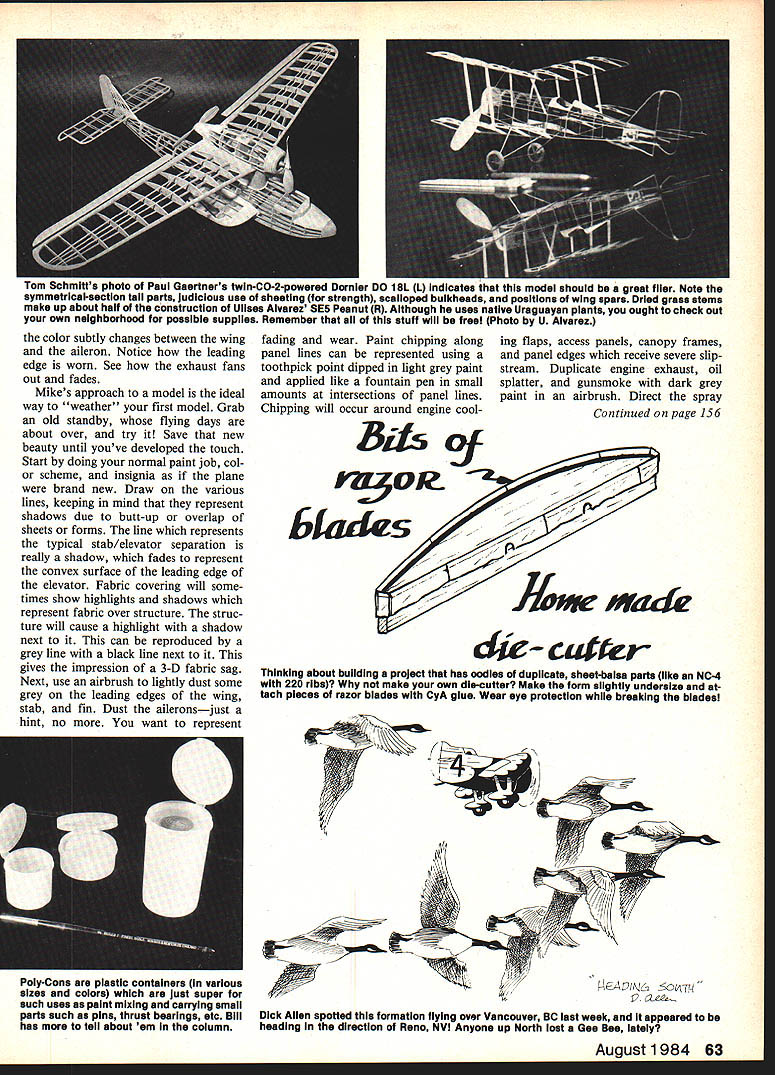
- Use an airbrush to lightly dust some grey on the leading edges of the wing, stab, and fin. Dust the ailerons—just a hint, no more—to represent fading and wear.
- Represent paint chipping along panel lines using a toothpick point dipped in light grey paint and applied like a fountain pen in small amounts at intersections of panel lines. Chipping will occur around engine cooling flaps, access panels, canopy frames, and panel edges which receive severe slipstream.
- Duplicate engine exhaust, oil splatter, and gunsmoke with dark grey paint from an airbrush. Direct the spray toward the rear, and don't overdo it.
- Double-check your photos to see if there are any peculiar discolorations or chipping you have missed.
- When finished, spray a light coat of clear over everything to prevent smudging.
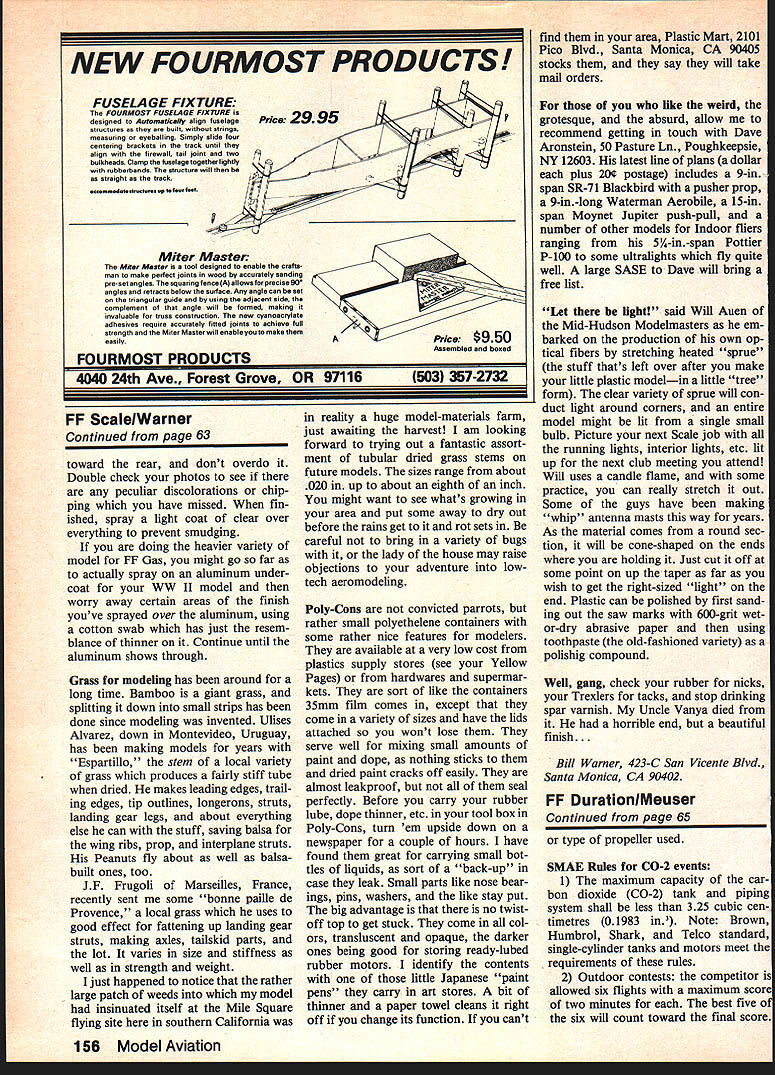
If you are doing the heavier variety of model for FF Gas, you might go so far as to spray an aluminum undercoat for your WWII model and then rub away certain areas of the finish you've sprayed over the aluminum using a cotton swab with just a bit of thinner on it. Continue until the aluminum shows through.
Grass and alternative building materials
Grass for modeling has been around for a long time. Bamboo is a giant grass, and splitting it down into small strips has been done since modeling was invented. Ulises Alvarez, down in Montevideo, Uruguay, has been making models for years with "espartillo," the stem of a local variety of grass which produces a fairly stiff tube when dried. He makes leading edges, trailing edges, tip outlines, longerons, struts, landing gear legs, and about everything else with the stuff, saving balsa for the wing ribs, prop, and interplane struts. His Peanuts fly about as well as balsa-built ones, too.
J.F. Frugoli of Marseilles, France, recently sent me some "bonne paille de Provence," a local grass which he uses to good effect for fastening up landing gear struts, making axles, tailskid parts, and the lot. It varies in size, stiffness, strength, and weight.
I just happened to notice that the rather large patch of weeds into which my model had insinuated itself at the Mile Square flying site here in southern California was in reality a huge model-materials farm, just awaiting the harvest. I am looking forward to trying out a fantastic assortment of tubular dried grass stems on future models. The sizes range from about .020 in. up to about an eighth of an inch. You might note that the weed's growing in your area and put some away to dry out before the rains get to it and rot the stuff. Be careful not to bring in a variety of bugs with it, or the lady of the house may raise objections to your adventure into low-tech aeromodeling.
Poly-Cons (small polyethylene containers)
Poly-Cons are simple polyethylene containers with some nice features for modelers. They are available at low cost from plastics supply stores, hardware stores, and supermarkets. They resemble 35mm film containers but come in a variety of sizes and have attached lids so you won't lose them. Uses and advantages:
- Mixing small amounts of paint and dope, as nothing sticks to them and dried paint cracks off easily.
- Carrying small bottles of liquids as a backup in case they leak—almost leakproof, but check them first by turning them upside down on newspaper for a couple of hours.
- Storing small parts like nose bearings, pins, washers, etc.
- Storing ready-lubed rubber motors—darker translucent or opaque containers are good for this.
- No twist-off tops to get stuck.
Identify contents with a small paint pen (Japanese paint pens sold in art stores work well). A bit of thinner and a paper towel cleans it right off if you change the container's function. If you can't find them locally, Plastic Mart, 2101 Pico Blvd., Santa Monica, CA 90405, stocks them and says they will take mail orders.
Strange and unusual plans
For those who like the weird, grotesque, and absurd, contact Dave Aronstein, 50 Pasture Ln., Poughkeepsie, NY 12603. His latest line of plans (a dollar each plus 20¢ postage) includes:
- A 9-in. span SR-71 Blackbird with a pusher prop.
- A 9-in.-long Waterman Aerobie.
- A 15-in. span Moynet Jupiter push-pull.
- Models for indoor fliers ranging from a 5½-in.-span Pottier P-100 to several ultralights that fly quite well.
A large SASE to Dave will bring a free list.
Homemade optical fibers and clear sprue work
"Let there be light!" said Will Auen of the Mid-Hudson Modelmasters as he embarked on producing his own optical fibers by stretching heated clear "sprue" (the leftover plastic from model kits). The clear variety of sprue will conduct light around corners, and an entire model might be lit from a single small bulb. Picture a scale job with all the running lights and interior lights lit up for the next club meeting.
Will uses a candle flame, and with some practice you can really stretch the sprue out. Some modelers have been making "whip" antenna masts this way for years. Because the material comes from a round section, it will be cone-shaped on the ends where you are holding it—just cut it off at some point on the taper to get the right-sized "light" on the end. Plastic can be polished by first sanding out saw marks with 600-grit wet-or-dry abrasive paper and then using toothpaste (the old-fashioned variety) as a polishing compound.
Final notes
Well, gang—check your rubber for nicks, your Trexlers for tacks, and stop drinking spar varnish. My Uncle Vanya died from it. He had a horrible end, but a beautiful finish.
Bill Warner 423-C San Vincente Blvd. Santa Monica, CA 90402
Transcribed from original scans by AI. Minor OCR errors may remain.

