
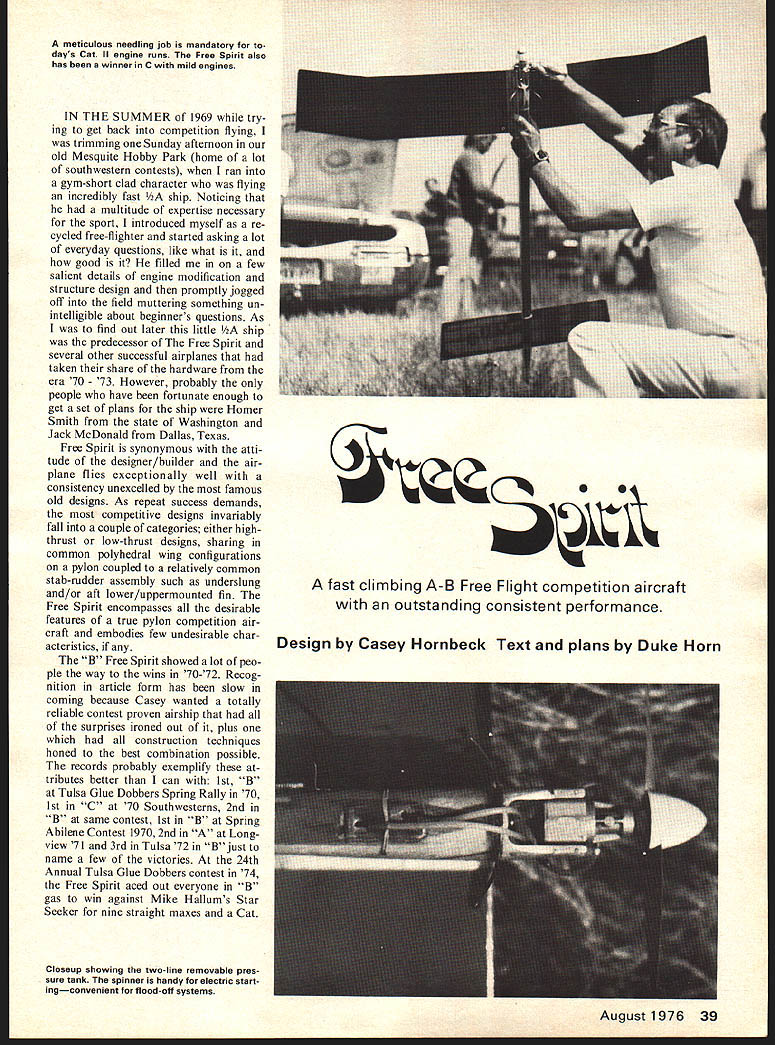
Free Spirit
IN THE SUMMER OF 1969 while trying to get back into competition flying, I was trimming one Sunday afternoon in our old Mesquite Hobby Park (home of a lot of southwestern contests), when I ran into a gym-short clad character who was flying an incredibly fast 1/2A ship. Noticing that he had a multitude of expertise necessary for the sport, I introduced myself as a re-cycled free-fighter and started asking a lot of everyday questions, like what is it, and how good is it? He filled me in on a few salient details of engine modification and structure design and then promptly jogged off into the field muttering something unintelligible about beginner's questions. As I was to find out later this little 1/2A ship was the predecessor of The Free Spirit and several other successful airplanes that had taken their share of the hardware from the era '70 - '73. However, probably the only people who have been fortunate enough to get a set of plans for the ship were Homer Smith from the state of Washington and Jack McDonald from Dallas, Texas.
Free Spirit is synonymous with the attitude of the designer/builder and the airplane flies exceptionally well with a consistency unexcelled by the most famous old designs. As repeat success demands the most competitive designs invariably fall into a couple of categories; either high-thrust or low-thrust designs, sharing in common polyhedral wing configurations on a pylon coupled to a relatively common stab-rudder assembly such as underslung and/or aft lower/upper mounted fin. Free Spirit encompasses all the desirable features of a true pylon competition aircraft and embodies few undesirable characteristics, if any.
The "B" Free Spirit showed a lot of people the way to the wins in '70-'72. Recognition in article form has been slow in coming because Casey wanted a totally reliable contest proven airship that had all of the surprises ironed out, plus one which had all construction techniques honed to the best combination possible. The records probably exemplify these attributes better than I can with: 1st, "B" at Tulsa Glue Dobbers Spring Rally in '70, 1st in "C" at '70 Southwesterns, 2nd in "B" at same contest, 1st in "B" at Spring Abilene Contest 1970, 2nd in "A" at Longview '71 and 3rd in Tulsa '72 in "B" just to name a few of the victories. At the 24th Annual Tulsa Glue Dobbers contest in '74, the Free Spirit aced out everyone in "B" gas to win against Mike Hallum's Star Seeker for nine straight maxes and a Cat.
A fast climbing A-B Free Flight competition aircraft with an outstanding consistent performance.
Design by Casey Hornbeck Text and plans by Duke Horn A time of 27:00. 'Nuf said.
The big secret to the Free Spirit is the fact that it is terribly fast. This is partially owing to a 9% airfoil, but more probably to a Hornbeck S.T.23 howling out 19,000 on the front end. In the free-flight games these days, 80% of the winning factor comes in on how short and fast you can close the distance from point A to point B. The fringe benefit of the ship is that it gives as good a glide as any you've seen. Naturally, this is the combination we look for, but seldom get to see as much as we had hoped for. This ship does also achieve the elusive compromise without the aid of auto surfaces. And needless to say it does even better with auto surfaces.
Since this is the first article about a Hornbeck design, a capsulized introduction would be in order. Casey has been an active modeler since he was 39, and joined the AMA and NFFS at the same time. He has won many CMC honorable mention certificates the last 10 months and all with his own airplanes.
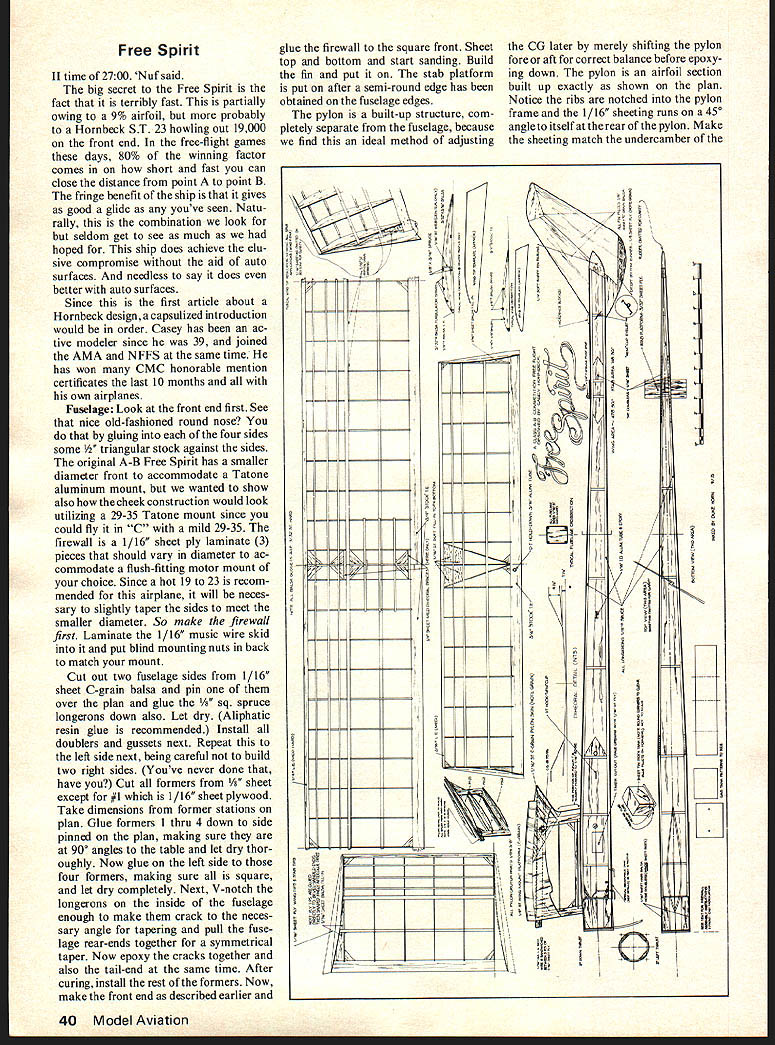
Fuselage: Look at the front end first. See that nice old-fashioned round nose? You do that by gluing into each of the four sides some 1/2" triangular stock against the sides. The original A-B Free Spirit has a smaller diameter front to accommodate a Tatone aluminum mount, but we wanted to show also how the cheek construction would look utilizing a 29-35 Tatone mount since you could fly it in "C" with a mild 29-35. The firewall is a 1/16" sheet ply laminate (3) pieces that should vary in diameter to accommodate a flush-fitting motor mount of your choice. Since a hot 19 to 23 is recommended for this airplane, it will be necessary to slightly taper the sides to meet the smaller diameter. So make the firewall first. Laminate the 1/16" music wire skid into it and put blind mounting nuts in back to match your mount.
Cut out two fuselage sides from 1/16" sheet C-grain balsa and pin one of them over the plan and glue the 1/8" sq. spruce longerons down also. Let dry. (Aliphatic resin glue is recommended.) Install all doublers and gussets next. Repeat this to the left side next, being careful not to build two right sides. (You've never done that, have you?) Cut all formers from 1/8" sheet except for #1 which is 1/16" sheet plywood. Take dimensions from former stations on plan. Glue formers 1 thru 4 down to side pinned on the plan, making sure they are at 90° angles to the table and let dry thoroughly. Now glue on the left side to those four formers, making sure all is square, and let dry completely. Next, V-notch the longerons on the inside of the fuselage enough to make them crack to the necessary angle for tapering and pull the fuselage rear-ends together for a symmetrical taper. Now epoxy the cracks and also the tail-end at the same time. After curing, install the rest of the formers. Now, make the front end as described earlier and glue the firewall to the square front. Sheet the top and bottom and start sanding. Build the fin and put it on. The stab platform is put on after a semi-round edge has been obtained on the fuselage edges.
The pylon is a built-up structure, completely separate from the fuselage, because we find this an ideal method of adjusting the CG later by merely shifting the pylon fore or aft for correct balance before epoxying down. The pylon is an airfoil section built up exactly as shown on the plan. Notice the ribs are notched into the pylon frame and the 1/16" sheeting runs on a 45° angle to itself at the rear of the pylon. Make the sheeting match the undercamber of the wing. wing mount and epoxy the mount to it and the scrap in the center which also should fit the bottom center of the mount. Trim and sand everything after drying. Finish up the fuselage by adding D.T. snuffer, line guide and necessary hooks. Now give the fuselage and pylon two coats of dope, sanding between each, and cover entire fuselage, pylon and fin with either silk or tissue. Here you might want to use fiberglass cloth and resin around the front end for maximum strength. Also, at this point, cut out holes for timer and removable gas tank and make a 1/16" sheet plywood screw facing for the timer and epoxy in position. After covering, give all parts two or three more coats of thin dope sanding lightly with #150 wet/dry sandpaper. Finish off with two coats of Hobbypoxy clear/color and trim to taste.
Wing
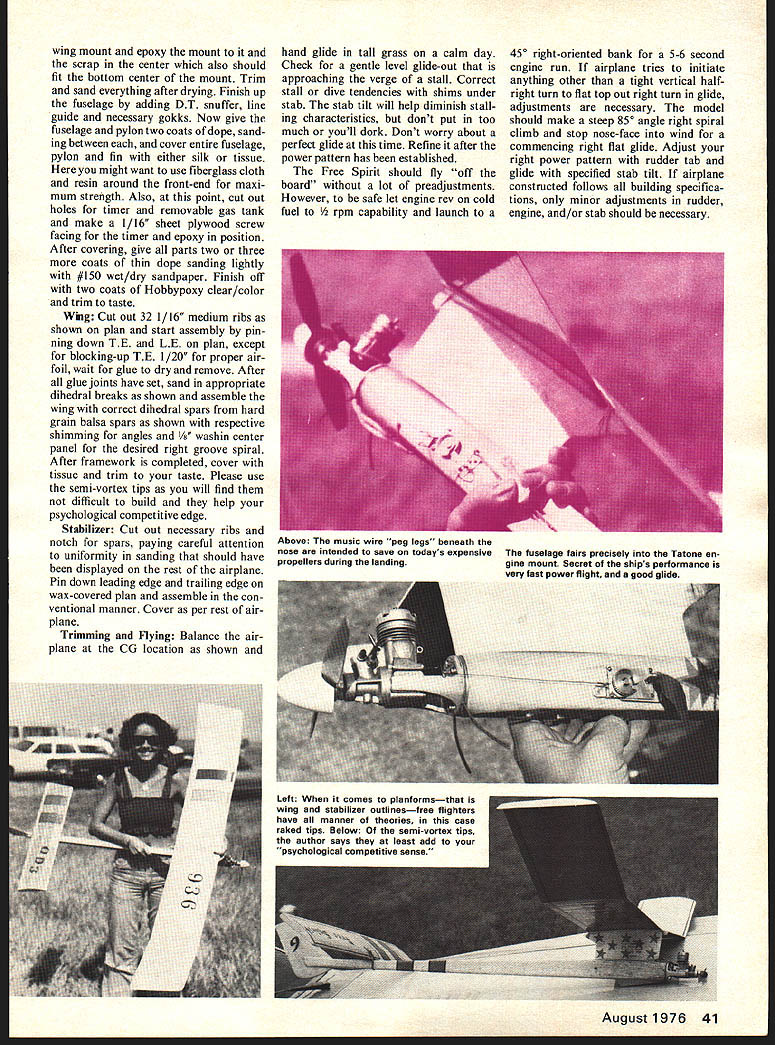
Cut out 32 1/16" medium ribs as shown on plan and start assembly by pinning down T.E. and L.E. on plan, except for blocking-up T.E. 1/20" for proper airfoil, wait for glue to dry and remove. After all glue joints have set, sand in appropriate dihedral breaks as shown and assemble the wing with correct dihedral spars from hard grain balsa spars as shown with respective shimming for angles and 1/8" wash-in center panel for the desired right-hand spiral. After framework is completed, cover with tissue and trim to your taste. Please use the semi-vortex tips as you will find them not difficult to build and they help your psychological competitive edge.
Stabilizer
Cut out necessary ribs and notch for spars, paying careful attention to uniformity in sanding that should have been displayed on the rest of the airplane. Pin down leading edge and trailing edge on wax-covered plan and assemble in the conventional manner. Cover as per rest of airplane.
Trimming and Flying
Balance the airplane at the CG location as shown and hand glide in tall grass on a calm day. Check for a gentle level glide-out that is approaching the verge of a stall. Correct stall or dive tendencies with shims under stab. The stab tilt will help diminish stalling characteristics, but don't put in too much or you'll cork. Don't worry about a perfect glide at this time. Refine it after the power pattern has been established.
The Free Spirit should fly "off the board" without a lot of preadjustments. However, to be safe let engine rev on cold fuel to 1/2 rpm capability and launch to a 45° right-oriented bank for a 5-6 second engine run. If airplane tries to initiate anything other than a tight vertical half-turn to flat top out right turn in glide, adjustments are necessary. The model should make a steep 85° angle right spiral climb and stop nose-face into wind for a commencing right flat glide. Adjust your right power pattern with rudder tab and glide with specified stab tilt. If airplane constructed follows all building specifications, only minor adjustments in rudder, engine, and/or stab should be necessary.
Transcribed from original scans by AI. Minor OCR errors may remain.

