

Haboob
When the normally oppressive, bright, glaring sun becomes fuzzy in Saharan Africa—and the wind begins to pick up speed—people begin running around, gathering children and possessions and seeking cover. One word is on everyone's lips: haboob, the terrifying African storm.
This model, the Haboob, is not terrifying. However, if such a wind comes up and other modelers stop flying, you can bring out this wind-powered model and really have fun. With a strong wind, you can perform almost any maneuver in the AMA Precision Aerobatics routine. Even with a light breeze, you can fly for as long as you wish, do many maneuvers, and finish flying with an airplane just as clean as when you began. There is no engine to start, no fuel to buy, and no oil to clean off. Altogether, it's pure fun.
Whip flying has its genesis in the U-Control kits designed by Jim Walker back in the Forties. The two whip power kits, an Aircobra and a Mustang, have been reissued and are available again. What wonderful Control Line trainers Walker's models made. They were not efficient fliers, though, and had to be "whipped" or led through flight and could do little maneuvering.
Really maneuverable wind flying became possible with the introduction of lightly loaded and efficient Stunt designs, such as the Veco Chief and subsequently the classic Stunt models.
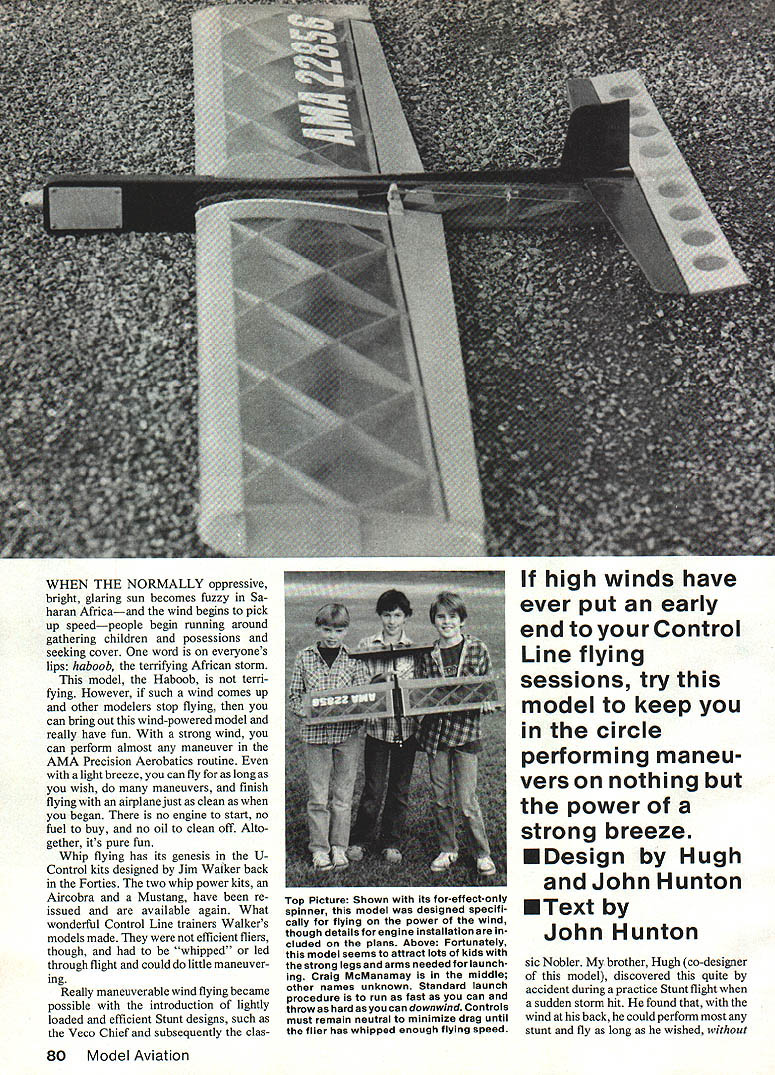
If high winds have ever put an early end to your Control Line flying sessions, try this model to keep you in the circle performing maneuvers on nothing but the power of a strong breeze.
Credits
- Design: Hugh and John Hunton
- Text: John Hunton
My brother, Hugh (co-designer of this model), discovered this quite by accident during a practice Stunt flight when a sudden storm hit. He found that, with the wind at his back, he could perform most any stunt and fly as long as he wished, without the engine running, as long as he kept a good head of speed and the wind kept blowing.
The Haboob came from that flight. It was designed specifically for wind flying and utilizes the lightest and most efficient structure possible: geodesics. The first design even had built-up wing flaps and elevator, and it was covered with Japanese tissue. This was too much trouble for the limited benefit, so the current design uses stock balsa sizes and is relatively easy to build.
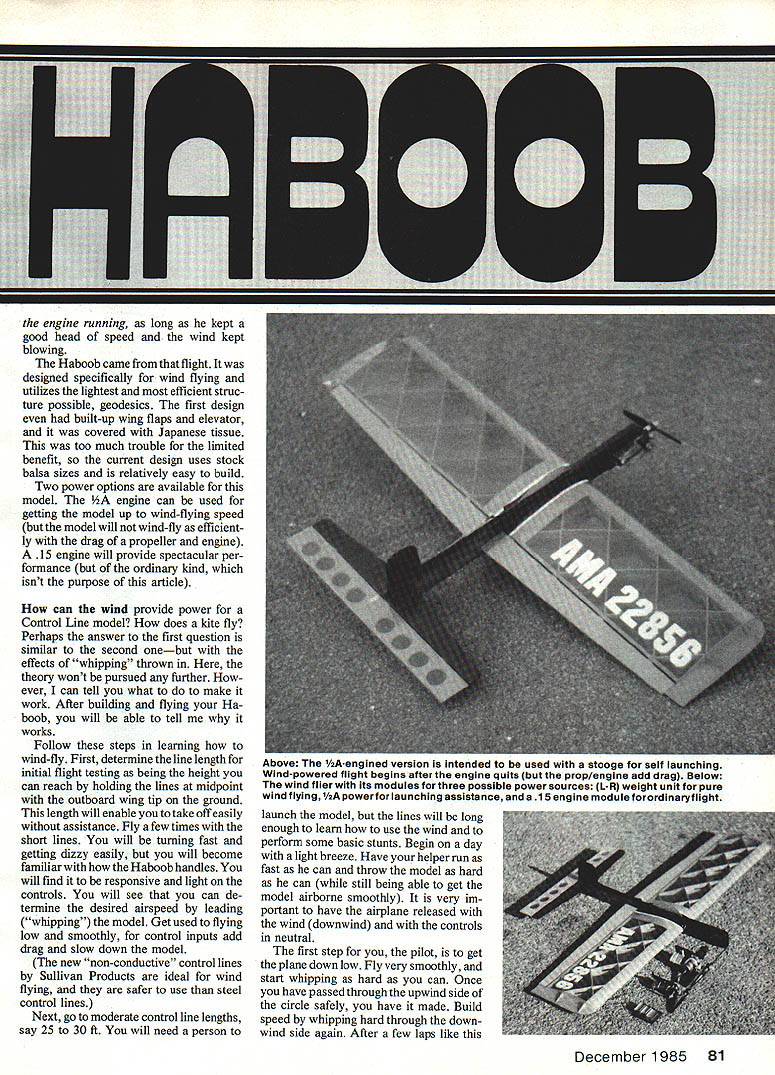
Two power options are available for this model. A 1/2A engine can be used for getting the model up to wind-flying speed (but the model will not wind-fly as efficiently with the drag of a propeller and engine). A .15 engine will provide spectacular performance (but of the ordinary kind, which isn't the purpose of this article).
How can the wind provide power for a Control Line model? How does a kite fly?
Perhaps the answer to the first question is similar to the second one—but with the effects of "whipping" thrown in. Here, the theory won't be pursued further. However, I can tell you what to do to make it work. After building and flying your Haboob, you will be able to tell me why it works.
Follow these steps in learning how to wind-fly:
- Determine the line length for initial flight testing as the height you can reach by holding the lines at midpoint with the outboard wing tip on the ground. This length will enable you to take off easily without assistance.
- Fly a few times with the short lines. You will be turning fast and getting dizzy easily, but you will become familiar with how the Haboob handles. You will find it to be responsive and light on the controls. You can determine the desired airspeed by leading ("whipping") the model. Get used to flying low and smoothly, for control inputs add drag and slow the model.
- Use non-conductive control lines. The new non-conductive control lines by Sullivan Products are ideal for wind flying and are safer than steel control lines.
- Move to moderate control line lengths (about 25 to 30 ft). You will need a person to launch the model, but the lines will be long enough to learn how to use the wind and to perform some basic stunts. Begin on a day with a light breeze. Have your helper run as fast as he can and throw the model as hard as he can (while still being able to get the model airborne smoothly). It is very important to have the airplane released with the wind (downwind) and with the controls in neutral.
- As the pilot, get the plane down low. Fly very smoothly, and start whipping as hard as you can. Once you have passed through the upwind side of the circle safely, you have it made. Build speed by whipping hard through the downwind side again.
- After a few laps like this, you will be reaching the limits of your endurance, but the Haboob will be whizzing along actually much faster than if it were powered by an engine. It's time to let the wind do the work.
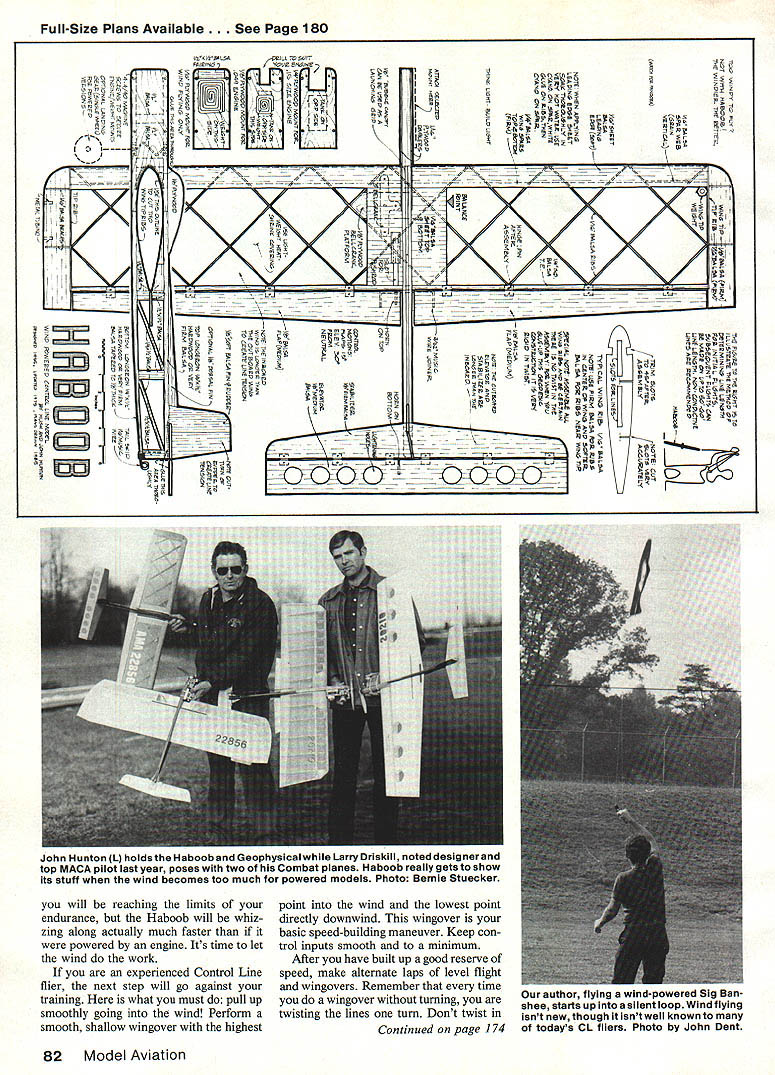
If you are an experienced Control Line flier, the next step will go against your training. Here is what you must do: pull up smoothly going into the wind. Perform a smooth, shallow wingover with the highest point into the wind and the lowest point directly downwind. This wingover is your basic speed-building maneuver. Keep control inputs smooth and to a minimum.
After you have built up a good reserve of speed, make alternate laps of level flight and wingovers. Remember that every time you do a wingover without turning, you are twisting the lines one turn. Don't twist in too many turns, or you will lose the ability to control the model.
Another good speed-building maneuver is the "lazy" horizontal figure eight. It is performed wide open and smoothly, with the wind directly at your back.
When you have mastered the arts of launching and building speed, you can go to lines up to 50 ft long (or as long as is comfortable for you). From the basic speed-building maneuvers, you can go on to almost any maneuver in the AMA routine—and then some. Then the world of silent Control Line flight is yours.
Construction
Do not be intimidated by the geodesic wing. This type of wing is self-aligning; therefore, it can be built without pinning the ribs over the plan. I suggest you start with the wing, as all other construction is normal.
- Cut all required wing ribs, being very careful to cut the slots accurately and to the proper depth. Slots for the control lines can be cut in all the ribs for lightness.
- Assemble the left and right panels with the center and the lighter ribs toward the tips. Pin on the spar and trailing edge, checking for proper dihedral and alignment over the plans. Check that there is no twist in the wing; once you glue this structure, it stays. Use cyanoacrylate (CyA) to cement the assembly.
- Select soft balsa for the leading edge, and soak it well in hot water. Pre-curve the sheet over a broom handle, and soak it again. Pin the wet sheet along the length of one wing spar, and use CyA to anchor the edge. Apply aliphatic resin (white glue) to the ribs, curve the sheet tightly around them, and CyA-glue it to the other spar.
- Install the plywood bellcrank mount, all wing tip parts, and the line guide tubes at this time. Fasten the guide tubes with epoxy. Install 1 to 1-1/2 oz. of weight in the outboard wing tip (note: the outboard wing panel is longer than the inboard panel).
- Trim the required ribs at the center section for the sheeting that goes there. Install the bellcrank with the leadouts and a 3/32-in. pushrod through the fuselage to the flap horn. Now install the center section sheeting.
- Sand the entire wing with fine-grit paper glued to a long flat block to get a smooth contour.
Fuselage:
- Select hardwood or very firm balsa for the fuselage longerons. Taper the lower longeron as shown on the plans (the object being to remove all possible weight at the tail), and assemble the built-up profile formers and light plywood firewall.
- Do not make the fuselage box too rigid; it should have some flex to absorb the whipping loads. Make the nose area strong for the landing loads and for installation of the engine module.
- Cover all parts with a lightweight heat-shrink material. Japanese tissue and clear dope could be used for covering, but it will probably require more maintenance. Add color dope trim as desired.
Final assembly:
- Begin with the wing-fuselage intersection. Slip in the outboard tip, cleaning the wing opening with sandpaper on a stick as required. Slip the wing off its centered position temporarily, and coat the center section, top and bottom, thoroughly with white glue. Slip the wing back to the proper final position. Force white glue into any voids.
- Align the wing properly, then apply thin CyA to the entire joint. This unit will then be strong enough to handle. Make a fillet of baking soda around the leading edge of the wing on both sides, and apply CyA to it.
- Clean any covering material from surfaces to be joined, and install the horizontal stabilizer on the fuselage, being careful to align it with the wing. As on the wing joint, use white glue, CyA, and the baking soda/CyA fillet. Similarly install the fin and rudder.
- Slip the flap joiner wire through the fuselage. Drill the flaps. Cut slots for all of the hinges. Install the flap and elevator hinges where shown on the plans. Be certain to run pins through the hinges to make sure they won't come out.
- Install the control horns. Rig the pushrod from the bellcrank to the next-to-last outside hole on the flap horn—and a pushrod from the last hole on the flap horn to the elevator. Check the plans for control surface deflections.
- Balance the model as shown on the plans. For more sensitive controls, move the center of gravity (CG) rearward. For less sensitive controls, move the CG forward.
May your flying days be windy!
Transcribed from original scans by AI. Minor OCR errors may remain.

