
HEINKEL H.E. 18
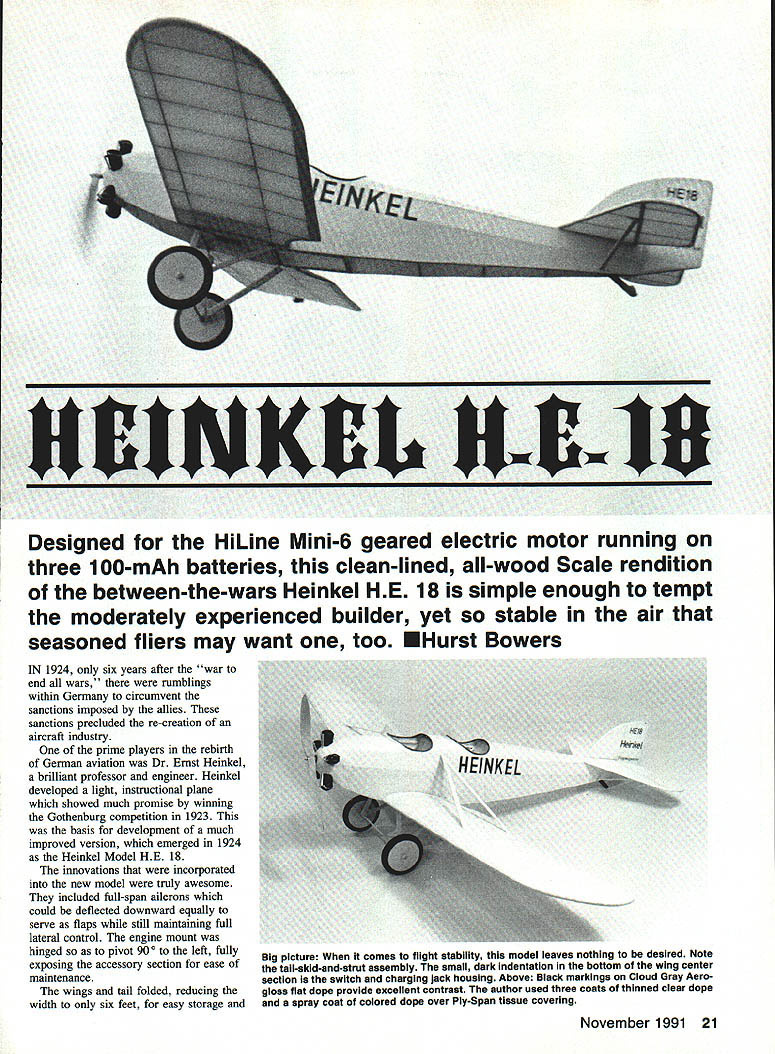
Designed for the HiLine Mini-6 geared electric motor running on three 100‑mAh batteries, this clean-lined, all-wood scale rendition of the between‑the‑wars Heinkel H.E. 18 is simple enough to tempt the moderately experienced builder, yet so stable in the air that seasoned fliers may want one, too. — Hurst Bowers
In 1924, only six years after the "war to end all wars," there were rumblings within Germany to circumvent the sanctions imposed by the Allies. These sanctions precluded the re-creation of an aircraft industry. One of the prime players in the rebirth of German aviation was Dr. Ernst Heinkel, a brilliant professor and engineer.
Heinkel developed a light, instructional plane that showed much promise by winning the Gothenburg competition in 1923. This was the basis for a much improved version, which emerged in 1924 as the Heinkel Model H.E. 18.
The innovations incorporated into the H.E. 18 were noteworthy:
- Full-span ailerons that could be deflected downward equally to serve as flaps while still maintaining full lateral control.
- An engine mount hinged to pivot 90° to the left, fully exposing the accessory section for ease of maintenance.
- Folding wings and tail to reduce width to only six feet for easy storage and transport.
- Fabric-covered wings; fuselage of spruce with welded steel tubing, also fabric covered. An all-wood fuselage was available as an option.
The H.E. 18 was a 36 ft 5 in span low-wing airplane, powered by a 75‑hp Siemens engine. It cruised for three hours at 84 mph and could climb approximately 3,100 ft in six minutes—satisfactory performance for a light, two‑place, open‑cockpit monoplane of the period. It was also efficient as a twin‑float seaplane. The plane’s simple yet clean lines have held attention for years as a modeling subject.
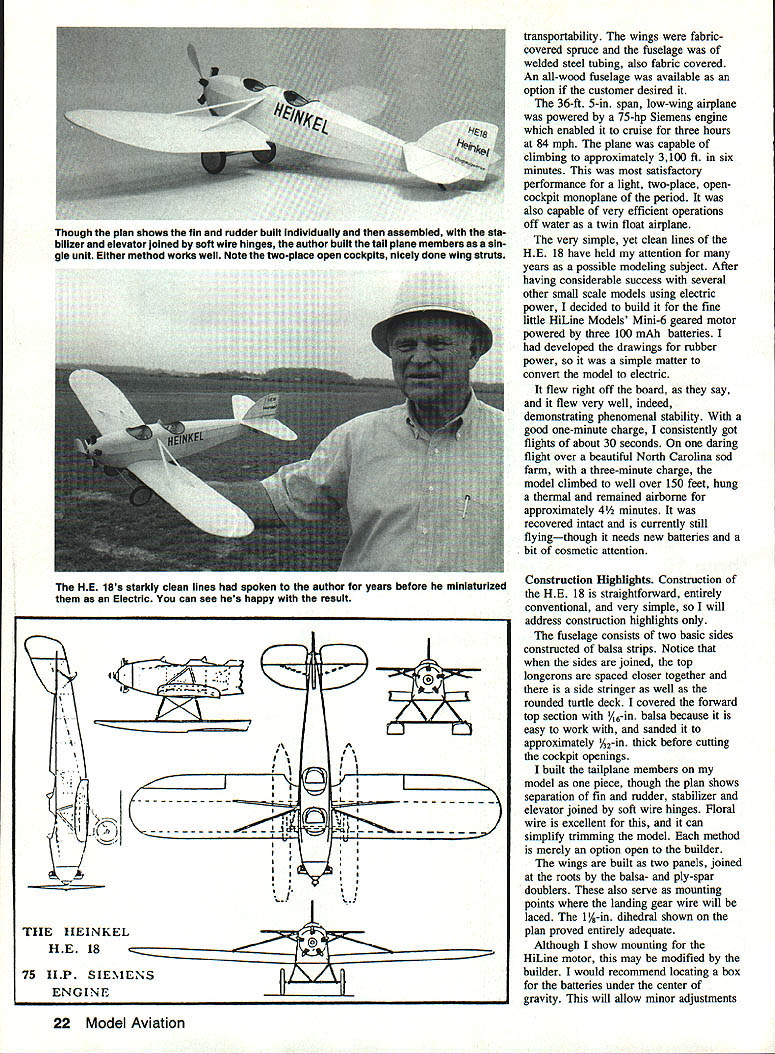
After success with several other small-scale electric models, I built a HiLine Models Mini-6 geared-motor model powered by three 100‑mAh batteries. I developed drawings from a rubber‑powered version and converted the model to electric. It flew right off the board and demonstrated phenomenal stability. With a good one‑minute charge I consistently got flights of about 30 seconds. On one daring flight over a North Carolina sod farm, with a three‑minute charge the model climbed well over 150 ft, found a thermal and remained airborne for about four minutes. It was recovered intact and is currently still flying, though it needs new batteries and a bit of cosmetic attention.
Construction Highlights
Construction of the H.E. 18 is straightforward and entirely conventional. It is simple, so the highlights follow.
Fuselage
- Built from two basic sides constructed of balsa strips.
- Sides join at the top longerons; side stringers are spaced to form a well-rounded turtledeck.
- Forward top section covered with 1/16 in balsa for ease of sanding; sand to approximately 1/32 in thickness before cutting cockpit openings.
- Battery box should be located at the model’s center of gravity to allow minor adjustments and avoid ballast.
Tailplane
- Tailplane members can be built as one piece, though plans show fin & rudder, stabilizer & elevator separated.
- Use soft-wire hinges (floral wire works well) to simplify trimming; either method is acceptable.
Wings
- Built in two panels and joined at the roots.
- Balsa-ply spar doublers also serve as mounting points for the landing-gear wire, which will be laced.
- The plan’s 1-1/2 in dihedral proved adequate.
Motor and Battery
- Plan shows mounting for the HiLine motor; this may be modified by the builder.
- Place batteries near the center of gravity for easy trimming and balance adjustments.
Wheels and Engine Details
- Any light 2 in scale wheels may be used; one method is two discs of soft 1/2 in sheet balsa (cross‑grained) with outer discs of 3/32 in plywood and a 3/4 in aluminum‑tube hub to capture the period scale effect.
- I used 3/32 in Williams Brothers cylinders with balsa heads and aluminum wire pushrods to mimic the five‑cylinder Siemens engine.
Propeller and Extension Shaft
- Extension shaft: 1/8 in Nyrod, 1 1/4 in long, threaded onto the prop shaft.
- Prop retained by a 2‑56 machine screw with two washers threaded into the front of the Nyrod.
Covering
- Cover with Ply‑Span tissue or very light silkspan.
- I used tissue, water‑shrunk, with three light coats of thinned clear dope and a coat of colored dope (Cloud Gray) sprayed on.
- Lettering may be done by hand or with a lettering guide on the rudder before assembly. Cut a stencil and spray the Heinkel name on each side of the fuselage in black.
- Add windshields and other details, then assemble.
My model, fully ready to fly, weighed 121 grams and the balance was good after minor battery-location adjustments.
Flying
- Test over grass using short charges of 20 to 30 seconds.
- The model had a very gentle left turn under power and retained it in the low-power/glide stage.
- Trimming and adjustments are simple; later I added 1° to 2° downthrust with only a minor attitude change.
- Final trimming can be done with small specks of clay on the wingtips.
- The model proved delightful to fly and should be good for many more flights.
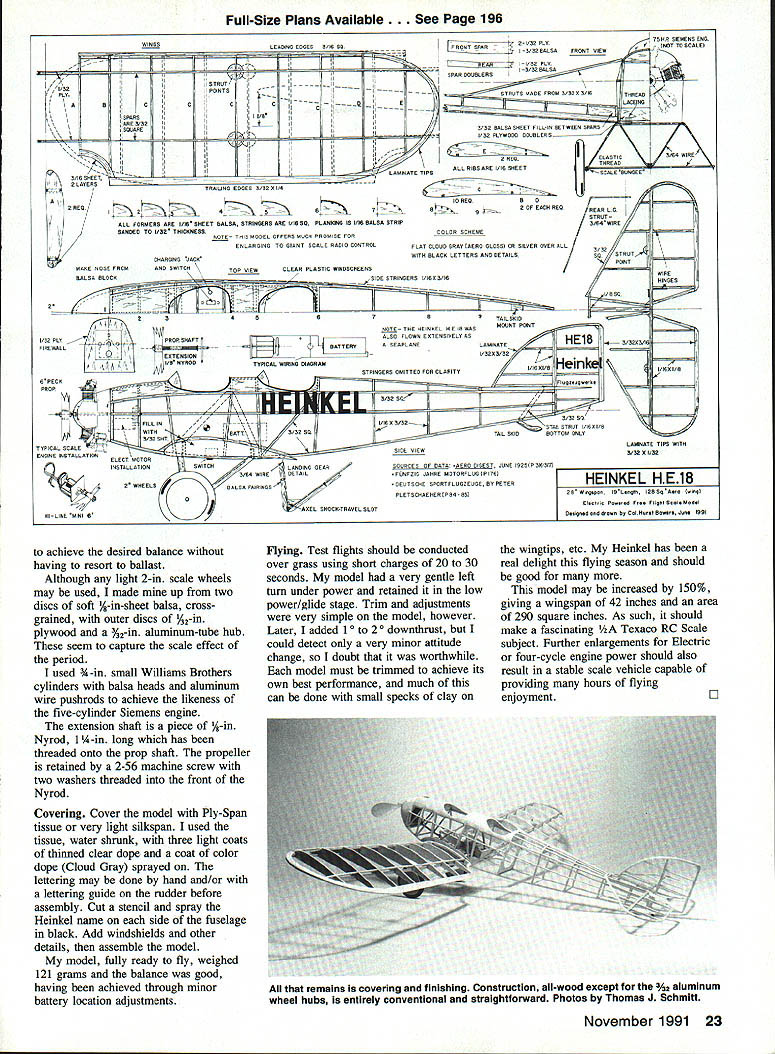
Scaling Up
- The model may be increased by 150%, giving a wingspan of 42 in and an area of about 290 sq in; this should make a fascinating 1/2 Texaco RC scale subject.
- Further enlargements for electric or four‑cycle engine power should result in a stable scale machine capable of many hours of flying enjoyment.
Transcribed from original scans by AI. Minor OCR errors may remain.

