
HOLES
A modeler's guide to selection and use of the proper tools for an important construction step. Ned Kragness
Building a model is an exercise in cutting and shaping bits and pieces to be assembled into the final product. To assemble the model properly, builders spend a lot of time and energy making holes.
The technique for making holes varies according to the size and shape of the hole and the material into which it is being cut. Modelers must learn to cut specific holes into specific materials.
Regardless of the shape of the hole, begin by drilling an aperture that is basically round. Even if a large, irregularly shaped cutout is what you're after, draw the initial hole basically round and pass a jigsaw blade or a file through it to work to size and shape from the inside.
If you want the hole to be smoothly cut and precisely located and sized, there are a few extra steps that should become automatic. All too often, when we want a 1/4-inch hole, we reach for the 1/4-inch jobber's drill. Don't do it! Good holes are produced by starting small—at least smaller than the desired dimension. You'll understand why as you read further.
General locating and starting technique
- Accurately locate the hole: draw or scribe centerlines that extend beyond the edges of the desired hole and make a punchmark where they cross. The locator lines will remain after the punchmark is gone. This helps position the drill to start the hole.
- Start undersize: begin with a smaller drill and enlarge progressively. Smaller drills have smaller chisels and are less likely to deflect the hole.
- Use backing scrap: support the underside of the workpiece with a snug piece of scrap to prevent splintering or distortion at the exit.
Drilling wood
Holes drilled in metal usually have smooth inner walls and fairly clean edges. Wood fibers, on the other hand, tend to tear rather than cut cleanly; holes in wood will be rough, with splinters and splits. Splintering is worst where the drill exits because feed pressure pushes the last weak, unsupported fibers out of place before the cutting edges have a chance to work.
This exit splintering can be prevented by placing scrap wood snugly against the underside of the surface being drilled. When the drill point enters the scrap, the fibers around the center cannot bend or break, so they cut neatly.
Wood-grain fibers also tend to deflect the drill off course. The drill follows a path between the strongest fibers, and the hole drifts. This is another reason for drilling undersize: if an intended 3/64-inch hole made with a 3/64 jobber's drill drifts, you can correct most or all of the error by enlarging the hole toward its intended location with a small round file before redrilling.
These small round files (rat-tail or round "bastard" type) generally taper slightly and can be used as tapered reamers.
Drill anatomy and center-punching
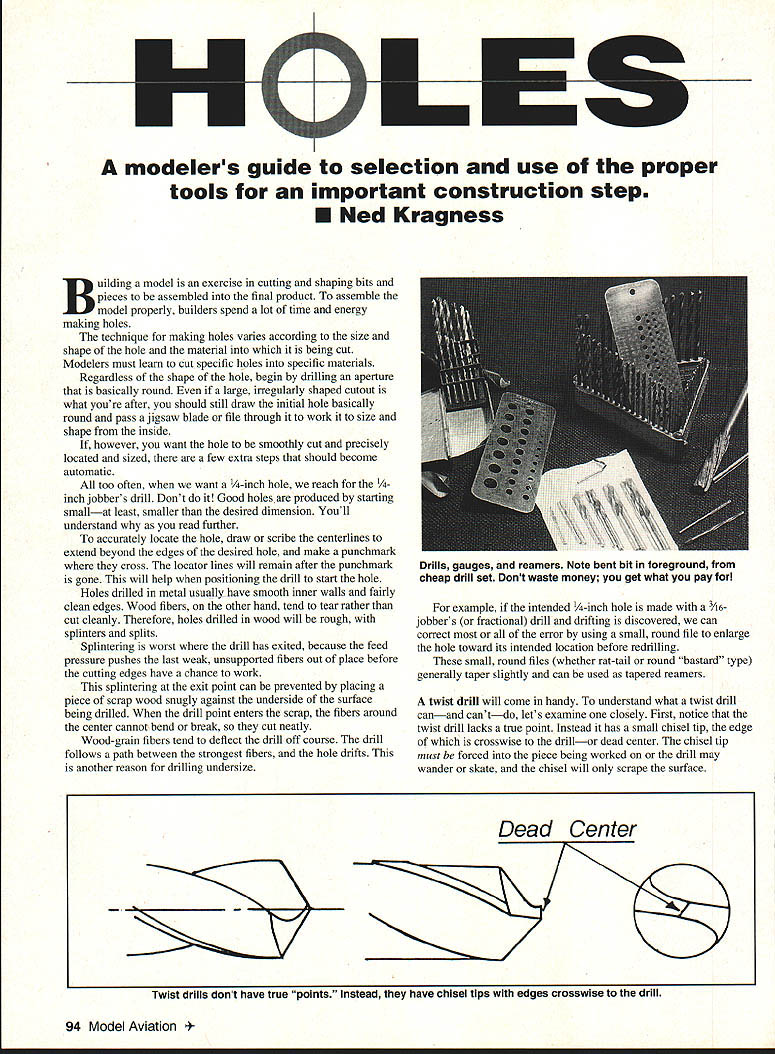
A twist drill lacks a true point; instead it has a small chisel tip, the edge of which is crosswise to the drill—or dead center. The chisel tip must be forced into the piece being worked on, or the drill may wander or skate and the chisel will only scrape the surface.
Dead Center
Make a center‑punch depression large enough to admit the entire chisel so the cutting lips can begin to work while the drill is held in the punch crater. If the material is too fragile for a heavy punch stroke, make a light one and use a smaller drill to begin enlarging the opening until it will accept the larger drill dead center. Remember, smaller drills have smaller chisels.
The cutting lips of a drill are almost invariably of unequal length. Drill sharpening is never exact, and drills always make holes slightly larger than their nominal size because the longer lip sweeps a greater diameter. Precision holes can still be made by drilling a few thousandths of an inch undersize and then reaming to final diameter.
Reaming and finishing holes
Reamers make cuts on the side walls of the hole. The straight flutes are usually given a very small taper at the entry end so they can enter the undersized drill hole and gradually begin the heaviest cutting. Since each flute is made entirely of cutting metal, the cut must be shallow enough to prevent the twisting forces from increasing to the point that they break the tool.
Reamers are available with straight or spiral flutes. Because the flutes of a twist drill are similar to those of a spiral reamer, you can ream with a twist drill provided you remove only a few thousandths of an inch. Whether you use a reamer or a twist drill, hand-turn the tool in one direction only, both going into the hole and coming back out.
Don't try to enlarge the hole diameter more than 1/64 inch in a single operation: there's a lot of cutting edge at work, and good tools are expensive—and brittle because they're hard. Use a lubricant when reaming metal.
When drilling or reaming deep holes, chips will fill and clog the flutes. Withdraw the reamer or twist drill from the hole and clear the flutes to prevent packing, jamming and breaking the tool.
Drilling thin metal
Define thin metal as anything thinner than half the diameter of the drill. Difficulty arises because the drill removes its own central pivot bearing before the cutting lips and flutes have penetrated far enough into the metal to be supported by the cylindrical portion of the hole.
One lip may hook into more metal than the other, and the drill will deflect or wobble the workpiece. The drill may bend, break, or produce a star- or keyhole-shaped hole surrounded by burrs.
Prevent this by solidly backing the piece with scrap to hold the drill point centered until the flutes have penetrated the metal. The scrap may be clamped, tack-soldered, or secured with cyanoacrylate (C/A) glue so it holds the entering drill point in position.
It's best to produce holes in thin sheet metal by punching first, then enlarging them by reaming, fretsawing, or nibbling. A nibbler is a small punch-and-die mounted on plierlike handles; insert the punch-and-die through a hole and punch the metal away bit by bit.
Drills, sets, and sizes
Drills come in sets:
- Jobber's (fractional) drill sets: graduated in 1/64-inch steps, commonly used by modelers.
- Number-coded sets: sizes coded 1 through 80 (usually sold in two groups: 1–60 and 61–80).
- Letter-coded sets (A–Z) and metric sets are also available.
Modelers commonly use fractional and number-coded drills. One reason for the wide range of sizes is that holes must be drilled precisely enough to be tapped (threaded). For threads to be cut, some metal must remain in the hole. For example, a 2-56 screw will slip into a #40 (0.086-inch) hole. To thread the hole with a tap, a #50 hole (0.070-inch) should be drilled.
Don't buy the cheapest drill sets. A good-quality set makes a noticeable difference. You should have a set of jobber's drills (fractional) ranging from 1/16 inch through 1/2 inch (in 1/64-inch increments). Good-quality drills are available in carbon steel and high-speed steel (HSS). HSS is mainly useful for stainless steel and machine-shop work and is more expensive.
A set of jeweler's broaches, if you can find one, is useful and inexpensive. A jeweler's broach is tapered much like a needle, but with a five-sided cross-section and five sharp edges.
You can make a disk or hole cutter for thin sheet balsa by sharpening a piece of tubing on one end. Cutting is done more by rotating than by punching, so the cutting edge should be toothed rather than razor-sharp. Either brass or aluminum tubing can be used; nicking the end with an old razor blade will make lots of little teeth.
Tapping and screws
If you're going to use screws, the holes should be threaded. Threading is done with taps—hard steel screws with flutes to create the cutting edges for the threads. They tend to accept and hold the chips produced while cutting.
For each tap size there is a specific corresponding drill size; using the right size drill ensures enough metal remains in the hole for threading. Screw the tap into the hole and rotate it back and forth to prevent jamming and breaking. Remove the tap entirely from the hole to clear chips. Use a lubricant except when working with brass or cast iron.
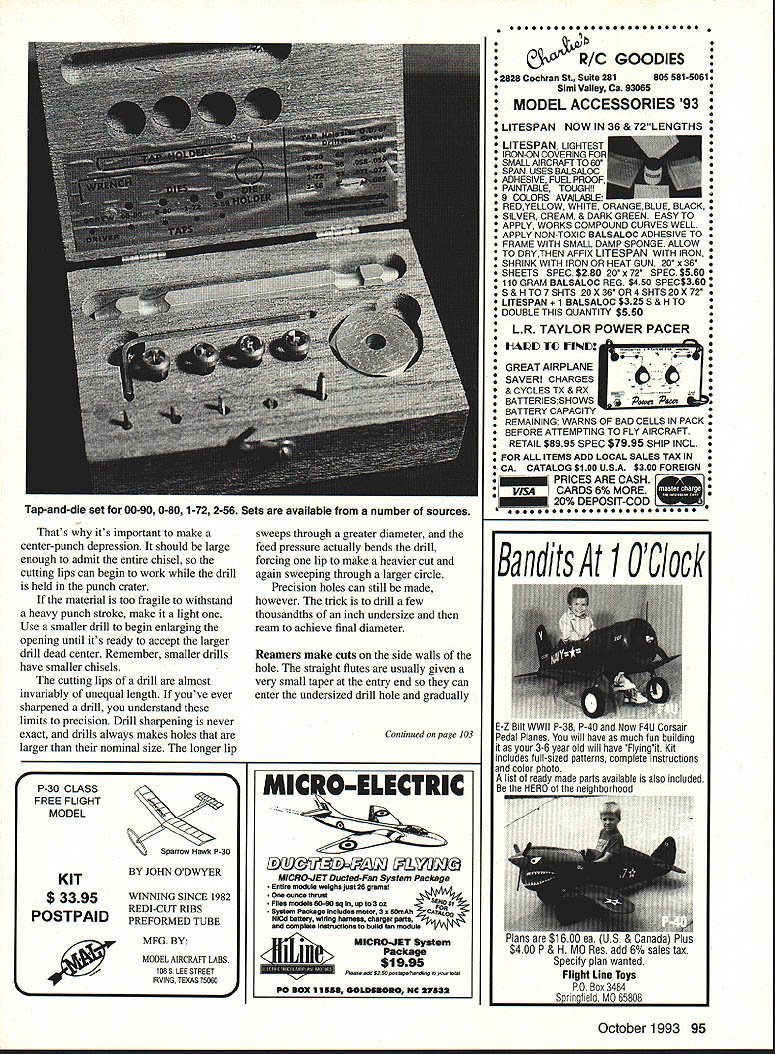
Small screws and fasteners made for instruments and eyeglasses are useful for scale models. The common 0-90 size is 0.045 inch in diameter. The screw is inexpensive and the corresponding tap costs about a dollar, but dies to put threads on a rod cost considerably more.
Sig Manufacturing Co. (and some model railroad dealers) has offered a tap-and-die set for the small sizes often used in models: 00-90, 0-80, 1-72, and 2-56. You'll also need the correct drill sizes for these taps—examples include drill numbers 60, 64, 53, 50, 48, and 43. A small collection of the right taps, dies and drills will cost around $40 but will last for many years.
Small screws come in several head styles—hex, flat, round, etc.—and look attractive on scale models. They are also surprisingly strong in wood—even balsa—if the wood around the hole is hardened first. The technique:
- Drill the wood undersize for the tap drill.
- Apply a thin variety of cyanoacrylate (C/A) glue to the inside of the hole and let it cure thoroughly.
- Redrill to the tap-drill size, treat with glue again, redrill, and then tap as if for metal.
Be absolutely certain the glue has cured, or you'll end up permanently installing the drill or tap.
Round stock
Modelers frequently need round wood to represent tubing and pipes. Hobby-shop dowels often work but sometimes must be reshaped from square stock. Hobby dowels may also be intentionally oversize.
Historically, dowels were made by driving wooden sticks through successively smaller sharp-edged holes in hardened steel plates. You can imitate this technique using the holes in drill gauges to reduce stick size or convert square stock to round:
- Put a point on the stick.
- Select the drill-gauge hole that will just take off the corners of the square stock or barely resist the round stock.
- Push or tap the stick through the hole.
- Progress from one hole to the next, making several passes through each if necessary.
Drill gauges come in both jobber's and numbered sizes. Jobber's sizes range from 1/16 inch through 2 inches in 1/64-inch increments. Numbered sizes range from No. 1 (.228 in.) through No. 60 (.040 in.). Hardened steel drill gauges are handy both for gauging drill sizes and for making custom dowels.
There you have it: everything you need to know to fashion a well-made hole in the size and location that suits your purpose.
Transcribed from original scans by AI. Minor OCR errors may remain.

