
How to Build a Wing/Fuselage Fillet
By Roy Day
By 1930, airplane designers using wind tunnels had determined that the sharp intersection of the fuselage side and the wing surface caused considerable drag. Thereafter, many airplanes, particularly high-performance ones, incorporated some sort of fillet along the wing/fuselage junction.
My last two scale projects, a WACO UPF-7 and a Spitfire, had fillets. In fact, the Spitfire has such large and long fillets that they've become somewhat of a standard for describing aircraft design; writers will often refer to "Spitfire-type" fillets.
Fillet types and materials
Model aircraft fillets can be made in two general ways:
- Small fillets: Use a filler such as Model Magic or a mixture of microballoons and epoxy. Shape the fillet with a plastic spoon, a wooden dowel, or even your finger (protect your skin with gloves).
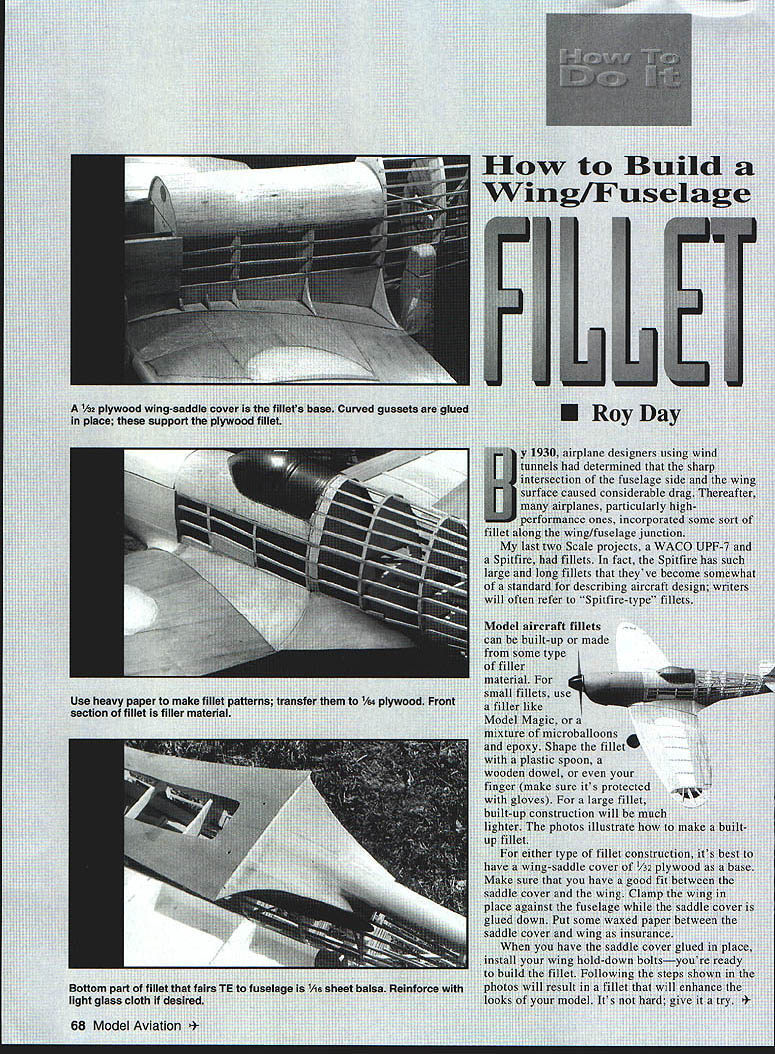
- Large fillets: Built-up construction will be much lighter and is preferable for large fillets. The photos (not included here) illustrate how to make a built-up fillet.
Preparing the wing saddle
For either type of fillet construction, it's best to have a wing-saddle cover of 1/32" plywood as a base. Make sure you have a good fit between the saddle cover and the wing.
- Clamp the wing in place against the fuselage while the saddle cover is glued down.
- Put some waxed paper between the saddle cover and the wing as insurance against accidental glue bonding.
Installing the wing and building the fillet
When you have the saddle cover glued in place, install your wing with the dowel and dowel-bolts — then you're ready to build the fillet. Follow the steps shown in the photos for built-up fillets or shape the filler material for small fillets.
Following these steps will result in a fillet that enhances the looks of your model. It's not hard — give it a try.
Transcribed from original scans by AI. Minor OCR errors may remain.

