
How to Construct Identical Built-Up Fuselage Sides
John R. Walker
Overview
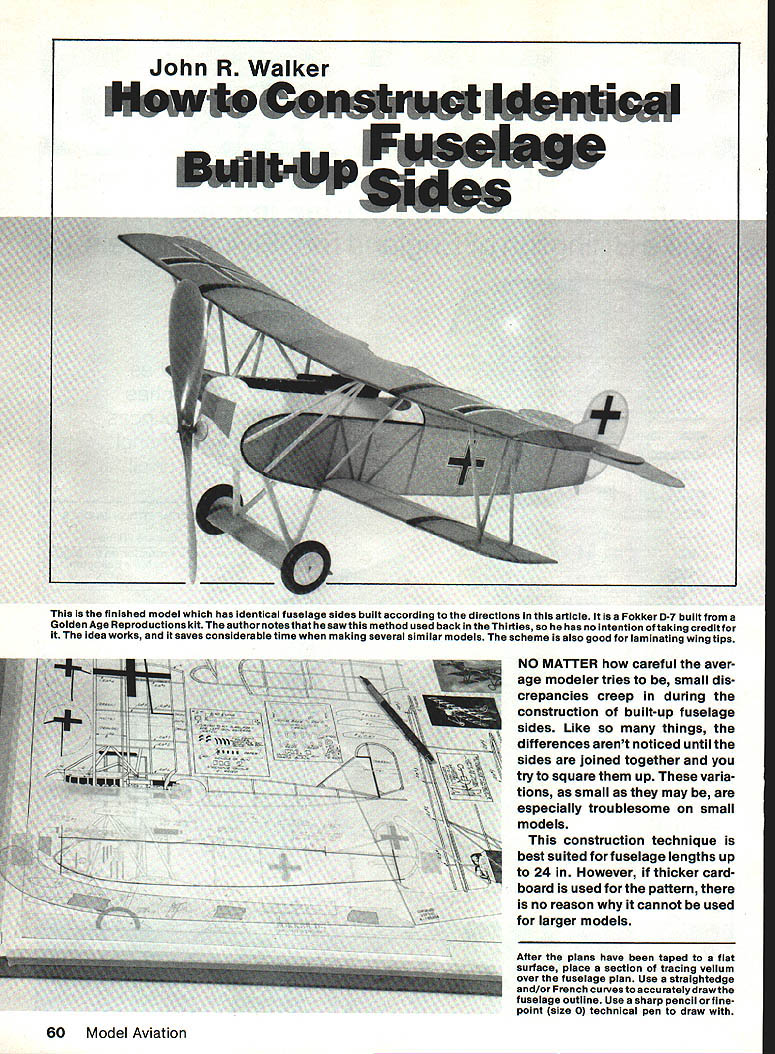
No matter how careful the average modeler tries to be, small discrepancies creep in during the construction of built-up fuselage sides. These differences often aren't noticed until the sides are joined and you try to square them up. Even small variations are especially troublesome on small models.
This construction technique is best suited for fuselage lengths up to 24 in. However, if thicker cardboard is used for the pattern, the method can be scaled for larger models.
Materials and Tools
- Plans taped to a flat surface
- Tracing vellum
- Straightedge and French curves
- Sharp pencil or fine-point (size 0) technical pen
- Thin cardboard (about 3/64 in. thick in the author's example)
- Rubber cement
- Modeling knife or single-edge razor blade
- Steel rule (as a cutting guide)
- Wax paper or plastic kitchen film (choose a film that repels cyanoacrylate if you will use CA glue)
- Wax (children's Crayola crayons work well)
- Type metal spacing quads (24 or 30 point) or pins to hold balsa while glue dries
Procedure
1. Trace the fuselage outline
- Tape the plans to a flat surface.
- Place a section of tracing vellum over the fuselage plan.
- Use a straightedge and/or French curves to accurately draw the fuselage outline.
- Draw with a sharp pencil or a fine-point (size 0) technical pen.
2. Transfer the pattern to cardboard
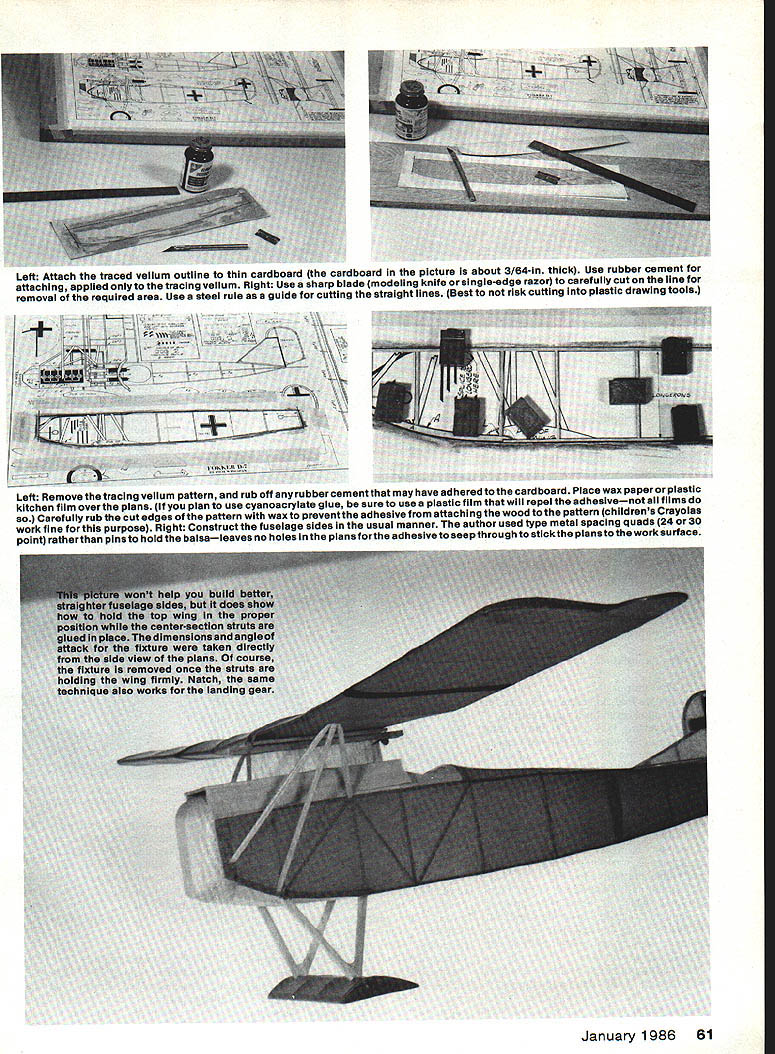
- Attach the traced vellum outline to thin cardboard using rubber cement. Apply the rubber cement only to the tracing vellum (not the plan or cardboard directly).
- Carefully cut the cardboard on the drawn lines using a sharp blade. Use a steel rule as a guide for straight cuts to maintain accuracy. Avoid cutting into plastic drawing tools.
3. Prepare the pattern for building
- Remove the tracing vellum pattern and rub off any remaining rubber cement from the cardboard.
- Place wax paper or plastic kitchen film over the plans before laying the cardboard pattern down. If you plan to use cyanoacrylate (CA) glue, be sure the chosen plastic film repels CA—some films do not.
- Carefully rub the cut edges of the cardboard pattern with wax (children's Crayola crayons work fine) to prevent adhesive from sticking the wood to the pattern.
4. Construct the fuselage sides
- Build the fuselage sides in the usual manner using the prepared cardboard pattern as a guide.
- The author preferred type metal spacing quads (24 or 30 point) rather than pins to hold the balsa in place. This leaves no holes in the plans and prevents adhesive from seeping through and sticking the plans to the work surface.
Fixture for Holding the Top Wing (and Landing Gear)
A small fixture can hold the top wing in the proper position while the center-section struts are glued in place. The fixture’s dimensions and angles of incidence were taken directly from the side view of the plans. The fixture is removed once the struts hold the wing firmly. The same technique also works for positioning and installing the landing gear.
Transcribed from original scans by AI. Minor OCR errors may remain.

