
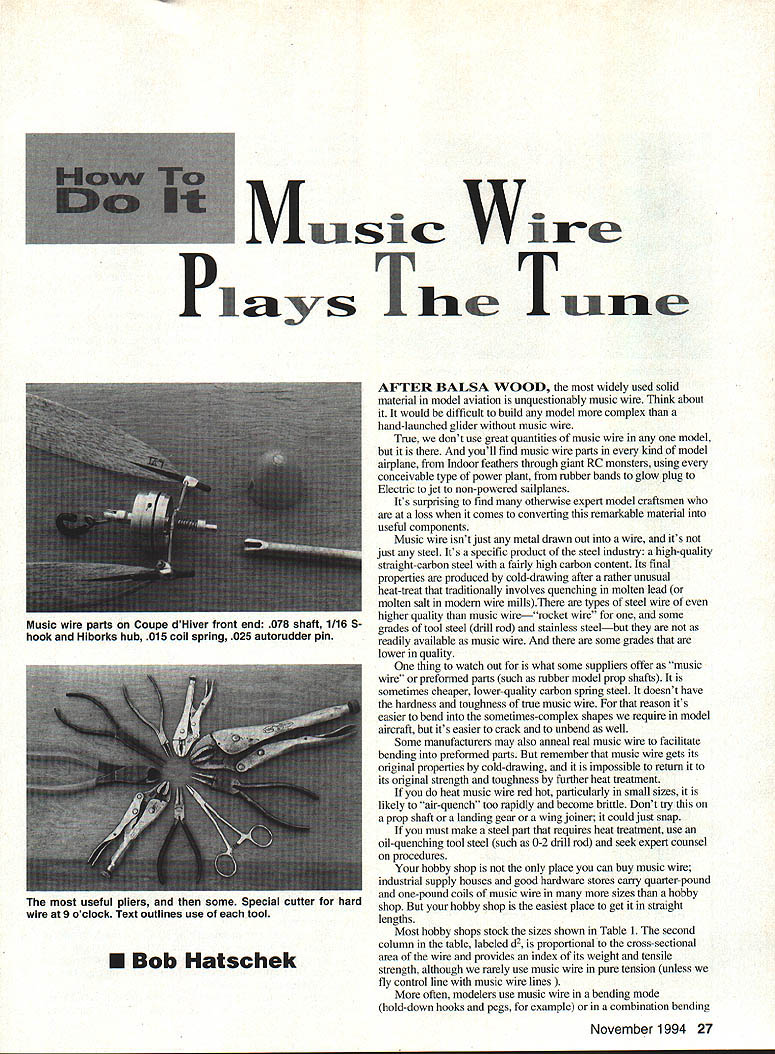
How to Do It?: Music Wire Plays The Tune
After balsa wood, the most widely used solid material in model aviation is unquestionably music wire. Think about it: it would be difficult to build any model more complex than a hand-launched glider without music wire.
True, we don't use great quantities of music wire in any one model, but it is there. You'll find music wire parts in every kind of model airplane, from indoor featherweights through giant R/C monsters, using every conceivable type of power plant — rubber bands, glow plug, electric, jet — and in non-powered sailplanes.
It's surprising how many otherwise expert model craftsmen are at a loss when it comes to converting this remarkable material into useful components.
Properties and heat treatment
Music wire isn't just any metal drawn into a wire, and it's not just any steel. It's a specific product of the steel industry: a high-quality, high-carbon spring steel. Its final properties are produced by cold-drawing after a rather unusual heat treat that traditionally involves quenching in molten lead (or molten salt in modern wire mills). There are steels of even higher quality than music wire — "rocket wire" for one, and some grades of tool steel (drill rod) and stainless steel — but they are not as readily available as music wire. There are also lower-quality grades.
One thing to watch for is what some suppliers offer as "music wire" or preformed parts (such as rubber-model prop shafts). These are sometimes cheaper, lower-quality carbon spring steel. They don't have the hardness and toughness of true music wire. For that reason they are easier to bend into the sometimes-complex shapes we require in model aircraft, but they are easier to crack and to unbend as well.
Some manufacturers may anneal real music wire to facilitate bending into preformed parts. But remember that music wire gets its original properties by cold-drawing, and it is impossible to return it to its original strength and toughness by further heat treatment.
If you do heat music wire red hot, particularly in small sizes, it is likely to "air-quench" too rapidly and become brittle. Don't try this on a prop shaft, a landing gear, or a wing joiner; it could just snap.
If you must make a steel part that requires heat treatment, use an oil‑quenching tool steel (such as O‑2 drill rod) and seek expert counsel on procedures.
Where to buy and sizes
Your hobby shop is not the only place to buy music wire; industrial supply houses and good hardware stores carry quarter‑pound coils and one‑pound coils of music wire in many more sizes than a hobby shop. But your hobby shop is the easiest place to get it in straight lengths.
Most hobby shops stock the common sizes. The second column in the usual size tables, labeled d^2, is proportional to the cross-sectional area of the wire and provides an index of its weight and tensile strength, although we rarely use music wire in pure tension (unless we fly control line with music wire lines).
More often, modelers use music wire in bending mode (hold‑down hooks and pegs, for example) or in a combination of bending and torsion (typical wire landing gear), or a combination of tension and torsion (rubber‑model prop shafts, torque meter elements). That is the significance of the last two columns in the table.
Torsional rigidity is a function of the cube of diameter (d^3), and bending stiffness varies as the fourth power (d^4). The d^4 column tells us not only how much stiffer a larger size of wire will be, it also tells us why the larger sizes are so difficult to bend.
Note that the numbers in such tables refer to geometric properties and have nothing to do with the material. A 1/8" wooden dowel, for example, would be about 15.5 times as stiff as a 1/16" dowel (from the table: 24414/1575 = 15.5). Actually the ratio would be exactly 16.0, but raising d to the fourth power multiplies the small errors due to rounding.
Working the wire
Working the wire can change some of its properties. Putting a sharp bend in a piece of steel cold‑works it locally: the outside of the bend is stretched and the inside compressed. This adds slightly to the hardness and leaves a residual stress in the metal that makes it a bit more resistant to further bending.
The effect works in both directions, but it's a bit stronger in the direction it was bent. Proper design of parts takes this into account. That's why it's better practice to make rubber‑model wire hubs (for right‑hand props) in a reverse Z (seen from the front) instead of a Z.
It's nearly impossible to make a really sharp bend in music wire. You get a small radius, and that's fine — don't try to make bends with a radius less than that of the wire you're bending. If the bend is too sharp, the excess cold‑working can make the wire brittle. (This is why a piece of wire will break when you bend it back and forth several times.)
A larger bend radius will allow you to adjust the length between bends slightly: just bend it a bit, move your round‑nose pliers slightly, and increase the bend at the other end. This is one reason round‑nose pliers are recommended.
When you grind music wire, be careful not to overheat and inadvertently "burn" it. Dip the part in water frequently if you're doing a lot of grinding, as any expert tool grinder will do.
I grind a lot of special tools for my Unimat from 1/32" music wire. Don't try to use music wire tools for turning or boring steel parts, but they work fine in most aluminum alloys and plastics like nylon, Delrin, and Teflon.
Tooling up for music wire parts
You should respect the material before using it, and you must have the proper tools. The secret of metal forming is to maintain control of the material throughout the operation. This takes good tools and tooling suited to the material.
Most difficulty in bending music wire results from use of poorly made or poorly selected pliers. Pliers made for electronics use — cutting and bending soft copper wire — just cannot do the job on hard music wire.
Also avoid bending blocks made of nonferrous metals, such as aluminum or diecast alloys. These may be fine if you're doing fancy bending of softer steels, but music wire will quickly break down the corners and radii of any bending block that isn't at least as hard as the wire itself. If you ever find a bending block machined from tool steel, hardened and tempered, it might be worth acquiring — but they're rare.
Here's what you need for general‑purpose wire bending, in my order of preference (you should have at least the first three items):
- A 7‑ or 8‑inch pair of side‑cutting pliers specifically made for cutting hard wire. Kraeuter and Crescent are two brands I can recommend. I have also seen some compound‑action cutters (miniature bolt cutters) that will do the job beautifully. Such tools can often be found in marine‑supply stores.
- At least one pair of Peterson Vise‑Grips (Model WR). I have five: one 4WR, two 5WR, one 7WR, and one 10WR (the number is the width across the jaws in 1/8‑inch units). These have hardened cutting jaws and can handle music wire. I use a 10WR regularly for cutting music wire up to .132" diameter.
- Two pairs of round‑nose pliers, small and large. Have a pair about four inches long and another about seven inches long. After you have them, you'll wonder how you ever did without them.
- At least one 5‑inch hemostat; longer jaws are useful. Cut the jaws fairly short and file a rather flat nose. Making bending of very small‑diameter wire (less than .030") easier often requires such modified tools.
- A pair of flat‑nose needle‑nose pliers.
- A pair of slip‑joint or gas pliers.
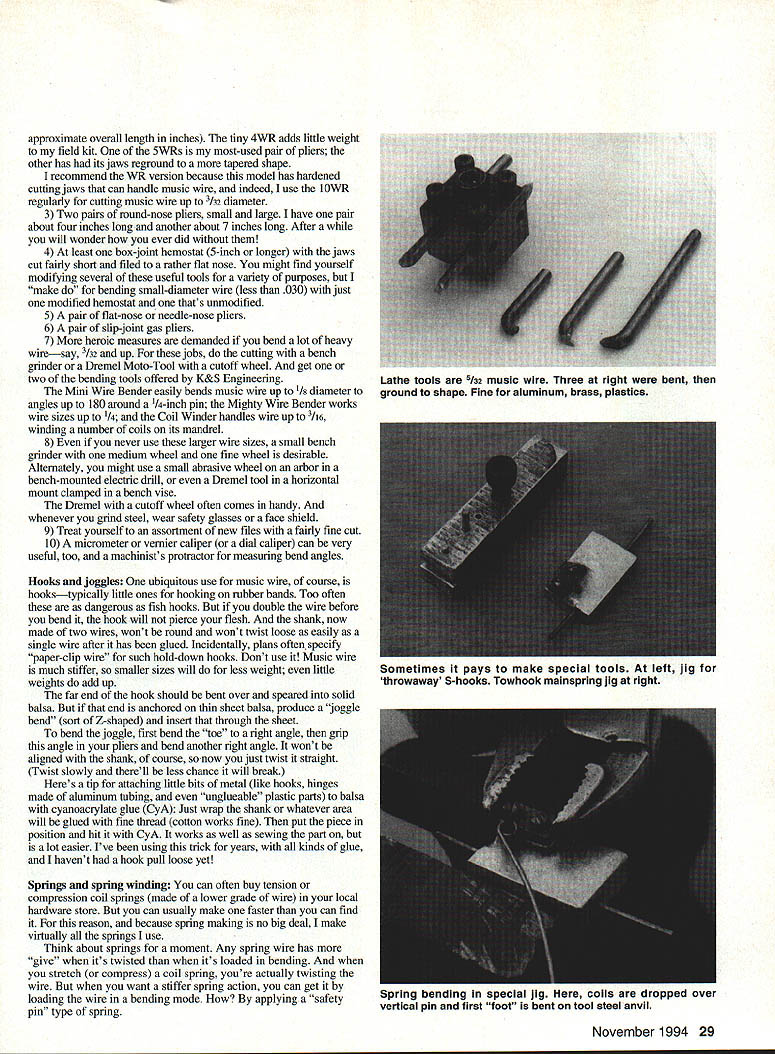
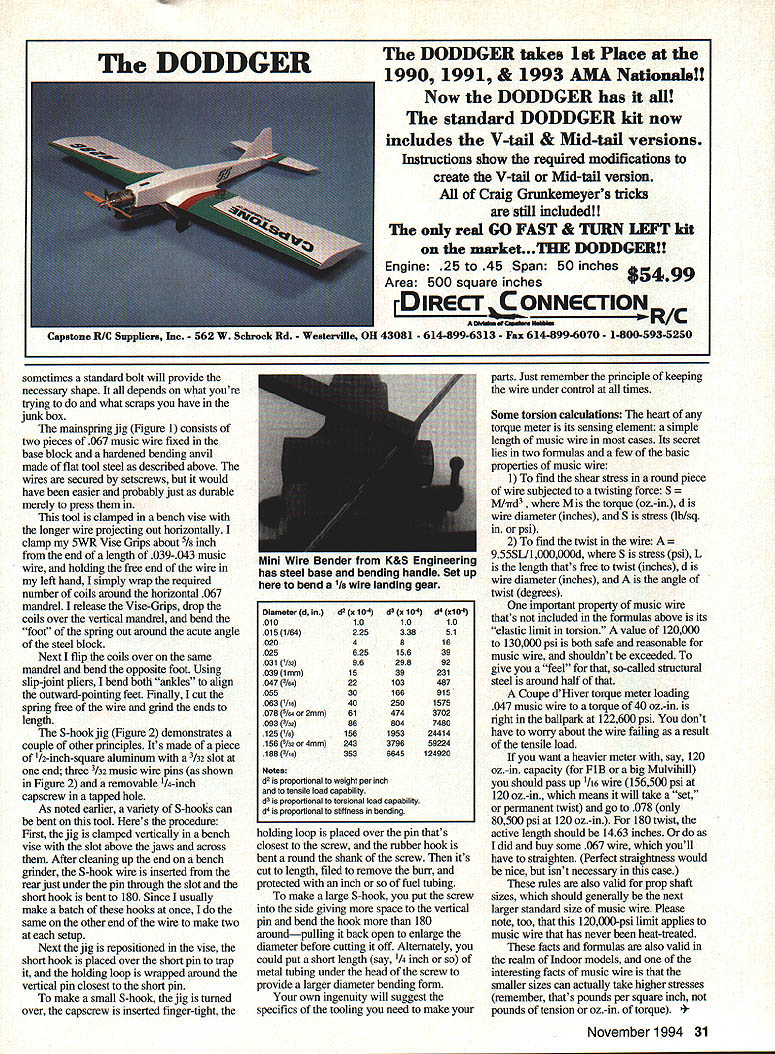
- For heroic measures — bending a lot of heavy wire, say .132" and up — you'll need cutting by a bench grinder or a Dremel/Moto‑Tool cutoff wheel. Consider the bending tools offered by K&S Engineering: the Mini Wire Bender (bends music wire up to 1/8" diameter; bends up to 180° around a 1/4" pin) and the Mighty Wire Bender (works wire sizes up to 1/4"). A Coil Winder handles wire up to 3/16" for winding a number of coils on its mandrel.
- Never use larger wire sizes on a small bench grinder; use a medium wheel and a fine wheel where desirable. Alternately, use a small abrasive‑wheel arbor on a bench‑mounted electric drill, a Dremel tool mounted horizontally in a clamped bench vise, or a Dremel cutoff wheel. Wear safety glasses and a face shield.
- An assortment of new files, fairly fine cut.
- A micrometer or vernier caliper for accurate measurement.
Hooks and joggles
One ubiquitous use for music wire is hooks — typically small ones for hooking on rubber bands. Too often these are as dangerous as fish hooks. If you double the wire before you bend it, the hook will not pierce your flesh. The shank, now made of two wires, won't be round and won't twist loose as easily as a single wire after it's been glued.
Plans often specify "paper‑clip wire" for hold‑down hooks. Don't use it. Music wire is much stiffer, so smaller sizes will do for less weight; even small weight savings add up.
The far end of the hook should be bent over and speared into solid balsa. If that end is anchored on thin sheet balsa, make a "joggle bend" (a Z‑shaped bend) and insert that through the sheet.
To bend the joggle, first bend the "toe" to a right angle, then grip this angle in your pliers and bend another right angle. It won't be aligned with the shank at first, so twist it straight — twist slowly and there's less chance it will break.
Here's a tip for attaching little bits of metal (hooks, hinges made of aluminum tubing, and even "unglueable" plastic parts) to balsa with cyanoacrylate glue (CYA): wrap the shank or the area to be glued with fine thread (cotton works fine). Put the piece in position and hit it with CYA. It works as well as sewing the part on, but is much easier. I've used this trick for years with many kinds of glue and haven't had a hook pull loose yet.
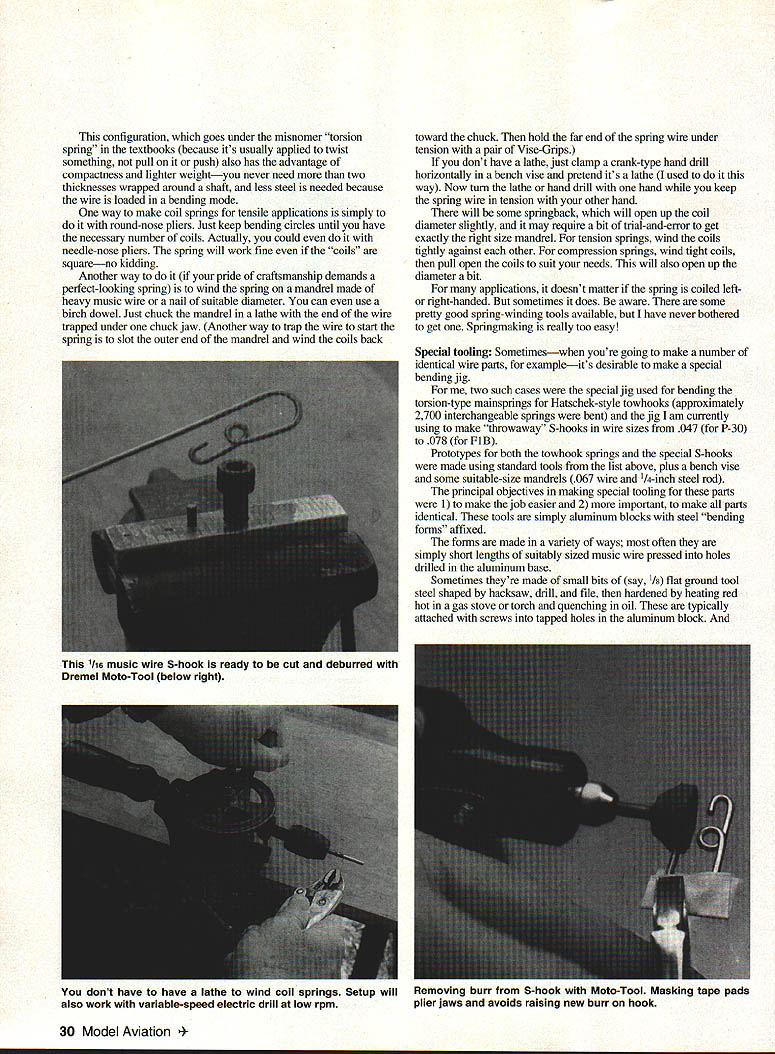
Springs and spring winding
You can often buy tension or compression coil springs (made of lower‑grade wire) in your local hardware store. Usually you can make one faster than you can find it, so I make virtually all the springs I use.
Think about springs for a moment. Any spring wire has more "give" when it's twisted than when it's loaded in bending. When you stretch (or compress) a coil spring, you're actually twisting the wire. If you want a stiffer spring action, you can get it by loading the wire in a bending mode — for example with a "safety pin" type of spring. This configuration, often misnamed a "torsion spring" in texts, has the advantage of compactness and light weight — you never need more than two thicknesses wrapped around a shaft, and less steel is needed because the wire is loaded in bending.
One way to make coil springs for tensile applications is simply with round‑nose pliers: keep bending circles until you have the necessary number of coils. The spring will work fine even if the "coils" are square.
A more craft‑proud method is to wind the spring on a mandrel made of heavy music wire or a nail of suitable diameter. You can even use a birch dowel. Chuck the mandrel in a lathe with the end of the wire trapped under one chuck jaw. Another startup trick is to slot the outer end of the mandrel and wind the coils back toward the chuck, then hold the far end of the spring wire under tension with Vise‑Grips.
If you don't have a lathe, clamp a crank‑type hand drill horizontally in a bench vise and pretend it's a lathe. Turn the lathe or hand drill with one hand while keeping the spring wire in tension with the other.
There will be some springback, which opens up the coil diameter slightly, so some trial and error may be required to get exactly the right mandrel size. For tension springs, wind the coils tightly against each other. For compression springs, wind tight coils then pull them open to suit your needs.
For many applications, it doesn't matter if the spring is left‑ or right‑handed, but sometimes it does. There are good spring‑winding tools available, but springmaking is easy enough that the author has never bothered to get one.
Special tooling
Two special cases for me were the jig used for bending the torsion‑type mainsprings for Hatschek‑style towhooks (about 2,700 interchangeable springs were bent) and a jig used to make "throwaway" S‑hooks in wire sizes from .047 (for P‑30) to .078 (for F1B).
Prototypes for both the towhook springs and the S‑hooks were made using the standard tools listed above, plus a bench vise and suitable mandrels (.067 wire and 1/4‑inch steel rod).
The principal objectives in making special tooling were to make the job easier and, more important, to make all parts identical. These tools are simply aluminum blocks with steel "bending forms" affixed.
The forms are made in various ways. Often they are short lengths of suitably sized music wire pressed into holes drilled in the aluminum base. Sometimes they are small bits of flat ground tool steel (say 1/8‑inch) shaped by hacksaw, drill, and file, then hardened by heating red hot and quenching in oil. These are typically attached with screws into tapped holes in the aluminum block. Sometimes a standard bolt will provide the necessary shape. It all depends on what you're trying to do and what scraps you have in the junk box.
The mainspring jig consists of two pieces of .067 music wire fixed in the base block and a hardened bending anvil made of flat tool steel as described above. The wires are secured by set screws, but it would have been easier and probably just as durable merely to press them in.
This tool is clamped in a bench vise with the longer wire projecting out horizontally. Clamp a 5WR Vise‑Grip about 5/8 inch from the end of a length of .039–.043 music wire, hold the free end of the wire in your left hand, and wrap the required number of coils around the horizontal .067 mandrel. Release the Vise‑Grips, drop the coils over the vertical mandrel, and bend the "foot" of the spring out around the acute angle of the steel block.
Flip the coils over on the same mandrel and bend the opposite foot. Using slip‑joint pliers, bend both "ankles" to align the outward‑pointing feet. Finally, cut the spring free of the wire and grind the ends to length.
The S‑hook jig demonstrates a couple of other principles. It's made of a piece of 1/2‑inch‑square aluminum with a 3/32" slot at one end; three 7/32" music wire pins and a removable 1/4‑inch capscrew in a tapped hole.
Procedure: clamp the jig vertically in a bench vise with the slot above the jaws. After cleaning up the end on a bench grinder, insert the S‑hook wire from the rear just under the pin through the slot and bend the short hook to 180°. If making a batch, do the same on the other end of the wire to make two hooks each setup.
Reposition the jig in the vise, place the short hook over the short pin to trap it, and wrap the hooking loop up over the short pin.
To make a small S‑hook, turn the jig over, insert the capscrew finger‑tight, place the holding loop over the pin closest to the screw, and bend the hook around the shank of the screw. Cut to length, file to remove the burr, and protect with an inch or so of fuel tubing.
To make a large S‑hook, use the screw and the same mandrel used earlier, bend the hook more than 180° and then pull it back open to enlarge the diameter before cutting it off. Alternately, put a short length (about 1/4 inch) of metal tubing under the head of the screw to provide a larger diameter bending form.
Your own ingenuity will suggest the specifics of any tooling you need. Remember the principle of keeping the wire under control at all times.
Some torsion calculations
The heart of any torque meter is its sensing element: a simple length of music wire in most cases. Its behavior is governed by two formulas and a few basic properties of music wire.
- To find the shear stress in a round piece of wire subjected to a twisting force:
S = M·r / J where M is the torque (oz·in), r is the wire radius (inches), and S is stress (lb/in², or psi).
- To find the twist in the wire:
A = 9.55·S·L / (G·d) where S is stress (psi), L is the length free to twist (inches), d is wire diameter (inches), and A is the angle of twist (degrees).
An important property of music wire not included in the formulas is its elastic limit in torsion. A value of 120,000 to 130,000 psi is both safe and reasonable for music wire and shouldn't be exceeded. For perspective, structural steel is around half that.
A D'Hiver torque meter loading .047 music wire to a torque of 40 oz·in registers around 122,600 psi — right in the ballpark. You don't have to worry about the wire failing as a result of the tensile load in that case.
If you want a heavier meter with, say, 120 oz·in capacity (for F1B or a big Mulvihill), pass up 1/16" wire (which would be at its limit and take a "set" or permanent twist) and go to .078" (only about 80,500 psi at 120 oz·in). For 180° twist, the length should be 14.63 inches. Or use .067" wire and straighten it — perfect straightness is nice but not necessary in many cases.
These rules also apply to prop shaft sizes, which would generally be the next larger wire size. Please note this 120,000 psi limit applies to music wire that has never been heat treated. These facts and formulas are also valid in the realm of indoor models, and one interesting fact is that the smaller sizes can actually take higher stresses (remember, that's pounds per square inch, not pounds of tension or oz·in of torque).
Transcribed from original scans by AI. Minor OCR errors may remain.

