
How to Modify the Monogram E-Power Module
An easy to install, low-cost electric power unit for small free-flight and RC jobs.
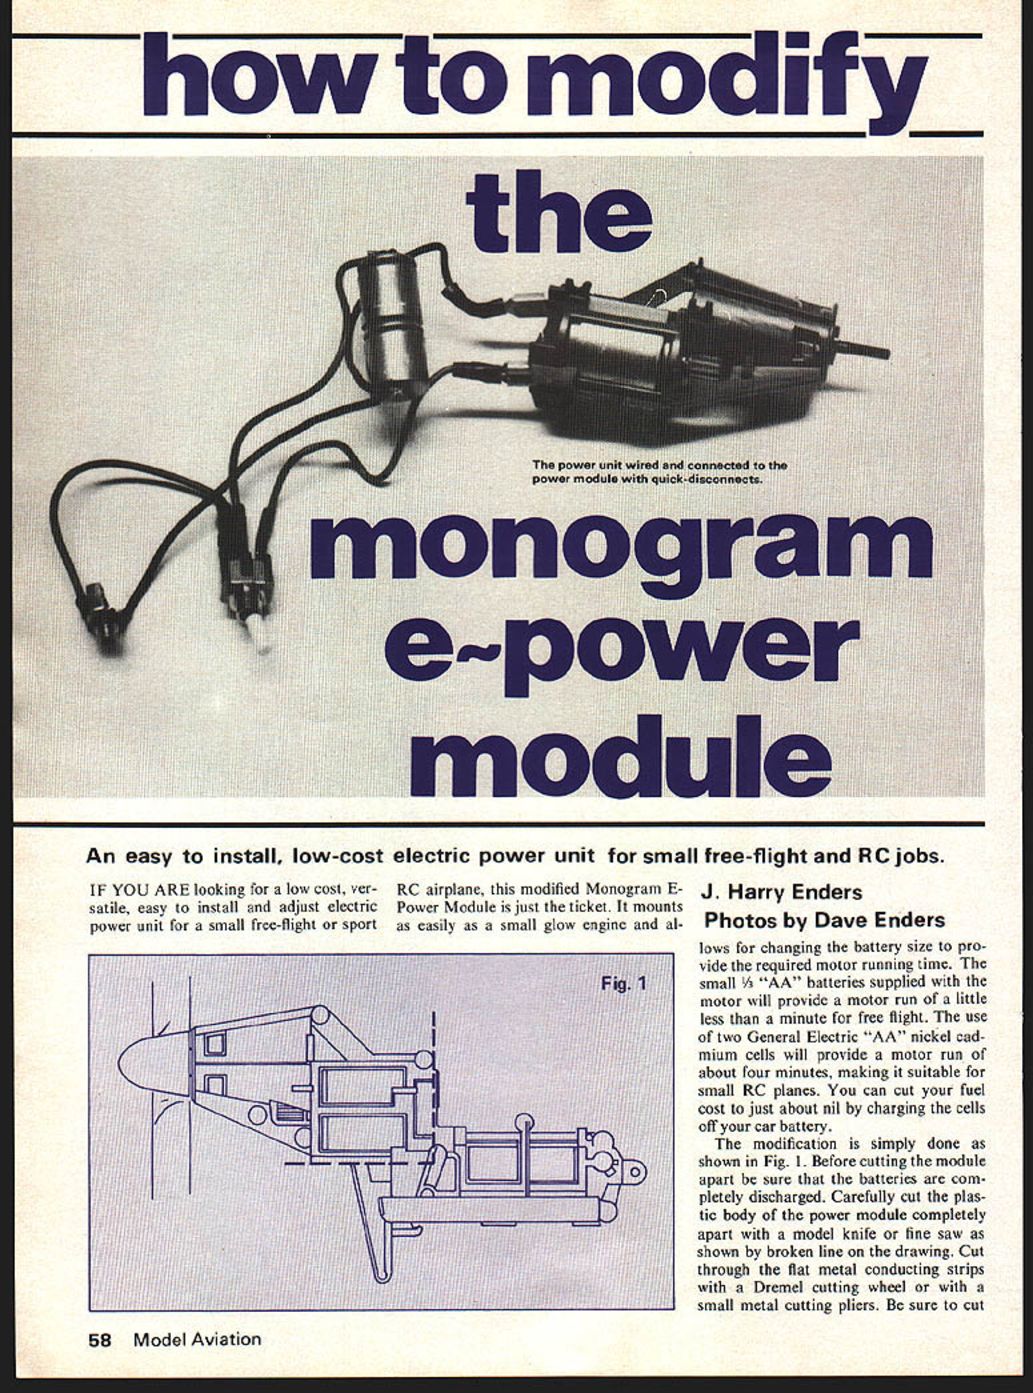
IF YOU ARE looking for a low cost, versatile, easy to install and adjust electric power unit for a small free-flight or sport RC airplane, this modified Monogram E-Power Module is just the ticket. It mounts as easily as a small glow engine and allows for changing the battery size to provide the required motor running time.
The small 1/3 "AA" batteries supplied with the motor will provide a motor run of a little less than a minute for free flight. The use of two General Electric "AA" nickel cadmium cells will provide a motor run of about four minutes, making it suitable for small RC planes. You can cut your fuel cost to just about nil by charging the cells off your car battery.
The modification is simply done as shown in Fig. 1. Before cutting the module apart be sure that the batteries are completely discharged. Carefully cut the plastic body of the power module completely apart with a model knife or fine saw as shown by the broken line on the drawing. Cut through the flat metal conducting strips with a Dremel cutting wheel or with small metal cutting pliers. Be sure to cut the flat metal conducting strips beyond the base of the motor to allow the power supply to be connected to the motor by female quick-disconnects.
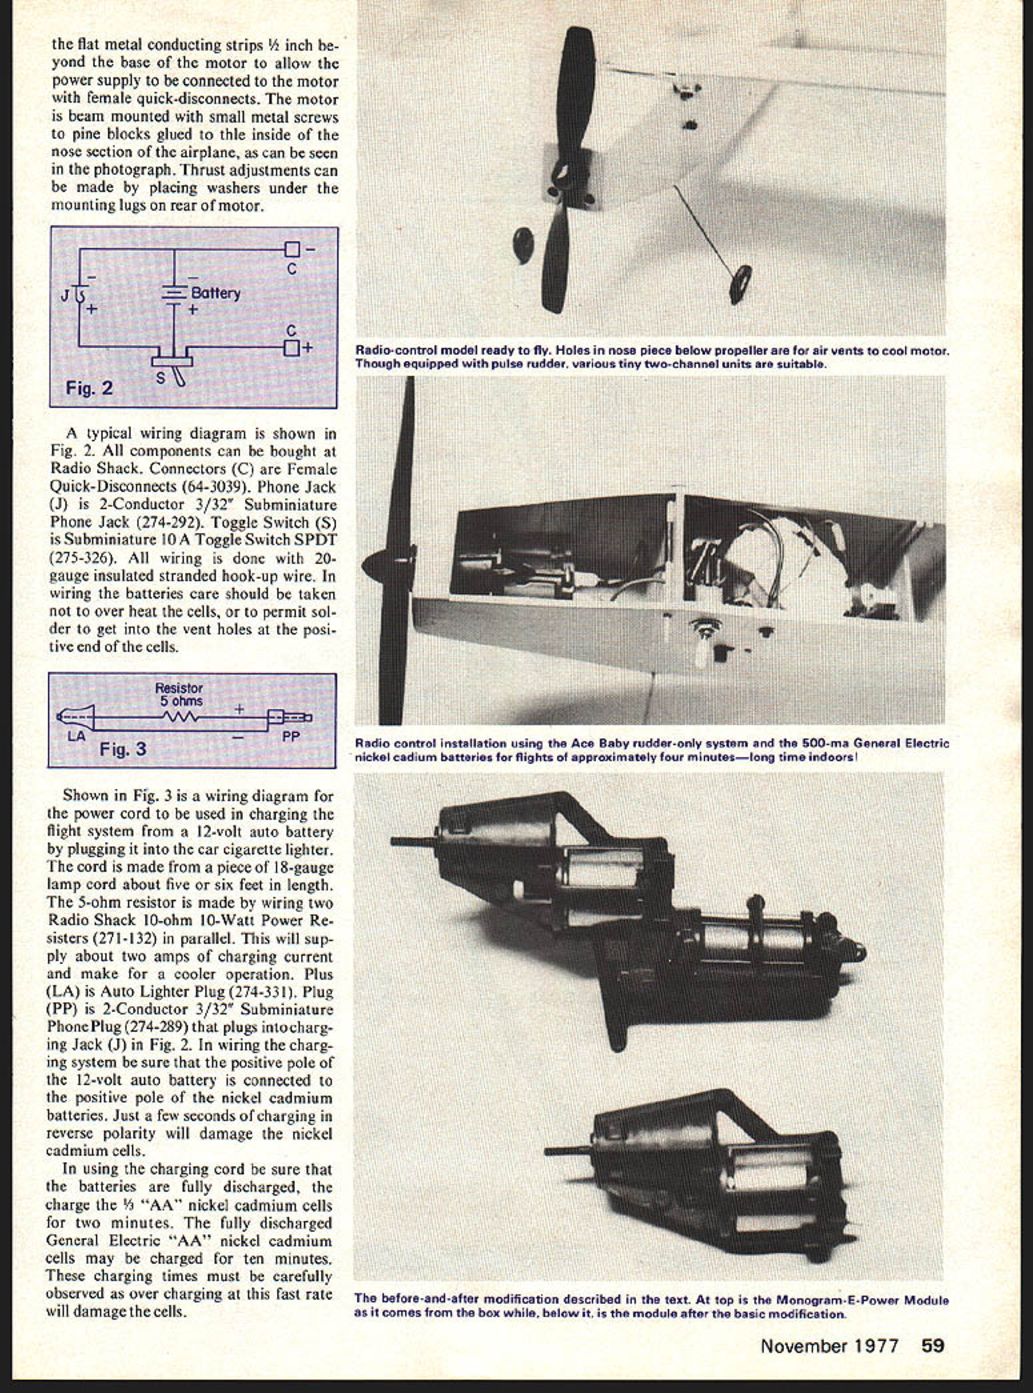
The motor is beam-mounted with small metal screws and pine blocks glued to the inside of the nose section of the airplane as can be seen in the photograph. Thrust adjustments can be made by placing washers under the mounting lugs at the rear of the motor.
A typical wiring diagram is shown in Fig. 2. Components can be bought from Radio Shack: Female Quick-Disconnects 64-3039; 2-Conductor 3/32" Subminiature Phone Jack 274-292; Subminiature Toggle Switch SPDT 275-326. Wiring is done with 20-gauge insulated stranded hookup wire. When wiring the batteries, care should be taken not to overheat the cells or to permit solder to get into the vent holes at the positive end of the cells.
The power cord used for charging the flight system from a 12-volt auto battery is made by plugging a car cigarette lighter cord into a piece of 18-gauge lamp cord about five to six feet in length. The 5-ohm resistor is made by wiring two Radio Shack 10-ohm 10-watt power resistors (271-132) in parallel; this will supply about two amps charging current and make for cooler operation. Radio Shack part numbers: Auto Lighter Plug 274-331; 2-Conductor 3/32" Subminiature Phone Plug 274-289. These plugs and the charging jack are used in the Fig. 2 wiring charging system. Be sure the positive pole of the 12-volt auto battery is connected to the positive pole of the nickel cadmium batteries. Just a few seconds charging with reverse polarity will damage nickel cadmium cells.
When using the charging cord, be sure the batteries are fully discharged before charging. Charging three 1/3 AA nickel cadmium cells that are fully discharged requires about two minutes; General Electric AA nickel cadmium cells may require about ten minutes. Charging times must be carefully observed—overcharging at a fast rate will damage cells.
J. Harry Enders Photos by Dave Enders the flat metal conducting strips 1/2 inch beyond the base of the motor to allow the power supply to be connected to the motor with female quick-disconnects. The motor is beam mounted with small metal screws to pine blocks glued to the inside of the nose section of the airplane, as can be seen in the photograph. Thrust adjustments can be made by placing washers under the mounting lugs on rear of motor.
A typical wiring diagram is shown in Fig. 2. All components can be bought at Radio Shack. Connectors (C) are Female Quick-Disconnects (64-3039). Phone Jack (J) is 2-Conductor 3/32" Subminiature Phone Jack (274-292). Toggle Switch (S) is Subminiature 10 A Toggle Switch SPDT (275-326). All wiring is done with 20-gauge insulated stranded hook-up wire. In wiring the batteries care should be taken not to overheat the cells, or to permit solder to get into the vent holes at the positive end of the cells.
Shown in Fig. 3 is a wiring diagram for the power cord to be used in charging the flight system from a 12-volt auto battery by plugging it into the car cigarette lighter. The cord is made from a piece of 18-gauge lamp cord about five or six feet in length. The 5-ohm resistor is made by wiring two Radio Shack 10-ohm 10-Watt Power Resistors (271-132) in parallel. This will supply about two amps of charging current and make for a cooler operation. Plus (LA) is Auto Lighter Plug (274-331). Plug (PP) is 2-Conductor 3/32" Subminiature Phone Plug (274-289) that plugs into charging Jack (J) in Fig. 2. In wiring the charging system, be sure that the positive pole of the 12-volt auto battery is connected to the positive pole of the nickel cadmium batteries. Just a few seconds of charging in reverse polarity will damage the nickel cadmium cells.
In using the charging cord be sure that the batteries are fully discharged, then charge the 1/3 "AA" nickel cadmium cells for two minutes. The fully discharged General Electric "AA" nickel cadmium cells may be charged for ten minutes. These charging times must be carefully observed as overcharging at this fast rate will damage the cells.
Transcribed from original scans by AI. Minor OCR errors may remain.

