
Part 1 — How to Mold Fiberglass Props
Text and Photos by Tom Hail and Larry Fagan
The advantages of fiberglass props—strength, rigidity, safety, and superior performance—have made them a popular item in competitive modeling events. Fiberglass props are useful whenever resistance to de-pitching is desired or whenever high rpm are encountered. A fiberglass prop will resist flying into pieces at high rpm, making it an ideal choice for free flight, CL, and RC racing events. Its rigidity lends itself to events, such as Carrier, that require the engine to run at more than one rpm, because the prop does not "throb" at a low rpm like a nylon prop occasionally does.
In addition to performance, the prop can be colored with many different dyes. In an event such as Stunt, in which the plane's appearance is considered as part of the total points, a prop that adds to the effect of your paint scheme might help. Another advantage of the fiberglass prop is that it is easily reproduced. Molding a favorite prop that you have spent considerable time carving, pitching, and finishing will allow you to reproduce it with far less effort than doing similar modifications on a new prop. Also, you can make these modifications without ruining your prototype. Breaking a copy is far less traumatic than breaking an original that may have hours of work in it.
Because of the fiberglass prop's popularity in so many different events, it has been more difficult to obtain. To ensure an adequate supply we realized we needed to make our own. We were concerned about the safety and performance aspects of building these props, as well as the ease of duplication. A talk with Les Pardue of Albuquerque alleviated our fears and convinced us we should proceed immediately. The next two weeks were spent in obtaining the various materials involved—which totalled about $40.00. We figured we had enough material to make about 600 7-inch props, the size in which we were most interested. The approximate cost for a commercially manufactured prop is about $4.00.
Starting one Saturday afternoon we tried our first prop. The mold was very good—especially considering it was our first. An article on carbon fiber props in the May 1972 issue of Aeromodeller helped. The first prop was a different story, however, although it taught us a couple of things. First, the amount of glass should be the absolute maximum. Second, the prop will increase to maximum rigidity about one week after molding. This last factor is important because it means the maximum economy of motion can be realized by using one weekend to turn out a number of props and a second weekend for balancing and finishing them. Another excellent winter project for summer flying!
The Mold
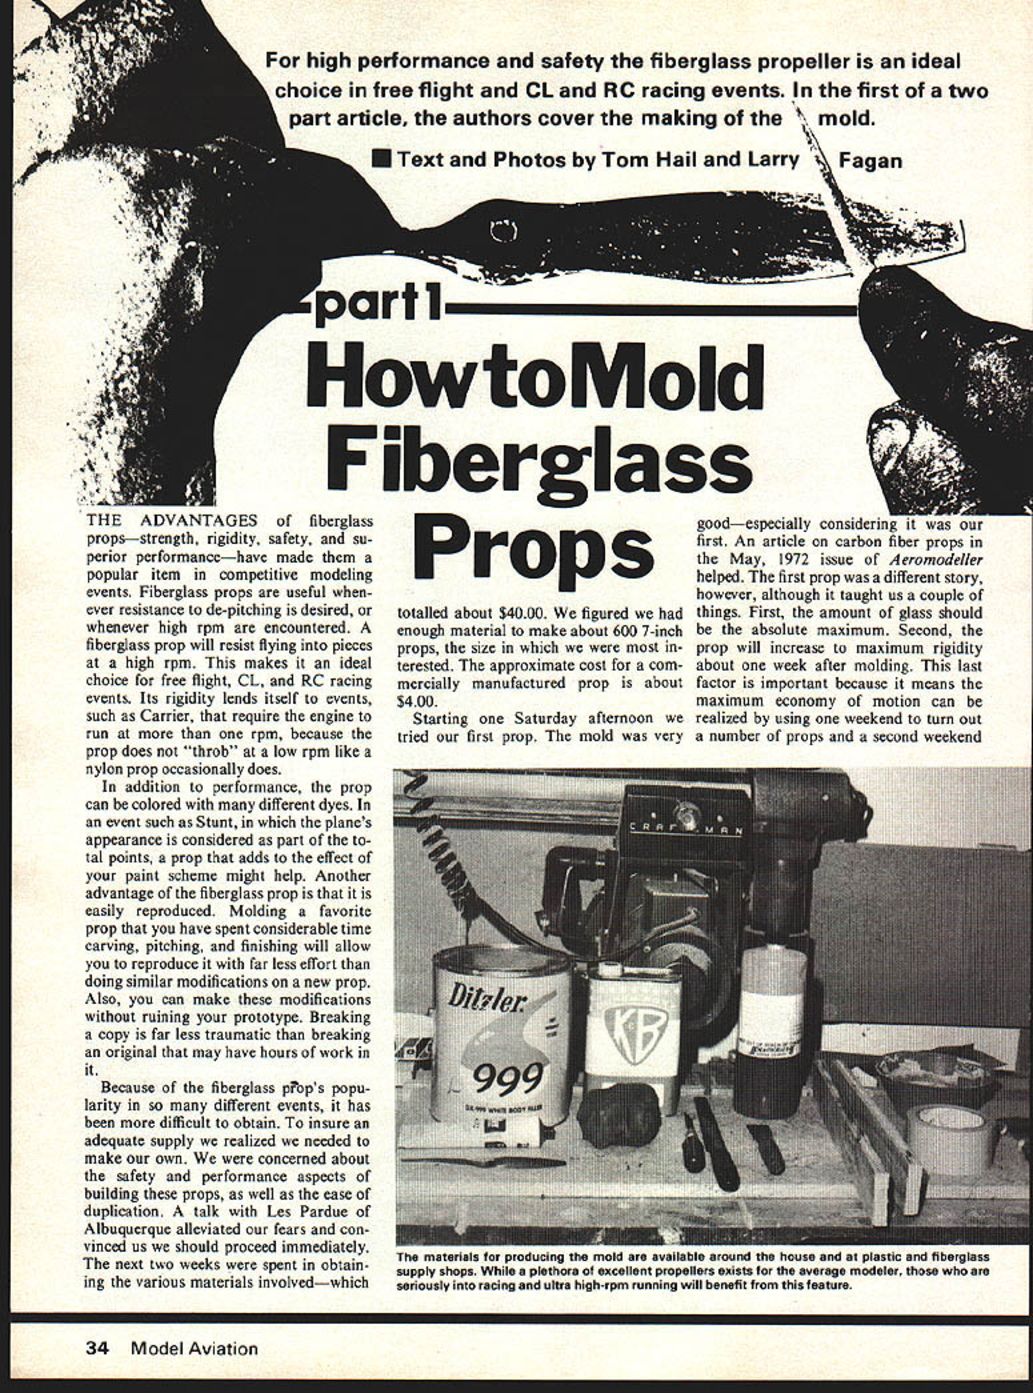
Materials and Equipment
Materials:
- Modeling clay
- Finishing resin (K & B is fine)
- Automotive body filler (such as Ditzler 999, compatible with K & B resin)
- Masking tape
- Mold release agent (PVA)
- Wax paper
Equipment:
- Mixing bowl (preferably expendable)
- Putty knife
- Modeling knife
- Long-bladed knife (an old butcher knife will do)
- Drill or drill rod the diameter of your engine's drive shaft
- "C" clamps
- Two boards measuring about 3 x 12 x 1/2"
- The prop you wish to duplicate, carefully brought to the desired pitch
The prop should also be thinned to the same thickness as you want the fiberglass prop to be. For a 7" diameter prop this would be in the vicinity of .100" at approximately mid-blade, thinning to approximately .050" at the tips. Other approximate mid-blade thicknesses are:
- 5" — .050"
- 6" — .075"
- 8" — .135"
Once the prop is properly dimensioned, it should be finished to a very high gloss. Wood props should be stripped, finished with resin, and buffed because the molding agent will melt the varnish and result in a rough finish. Any dents or scratches in the prop to be duplicated will be faithfully reproduced in the mold.
Procedure
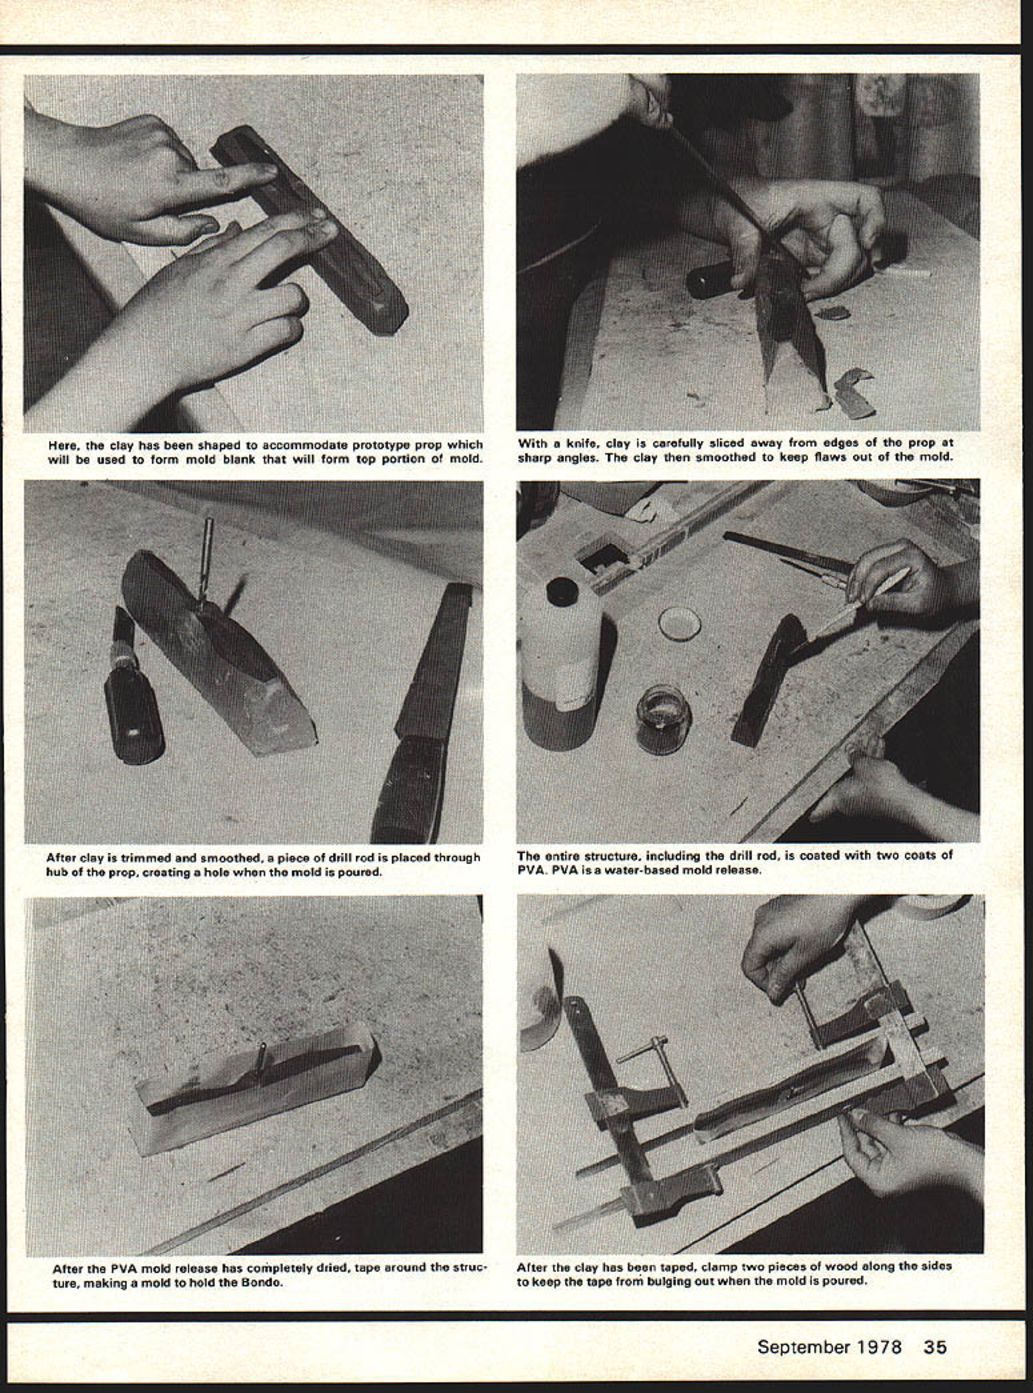
- Prepare the clay.
- Begin with a piece of clay about 1-inch square and slightly longer than the prop to be duplicated.
- Soften the clay by kneading until it is easy to work. This is important because you do not want to deform the prop as you push the bottom of it into the clay.
- (Hereafter, the top of the prop will refer to the front or curved side of the airfoil, and the bottom will refer to the back or flat side of the airfoil.)
- Continue working the clay around the prop until it fills the entire bottom.
- Trim and set up for the top half of the mold.
- Trim the clay around the prop at a sharp angle to the edges of the blades to ensure an easy separation of the completed mold.
- Insert the drill or drill rod into the hub and trim the excess clay away from the ends. The clay should extend no further than 1/8" beyond the sides of the prop or 1/2" beyond the ends.
- If any void appears under the blade, carefully work the clay to cover them, as the body filler will flow into them.
- Carefully brush two coats of mold release on the structure, allowing each coat to dry thoroughly. This is a must if you wish to retrieve your prototype prop.
- Tape around the structure carefully to form a sealed trough about 1" above the highest point of the blade.
- Clamp the taped structure between the two boards, taking care not to deform the clay. Set this aside while you mix the resin into the body filler.
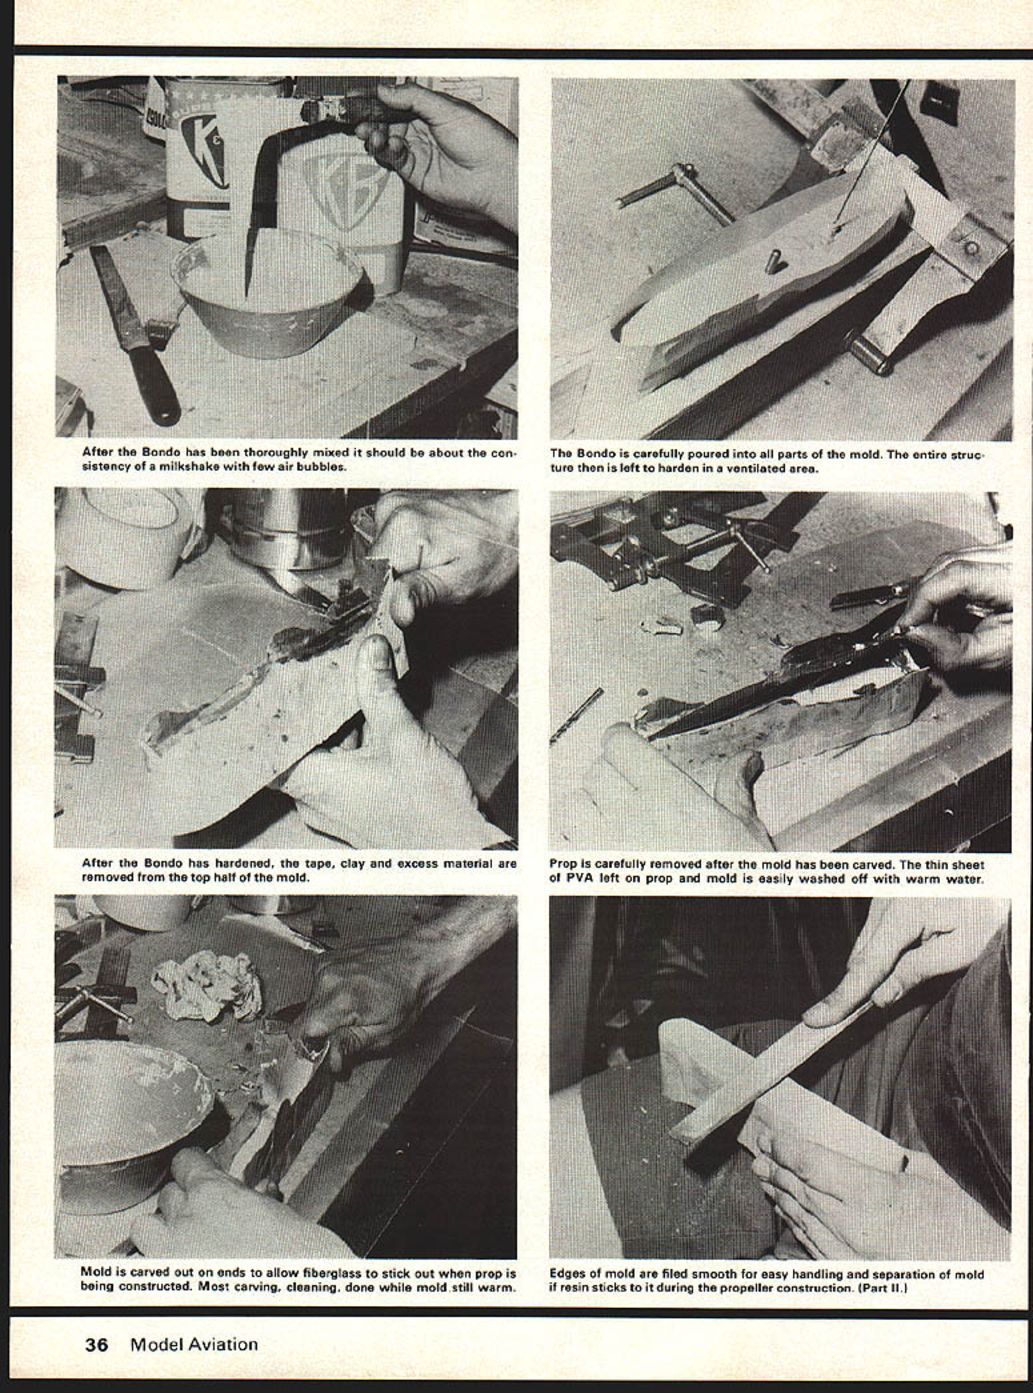
- Mix and pour the body filler for the top half.
- Use about five golf-ball-sized portions of body filler and enough resin to thin the mixture to a milk-shake consistency.
- Complete this step before adding the catalyst because the mixture "goes off" quite suddenly, and you want some time to allow the bubbles to come to the surface after you have filled the mold.
- Take care when pouring the filler so that it flows smoothly around the hub without entraining any air.
- Remove and finish the top half.
- After the filler has set, and while it is still very warm to the touch, remove the drill or drill rod and the clay. The clay separates easily while it is hot, and all excess body filler can be trimmed easily, too.
- Be careful not to bend the mold as it is very pliable until it cures completely.
- Remove the prop carefully so as not to score the surface of the mold. The mold release will resemble a thin, water-soluble plastic coating.
- Carve out the ends of the mold to allow the fiberglass strands room to pass through the mold during the laying-up process.
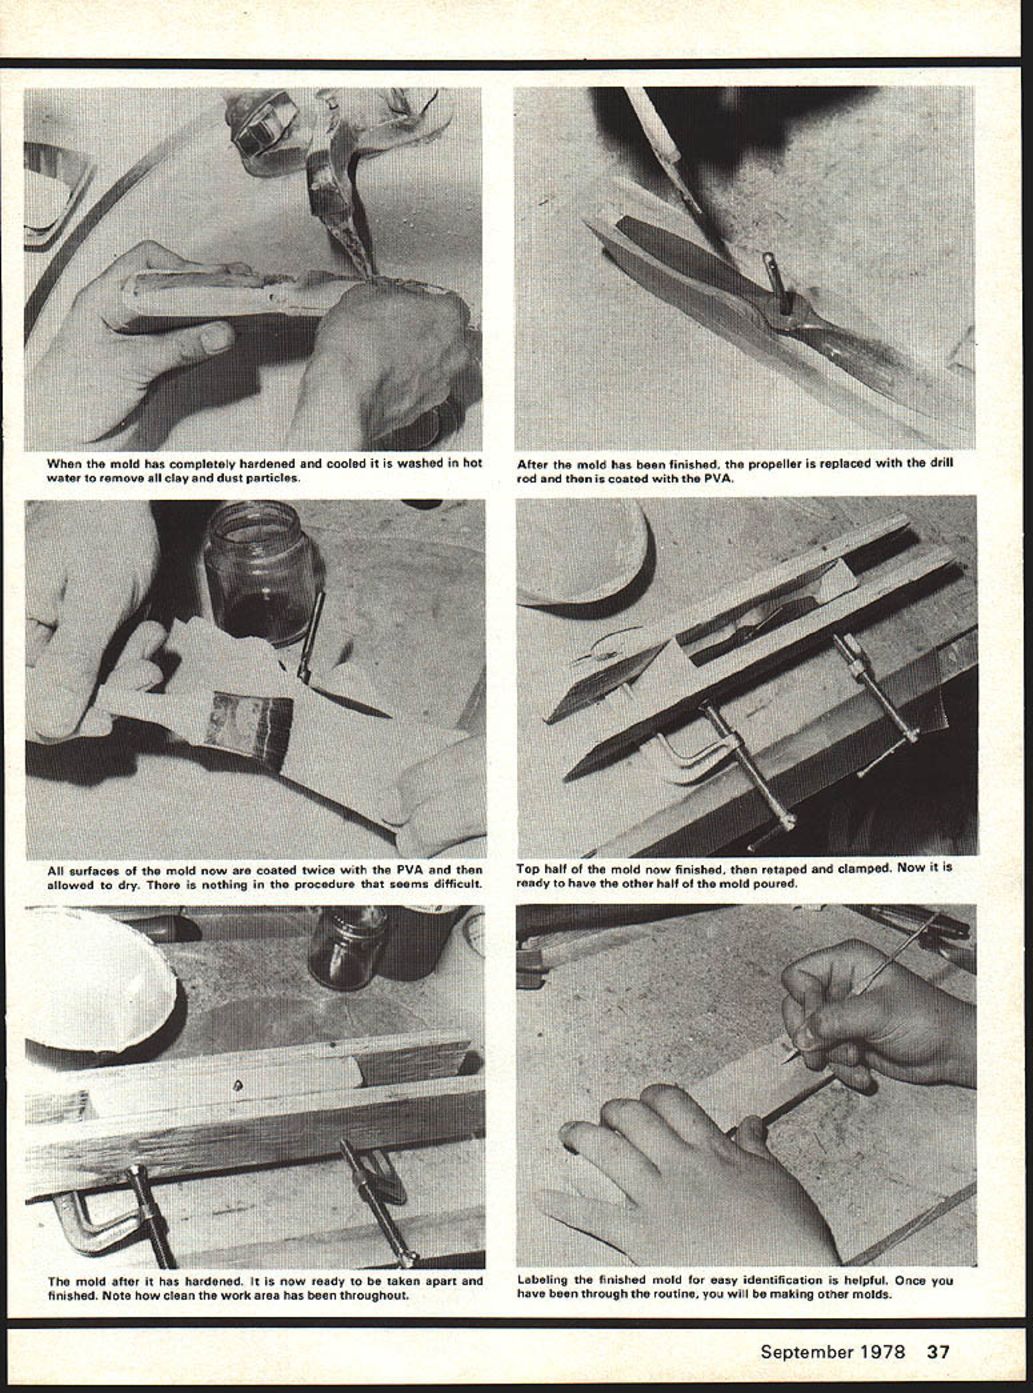
- Complete this top half of the mold by thoroughly washing and drying it.
- Produce the bottom half of the mold.
- Replace the prop and drill (or drill rod) into the top half of the mold.
- Give this new structure two coats of mold release, allowing each coat to dry completely.
- Tape the assembly and clamp between the boards.
- Mix the body filler to the same consistency as before and pour.
- While the mold is still quite warm, separate and trim, being careful not to score or bend the mold.
- If you do bend the mold, do not panic. Simply clamp the hot half gently back onto the cured one.
- Final curing and fitting.
- When the mold cools completely, the two halves will mate perfectly, as the cured mold will retain its clamped shape and not spring back to its originally warped condition.
- If you allowed the two halves to cool completely before separation and find that they stubbornly stick together, heat the mold in hot water, and you should find that the mold will separate with little effort.
- Label and mark the mold.
- Label the mold to identify the prop it will produce.
- Mark the mating ends of the two halves so you will not try to assemble them backwards when molding props.
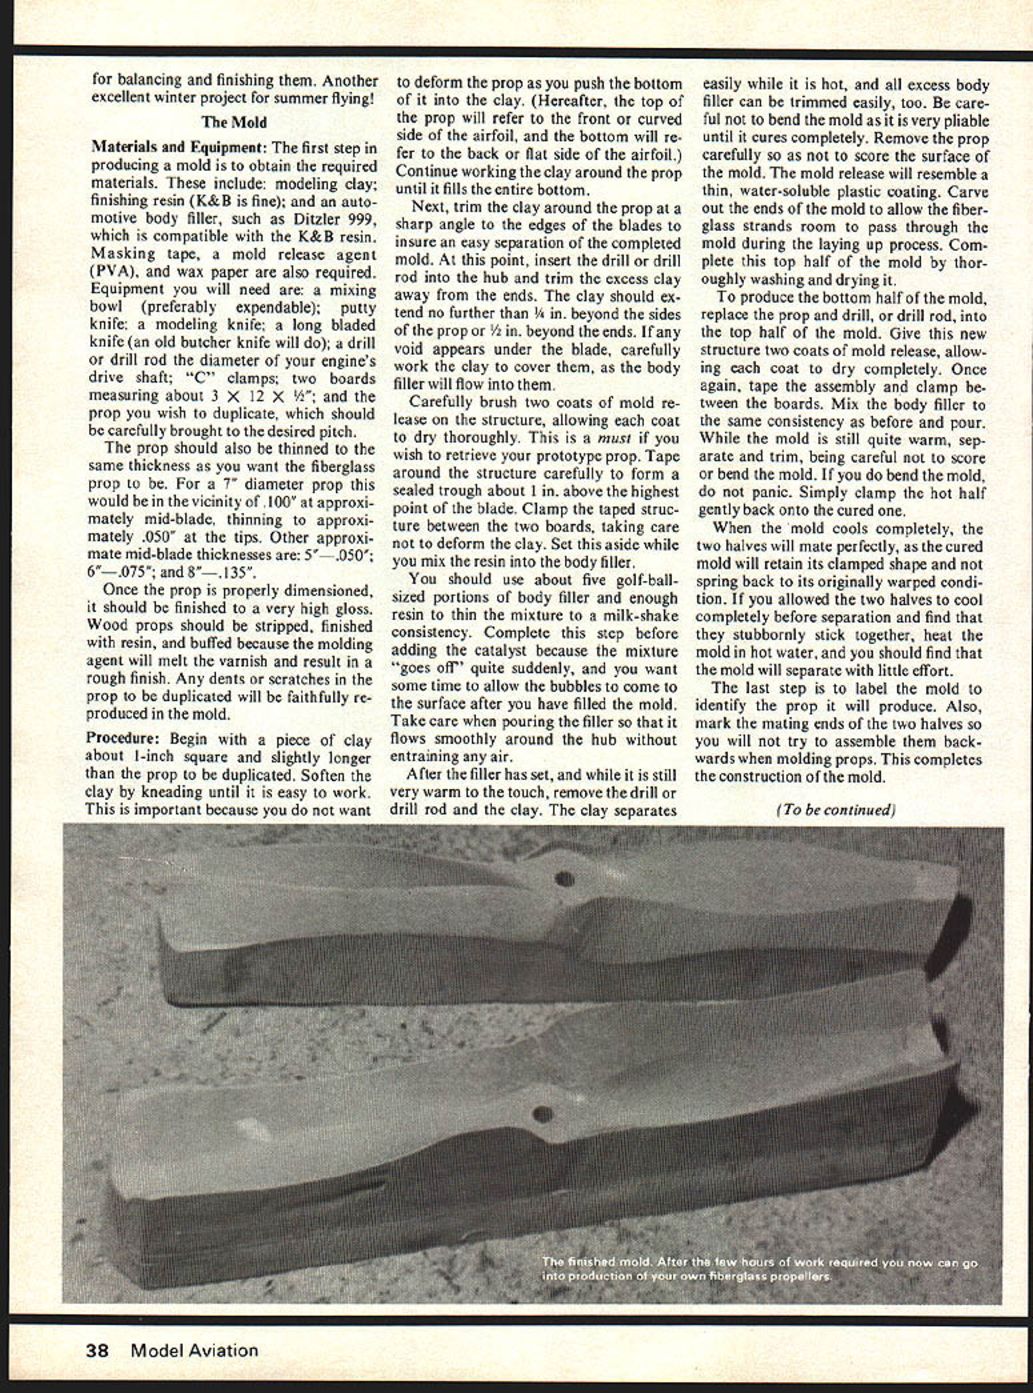
This completes the construction of the mold.
(To be continued)
Transcribed from original scans by AI. Minor OCR errors may remain.

