
Insider
An electric-powered RC model designed expressly for flying indoors.
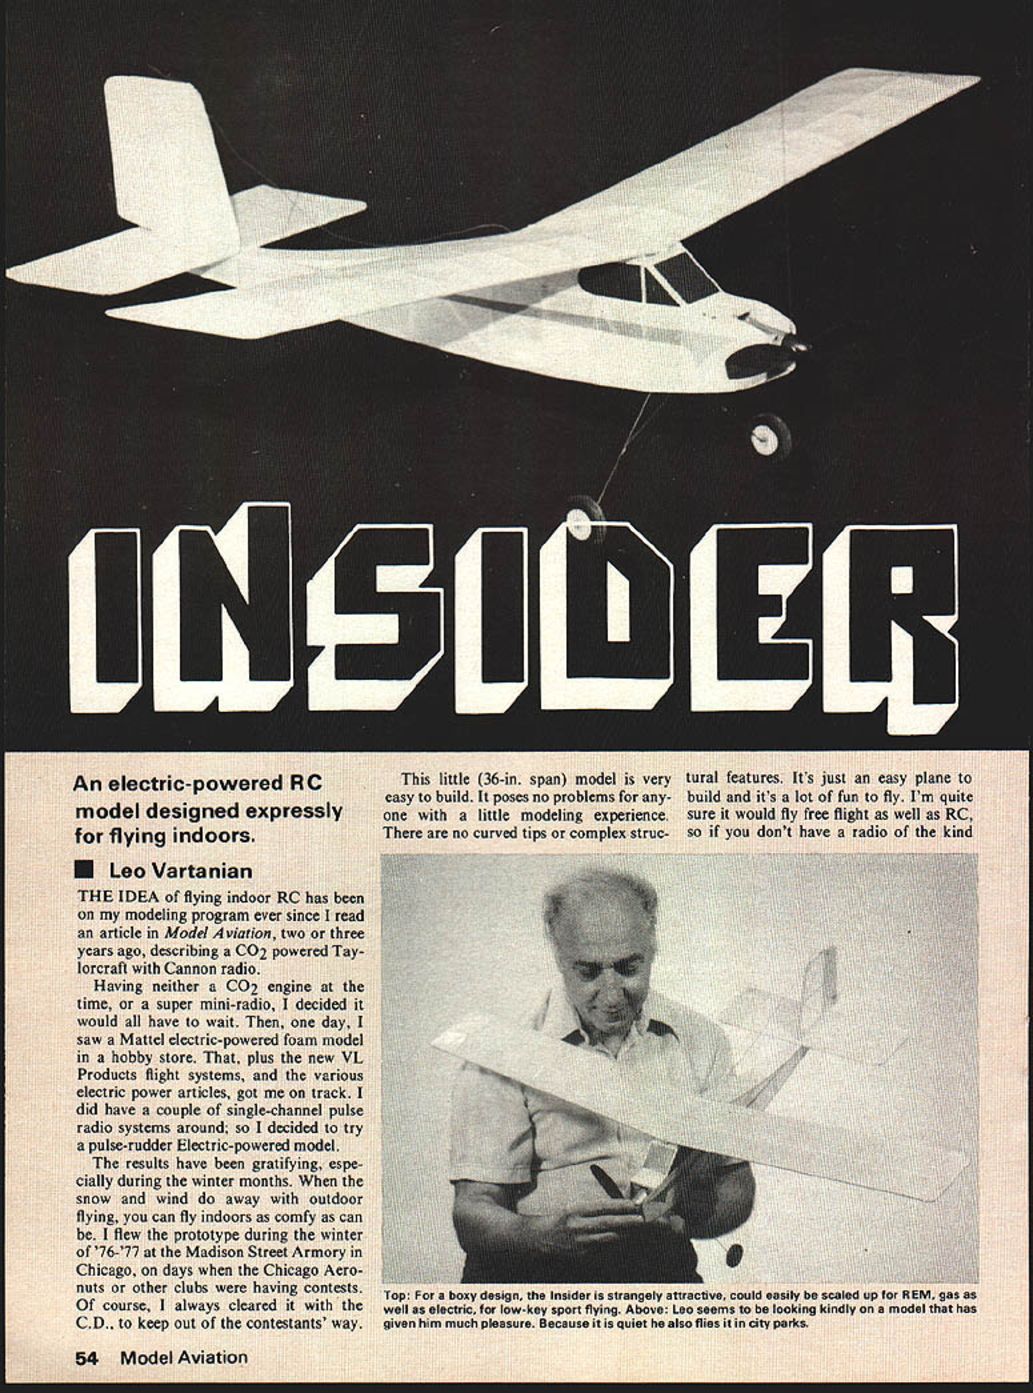
Leo Vartanian
THE IDEA of flying indoor RC has been on my modeling program ever since I read an article in Model Aviation, two or three years ago, describing a CO2 powered Taylorcraft with Cannon radio.
Having neither a CO2 engine at the time, or a super mini-radio, I decided it would all have to wait. Then, one day, I saw a Mattel electric-powered foam model in a hobby store. That, plus the new VL Products flight systems, and the various electric power articles, got me on track. I did have a couple of single-channel pulse radio systems around, so I decided to try a pulse-rudder electric-powered model.
The results have been gratifying, especially during the winter months. When the snow and wind do away with outdoor flying, you can fly indoors as comfy as can be. I flew the prototype during the winter of '76-'77 at the Madison Street Armory in Chicago, on days when the Chicago Aeronuts or other clubs were having contests. Of course, I always cleared it with the C.D. to keep out of the contestants' way.
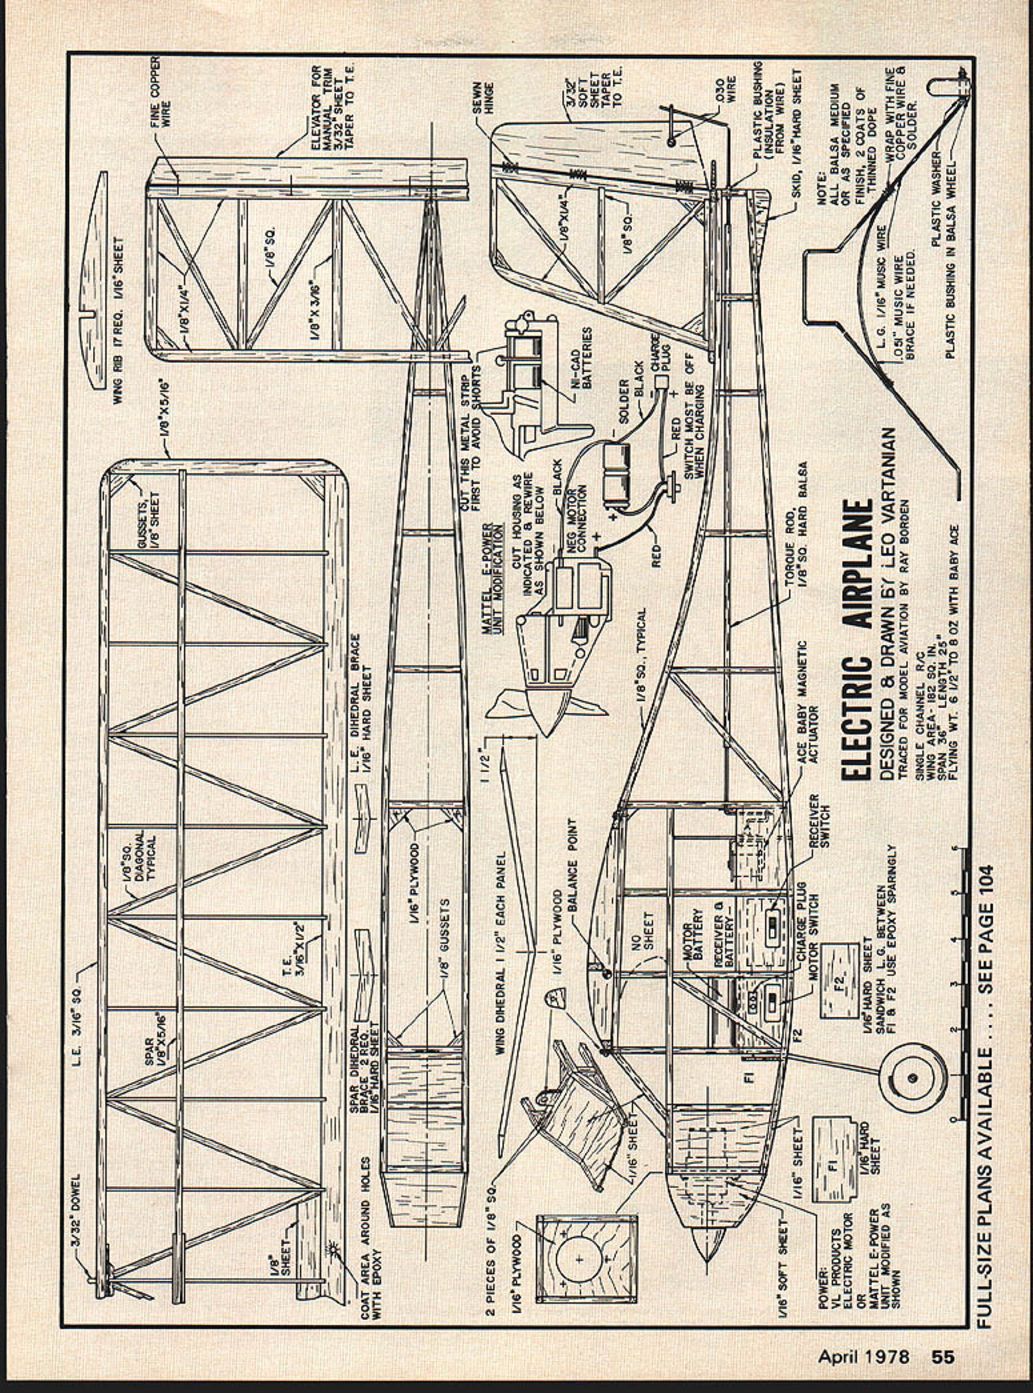
This little (36-in. span) model is very easy to build. It poses no problems for anyone with a little modeling experience. There are no curved tips or complex structural features. It's just an easy plane to build and it's a lot of fun to fly. I'm quite sure it would fly free flight as well as RC, so if you don't have a radio of the kind used here, you can still build it for free flight or install a single‑channel pulse‑rudder radio. I recommend the Testors receiver/actuator or the Ace Baby magnetic actuator — both are light and ready to use. The Mattel E‑Power unit (modified as shown) works well when properly altered; VL Products electric systems are also suitable.
Weight is important — don't overbuild. After construction there’s no need for fancy shaping; keep things straightforward and true. Cover with Japanese tissue and two coats of thinned dope. Make sure you use the balsa grades specified on the plans; balsa from hobby shops can be heavier than specified, so be careful when laminating and adding reinforcements.
Leave the wheel axle hole until after covering. Mount the battery as designated on the plan — the radio battery is placed just ahead of the receiver/actuator so the receiver may have internal components fitted in the model. Add ballast only if necessary; overall balance is critical. The all‑up flying weight should not exceed eight to nine ounces — my finished model weighed about six and a half ounces.
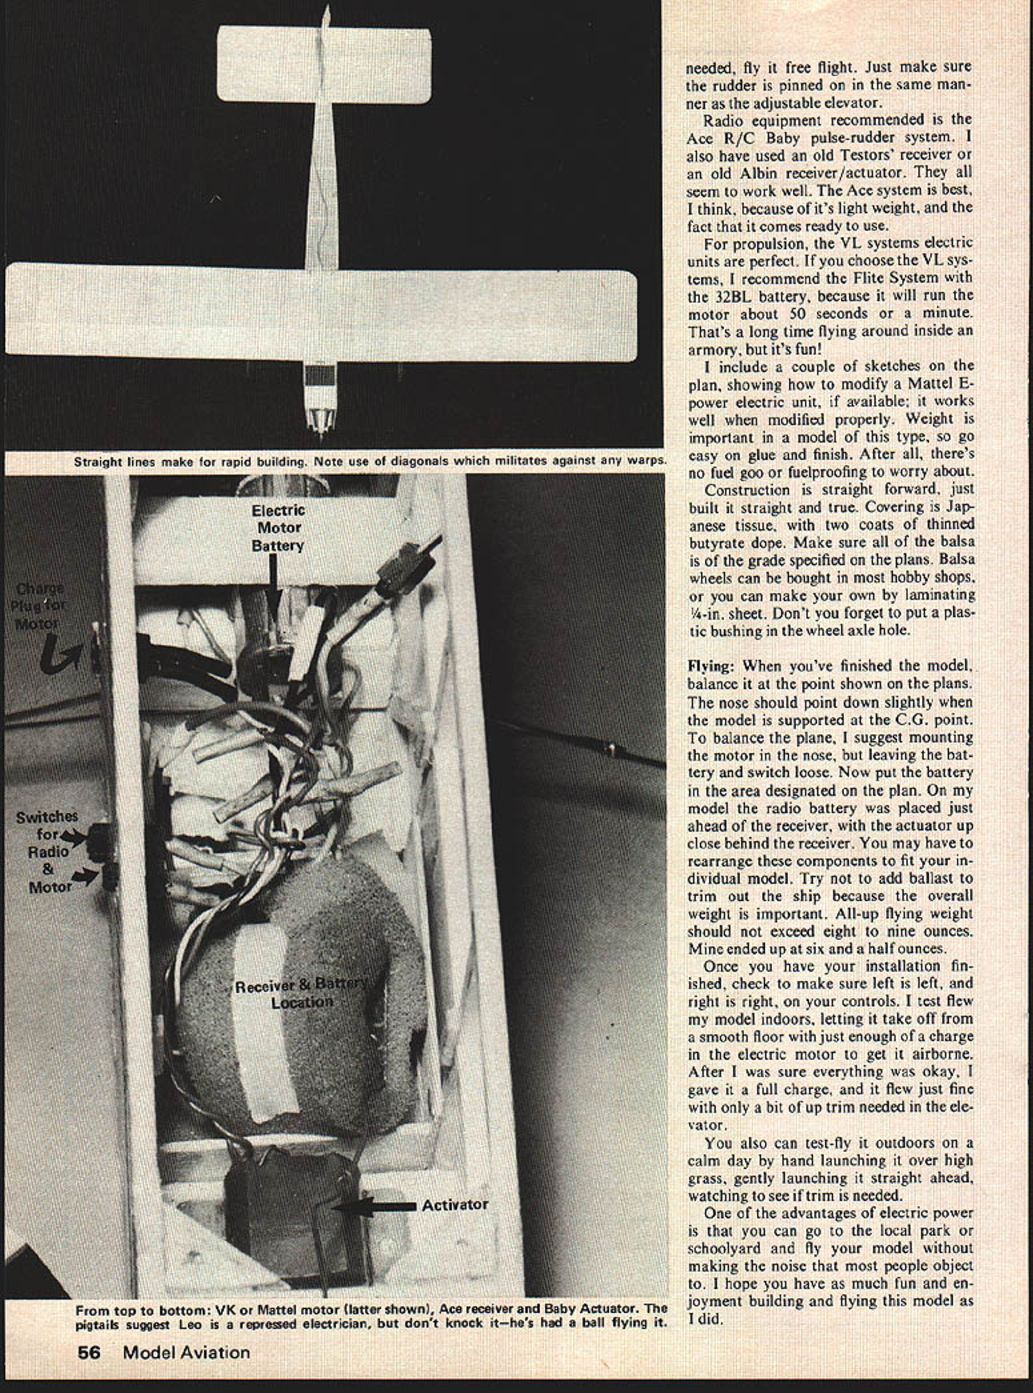
Check the installation to make sure left and right controls operate correctly. Test‑fly indoors first, allowing the model to take off from the floor with just enough motor charge to get airborne; confirm everything works. With a full charge it flew fine, though a bit of up‑elevator trim was needed. The model can also be test‑flown outdoors. Hand‑launch from a high spot, launching straight ahead. Make small trim adjustments as required (using the motor pigtail or control linkages). If needed, fly it free flight. Just make sure the rudder is pinned on in the same manner as the adjustable elevator.
Radio equipment recommended is the Ace R/C Baby pulse-rudder system. I also have used an old Testors receiver or an old Albin receiver/actuator. They all seem to work well. The Ace system is best, I think, because of its light weight, and the fact that it comes ready to use.
For propulsion, the VL systems electric units are perfect. If you choose the VL systems, I recommend the Flite System with the 32BL battery, because it will run the motor about 50 seconds or a minute. That's a long time flying around inside an armory, but it's fun!
I include a couple of sketches on the plan, showing how to modify a Mattel E-power electric unit, if available; it works well when modified properly. Weight is important in a model of this type, so go easy on glue and finish. After all, there's no fuel goo or fuelproofing to worry about.
Construction is straight forward, just build it straight and true. Covering is Japanese tissue, with two coats of thinned butyrate dope. Make sure all of the balsa is of the grade specified on the plans. Balsa wheels can be bought in most hobby shops, or you can make your own by laminating 1/4-in. sheet. Don't you forget to put a plastic bushing in the wheel axle hole.
Flying: When you've finished the model, balance it at the point shown on the plans. The nose should point down slightly when the model is supported at the C.G. point. To balance the plane, I suggest mounting the motor in the nose, but leaving the battery and switch loose. Now put the battery in the area designated on the plan. On my model the radio battery was placed just ahead of the receiver, with the actuator up close behind the receiver. You may have to rearrange these components to fit your individual model. Try not to add ballast to trim out the ship because the overall weight is important. All-up flying weight should not exceed eight to nine ounces. Mine ended up at six and a half ounces.
Once you have your installation finished, check to make sure left is left, and right is right, on your controls. I test flew my model indoors, letting it take off from a smooth floor with just enough of a charge in the electric motor to get it airborne. After I was sure everything was okay, I gave it a full charge, and it flew just fine with only a bit of up trim needed in the elevator.
You also can test-fly it outdoors on a calm day by hand launching it over high grass, gently launching it straight ahead, watching to see if trim is needed.
One of the advantages of electric power is that you can go to the local park or schoolyard and fly your model without making the noise that most people object to. I hope you have as much fun and enjoyment building and flying this model as I did.
Transcribed from original scans by AI. Minor OCR errors may remain.

