
IRON-ON HINGES
Photo Essay by L. F. Randolph
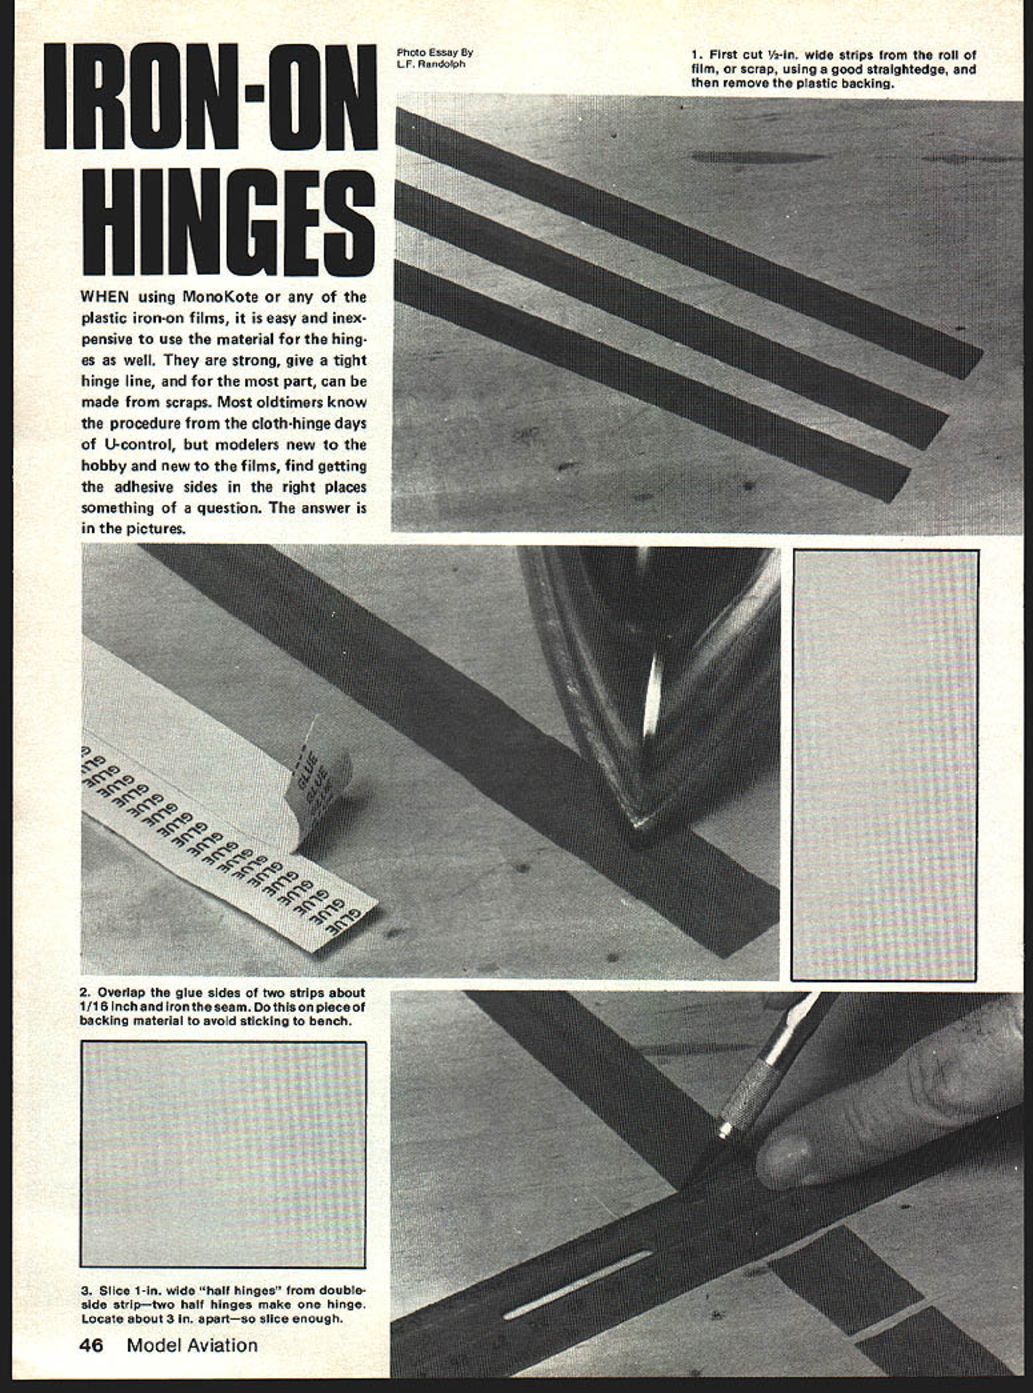
When using MonoKote or other plastic iron-on films, it's easy and inexpensive to use the same material for the hinges. They are strong, provide a tight hinge line, and can often be made from scraps. Most old-timers know the procedure from the cloth-hinge days of U-control, but modelers new to the hobby — and new to the films — often find getting the adhesive sides in the right places confusing. The answer is in the pictures.
- First, cut 1/2-in. wide strips from the roll of film or scraps using a good straightedge, and then remove the plastic backing.
- Overlap the adhesive sides of two strips about 1/16 in. and iron the seam. Do this on a piece of backing material to avoid sticking to the bench.
- Slice 1-in. wide "half hinges" from the double-sided strip — two half hinges make one hinge. Place them about 3 in. apart, so slice enough.
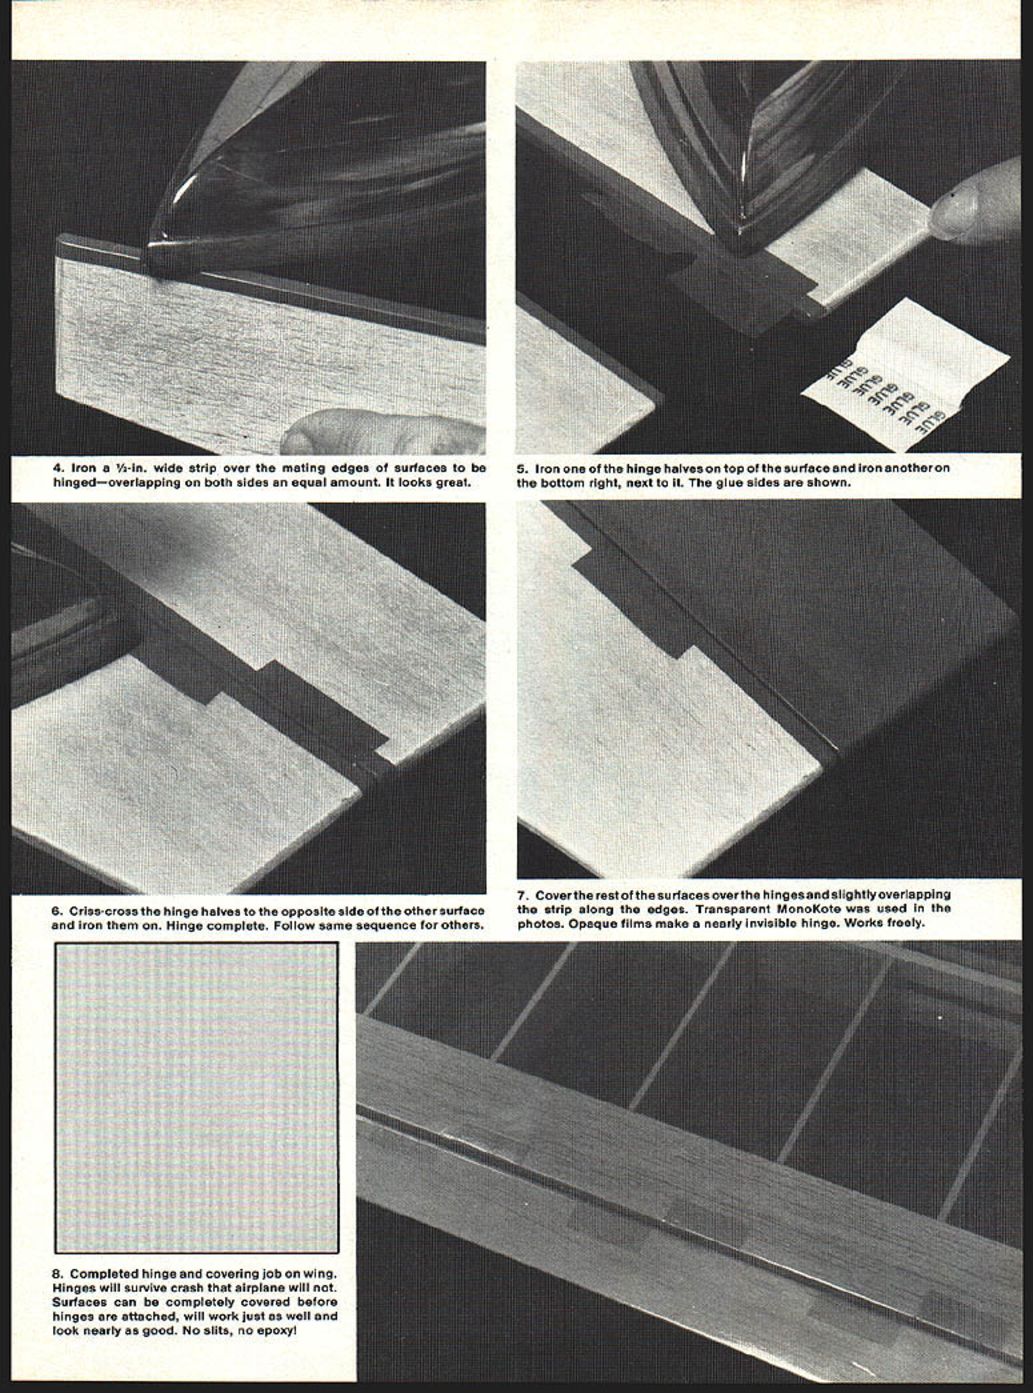
- Iron a 1/2-in. wide strip over the mating edges of the surfaces to be hinged, overlapping each side an equal amount.
- Iron one of the hinge halves on top of the surface and iron another on the bottom right next to it. The adhesive sides should be shown and aligned.
- Criss-cross the hinge halves to the opposite side of the other surface and iron them on. Hinge complete. Follow the same sequence for the other hinges.
- Cover the rest of the surfaces over the hinges, slightly overlapping the strips along the edges. Transparent MonoKote was used in the photos; opaque films make a nearly invisible hinge.
- Completed hinge and covering job on the wing. Hinges will often survive a crash that the airplane will not. Surfaces can be completely covered before hinges are attached; this will work just as well and look nearly as good. No slits, no epoxy!
Transcribed from original scans by AI. Minor OCR errors may remain.

