
Jig That Fuselage
By L. F. Randolph
Overview
Inaccurate and misaligned fuselages are a common cause of poor performance. Intended for small to medium-sized RC craft, this jig can be built for anything from Peanut to Quarter-Scale. The jig described here is simple to build if a table saw or radial-arm saw is available, and well worth the effort. It will help guarantee a true fuselage every time with less fuss. The dimensions given are for reference and can be varied to suit your requirements; this example is sized for small to medium RC aircraft.
Materials and Tools
- Baseboard: 9" x 34" x 3/4"
- 1/8" plywood or masonite for channels
- 1/4" square pine or spruce strips
- 1/2" brads
- 14 carriage bolts, 1/4" x 5"
- Washers and wingnuts
- Drill (drill press recommended)
- Countersink
- Table saw or radial-arm saw
- Sanding block
- Stop block for sawing uprights
- Wood glue
Construction
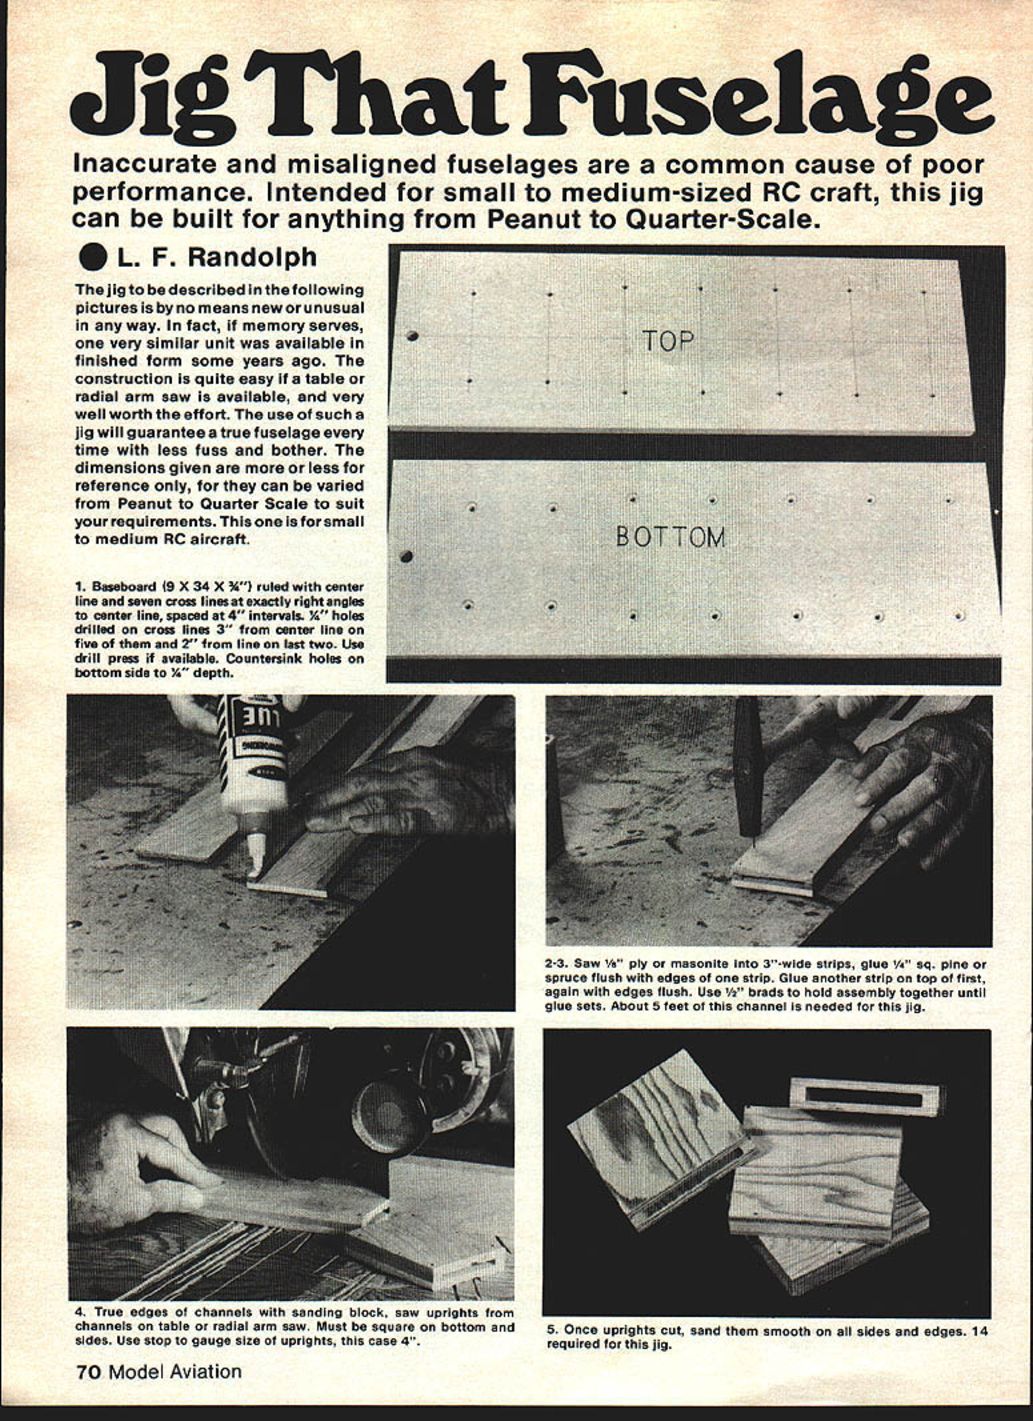
- Baseboard
- Mark a center line lengthwise on the baseboard.
- Scribe seven cross lines at exactly right angles to the center line, spaced at 4" intervals.
- On five of the cross lines drill 1/4" holes 3" from the center line; on the remaining two cross lines drill 1/4" holes 2" from the center line.
- If available, use a drill press for accurate holes.
- Countersink the holes from the bottom side to a depth of 3/8".
- Make channel stock
- Saw 1/8" plywood or masonite into 3"-wide strips.
- Glue a 1/4" square pine or spruce strip flush with the edge of one plywood strip.
- Glue a second plywood strip on top of the first so the square strip is sandwiched and edges are flush.
- Use 1/2" brads to hold the assembly until the glue sets.
- About 5 feet of this channel stock is needed for the jig.
- True and cut uprights
- True the edges of the channels with a sanding block.
- Using a table saw or radial-arm saw, cut uprights from the channels. They must be square on the bottom and sides.
- Use a stop block to gauge the size of the uprights; in this example the uprights are 4" tall.
- Once cut, sand each upright smooth on all sides and edges.
- Fourteen uprights are required for this jig.
- Assemble jig components
- Drill or prepare the carriage-bolt locations in the baseboard as described in step 1.
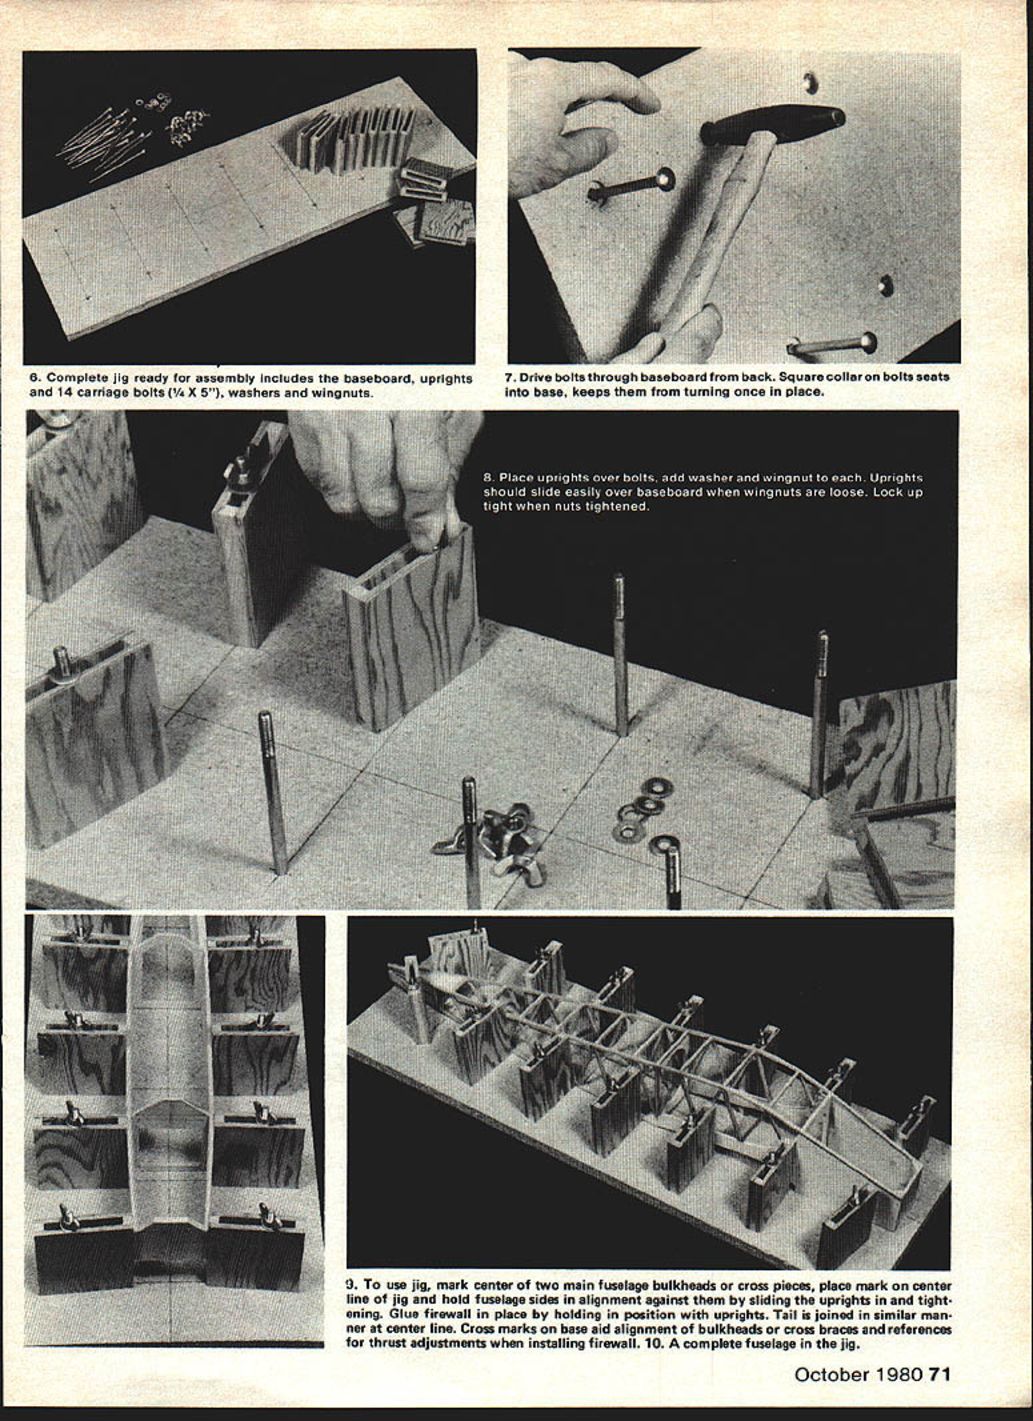
- The complete jig when ready for assembly includes the baseboard, uprights, 14 carriage bolts (1/4" x 5"), washers, and wingnuts.
- Install bolts and uprights
- Drive the carriage bolts through the baseboard from the back. The square collar on the bolts should seat into the baseboard and keep the bolts from turning once in place.
- Place uprights over the bolts, then add a washer and wingnut to each bolt.
- With the wingnuts loose, the uprights should slide easily along the baseboard. Tighten the wingnuts to lock the uprights in position.
Using the Jig
- Marking
- Mark the center line on the two main fuselage bulkheads and on any cross pieces.
- Transfer those marks to the center line of the jig (use the cross lines on the baseboard as references).
- Assembling the fuselage in the jig
- Place the fuselage sides in the jig and align them against the sliding uprights.
- Tighten the uprights as required to hold the sides firmly and square.
- Glue the firewall in place while holding its position with uprights. The cross marks on the baseboard help align bulkheads and cross braces and serve as references for thrust adjustments when installing the firewall.
- Join the tail assembly in a similar manner using the center line for alignment.
- Finishing
- Complete the fuselage while it remains in the jig to ensure all parts stay true and aligned during glue-up and drying.
Complete fuselage in jig.
Transcribed from original scans by AI. Minor OCR errors may remain.

