
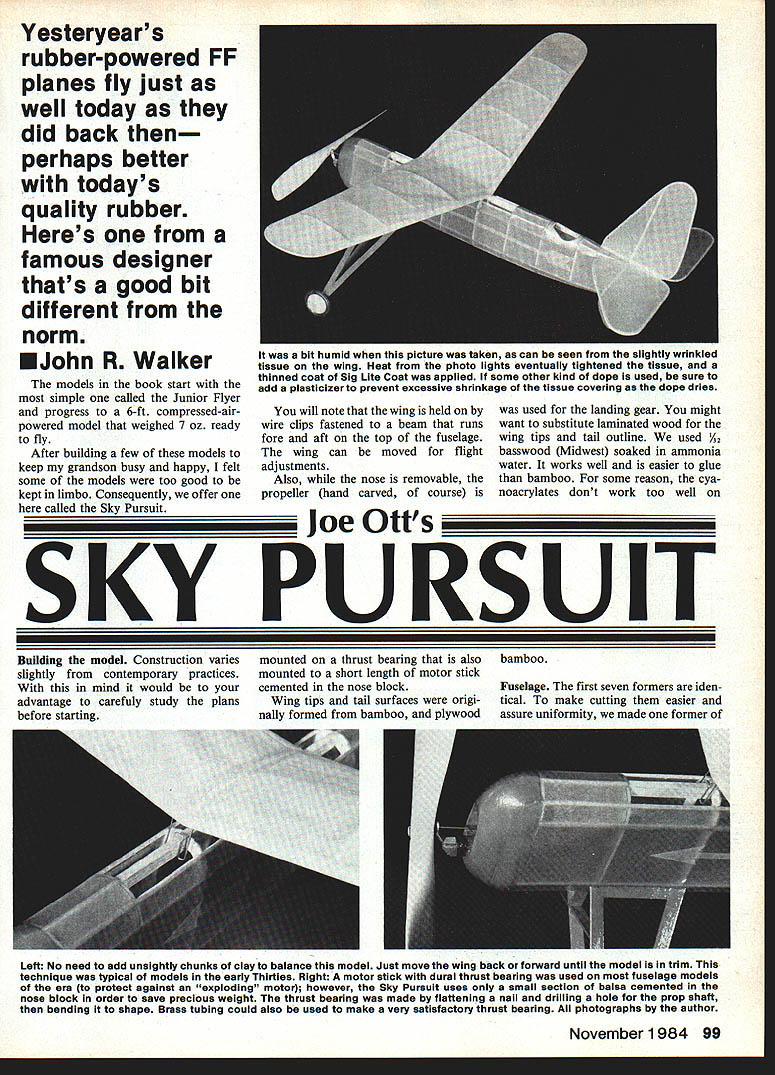
Joe Ott's Sky Pursuit
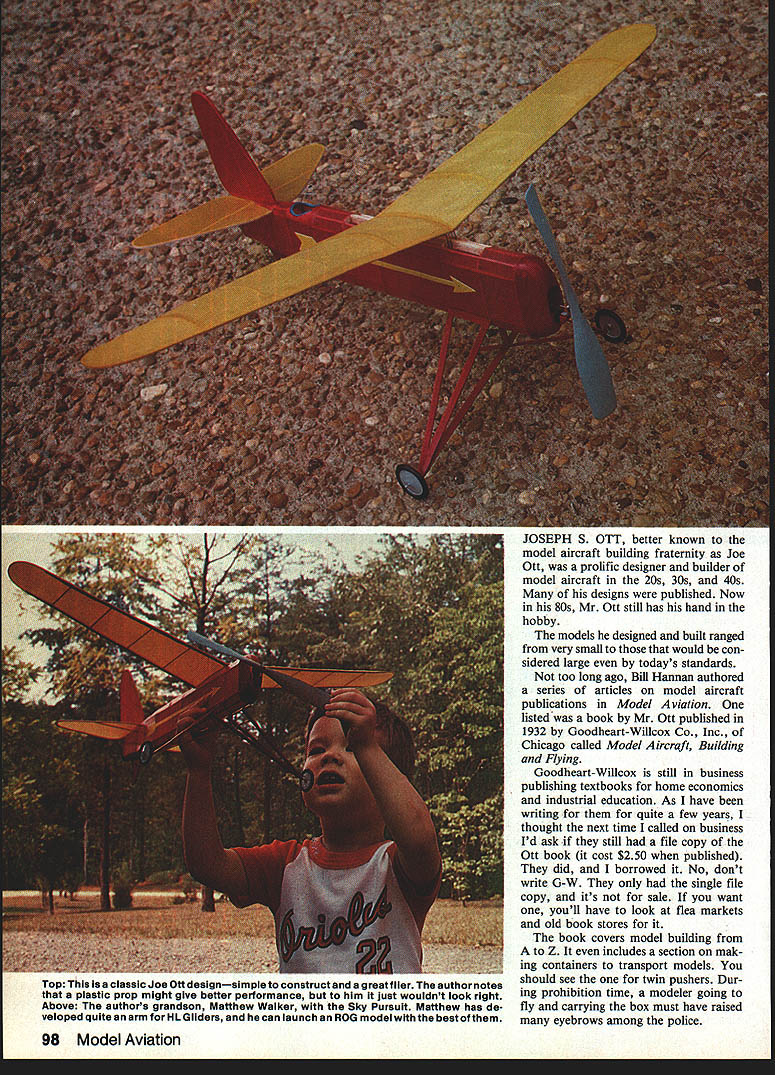
JOSEPH S. OTT, better known to the model aircraft building fraternity as Joe Ott, was a prolific designer and builder of model aircraft in the 1920s, 1930s, and 1940s. Many of his designs were published. Now in his 80s, Mr. Ott still has his hand in the hobby.
The models he designed and built ranged from very small to those that would be considered large even by today's standards.
Not too long ago, Bill Hannan authored a series of articles on model aircraft publications in Model Aviation. One listed was a book by Mr. Ott published in 1932 by Goodheart-Willcox Co., Inc., of Chicago called Model Aircraft, Building and Flying. Goodheart-Willcox is still in business publishing textbooks for home economics and industrial education. As I have been writing for them for quite a few years, I thought the next time I called on business I'd ask if they still had a file copy of the Ott book (it cost $2.50 when published). They did, and I borrowed it. No, don't write G‑W. They only had the single file copy, and it's not for sale. If you want one, you'll have to look at flea markets and old book stores for it.
The book covers model building from A to Z. It even includes a section on making containers to transport models. You should see the one for twin pushers. During Prohibition, a modeler going to fly and carrying the box must have raised many eyebrows among the police.
Building the Model
Construction varies slightly from contemporary practices. With this in mind, it would be to your advantage to carefully study the plans before starting.
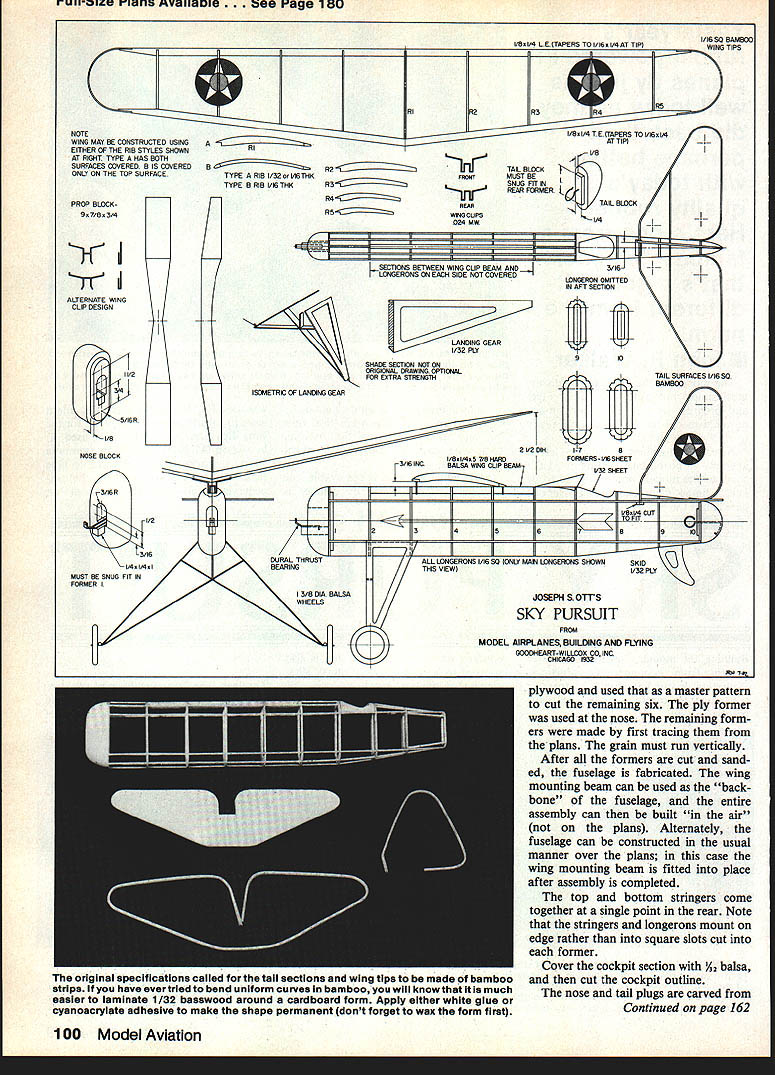
Wing tips and tail surfaces were originally formed from bamboo and plywood.
Fuselage
The first seven formers are identical. To make cutting them easier and to assure uniformity, make one former of plywood and use that as a master pattern to cut the remaining six. Use the plywood former at the nose. The remaining formers should be made by tracing them from the plans. The grain must run vertically.
After all the formers are cut and sanded, fabricate the fuselage. The wing mounting beam can be used as the "backbone" of the fuselage, and the entire assembly can then be built "in the air" (not on the plans). Alternately, the fuselage can be constructed in the usual manner over the plans; in this case the wing mounting beam is fitted into place after assembly is completed.
The top and bottom stringers come together at a single point in the rear. Note that the stringers and longerons mount on edge rather than into square slots cut into each former.
Cover the cockpit section with 1/32" balsa, and then cut the cockpit outline.
Nose and Tail Plugs
The nose and tail plugs are carved from balsa and carefully fitted to the fuselage. They should fit snugly enough so they will not fall out when the rubber unwinds.
An S‑hook may be used at the rear plug to make winding easier.
Landing Gear
The landing gear is assembled and cemented in place. After a thorough sanding to remove cement bumps and fuzz, cover the body with a good grade of Japanese tissue. The best tissue costs only a bit more. Water‑shrink the tissue, and apply two coats of thin plasticized clear dope. Sand lightly between coats.
The nose and tail plugs, landing gear, and tail skid can be finished with colored dope.
The landing gear is made from 3/32" plywood. It is very strong when fitted together properly. The axles have a small loop bent into the wire to absorb landing shocks. Balsa wheels with a short section of aluminum tubing as a bearing, or Williams Bros. plastic wheels, may be used.
Wing
The wing is built in the usual manner. Two types of construction are shown on the plans. Do not water‑shrink the tissue nor apply dope to the wing covering.
You can make the tips of:
- bamboo
- laminated balsa
- basswood
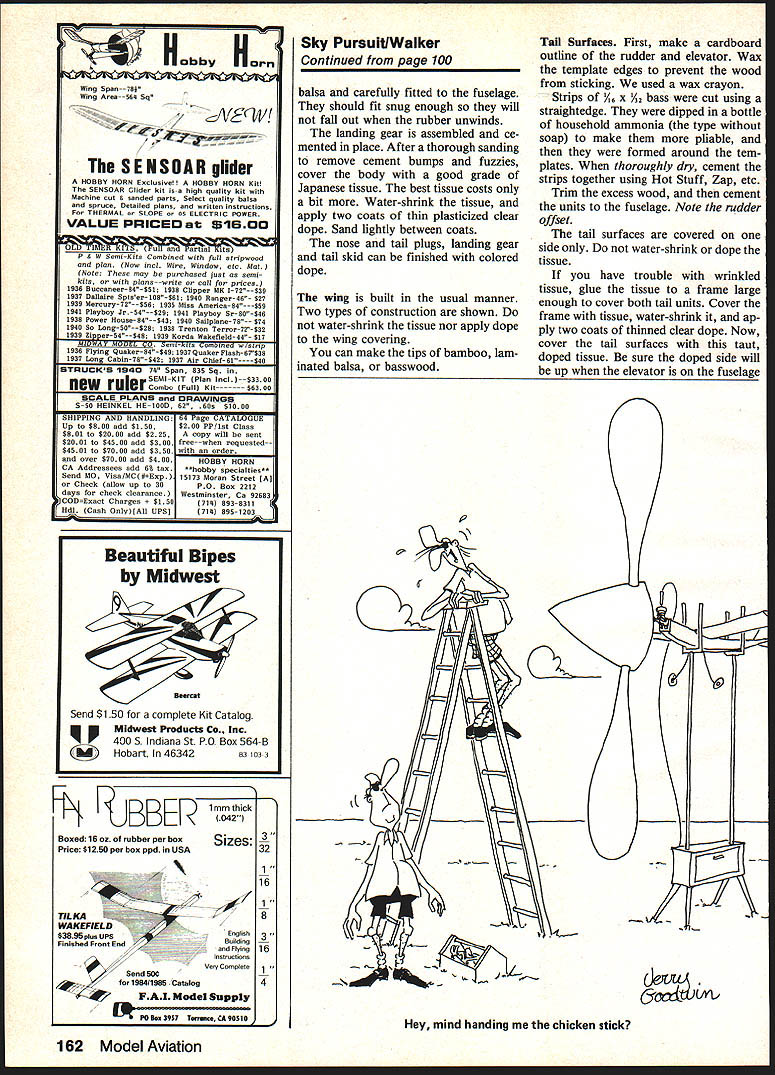
Tail Surfaces
First, make a cardboard outline of the rudder and elevator. Wax the template edges to prevent the wood from sticking; a wax crayon works well.
Strips of 1/16" x 1/8" basswood are cut using a straightedge. Dip them in a bottle of household ammonia (the type without soap) to make them more pliable, and then form them around the templates. When thoroughly dry, cement the strips together using adhesives such as Hot Stuff or Zap. Trim the excess wood, and then cement the units to the fuselage. Note the rudder offset.
The tail surfaces are covered on one side only. Do not water‑shrink or dope the tissue.
If you have trouble with wrinkled tissue, glue the tissue to a frame large enough to cover both tail units. Cover the frame with tissue, water‑shrink it, and apply two coats of thinned clear dope. Now cover the tail surfaces with this taut, doped tissue—be sure the doped side will be up when the elevator is on the fuselage and facing away from the framework on the rudder.
Propeller
The propeller is mounted on a thrust bearing that is also mounted to a short length of motor stick cemented in the nose block.
A plastic propeller may be used. However, the balsa prop shown on the plans was designed for the model. Take your choice. No free‑wheeling device was installed on the original. You may want to use one, although the stalled prop acts sort of like a dethermalizer and makes it fine for small‑field flying.
Decorating
The original 1932 model used stick‑on designs. Our model was covered with red (fuselage and rudder) and yellow (wing and elevator). Use whatever colors appeal to your taste.
The arrow down the side of the fuselage was cut from yellow Chartpak color film, but Trim MonoKote will do just as well. Decals may also be added to the fuselage, but they are not advised for the undoped wing surfaces.
Flying
Four loops of 1/8" rubber (well lubricated) were used for motive power. An S‑hook was used at the rear plug to make winding easier.
Check your model for warps. Remove any by steaming and twisting opposite the warp.
Mount the wing to the fuselage. Note that the front wing clip is different from the rear clip.
Move the wing along the main beam until the model balances about one‑third of the wing chord back from the leading edge at the tip.
Test‑glide the model over the proverbial "tall grass" (an excuse not to mow the grass for a few weeks?) until a nice glide slope is attained. Move the wing forward if the model dives, aft if it stalls. Make those adjustments as necessary to get proper flights.
When everything is "hunky‑dory," put 350–400 turns into the rubber with a winder. The Sky Pursuit will ROG (rise off ground) and give flights of a minute or so in the still air of the evening. Put your AMA number, name, address, and phone number on the model. If you plan to fly it when thermals are about, there is a good chance that you will never see it again if you don't.
Transcribed from original scans by AI. Minor OCR errors may remain.

