
Junkbox: Air Compressor
Joel Hamm
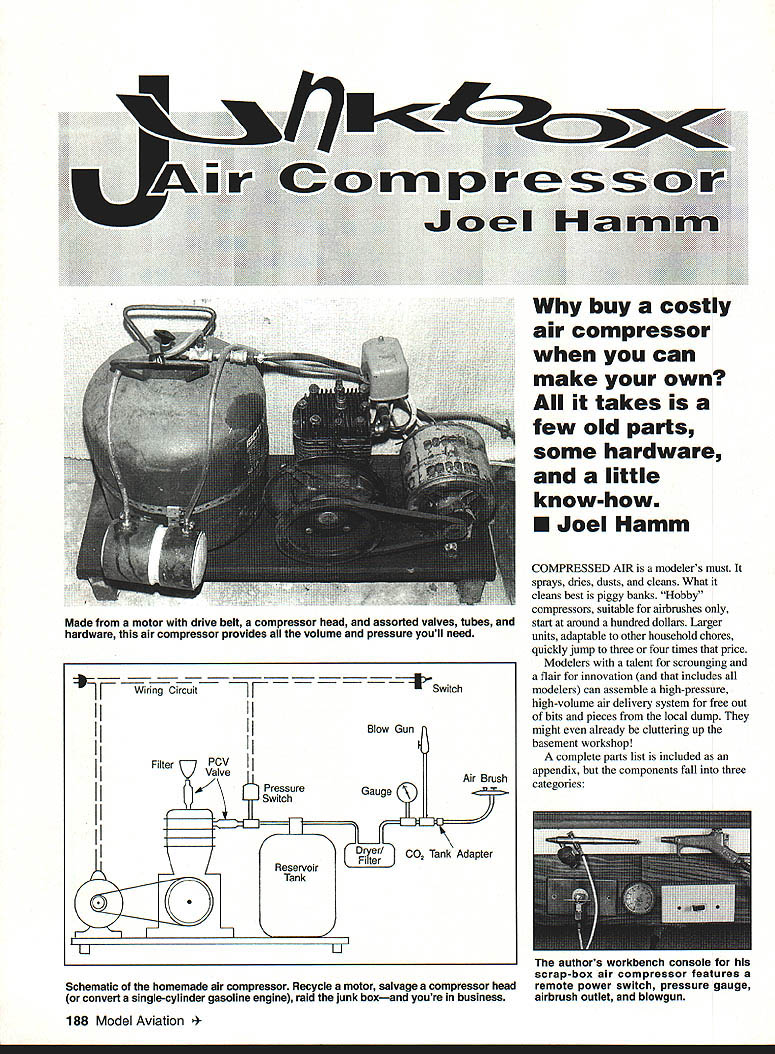
COMPRESSED AIR is a modeler's must. It sprays, dries, dusts, and cleans. What it cleans best is piggy banks. "Hobby" compressors, suitable for airbrushes only, start at around a hundred dollars. Larger units, adaptable to other household chores, quickly jump to three or four times that price.
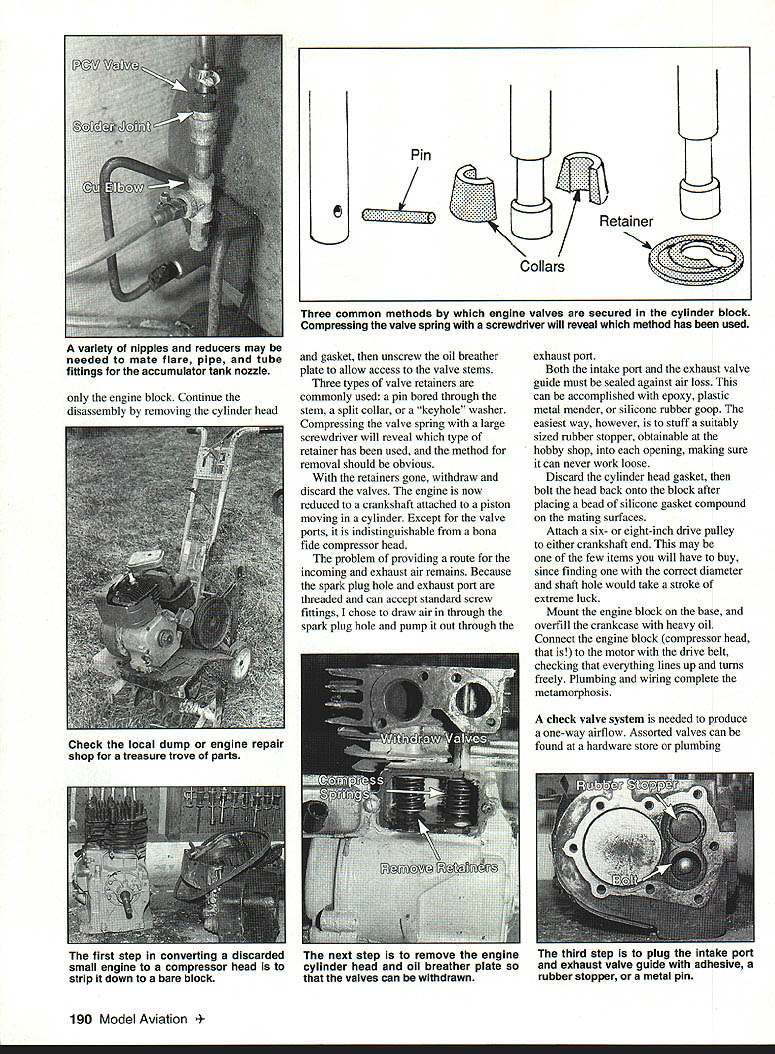
Modelers with a talent for scrounging and a flair for innovation (and that includes all modelers) can assemble a high-pressure, high-volume air delivery system for almost nothing out of bits and pieces from the local dump. You might even already have many of the parts cluttering up the basement workshop.
Components
A complete parts list is included as an appendix, but the components fall into three categories:
- A motor, including drive pulleys and belt
- A compressor head
- A large box of valves, tubes, clamps, fittings, and assorted hardware
Any motor salvaged from a washing machine, dishwasher, or clothes dryer will do. These commonly range from 1/8 to 1/3 horsepower, and can go up to 1/2 horsepower. My contraption is powered by a one-sixth-horsepower clothes-dryer motor. Reduced through a belt drive to a 1:4 ratio, it has never wanted for power.
A compressor head may seem like an exotic and unlikely treasure to find on a scrap heap, but it is possible to come upon one from an old refrigeration unit. Just as useful—and far easier to find—is a discarded single-cylinder gasoline engine from a lawn mower or tiller. If you can't find one at the local junkyard, check the back door of any small-engine repair shop; you'll often find piles of them free for the taking. If you have a choice, select a horizontal-shaft engine, since its upright posture makes mounting easier.
Because of the almost-infinite possible combinations of parts, only general assembly instructions are given here; precise connection and fastening methods are left to the modeler's ingenuity.
Selecting and preparing the base
The first step is to select a suitable base. Wood is easiest to work with; I used a three-foot section of 2 x 12 and added rubber feet to dampen noise and vibration. Mount the motor to the base, providing a way to shift it sideways for belt-tension adjustment. If the motor lacks a mounting bracket, secure it with lengths of perforated metal pipe strap.
Converting an engine into a compressor
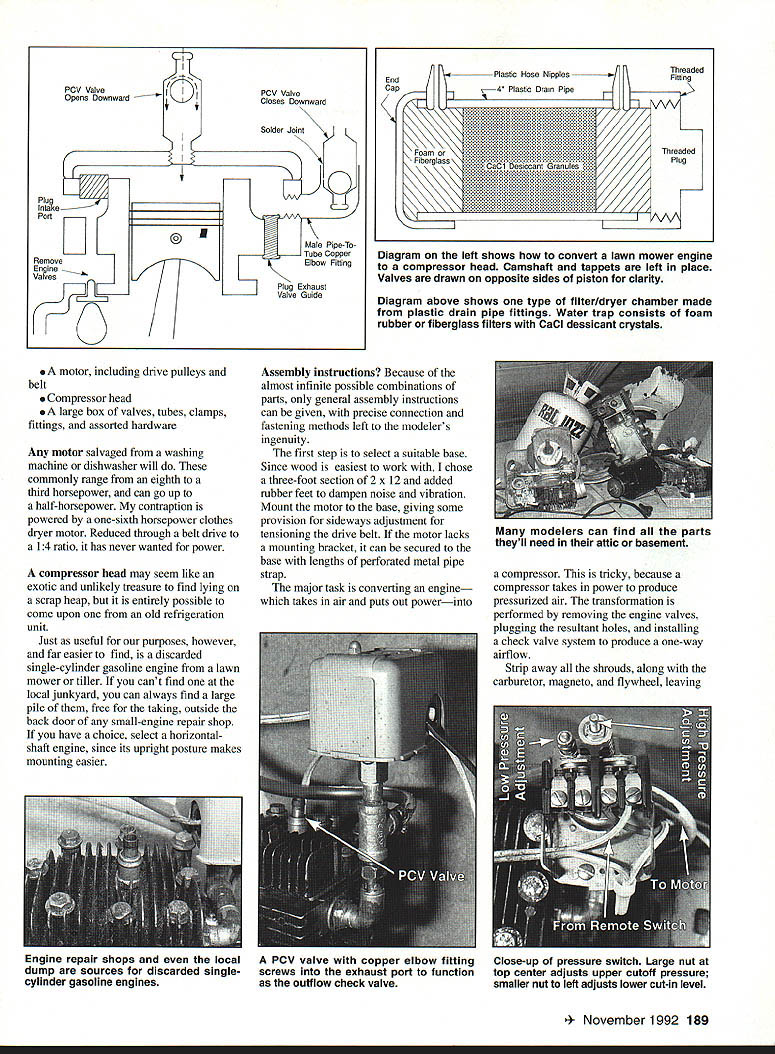
The major task is converting an engine—which intakes air and produces power—into a compressor, which consumes power to produce pressurized air. Do this by removing the engine valves, plugging the resultant holes, and installing a check-valve system to produce a one-way airflow.
Strip away all shrouds, the carburetor, magneto, and flywheel, leaving the engine block. Remove the cylinder head. There are three common methods used to secure engine valves to the cylinder block (pin bored through the stem, split collar, keyhole washer). Compress the valve spring (a large screwdriver can be used as a compressor) to reveal which retainer is present, then remove the retainer and withdraw and discard the valves.
The engine is now reduced to a crankshaft attached to a piston moving in a cylinder. Except for the valve ports, it is indistinguishable from a compressor head.
You still need to provide routes for incoming and outgoing air. Because the spark-plug hole and exhaust port are threaded and will accept standard screw fittings, a convenient arrangement is to draw air in through the spark-plug hole and pump it out through the exhaust port.
Sealing ports and reassembly
Both the intake port and the exhaust valve guide must be sealed against air loss. Sealants such as epoxy, metal-plastic mender, or silicone rubber will work, but the easiest method is to stuff a suitably sized rubber stopper (available at hobby shops) into each opening—make sure it cannot work loose.
Discard the cylinder-head gasket, then bolt the head back onto the block after placing a bead of silicone gasket compound on the mating surfaces.
Attach a six- or eight-inch drive pulley to either crankshaft end. This may be one of the few items you'll have to buy, since finding one with the correct diameter and shaft hole by chance is unlikely.
Mount the engine block (the compressor head) on the base, overfill the crankcase with heavy oil, and connect it to the motor with the drive belt. Check that everything lines up and turns freely. Plumbing and wiring complete the metamorphosis from engine to air pump.
Check-valve system
A check-valve system is needed to produce one-way airflow. Assorted valves can be found at hardware or plumbing-supply companies, but the cheapest alternative is a pair of automobile positive crankcase ventilation (PCV) valves sold for a dollar or two in the automotive section of department stores. Some hunting and experimentation will be necessary to fit valves to your particular tubes and fittings.
The intake valve can be screwed directly into the spark-plug hole; it will open on the suction created by the piston downstroke and close under the pressure of the upstroke. By soldering the intake valve to a 1/2-inch copper pipe fitting, you can screw the outflow valve into the exhaust port (where the muffler used to fit). Seal threaded joints with Mylar tape or silicone compound.
With the one-way valves installed, the assembly becomes an efficient air pump. Provided the motor is adequate and a suitably low-ratio belt-drive reduction is used, the pump will continue to work—until something in the system gives.
Regulator and safety
A regulator must be installed to either release excess pressure or shut off power at a preset level. Both types are common and inexpensive.
Blowoff safety valves (like those on water heaters) and pressure-sensing electric switches (used on water-system pressure tanks) are standard choices. With luck, you can scavenge one from a dump or a plumber's scrap heap; otherwise you'll have to buy one.
A blowoff valve is cheaper and requires no wiring, but it requires the compressor to run continuously. A pressure-sensing switch wired into the motor circuit is preferable: it automatically cycles the motor to maintain tank pressure. These switches are usually set for a range such as 40–60 lb. (cut-out at 60 lb., cut-in at 40 lb.), which is ideal for modelers. Settings can be adjusted via small screws on the unit.
Tubing and accumulator tank
No special tubing is required. 1/4-inch or 5/16-inch vinyl tubing secured with hose clamps will withstand the pressure for modeler's use.
Before routing air to the workbench, dump the pump output into an accumulator tank to smooth pulses and form a supply reservoir. An empty freon tank salvaged from an auto-repair-shop dumpster works well. The nozzles on these tanks have flare threads that don't match standard plumbing, but auto-supply houses have adapters that mate flare, pipe, and tube fittings.
Filters and dryer
Dirt, oil residue, and condensed water blown through the lines can wreck a paint job and an airbrush, so insert a filter and drying device downstream of the accumulator.
You can buy a ready-made water trap from airbrush manufacturers, or build a more effective and less expensive unit yourself. Use chunks of foam rubber for filtering and calcium chloride (CaCl2) desiccant crystals (sold in hardware stores for drying damp closets) as a dryer. When the CaCl2 becomes saturated, dry it in a microwave or toaster oven for a few minutes and reuse it.
Any airtight metal or plastic container that can withstand the pressure will work as a filter canister (no glass). Attach hose nipples by soldering or epoxy.
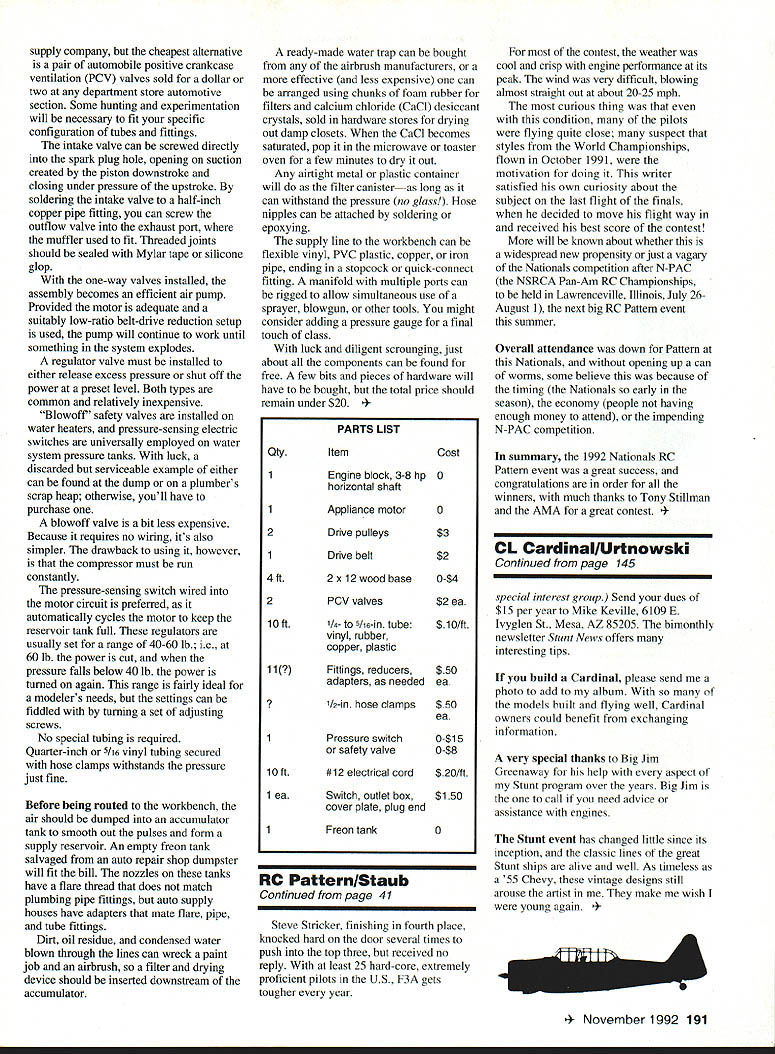
Supply line and fittings
The supply line to the workbench can be flexible vinyl, PVC, copper, or iron pipe, ending in a stopcock or quick-connect fitting. A manifold with multiple ports allows simultaneous use of a sprayer, blowgun, or other tools. Consider adding a pressure gauge for convenience.
With diligent scrounging, most components can be found for little or no cost. A few bits and pieces may need to be purchased, but the total price can often be kept under $20.
PARTS LIST
- Qty: 1 — Engine block, 3–8 hp horizontal shaft — Cost: $0
- Qty: 1 — Appliance motor — Cost: $0
- Qty: 2 — Drive pulleys — Cost: $3 (total)
- Qty: 1 — Drive belt — Cost: $2
- Qty: 4 ft — 2 x 12 wood base — Cost: $0–$4
- Qty: 2 — PCV valves — Cost: $2 each
- Qty: 10 ft — 1/4- to 5/16-in. tubing (vinyl, rubber, copper, plastic) — Cost: $0.10/ft
- Qty: 11 (approx.) — Fittings, reducers, adapters, as needed — Cost: $0.50 each
- Qty: 2 — 1/2-in. hose clamps — Cost: $0.50 each
- Qty: 1 — Pressure switch or safety (blowoff) valve — Cost: $0–$15
- Qty: 10 ft — #12 electrical cord — Cost: $0.20/ft
- Qty: 1 — Switch, outlet box, cover plate, plug end — Cost: $1.50
- Qty: 1 — Freon tank (accumulator) — Cost: $0
(Prices are approximate and based on scrounged or low-cost sources.)
Transcribed from original scans by AI. Minor OCR errors may remain.

