
Keep Your Pants On!
By Dr. D. B. Mathews
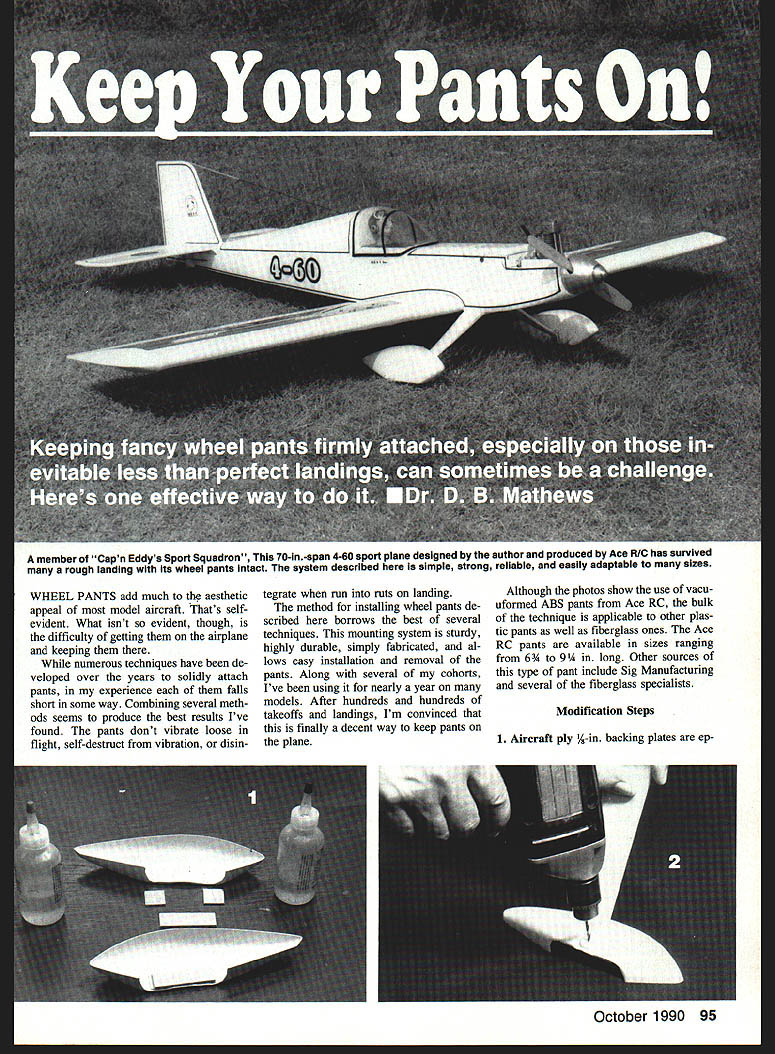
Keeping fancy wheel pants firmly attached — especially through less-than-perfect landings — can be a challenge. Wheel pants add a lot to the aesthetic appeal of most model aircraft, but getting them on the airplane and keeping them there is not always easy.
Many attachment techniques have been developed; in my experience each has shortcomings. Combining several methods, however, produces the best results: the pants don't vibrate loose in flight, self-destruct from vibration, or disintegrate when run into ruts on landing.
The mounting system described here borrows the best features of several techniques. It is sturdy, highly durable, simply fabricated, and allows easy installation and removal of the pants. My colleagues and I have used it for nearly a year on many models. After hundreds of takeoffs and landings, I’m convinced this is a reliable way to keep pants on the plane.
Although the photos that accompanied the original article show vacuum-formed ABS pants from Ace RC, most of the method applies equally well to other plastic or fiberglass pants. Ace RC pants are available in sizes from 6 3/4 to 9 1/4 in. long. Other sources include Sig Manufacturing and several fiberglass specialists.
Modification Steps
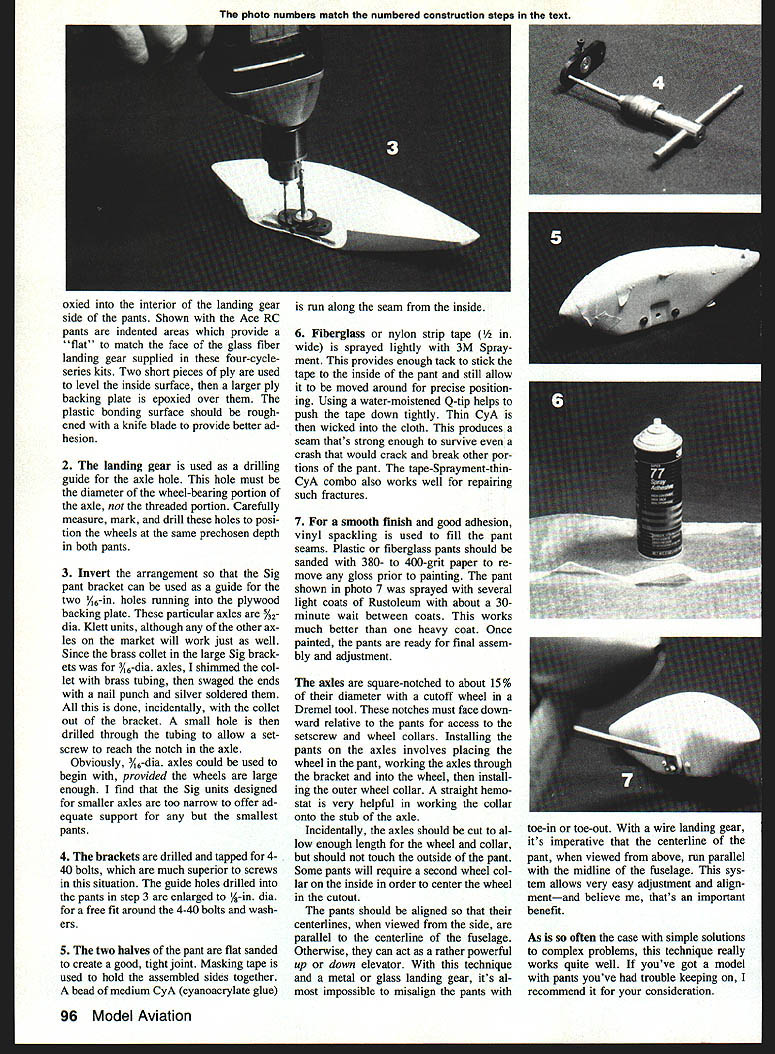
- Aircraft-ply 3/8-in. backing plates are epoxied to the interior landing-gear side of the pants.
- On the Ace RC pants the indented areas provide a flat mating face for glass-fiber landing gear supplied with four-cycle 4-60 series kits.
- Use two short pieces of ply to level the inside surface, then epoxy a larger ply backing plate over the plastic bonding area.
- Roughen the plastic with a knife blade before bonding for better adhesion.
- Use the landing gear as a drilling guide.
- The axle hole must clear the diameter of the wheel-bearing portion of the axle, not the threaded portion.
- Carefully measure, mark, and drill so the wheels seat to the same preset depth in both pants.
- Invert the arrangement and use a pant bracket (Sig pant bracket or similar) as a guide.
- Drill two 5/16-in. holes through the plywood backing plate to accommodate the landing-gear axles.
- Other axle types will also work (for example, 5/32-in. diameter units), depending on your gear.
- If the brass collet in a large Sig bracket is too large for your axle, shim the collet with brass tubing; swage the ends, use a nail punch, and silver-solder as required.
- Drill a small hole through the tubing so the setscrew can reach the notch in the axle. (Alternatively, start with 5/16-in. axles if your wheels are large enough; many Sig units designed for smaller axles are too narrow to support the smallest pants.)
- Drill and tap the brackets for 4-40 bolts (these are superior to screws for this application).
- Enlarge the guide holes drilled in the pants (step 3) to 3/16-in. dia. so the 4-40 bolts and washers fit freely.
- Join the two halves of the pant.
- Flat-sand mating edges to create a tight joint.
- Use masking tape to hold the assembled sides together and apply a bead of medium CA (cyanoacrylate) glue along the seam.
- Reinforce the seam with cloth tape.
- Use fiberglass or nylon strip tape lightly sprayed with 3M Spray Mount to give enough tack for positioning inside the pant. A water-moistened Q‑tip helps press the tape down tightly.
- Wick thin CA into the cloth tape to produce a seam strong enough to survive crashes that would crack other portions of the pant.
- The tape + Spray Mount + thin CA combination also works well for repairing fractures.
- Finish, paint, and perform final assembly and alignment.
- For a smooth finish and good adhesion, fill pant seams with vinyl spackling compound.
- Sand plastic or fiberglass pants with 380–400 grit paper to remove the gloss before painting.
- Spray several light coats of paint (Rust-Oleum works well), allowing about 30 minutes between coats — this gives a better finish than one heavy coat.
- After painting, adjust the axles square. Notch the wheel (about 15% of its diameter) with a Dremel tool; the notch must face downward relative to the pants so the access setscrew can engage the wheel collar.
- Install the pants’ axles by placing the wheel pant over the working axle through the bracket, then install and seat the outer wheel collar. A small hemostat is helpful for working the collar onto the stub axle.
- Cut axles to allow enough length so the wheel collar touches the outside of the pant. Some pants will require a second wheel collar inside to center the wheel in the cutout.
- When viewed from the side, pants should be aligned with the fuselage centerline; otherwise they can significantly affect elevator control. With wire landing gear, the pant centerline (viewed from above) must run parallel with the fuselage midline. This system permits easy adjustment and alignment, which is an important benefit.
As is often the case, this relatively simple combination of techniques works very well. If you have a model with pants that are difficult to keep on, consider using this method.
Transcribed from original scans by AI. Minor OCR errors may remain.

