
Kit Conversion: RC to CL
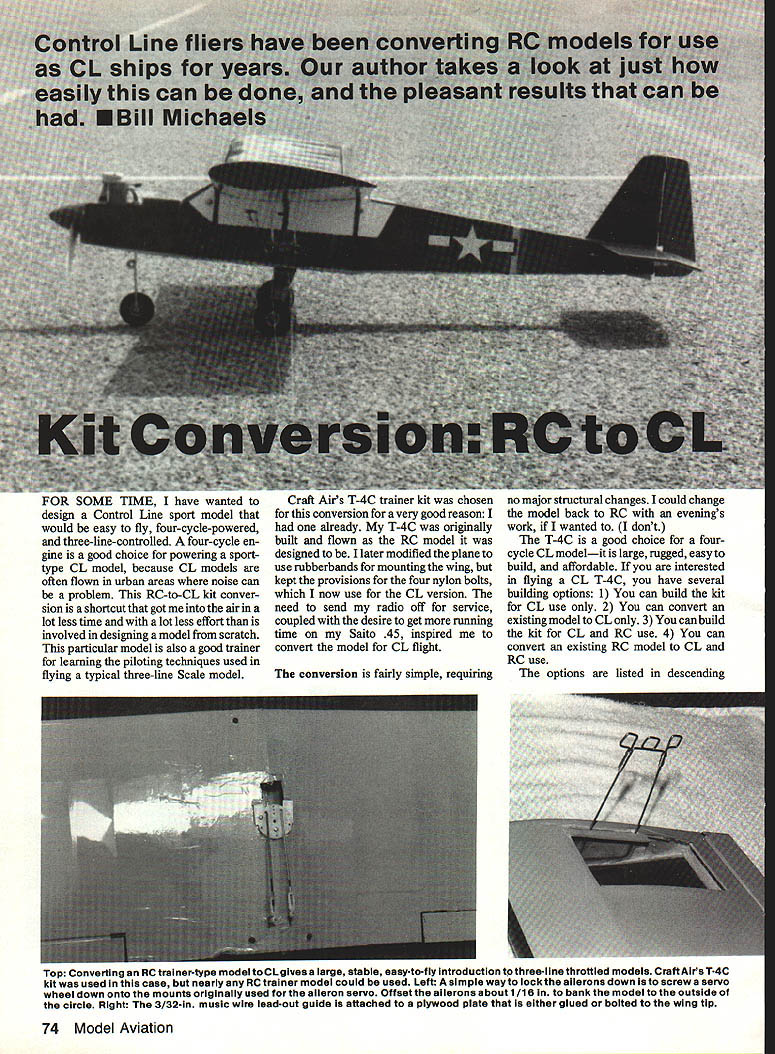
Control Line fliers have been converting RC models for use as CL ships for years. Our author takes a look at just how easily this can be done, and the pleasant results that can be had. — Bill Michaels
Introduction
For some time I have wanted to design a Control Line sport model that would be easy to fly, four-cycle-powered, and three-line-controlled. A four-cycle engine is a good choice for powering a sport-type CL model, because CL models are often flown in urban areas where noise can be a problem. Converting an RC kit to CL is a shortcut that got me into the air much faster and with far less effort than designing from scratch. The converted model also makes a good trainer for learning typical three-line piloting techniques.
Why I Chose the T-4C
I chose Craft Air's T-4C trainer kit for a simple reason: I already had one. My T-4C was originally built and flown as the RC model it was designed to be. I later modified the plane to use rubber bands for wing mounting, but kept provisions for the four nylon bolts, which I now use for the CL version. Needing to send my radio off for service, coupled with a desire to get more running time on my Saito .45, inspired me to convert the model for CL flight.
The conversion is fairly simple and requires no major structural changes. I could change the model back to RC with an evening's work if I wanted to (I don't). The T-4C is a good choice for a four-cycle CL model — it is large, rugged, easy to build, and affordable.
Conversion Options
You have several building options:
- Build the kit for CL use only.
- Convert an existing model to CL only.
- Build the kit for CL and RC use.
- Convert an existing RC model to CL and RC use.
The options are listed in descending order. Options 3 and 4 are nearly the same, but it's a little easier to make the changes while you build than to retrofit them afterward. My model is a cross between options 2 and 4: some CL control system items were not made removable, and the RC items were left in the plane. Since I do not intend to convert my model back to RC, I glued the bellcrank mount, line guide, and wing tip weight in place rather than make them removable. With a little more effort they could be made removable for easier reinstallation of radio gear. I did leave the pushrods and wing holddowns installed.
This article outlines the steps to complete option 4, because it entails slightly more work than the others.
Conversion Overview
The conversion is fairly simple and involves:
- Removing the radio.
- Securing the ailerons and rudder.
- Securing the steerable nosegear.
- Installing the bellcrank and lead-outs.
- Installing the lead-out guide and wing tip weight.
Remove the Radio Gear
First, remove the radio gear. It is not necessary to remove the servo rails, as they should not interfere with the CL mechanics; leaving them makes it easier to return the model to RC later.
Securing Control Surfaces
Ailerons
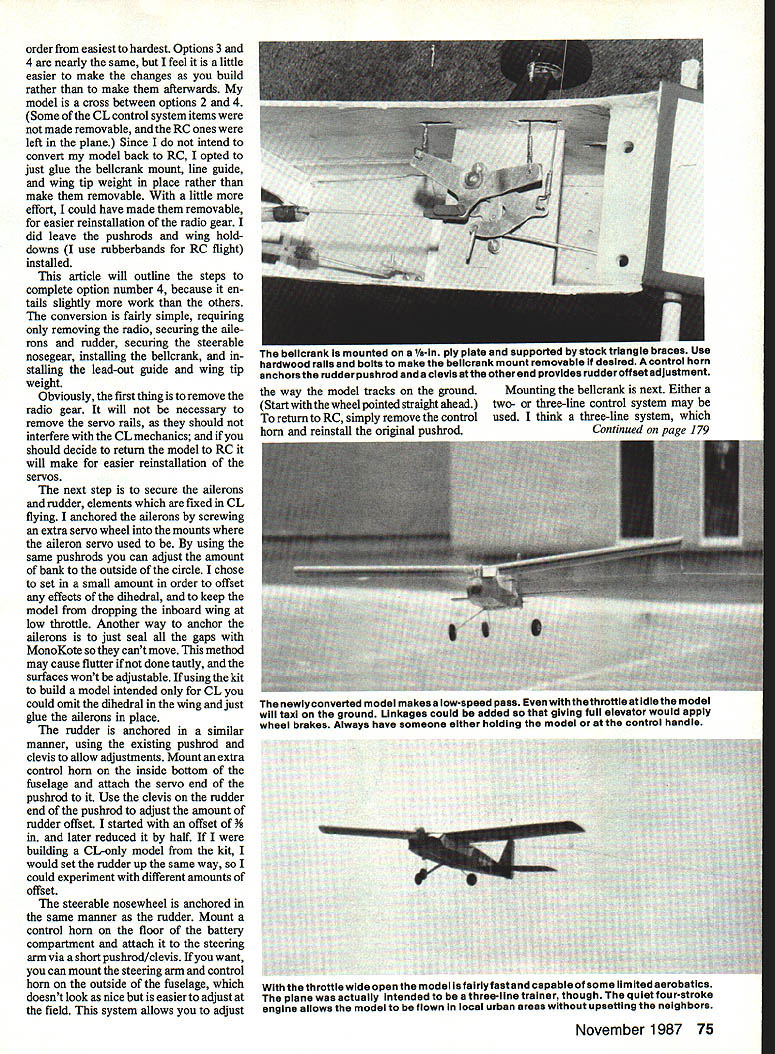
Ailerons are fixed in CL flying and must be anchored. I anchored the ailerons by screwing an extra servo wheel into the mounts where the aileron servo used to be. By using the same pushrods you can adjust the amount of bank to the outside of the circle. I set a small amount to offset any effects of the dihedral and to keep the model from dropping the inboard wing at low throttle.
Another method is to seal all the gaps with MonoKote so the ailerons cannot move. This may cause flutter if not done tautly, and the surfaces won't be adjustable. If you build the kit for CL-only use, you could omit the dihedral and glue the ailerons in place.
Rudder
Anchor the rudder similarly, using the existing pushrod and clevis to allow adjustments. Mount an extra control horn on the inside bottom of the fuselage and attach the servo end of the pushrod to it. Use the clevis on the rudder end of the pushrod to adjust rudder offset. I started with an offset of 3/8 in. and later reduced it by half. If building a CL-only model, set the rudder this way to allow experimentation with offsets.
Steerable Nosewheel
Anchor the steerable nosewheel like the rudder. Mount a control horn on the floor of the battery compartment and attach it to the steering arm via a short pushrod and clevis. You may mount the steering arm and control horn on the outside of the fuselage for easier field adjustment (though it looks less neat). This lets you adjust ground tracking; start with the wheel pointed straight ahead. To return to RC, remove the control horn and reinstall the original pushrod.
Bellcrank and Lead-outs
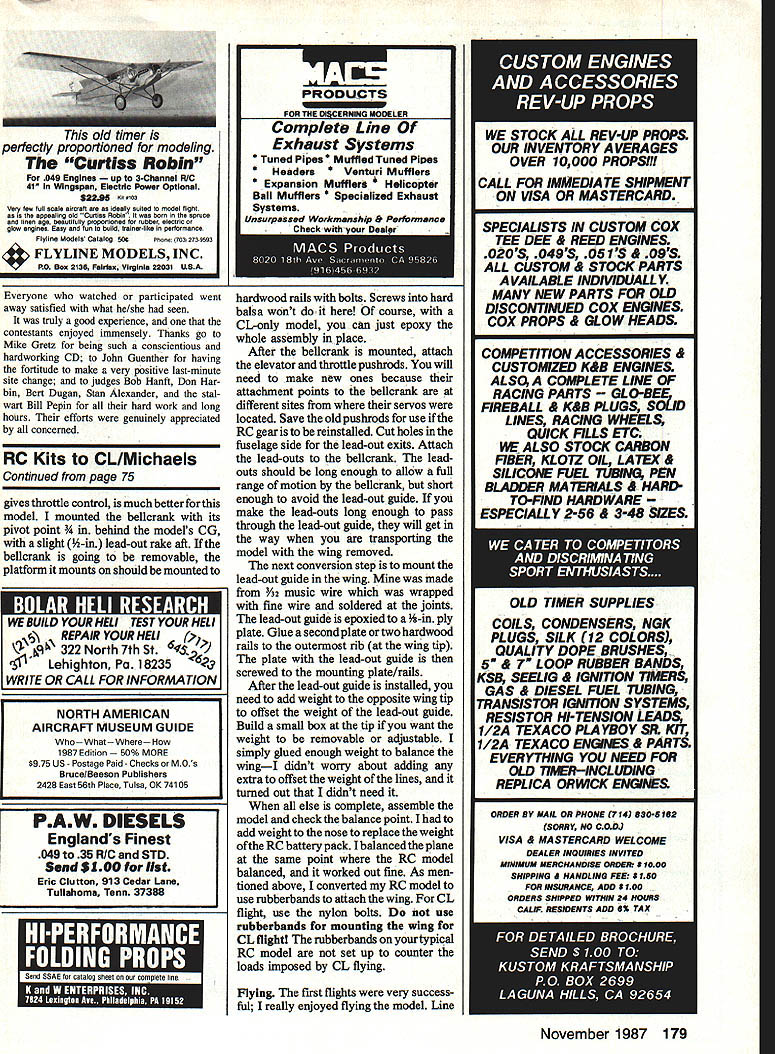
Mount the bellcrank next. Either a two- or three-line control system may be used; I prefer a three-line system because it gives throttle control, which is much better for this model. I mounted the bellcrank with its pivot point 3/4 in. behind the model's CG, with a slight (1/16 in.) lead-out rake aft.
If the bellcrank is to be removable, mount its platform on hardwood rails with bolts. Screws into hard balsa won't hold up here. For a CL-only model, you can just epoxy the whole assembly in place.
After mounting the bellcrank, attach the elevator and throttle pushrods. You will need new pushrods because their attachment points on the bellcrank differ from the original servo locations. Save the old pushrods for use if the RC gear is ever reinstalled.
Cut holes in the fuselage side for the lead-out exits and attach the lead-outs to the bellcrank. The lead-outs should be long enough to allow a full range of bellcrank motion but short enough to avoid the lead-out guide. If the lead-outs are long enough to pass through the lead-out guide they will get in the way when transporting the model with the wing removed.
Lead-out Guide and Wing Tip Weight
Mount the lead-out guide in the wing. My guide was made from 3/32 in. music wire, wrapped with fine wire and soldered at the joints. The lead-out guide is epoxied to a 1/8 in. ply plate. Glue a second plate or two hardwood rails to the outermost rib at the wing tip, then screw the plate with the lead-out guide to the mounting plates/rails.
After installing the lead-out guide, add weight to the opposite wing tip to offset the guide's weight. Build a small box at the tip if you want the weight to be removable or adjustable. I simply glued enough weight to balance the wing — I did not add extra to offset the weight of the lines and found it unnecessary.
Balance and Wing Mounting
Assemble the model and check the balance point. I had to add weight to the nose to replace the weight of the RC battery pack. I balanced the plane at the same point where the RC model balanced, and it worked fine.
For CL flight, use nylon bolts for wing mounting. Do not use rubber bands — the rubber bands on a typical RC model are not set up to counter the loads imposed by CL flying.
Flying
My first flights were very successful. Line flying was smoother and more predictable than RC flying. With the Saito .45 I used very low throttle settings for takeoff and climb; the model would fly at half throttle. At wide-open throttle it was too fast. Trimming consisted of adjusting the throttle and the amount of aileron offset. With too much offset the model wanted to roll out of the circle at full throttle. Initial flights were on 20-ft lines; later I changed to 15-ft lines for a bit more response. The Saito .45 had plenty of power; any four-cycle engine of around .40–.45 cu in. should be suitable.
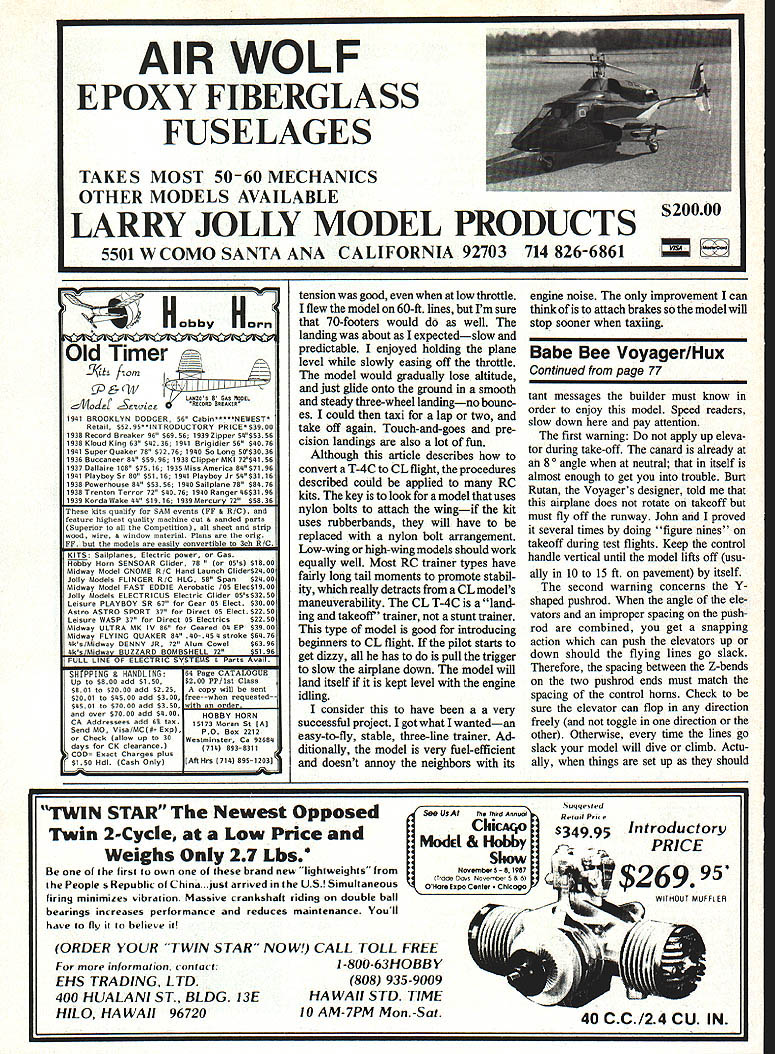
Line tension was good, even when at low throttle. I flew the model on 60-ft lines, but I'm sure 70-footers would work as well. Landings were slow and predictable. I enjoyed holding the plane level while slowly easing off the throttle; the model would gradually lose altitude and glide onto the ground in a smooth and steady three-wheel landing—no bounce. I could taxi for a lap or two and take off again. Touch-and-goes and precision landings are also a lot of fun.
Reversible Conversion Tips
If you intend to convert your model back to RC occasionally, make the bellcrank mount removable. Use bolts attaching to hardwood rails so the mounting plates can take the abuse. If you want to keep the RC servos in place for quick conversion, tie the servo arms down so they cannot move. Remove the battery and radio and it's ready for CL. For a permanent CL conversion, epoxy everything in place and use nylon bolts for the wing.
Applicability and Conclusion
Although this article describes converting a T-4C to CL flight, the procedures can be applied to many RC kits. The key is to look for a model that uses nylon bolts to attach the wing—if the kit uses rubber bands they will have to be replaced with a nylon bolt arrangement. Low-wing and high-wing models should both work. Most RC trainer types have fairly long tail moments to promote stability, which detracts from a CL model's maneuverability. The CL T-4C is a "landing and takeoff" trainer, not a stunt trainer. It is good for introducing beginners to CL flight: if the pilot gets dizzy, he can pull the trigger to shut the engine down and the airplane will land itself if kept level at idle.
This was a very successful project for me. I got an easy-to-fly, stable, three-line trainer that is fuel-efficient and less annoying to neighbors. The only improvement I can think of is to attach brakes so the model will stop sooner when taxiing.
Transcribed from original scans by AI. Minor OCR errors may remain.

