
Lil Pieces
By L. F. Randolph
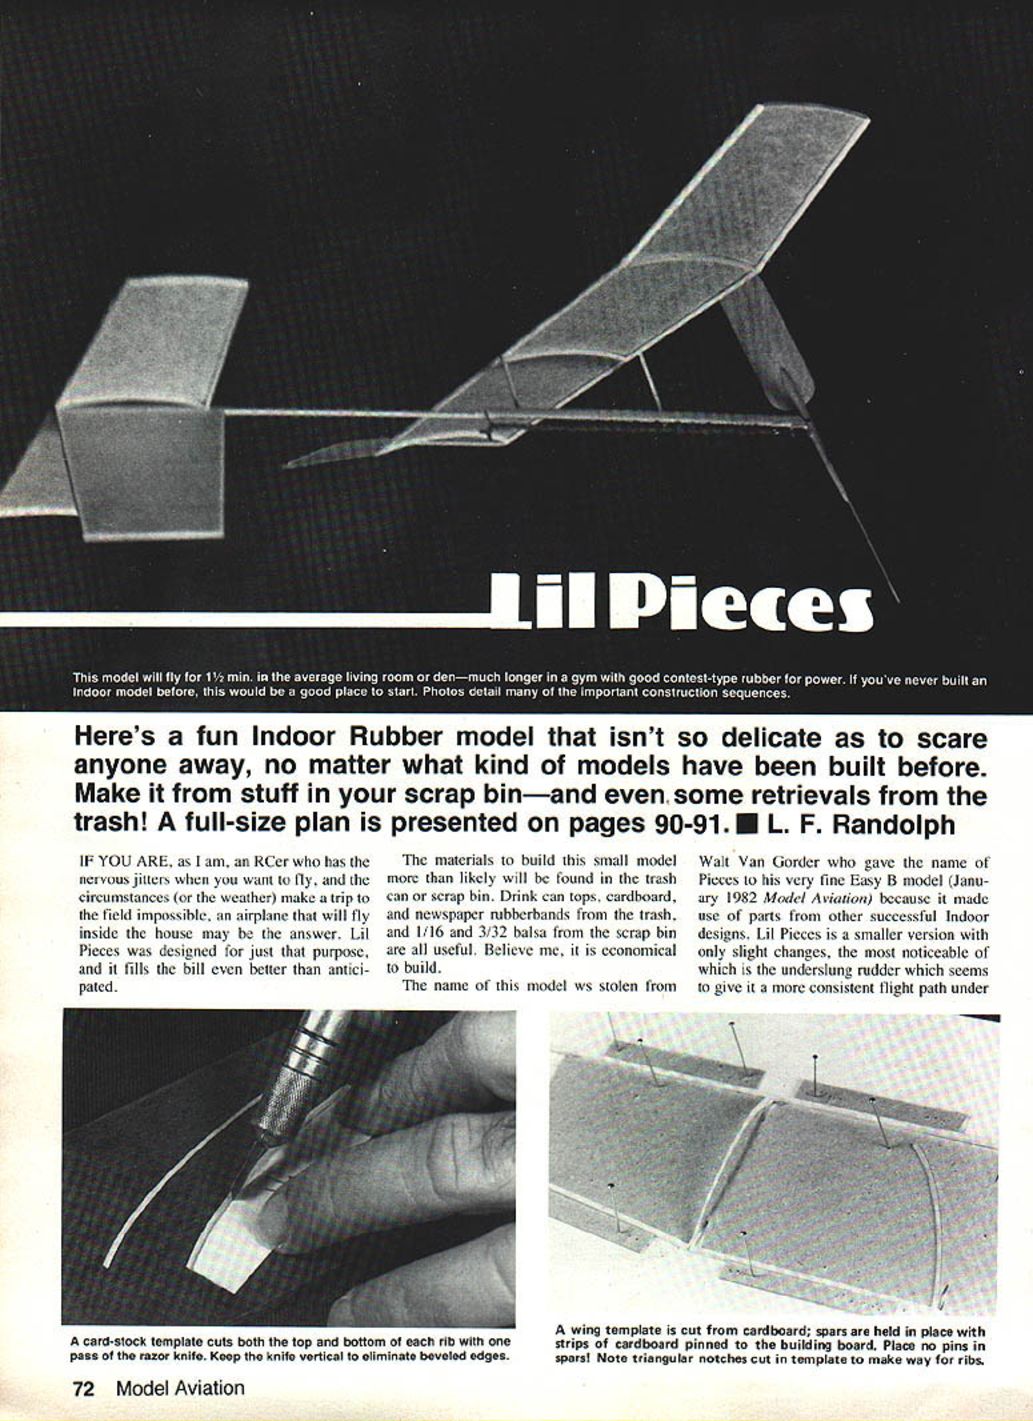
Here's a fun indoor rubber model that isn't so delicate as to scare anyone away, no matter what kind of models have been built before. Make it from stuff in your scrap bin—and even some retrievals from the trash! A full-size plan is presented on pages 90–91.
If you are, as I am, an RCer who gets nervous when you want to fly and the circumstances (or the weather) make a trip to the field impossible, an airplane that will fly inside the house may be the answer. Lil Pieces was designed for just that purpose, and it fills the bill even better than anticipated.
The materials to build this small model more than likely will be found in the trash can or scrap bin: drink can tops, cardboard, newspaper rubber bands from the trash, and 1/16 and 3/32 balsa from the scrap bin are all useful. Believe me, it is economical to build.
The name of this model was stolen from Walt Van Gorder, who gave the name Pieces to his very fine Easy B model (January 1982 Model Aviation) because it made use of parts from other successful indoor designs. Lil Pieces is a smaller version with only slight changes, the most noticeable of which is the underslung rudder, which seems to give it a more consistent flight path under varying amounts of power.
Lil Pieces is flown in the living room, den, bedroom, or any place where 8 to 10 sq. ft. of ceiling is available. In my bedroom, where it must circle a ceiling fan, it will consistently fly for 1-1/2 minutes before hitting a wall, fan, chair, bed, etc. In a school auditorium with an 18-ft. ceiling, it will fly for 3 minutes without looking back. If you have never built an indoor type of model, please build this one—if not for other reasons than to see if your fingers still work!
Construction
Materials
- 1/16 in. balsa sheet (lightest good-quality sheet available)
- 1/32 in. balsa sheet (or sand 1/16 sheet to 1/32)
- 1/16 in. square balsa (spars)
- 3/32 in. by 3/16 in. balsa (motor stick)
- 3/32 in. square balsa (prop hub stock)
- 1/32 in. music wire (for rolling tissue tubes)
- Light aluminum from a drink can (for thrust bearing)
- Tissue for covering
- White glue or aliphatic resin and light model cement (or CyA where noted)
- Newspaper rubber bands or FAI rubber for motor
- Small glass bead (for prop bearing)
- Sandpaper (100-grit and 150-grit)
- Cardboard (file-folder type) for templates and holding strips
Preparing stock and template
- Pick the lightest sheet of 1/16 balsa from your stock—not the softest, but the lightest. Strip four 1/16 in. square strips 18 in. long for spars. If you don't have a stripper, use a metal straightedge and a modeling knife. One end of a 36-in. strip is usually better than the other.
- If you don't have 1/32 sheet, cut a piece about 6 in. long from the good end of the 1/16 sheet and sand it down to 1/32 in. Tape 100-grit sandpaper to the bench, put the balsa on it, and sand with a sanding block. Turn the sheet often and sand both faces.
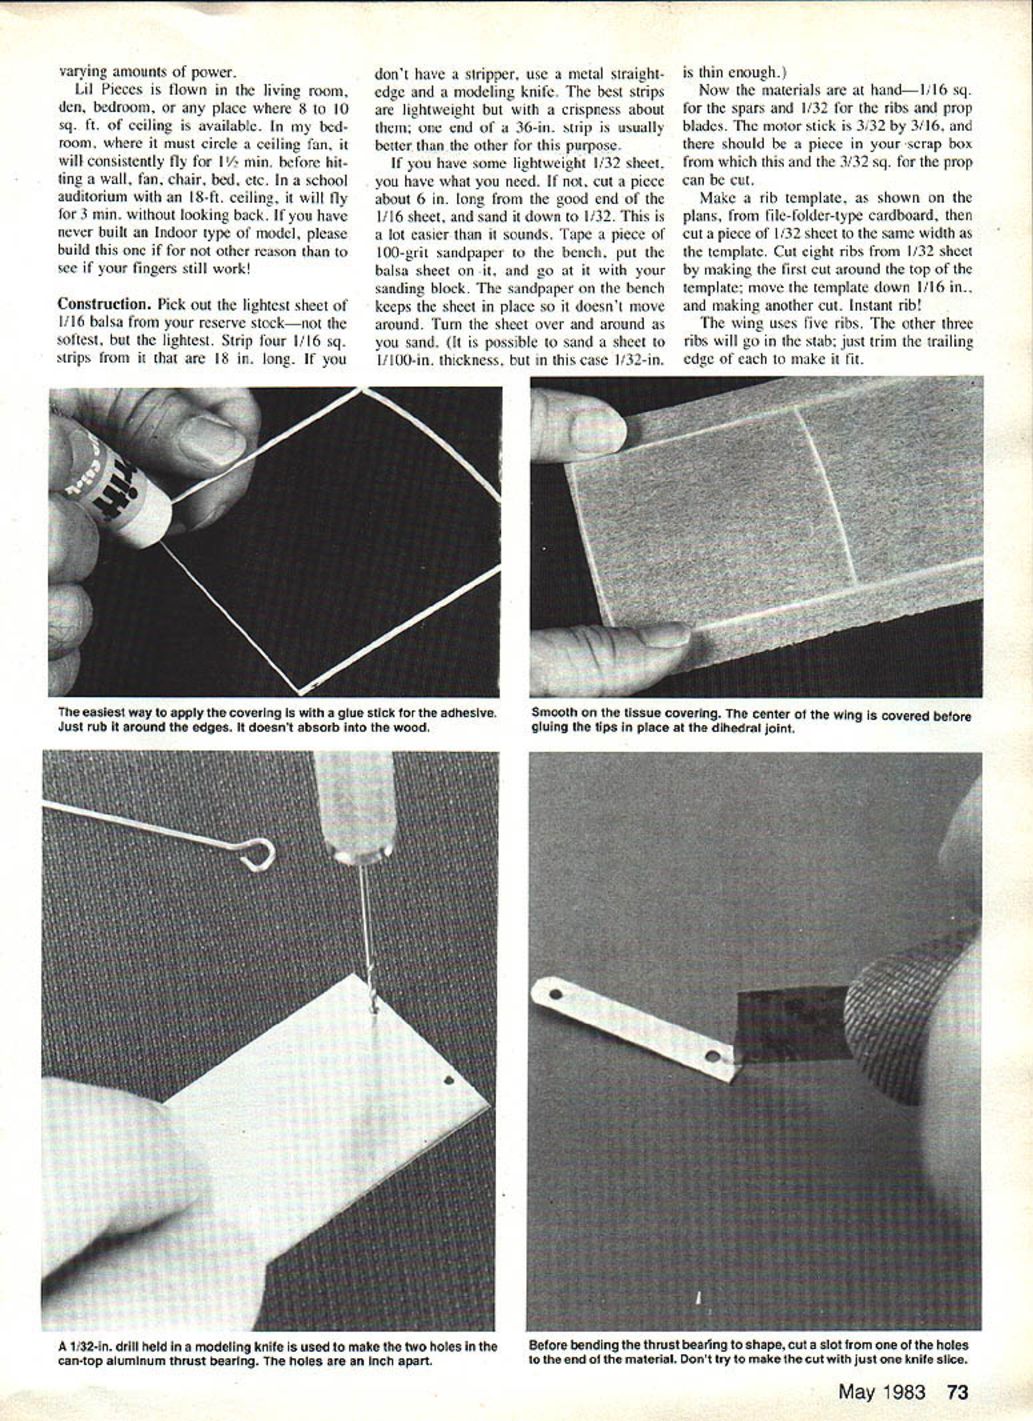
- Make a rib template from file-folder-type cardboard (as shown on the plans). Cut a piece of 1/32 sheet to the same width as the template.
Cutting ribs
- Cut eight ribs from 1/32 sheet by using the template: make the first cut around the top of the template, move the template down 1/16 in., and make another cut—repeat for instant ribs.
- The wing uses five ribs. The remaining three ribs will go into the stab; trim the trailing edge of each to fit.
Building wing and stab
There are two ways to build the wing and stab:
- Cardboard strip method: Cut 1/4 x 2 in. strips of cardboard; you will need 16 to hold the spars in place over the plans. This is quickest for building a single model.
- Template method: Make a wing and stab template out of cardboard and hold the spars against it with the same strips. Pins go through the cardboard, not the spars. The template method is handy when building several models and allows building on any flat surface without continual use of the plans.
Assembly steps (cardboard strip method):
- Pin four strips over the plans along the inside of the leading edge between rib locations.
- Put a 1/16 in. square spar in place and hold it with four more strips pinned along the outside, opposing the four inside strips. Hold the trailing edge in place the same way.
- Glue the three full-size ribs between the spars using light model cement (lightest) or CyA if preferred.
- Trim 1/8 in. from the trailing edge of two more ribs and glue them at the tips.
- When glue has set, cut through the leading edge at the dihedral breaks (the trailing edge is already in separate pieces). Do not glue in the dihedral at this time.
The stab and rudder are built similarly. Cut the three remaining wing ribs to length from the trailing edge to form the stab ribs. The rudder and boom are built in one piece.
Motor stick and thrust bearing
- Cut the motor stick from lightweight 3/32 in. stock and lightly sand the edges.
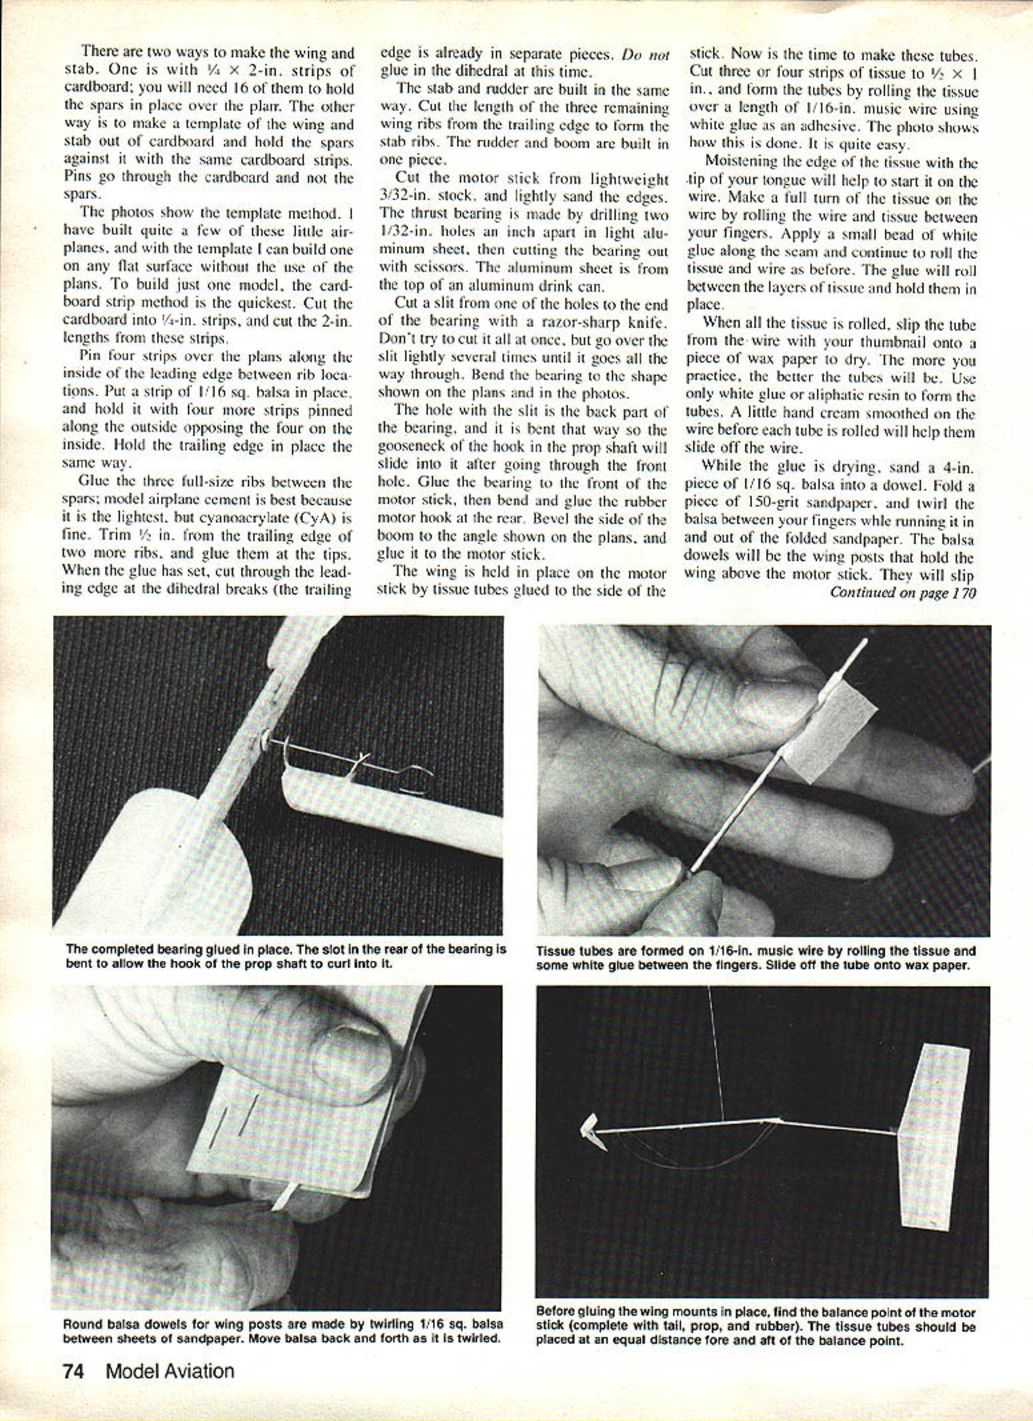
- Make the thrust bearing from light aluminum (from a drink can): drill two 1/32 in. holes an inch apart, then cut the bearing out with scissors.
- Cut a slit from one of the holes to the end of the bearing with a razor-sharp knife—go over the slit lightly several times until it goes through. Bend the bearing to the shape shown on the plans.
- The hole with the slit is the back part of the bearing; it is bent so the gooseneck of the hook in the prop shaft will slide into it after passing through the front hole.
- Glue the bearing to the front of the motor stick, then bend and glue the rubber motor hook at the rear.
- Bevel the side of the boom to the angle shown on the plans and glue it to the motor stick.
Wing mounting tubes and posts
- The wing is held in place on the motor stick by tissue tubes glued to the side of the stick. Make these tubes now.
- Cut three or four strips of tissue to 1/2 x 1 in. Form the tubes by rolling the tissue over a length of 1/16 in. music wire using white glue as adhesive:
- Moisten the tissue edge with the tip of your tongue to help start it on the wire.
- Make a full turn of the tissue on the wire by rolling the wire and tissue between your fingers.
- Apply a small bead of white glue along the seam and continue to roll; the glue will roll between layers and hold them.
- Slip the tube from the wire with your thumbnail onto wax paper to dry.
- Use only white glue or aliphatic resin to form the tubes. A little hand cream on the wire before each tube helps them slide off.
- While tubes dry, sand a 4-in. piece of 1/16 in. square balsa into a dowel: fold 150-grit sandpaper and twirl the balsa between your fingers while running it in and out of the folded sandpaper. The balsa dowels will be the wing posts that hold the wing above the motor stick. They will slip into the two tissue tubes when the airplane is completed.
- This mounting method makes it possible to adjust incidence and to remove the wing for storage. Incidentally, this airplane and another just like it will fit into a shoe box with ease.
Covering and final assembly
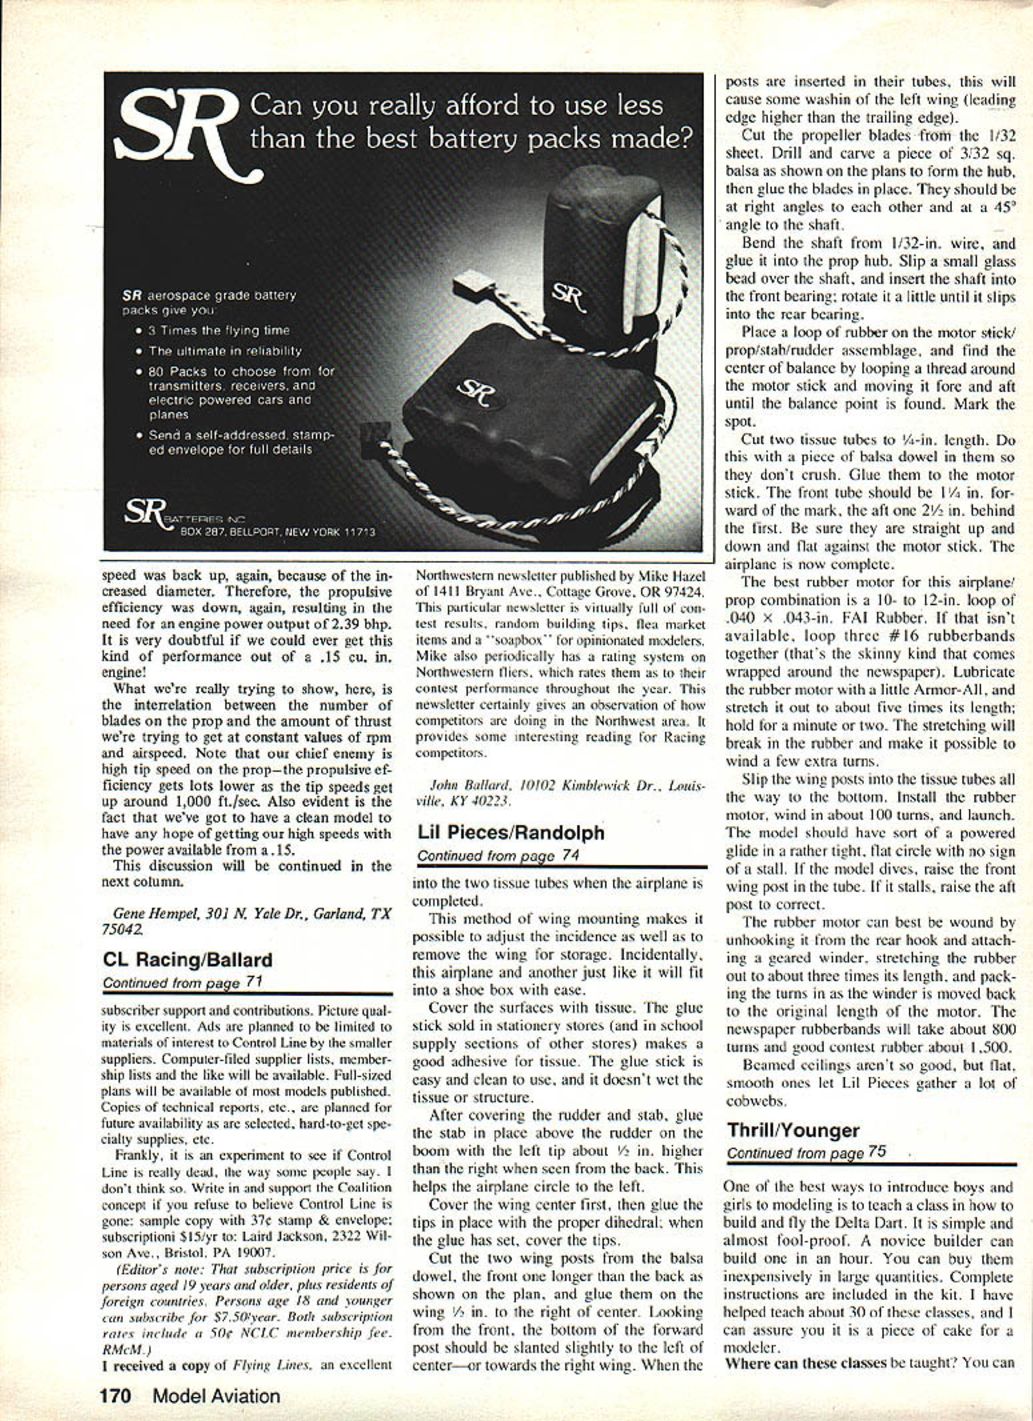
- Cover all surfaces with tissue. The glue stick sold in stationery stores makes a good adhesive for tissue: it is easy and clean to use and doesn't wet the tissue or structure.
- After covering the rudder and stab, glue the stab in place above the rudder on the boom with the left tip about 1/8 in. higher than the right when seen from the back—this helps the airplane circle to the left.
- Cover the wing center first, then glue the tips in place with the proper dihedral; when the glue has set, cover the tips.
- Cut the two wing posts from the balsa dowel, the front one longer than the back as shown on the plan, and glue them on the wing 1/8 in. to the right of center.
- Looking from the front, the bottom of the forward post should be slanted slightly to the left of center—or towards the right wing. When the posts are inserted in their tubes, this will cause some wash-in of the left wing (leading edge higher than the trailing edge).
Propeller, shaft, and hub
- Cut the propeller blades from 1/32 in. sheet.
- Drill and carve a piece of 3/32 in. square balsa as shown on the plans to form the hub, then glue the blades in place. They should be at right angles to each other and set at a 45° angle to the shaft.
- Bend the shaft from 1/32 in. wire and glue it into the prop hub.
- Slip a small glass bead over the shaft and insert the shaft into the front bearing; rotate it a little until it slips into the rear bearing.
Balancing and motor installation
- Place a loop of rubber on the motor stick/prop/stab/rudder assemblage and find the center of balance by looping a thread around the motor stick and moving it fore and aft until the balance point is found. Mark the spot.
- Cut two tissue tubes to 1/4 in. length (do this with a piece of balsa dowel in them so they don't crush). Glue them to the motor stick:
- The front tube should be 1/4 in. forward of the mark.
- The aft tube should be 2-1/2 in. behind the first.
- Be sure they are straight up and down and flat against the motor stick.
- The airplane is now complete.
Rubber motor and winding
- The best rubber motor for this airplane/prop combination is a 10–12 in. loop of .040 x .043 in. FAI rubber. If that isn't available, loop three #16 newspaper rubber bands together (the skinny kind that comes wrapped around the newspaper).
- Lubricate the rubber motor with a little Armor-All and stretch it to about five times its length; hold for a minute or two. The stretching breaks in the rubber and makes it possible to wind a few extra turns.
- Slip the wing posts into the tissue tubes all the way to the bottom. Install the rubber motor, wind in about 100 turns, and launch.
If the model dives, raise the front wing post in the tube. If it stalls, raise the aft post to correct.
The rubber motor can best be wound by unhooking it from the rear hook and attaching a geared winder, stretching the rubber out to about three times its length, and packing the turns in as the winder is moved back to the original length of the motor. Newspaper rubber bands will take about 800 turns and good contest rubber about 1,500.
Beamed ceilings aren't so good, but flat, smooth ones let Lil Pieces gather a lot of cobwebs.
Transcribed from original scans by AI. Minor OCR errors may remain.

