
Low-Cost Foam Cutter
Styrofoam-core wings have advantages over conventional built-up wings: they can provide a more accurate airfoil and faster assembly times. Presented here is a low-cost jig for cutting your own custom foam wing cores. This cutter features hands-off operation for good results on your very first try.
Everything you need to build the foam cutter is available at the local hobby shop, home center, and Radio Shack. With the exception of the power supply, the materials can be purchased for less than $30. Some of the materials you probably already have in your workshop. The aluminum channel sizes may seem odd, but they were what was available at the local home center.
Power supply
You don't need an expensive power supply. A manual automotive battery charger (for example, Sears #71206) or a constant-current Ni–Cd charger will work fine. Automatic or peak-detecting chargers will not work.
Whatever you choose to power your foam cutter, it must be able to put out 1.5–2 amps at 14–16 volts.
Assembly
- Prepare the cutter base and swing bar:
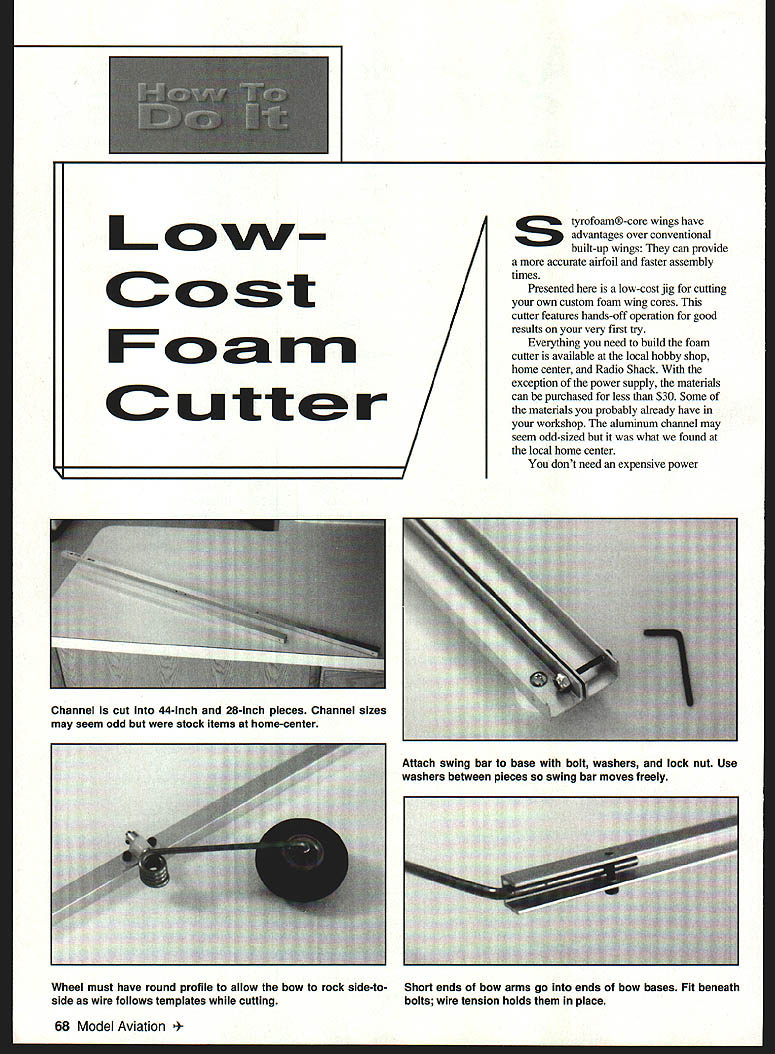
- Cut the 5/64" channel into two pieces: one 44" long and the other 28" long.
- For the 44" piece (cutter base):
- Drill three holes for the rollers in the top: one hole 1" from each end and one hole 14" from one end.
- Drill two holes in the front side of the channel, 5/8" from the center on each side.
- Drill one 1/8" hole for the pivot point all the way through the front side of the channel, 1/2" from the right end.
- For the 28" piece (swing bar):
- Drill one 1/8" hole for the pivot point all the way through, 1/2" from one end.
- Mount the nylon rollers to the cutter base using the bolts provided with them. Mount two rollers on the top and the other two on the front in the two center holes. Use the hole 14" in from the end when using the smaller cutting bow. Be sure the rollers turn freely and smoothly.
- Attach the swing bar to the base with a 6-32 bolt, washers, and lock nut. Use washers between the two pieces so the swing bar moves freely.
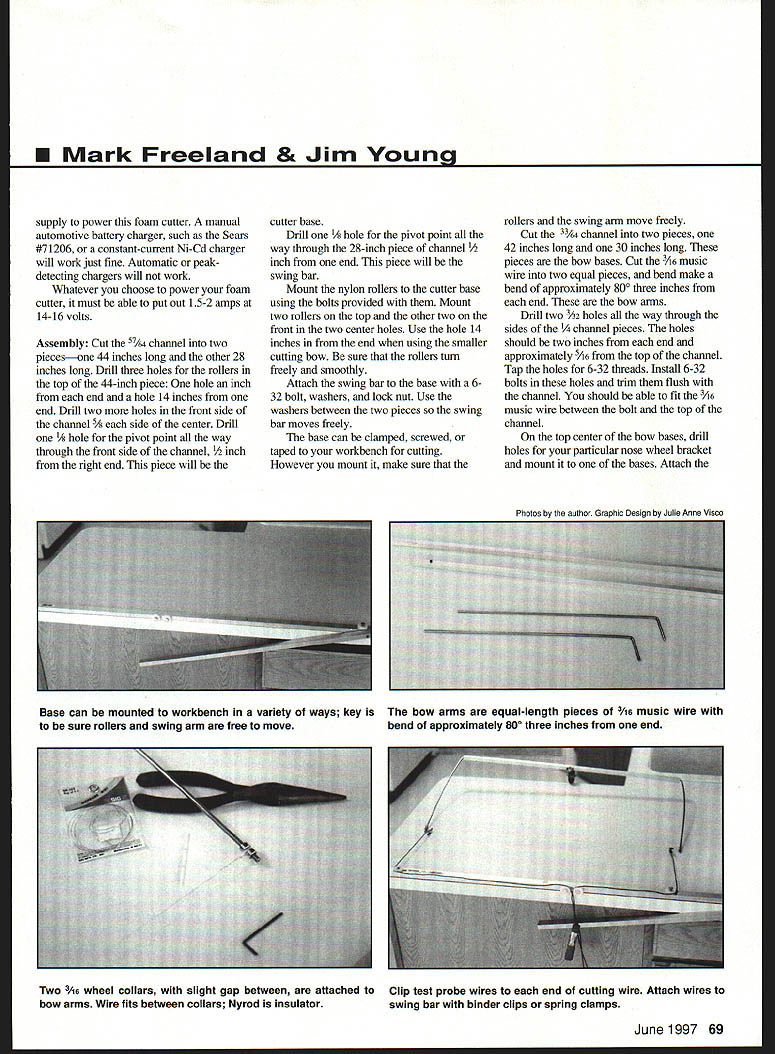
- The base can be clamped, screwed, or taped to your workbench for cutting. However you mount it, make sure that the rollers and the swing arm move freely.
- Build the bows:
- Cut the 3/16" channel into two pieces: one 42" long and one 30" long (these are the bow bases).
- Cut the 3/16" music wire into two equal pieces and bend to make a bend of approximately 80° about 3" from one end. These are the bow arms.
- Drill two 3/8" holes all the way through the sides of each 1/4" channel piece. The holes should be 2" from each end and approximately 3/16" from the top of the channel. Tap the holes for 6-32 threads.
- Install 6-32 bolts in these holes and trim them flush with the channel. You should be able to fit the 3/16" music wire between the bolt and the top of the channel.
- Install the nose wheel and landing gear:
- On the top center of one bow base, drill holes to suit your particular nose-wheel bracket and mount the bracket to that base.
- Attach the landing gear wire and bend it back to allow the wheel to caster. Secure the wheel with appropriate wheel collars.
- The wheel must have a round profile to allow the bow to rock from side to side as the wire follows the templates when cutting. A flat-treaded wheel can be made round by dressing it on a disk or belt sander.
- Assemble bow arms and cutting wire:
- Insert the short ends of the bow arms into each end of one bow base. They are inserted under the bolts and held in place by wire tension. The bow arms, nose wheel, and wire can be transferred between the two bases to cut different-length wings.
- Secure two 3/16" wheel collars to the ends of each bow arm, leaving a small gap between them.
- Attach the nichrome cutting wire to the bow arms between the wheel collars, winding it back on itself several times.
- On one side, slip a small piece of inner Nyrod over the wire to act as an insulator between the wire and bow arm.
- Keep the wire as smooth as possible and avoid kinks — kinks will affect how smoothly the foam is cut. The wire should have enough tension to pull the bow arms in so that they are square to the bow base.
- Prepare the test/probe wires:
- Cut the test-probe wire into two 10-foot pieces and solder an alligator clip to one end of each wire.
- To the other ends attach a clip or plug that can be used to connect the wire to your battery charger or power supply.
Bill of Materials
- 1 — 57/64" x 9/16" x 1/16" x 72" aluminum channel
- 1 — 33/64" x 1/2" x 1/16" x 72" aluminum channel
- 4 — 1" nylon screen-door replacement rollers (bushed type works best)
- 1 — 1" inner Nyrod
- 1 — 3/16" x 36" music wire
- 4 — 3/16" wheel collars
- 3 — 6-32 x 1/2" bolts
- 2 — #6 washers
- 1 — 6-32 locknut
- 1 — .40-size nose wheel mount, landing gear, and associated hardware
- 1 — 2–3" wheel
- 1 — 5' length Sig nichrome wire
- 2 — binder clips or spring clamps
- 2 — alligator clips
- 1 — 20' 20 AWG test-probe wire (Radio Shack 278-563A)
- 1 — 12 V, 2 A battery charger or other suitable power supply
Cutting Foam Wing Panels
- Prepare templates:
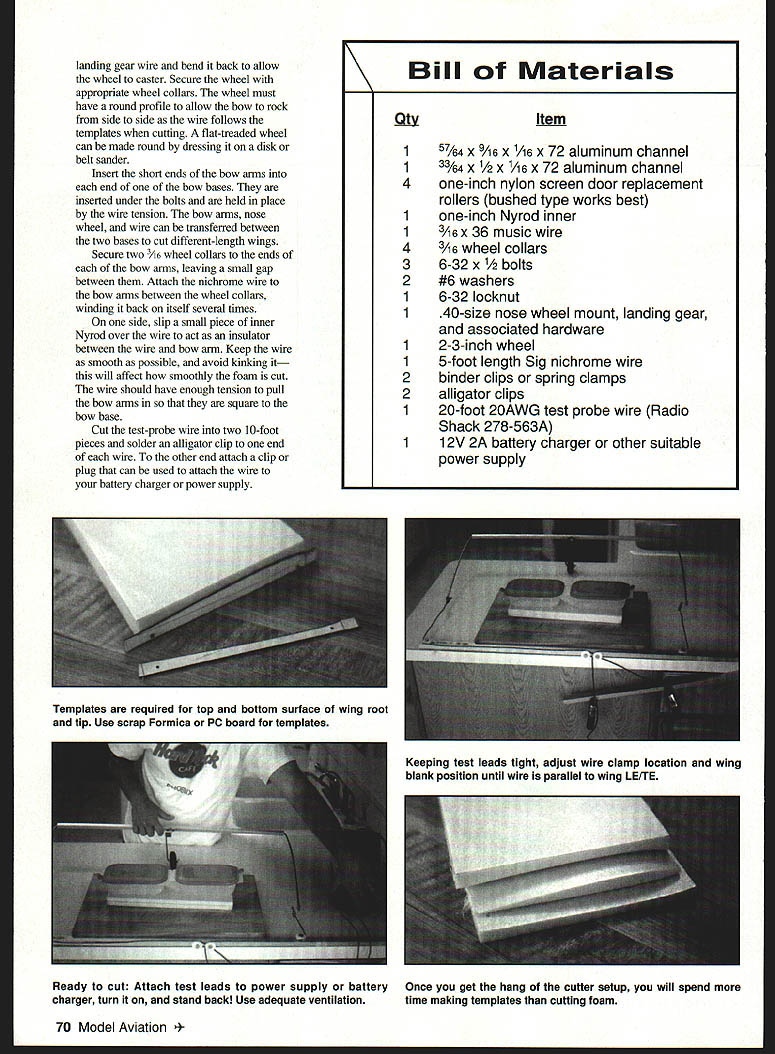
- Make wing templates for the top and bottom surface of the wing root and tip. Scrap Formica or printed-circuit board are good template materials.
- The top ("male") template should be the final wing profile. The bottom ("female") template should allow for the thickness of the cutting wire.
- The templates should account for leading and trailing edges and the thickness of the wing sheeting.
- Include at least a 1/2" flat lead-in and lead-out area on the templates to support the cutting wire in front of and behind the foam blank.
- Drill two holes in each template pair and use pop rivets or nails to hold the templates to the foam. The holes in the template pairs should line up so the same holes in the foam can be used for both templates.
- Prepare foam blanks:
- Cut the foam to the desired outline of the wing panel.
- Use only blue extruded foam or white beaded foam. Do not use urethane, polyester, or PVC foams — the fumes are toxic.
- Setup and cutting:
- Position a foam blank behind the cutter base with the wing leading edge pointing away from the base. For thin wing sections, it may be necessary to put a board under the blank to keep the tips of the bow arms from dragging on the workbench.
- Attach the bottom templates to the ends of the foam with the leading edge of the templates lined up with the front of the blank.
- Place the bow behind the foam blank with the cutting wire on the leading edge. Attach the test-probe wires to the cutting wire.
- Route the test-probe wires around and over the rollers. With the end of the swing bar approximately 5" below the front edge of the templates, plug the other ends of the test-probe wires into the battery charger or power supply.
- Turn the charger on and let the wire warm for a few seconds.
- Use a slow, steady forward motion to pull the cutter through the foam. Do not force the cutter; let the heated wire do the work. If the wire begins to glow orange, reduce the voltage immediately. If the cut is rough, try slowing the feed rate or increasing the voltage slightly until a smooth cut is achieved.
- At the base, clip the wires to the swing bar with binder clips or spring clamps.
Notes on wire/clamp placement:
- When cutting constant-chord wings, the two test wires are clamped together on the swing bar.
- When cutting tapered wings, the test-probe wire connected to the wingtip end of the cutting wire must be moved up the swing bar toward the pivot point. This compensates for the different distances the wire must travel at each end of the wing.
- Keeping the test leads tight, adjust the wire clamp location and the wing blank position until the cutting wire is parallel to the leading edge at the start of cutting and parallel to the trailing edge at the end of cutting. This may require several iterations.
- Final steps:
- With the bow behind the wing blank, adjust the nose wheel on the bow until it is perpendicular to the cutting wire.
- Place the cutting wire on the wing templates and line up the wire with the leading edge of the blank.
- Attach the test leads to the battery charger or power supply, turn it on, and stand back. It may take a few seconds for the wire to heat up and start cutting.
- The weight of the swing bar and clamps will pull the wire evenly through the foam as it cuts.
- Avoid breathing the foam fumes and be sure the work area is well ventilated.
- When the cutting wire comes through the trailing edge, catch the bow by the base (not the wire) and turn off the power supply. Without moving the wing blank, remove the bottom templates, attach the top templates, and repeat.
Once you get the hang of setting up your cutter, you will spend more time making templates than cutting foam. The nice thing is that you only have to make four templates to cut a foam wing, as opposed to ten or more ribs per side in a conventional built-up wing.
Foam-Cutting Tips
- Blue extruded foam is stronger and cuts better than white beaded foam.
- You can regulate the temperature of the cutting wire by the placement of the alligator clips. Moving the clips closer together gives a hotter wire; moving them farther apart gives a cooler wire.
- If the wire is too hot, it will drag in the middle of the foam, resulting in a concave surface when viewed from the front. The wire should cut at a slow, even pace of about 5" per minute.
- Sheet Styrofoam has internal and surface stresses (especially blue extruded foam). The top and bottom 3/8" of the wing blanks should be cut off to help prevent warping. It may be helpful to make several templates for trimming foam blanks.
- You can use the cutting bow to trim wing blanks to size: mark the outline of the top of the foam, hang the portion to be cut off over the edge of your workbench, hang the bow on the foam by the cutting wire and align it on the marks. Make sure the test lead wires hang straight down or the bow will twist as it cuts. Turn on the power supply and let gravity do the rest.
- To cut washout into a wing, use a drill-bit shank to elevate the tip-template trailing edge a set amount. This is easier than designing the washout into the template.
Mark Freeland & Jim Young 7563 Wellington Brighton, MI 48116
Transcribed from original scans by AI. Minor OCR errors may remain.

