
Make Lightweight Foam Wheels
— Roger Carignan
When I was building a kit of the Little Tiny — a 24-inch-wingspan electric indoor/outdoor radio-control model — one objective was to achieve as low an airframe weight as I could to compensate for the heavier servos and receiver I used compared with those specified in the plans. One of several weight-saving methods I used was to replace the kit-supplied wheels with homemade foam wheels.
The 1-1/2-inch-diameter wheels supplied with the kit were nicely made from laminated 1/32-inch balsa with a plastic hub and an O-ring tire approximately 0.080 inch wide; these weighed 840 milligrams (mg) each.
My first set of homemade wheels was purely functional, with a flat tread and no paint or other embellishments. These were 1-3/8 inches in diameter, 3/8 inch wide, and weighed 280 mg each. By rounding the tread to look more like an aircraft tire, the weight of each wheel dropped to 260 mg — less than one-third of the kit-wheel weight.
The homemade wheels work well on most indoor and lightweight outdoor models and look better than the thin balsa-disk or plastic "spider" type wheels. Because of the foam material they will not tolerate rough surfaces (for example, flying off gravel), although a coat of diluted aliphatic resin glue on the tread provides better endurance on such surfaces. These wheels give satisfactory service on smooth floors, paved surfaces, or mowed grass (for larger sizes).
I used pink insulation foam for all the work in this article; most other foams with similar compressive strength should work. Using common tools and simple homemade fixtures, wheels can be made to any required size. The following is a step-by-step procedure for making the required tools and fabricating the wheels.
Fabrication steps
- Make the wheel-cutting fixture from 1/4-inch plywood as shown in the drawing. Ensure the 1/16-inch music-wire pin in the movable corner piece is perpendicular to the surface. This pin should match the outer diameter of the hub bearing to be used in the wheels. To make wheels with larger-diameter hub bearings, make a bushing from brass tubing to the larger size required and place it over the fixture pin.
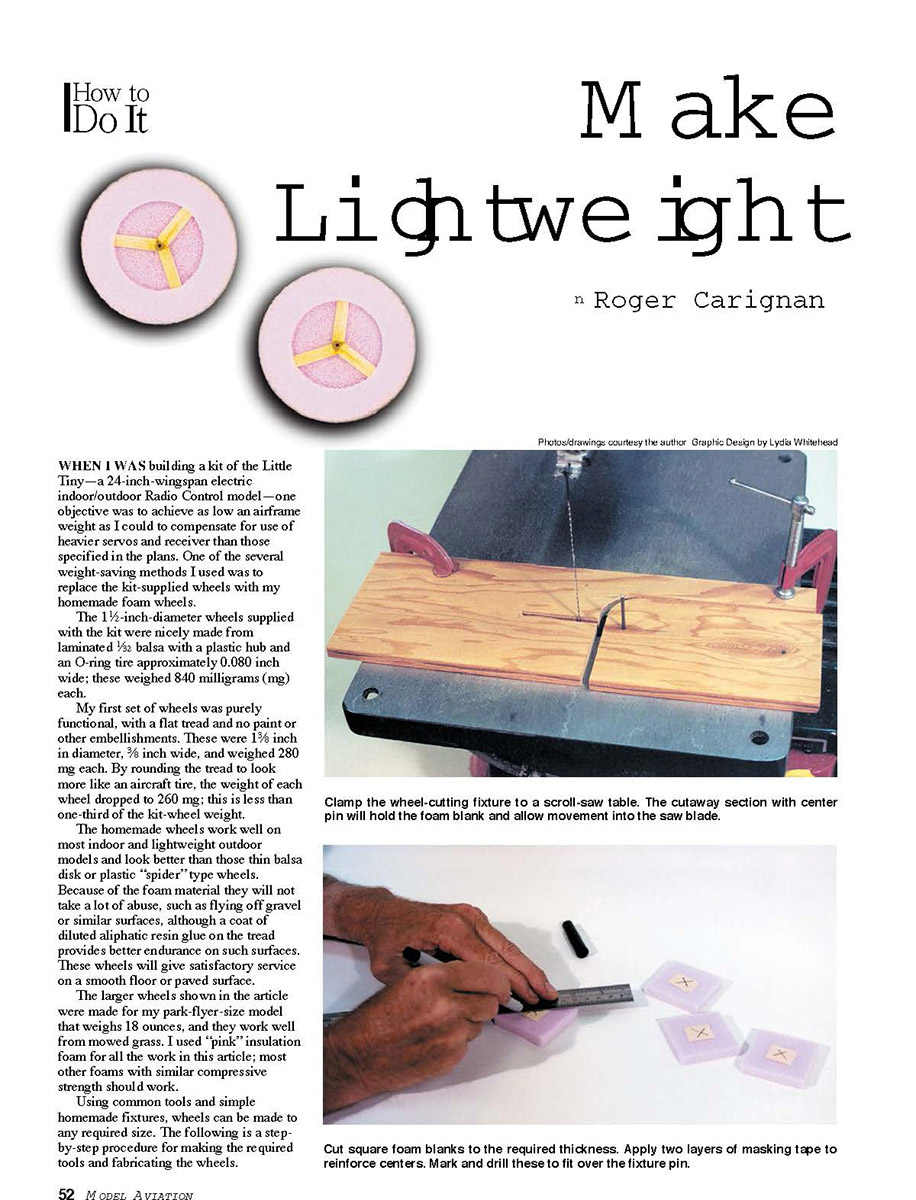
- Attach the fixture to a scroll-saw table with C-clamps as shown in the photos. Adjust to provide the required wheel diameter by positioning the pin relative to the saw blade. A similar setup could be made using a homemade hot-wire foam cutter.
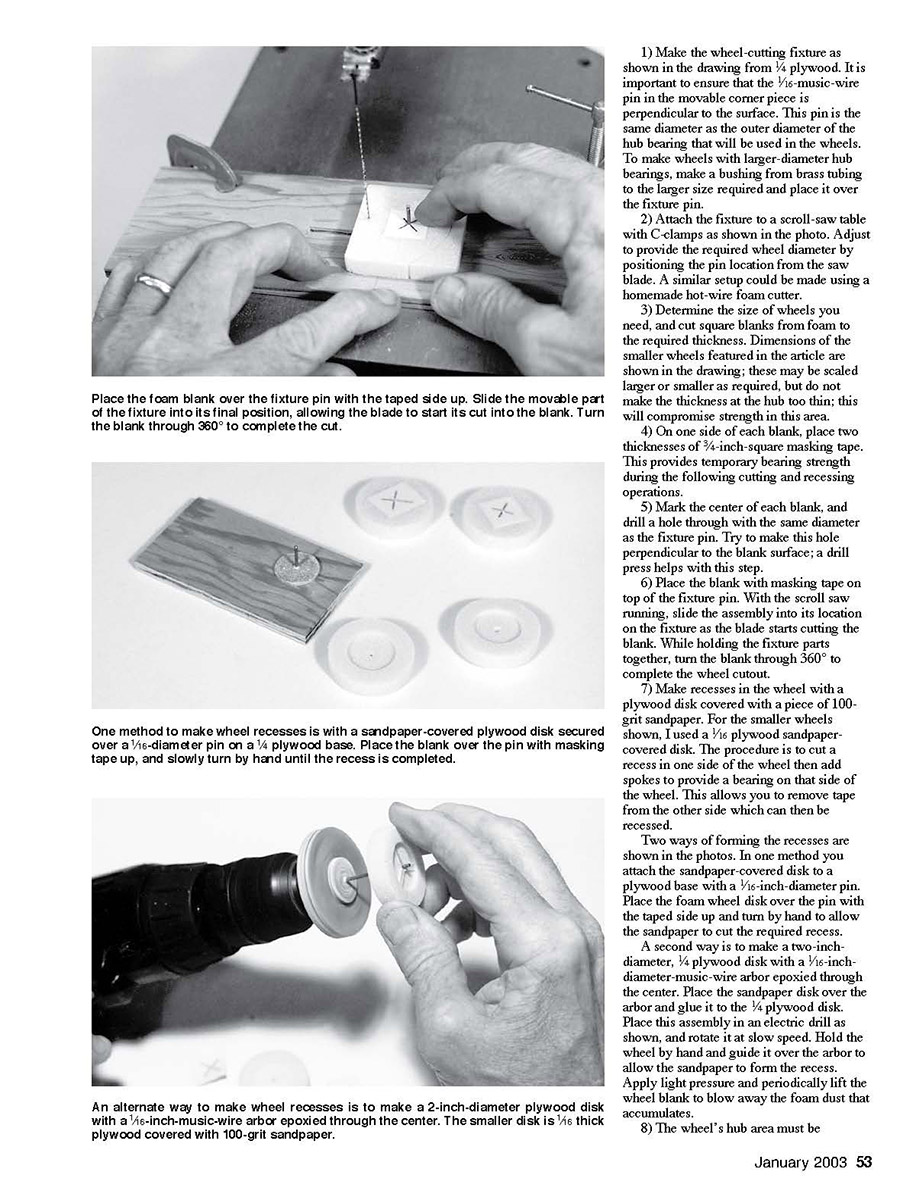
- Determine the wheel size you need, and cut square blanks from foam to the required thickness. Dimensions of the smaller wheels are shown in the drawing; these may be scaled larger or smaller as required. Do not make the thickness at the hub too thin, as this will compromise strength.
- On one side of each blank, place two thicknesses of 3/4-inch-square masking tape. This provides temporary bearing strength during the following cutting and recessing operations.
- Mark the center of each blank, and drill a hole through the center the same diameter as the fixture pin. Try to make this hole perpendicular to the blank surface; a drill press helps with this step.
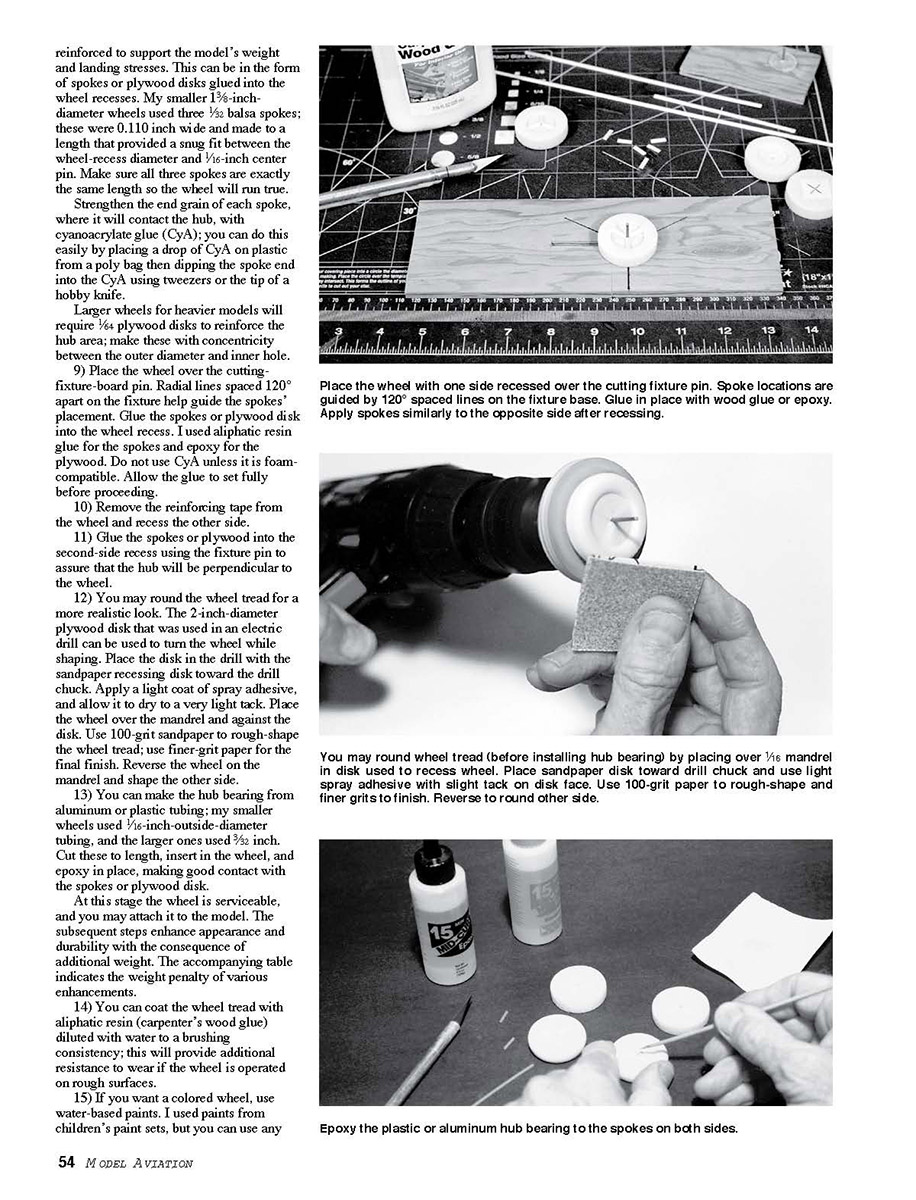
- Place the blank (taped side up) on the fixture pin. With the scroll saw running, slide the assembly into the fixture as the blade starts cutting the blank. While holding the fixture parts together, turn the blank through 360° to complete the wheel cutout.
- Make recesses in the wheel using a plywood disk covered with 100-grit sandpaper. For the smaller wheels I used a 1/2-inch-thick plywood sandpaper-covered disk. The procedure is to cut a recess in one side of the wheel, then add spokes or a plywood disk to provide a bearing on that side. This allows you to remove the tape from the other side, which can then be recessed.
Two ways of forming the recesses:
- Attach the sandpaper-covered disk to a plywood base with a 1/16-inch-diameter pin. Place the foam wheel disk over the pin with the taped side up and turn by hand to allow the sandpaper to cut the required recess.
- Make a 2-inch-diameter, 1/4-inch plywood disk with a 1/16-inch-diameter music-wire arbor epoxied through the center. Place the sandpaper disk over the arbor and glue it to the 1/4-inch disk. Place this assembly in an electric drill and rotate at slow speed. Hold the wheel by hand and guide it over the arbor to allow the sandpaper to form the recess. Apply light pressure and periodically lift the wheel blank to blow away foam dust.
- The wheel's hub area must be reinforced to support the model's weight and landing stresses. Reinforcement can be spokes or plywood disks glued into the wheel recesses. My smaller 1-3/8-inch-diameter wheels used three 1/32-inch balsa spokes; these were 0.110 inch wide and made to a length providing a snug fit between the wheel-recess diameter and the 1/16-inch center pin. Make sure all three spokes are exactly the same length so the wheel will run true.
Strengthen the end grain of each spoke, where it will contact the hub, with cyanoacrylate glue (CyA). Do this by placing a drop of CyA on plastic from a poly bag, then dipping the spoke end into the CyA using tweezers or the tip of a hobby knife.
Larger wheels for heavier models will require 1/64-inch plywood disks to reinforce the hub area; make these concentric between outer diameter and inner hole.
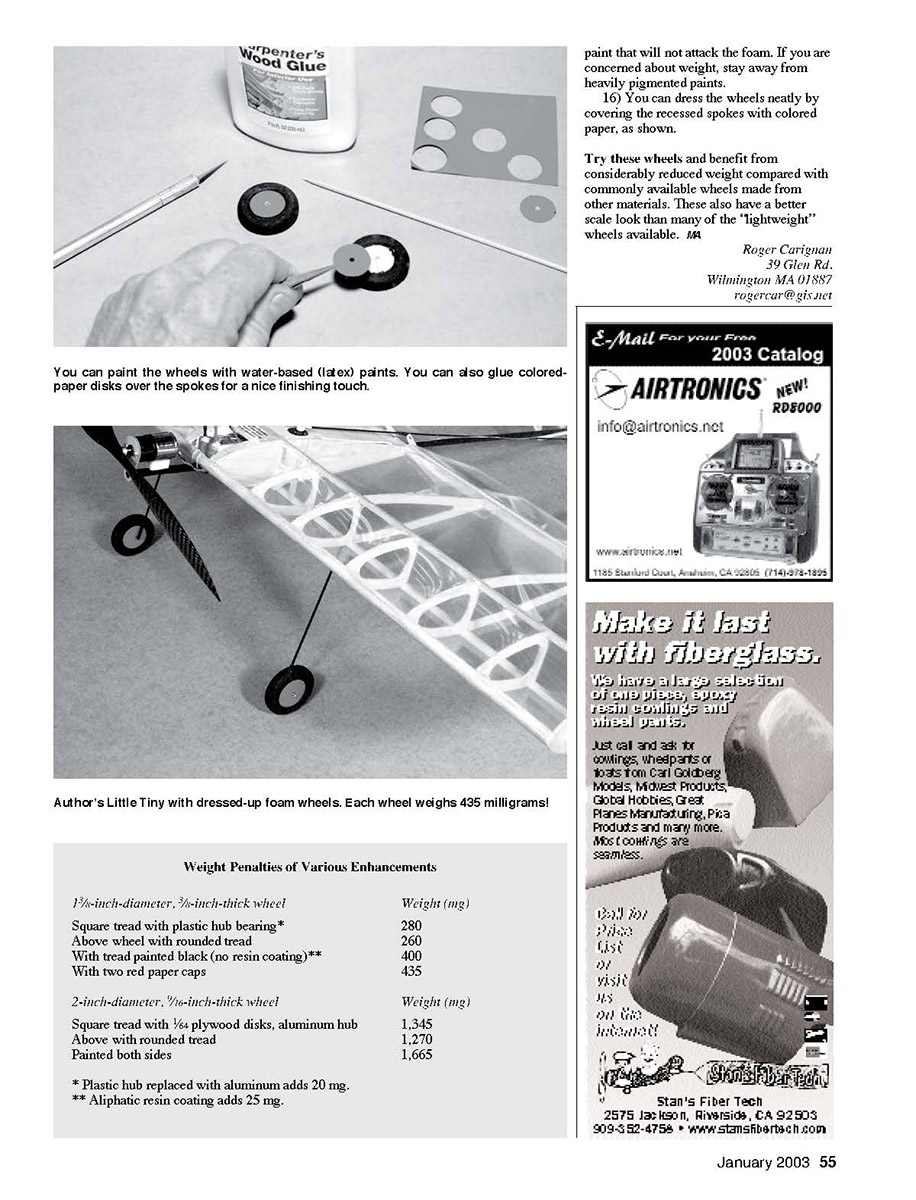
- Place the wheel over the cutting-fixture-board pin. Radial lines spaced 120° apart on the fixture help guide the spokes' placement. Glue the spokes or plywood disk into the wheel recess. I used aliphatic resin glue for the balsa spokes and epoxy for the plywood disks. Do not use CyA unless it is foam-compatible. Allow the glue to set fully before proceeding.
- Remove the reinforcing tape from the wheel and recess the other side (repeat the recessing method described in step 7).
- Glue the spokes or plywood into the second-side recess using the fixture pin to ensure the hub will be perpendicular to the wheel.
- You may round the wheel tread for a more realistic look. The 2-inch-diameter plywood disk used in an electric drill can serve as a mandrel. Place the disk in the drill with the sandpaper recessing disk toward the drill chuck. Apply a light coat of spray adhesive and allow it to dry to a very light tack. Place the wheel over the mandrel and against the disk. Use 100-grit sandpaper to rough-shape the wheel tread; use finer-grit paper for the final finish. Reverse the wheel on the mandrel and shape the other side.
- Make the hub bearing from aluminum or plastic tubing; my smaller wheels used 1/16-inch outside-diameter tubing, and the larger ones used 3/32 inch. Cut these to length, insert in the wheel, and epoxy in place, making good contact with the spokes or plywood disk.
At this stage the wheel is serviceable and may be attached to the model. The subsequent steps enhance appearance and durability but add weight. The table below indicates the weight penalty of various enhancements.
- You can coat the wheel tread with aliphatic resin (carpenter's wood glue) diluted with water to brushing consistency; this will provide additional resistance to wear on rough surfaces.
- If you want a colored wheel, use water-based paints. I used paints from children's paint sets, but any water-based paint will work.
- Finish the wheels neatly by covering the recessed spokes with colored paper, as shown.
Try these wheels and benefit from considerably reduced weight compared with commonly available wheels made from other materials. They also have a better scale look than many of the "lightweight" wheels available.
Roger Carignan 39 Glen Rd. Wilmington, MA 01887 rogercar@gis.net
Weight Penalties of Various Enhancements
1-3/8-inch-diameter, 3/8-inch-thick wheel
- Square tread with plastic hub bearing* ...... 280 mg
- Above wheel with rounded tread .............. 260 mg
- With tread painted black (no resin coating)** . 400 mg
- With two red paper caps ........................ 435 mg
2-inch-diameter, 7/16-inch-thick wheel
- Square tread with 1/4-inch plywood disks, aluminum hub . 1,345 mg
- Above with rounded tread ..................................... 1,270 mg
- Painted both sides ............................................... 1,665 mg
* Plastic hub replaced with aluminum adds 20 mg. ** Aliphatic resin coating adds 25 mg.
Transcribed from original scans by AI. Minor OCR errors may remain.

