

Make Your Own RC Channel Flags
George M. Myers
I find it hard to believe that modelers could be serious when they tell me they don't want to use the new RC channels until they can get flags for them, but that's what I hear from time to time. This article describes a simple, reliable way to make serviceable frequency flags for RC transmitters. I have made dozens of these and the technique below yields the best results with minimal effort.
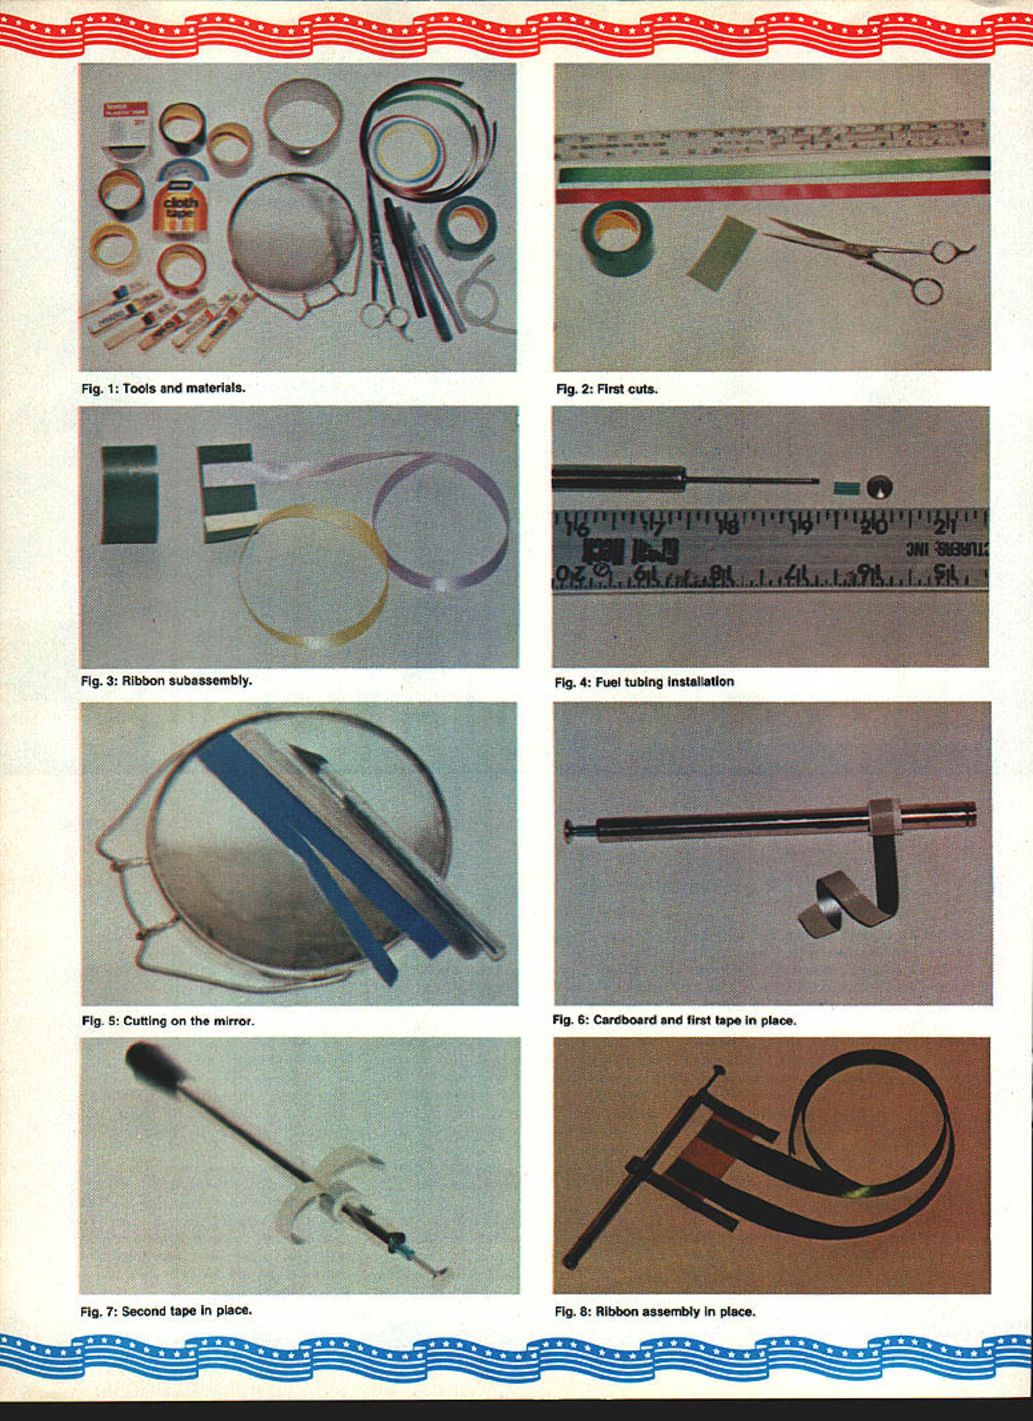
Materials
- Mystic Plastic Tape #191 (1-1/4-in. wide) in black, white, and any other colors you need. Available colors include red, white, blue, green, brown, black, yellow, gold, gray, and turquoise.
- Mystic Cloth Tape #M-169 (or ordinary aluminized duct tape).
- Double-sided adhesive tape (adhesive on both sides), typically sold as carpet tape (about 1/4-in. wide).
- Ribbons (satin finish on at least one side, with binding stitch along the edges). 1/2-in. or 1-in. widths are acceptable; color accuracy is important.
- Short length of blue silicone fuel tubing or medium-diameter vinyl tubing (avoid natural rubber tubing).
Tools
- Sharp X-Acto knife
- Ruler
- Scissors
- Small glass mirror (about 5 in.) — useful as a cutting surface
- Flair nylon-tip pen (or similar washable ink pen)
- Cardboard scrap (about 3/4 x 3 in.)
- Clothespins (optional — see Notes)
Procedure
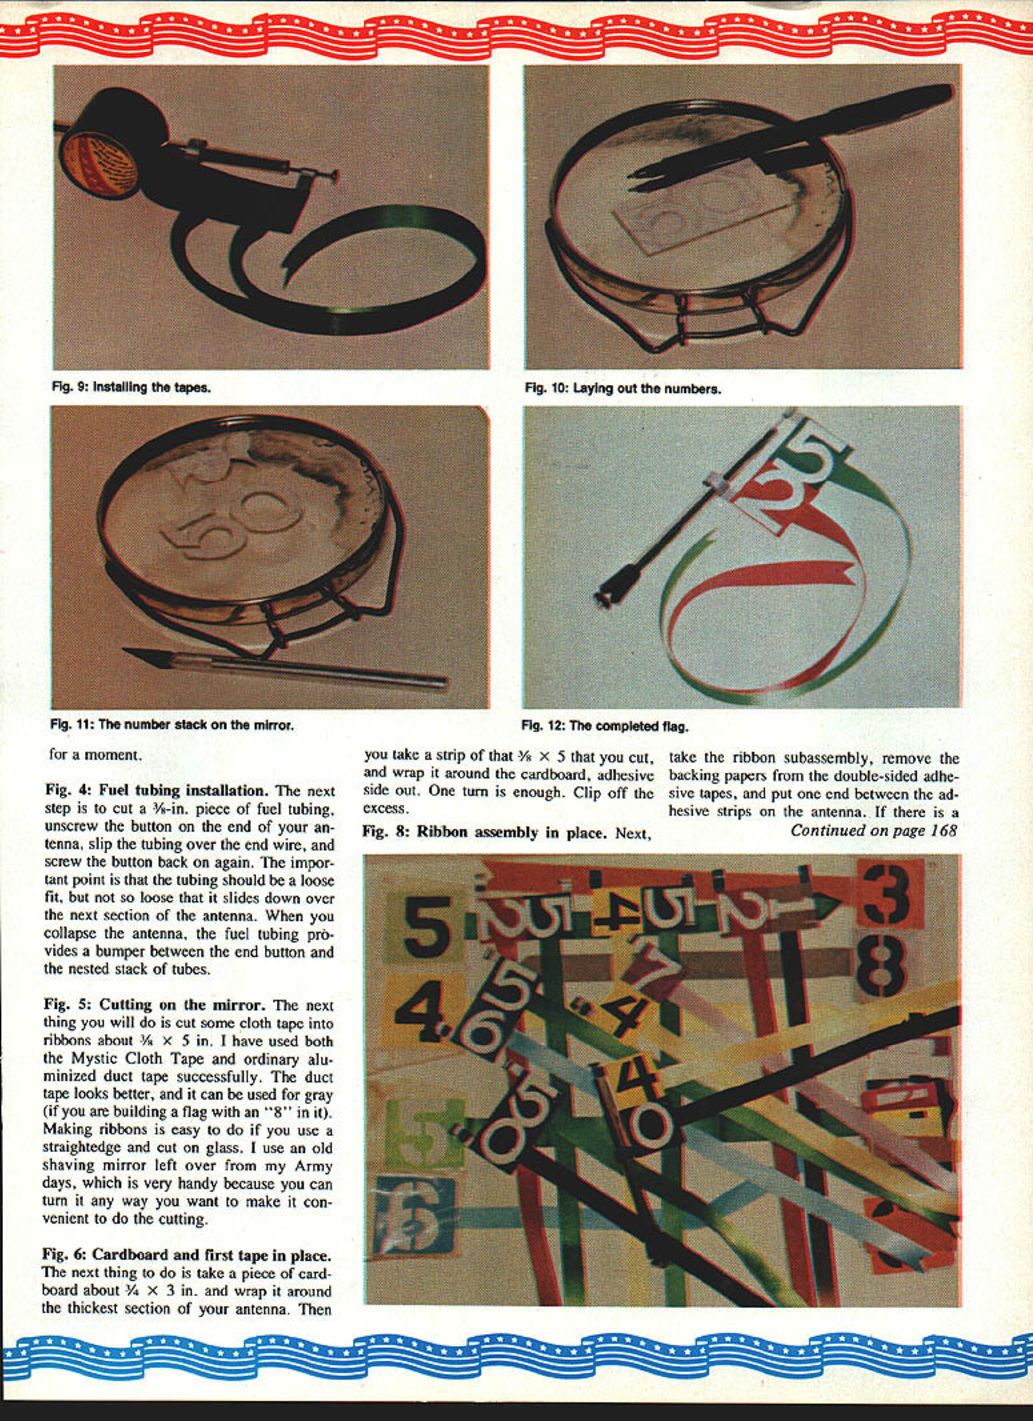
1. Make the ribbon subassembly
- Cut two pieces of double-sided adhesive tape about 3 in. long.
- Cut two pieces of ribbon about 16 in. long.
- Press the ribbons onto one piece of double-sided tape, placing them about 1/2 in. from each end, without removing the backing paper.
- Place the other piece of double-sided tape over the ribbons so the ribbons are sandwiched between the tapes. The subassembly should still have backing paper on both sides. Set it aside.
2. Install the antenna bumper
- Cut a 3/8-in. length of fuel tubing.
- Unscrew the button-end antenna tip, slip the tubing over the end wire, and screw the button back on.
- Important: the tubing should be a loose fit so it will slide down when the antenna collapses. The tubing acts as a bumper between the antenna button and the nested tubes.
3. Prepare the antenna support tape
- Cut cloth-tape ribbons about 3/4 in. wide. I use a straightedge and cut on a glass mirror for a clean edge.
- Take a strip of cardboard about 3/4 x 3 in. and wrap it around the thickest section of the antenna.
- Cut a strip of cloth tape about 3/4 x 5 in. and wrap it around the cardboard, adhesive side out. One turn is enough; clip off the excess.
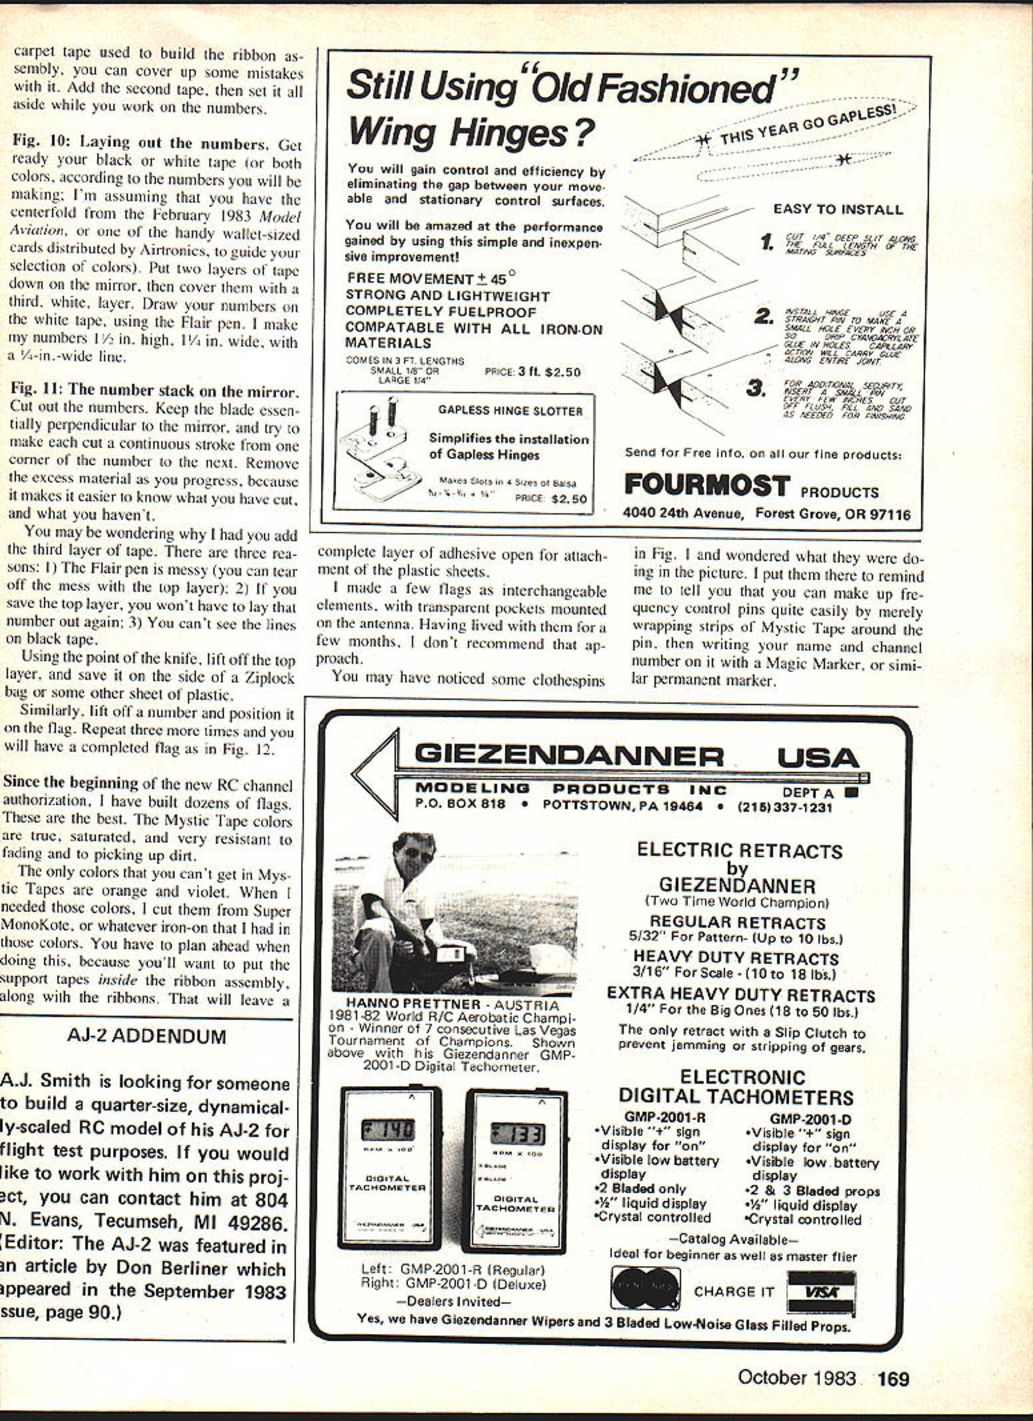
4. Attach the ribbon assembly to the antenna
- Remove the backing papers from the double-sided adhesive tapes on the ribbon subassembly.
- Put one end of the ribbon assembly between the adhesive strips on the antenna (on the tape you wrapped around the cardboard). Critical point: be absolutely sure you have the correct ribbon color on the bottom before final placement.
- Slip the cardboard tube out, stretch the holding tape flat, and hold the edge of the ribbon assembly parallel to the antenna.
- Install the top support tape around the piece of fuel tubing and out around the ribbon assembly, joining the tapes gum-to-gum. Do this carefully; there is little chance to correct mistakes once the adhesive is joined.
- If you used carpet tape to build the ribbon assembly, you may be able to cover some small mistakes with an additional strip. Add a second support strip if desired, then set the assembly aside while you make the numbers.
Making the numbers
Layout and cutting
- Prepare black or white tape for the numbers, choosing contrast appropriate to the flag colors.
- On the mirror, lay down two layers of tape (adhesive side down), then cover them with a third, white, top layer.
- Draw your numbers on the top (white) layer with the Flair pen. I make my numbers 1/2 in. high, with strokes about 1/4 in. wide.
- Cut out the numbers with the X-Acto knife. Keep the blade essentially perpendicular to the mirror and try to make each cut a continuous stroke from corner to corner. Remove excess material as you progress so you can see what remains to be cut.
- Reasons for the third (top) layer:
- The Flair pen can be messy — the top layer protects the underlying layers.
- If you save the top layer, you won't have to lay out that number again.
- Lines drawn on black tape are hard to see without a light-colored top layer.
Applying the numbers
- Using the point of the knife, lift off the top layer and save it on a Ziplock bag or other plastic sheet.
- Lift a cut number and position it on the flag. Repeat three more times to complete the flag (typically four numbers per flag, depending on design).
Notes and tips
- Mystic Tape colors are true, saturated, and resist fading and soiling — they make attractive, durable flags.
- Mystic Tape does not come in orange or violet. For those colors, cut them from Super MonoKote or other iron-on plastics. When using plastic sheets, plan ahead: put the support tapes inside the ribbon assembly along with the ribbons so there is an adhesive layer open for attaching the plastic.
- I experimented with interchangeable flags mounted in transparent pockets on the antenna and do not recommend that approach after using it for a few months.
- Clothespins make handy frequency-control pins: wrap strips of Mystic Tape around the pin and write your name and channel number on it with a permanent marker.
Figures
- Fig. 1: Tools and materials.
- Fig. 2: First cuts.
- Fig. 3: Ribbon subassembly.
- Fig. 4: Fuel tubing installation.
- Fig. 5: Cutting on the mirror.
- Fig. 6: Cardboard and first tape in place.
- Fig. 7: Second tape in place.
- Fig. 8: Ribbon assembly in place.
- Fig. 10: Laying out the numbers.
- Fig. 11: The number stack on the mirror.
- Fig. 12: Completed flag.
Transcribed from original scans by AI. Minor OCR errors may remain.

