

Making Composite Gear Doors
Windy Urtnowski
Of all the parts of our models that take a beating, the landing gear doors rank right up near the top. This is especially true if you fly from grass runways or Control Line circles.
I have tried many ways to make these parts more bulletproof. Making the gear doors from plywood (instead of balsa) helped. A few layers of lightweight cloth helped even more, but I still wanted a better solution to this problem.
Since I fly from grass most of the time, I was constantly repairing cracks and chipped paint on these delicate parts. Once a crack developed, oil soaked in and each successive repair was more difficult. Most of my models are near-scale types, so using bare wires wasn't the solution I was looking for either.
During the construction of my Spitfire (February 1998 MA), I decided to try molding the gear doors to see if this would end my constant repairing of their wooden counterparts. It worked so well and was so easy to do that I don't think I'll ever do it any other way (until something even better comes along). In two years of competition, I haven't even had to touch up the paint!
Prepare the gear and plugs
- Bend the gear wires.
- With the model upside-down, use a four-foot straightedge to true-up the tracking and vertical angles. Doing this now is much easier than correcting problems later.
- Temporarily install the wheels and wires and do a test roll. Be sure the gear aren't too far forward or back, and that prop clearance is adequate. Now is the time to check these items—not after molding is completed.
- Make the leg of the wire that goes into the wing as long as possible to prevent rotation. On models with thick airfoils this is easier; on models with thin airfoils, bending the wire along the rib centerline may provide more strength. Make that part of the wire at least 40% of the leg length.
- Wing-mounted gear are always vulnerable, so proper engineering of the wire and attachment into the wing structure will help prevent unnecessary repairs down the road. (What good are bulletproof doors if the gear breaks in the wing?)
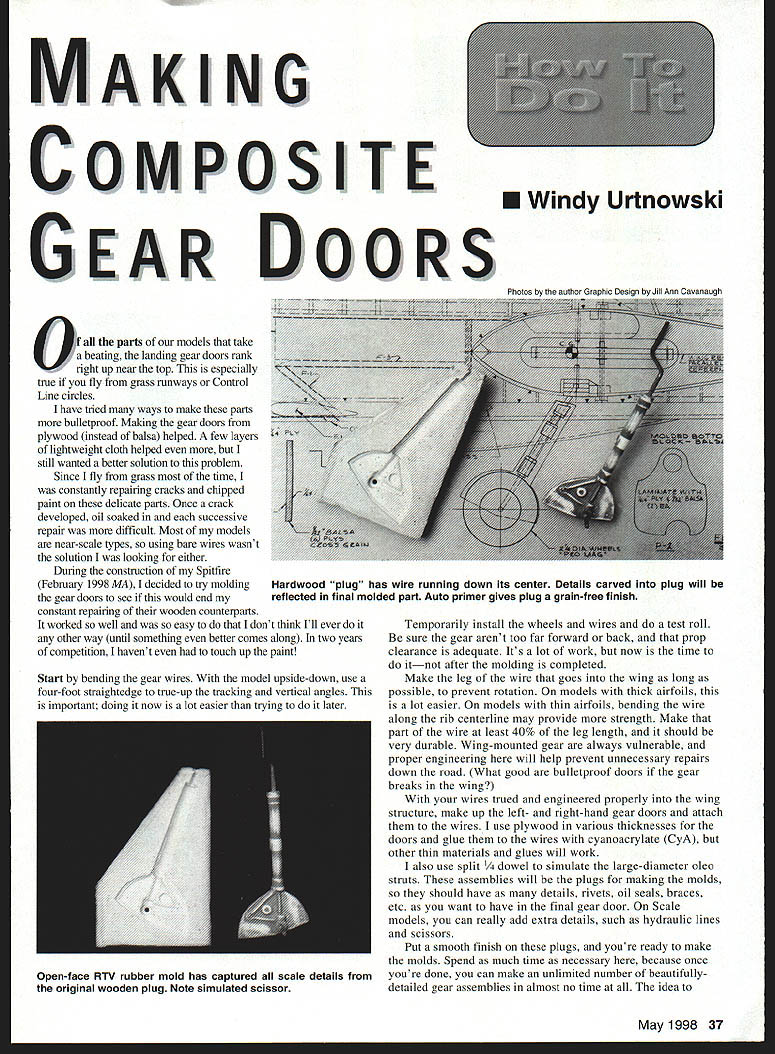
With your wires trued and engineered properly into the wing structure, make up the left- and right-hand gear door plugs and attach them to the wires. I use plywood in various thicknesses for the doors and glue them to the wires with cyanoacrylate (CyA), but other thin materials and glues will work.
I also use split 1/4" dowel to simulate the large-diameter oleo struts. These assemblies will be the plugs for making the molds, so they should include as many details—rivets, oil seals, braces, etc.—as you want in the final gear door. On scale models, you can add extra details, such as hydraulic lines and scissors.
Put a smooth finish on these plugs and spend as much time as necessary here; a well-finished plug produces the best parts. Once you're done, you can make an unlimited number of beautifully detailed gear assemblies in very little time.
Make the mold (soft molds using Dow-Corning RTV III)
I have experimented with molding materials over the years; in my opinion Dow-Corning RTV III is by far the best material to use to make molds. Parts always release, and you need no mold-release agents whatsoever.
I call molds made from this material "soft molds," as opposed to polyester or epoxy "hard molds" which require draft angles and mold-release agents. Using this material guarantees success for the newcomer—it really is easier than it looks.
Steps:
- Make a small balsa box without a top. Be sure to have at least 1/4" clearance around all edges.
- Insert the wire through the box bottom and secure the gear door plug in place, even with the top of the box. This assembly is now ready for the molding rubber.
- Mix the hardener and rubber per the directions. Mix slowly or you'll get air bubbles. Mix thoroughly—long after you think you have mixed well enough.
- Pour slowly to avoid air bubbles and fill the box until the top surface of the RTV III is level with the plug.
- Allow the mold to cure 24 hours, then gently remove the plug. The cavity should exactly match the gear door plug.
Tip: roughen the wire where it will pass through the resin with a file or a Dremel cutoff wheel so the resin will pass through and offer good mechanical adhesion.
Casting the doors
- You can use polyester resin for the actual casting, but I prefer West System #105 epoxy resin with #206 hardener.
- Make a paste by mixing some mixed resin with Cab-O-Sil and paint the mold with the paste using a flux brush or a stiff-bristle paintbrush.
- Fill the mold with the remaining epoxy. You can dye the epoxy any color you choose; I dyed mine the color of zinc oxide so that if paint wore away on the edges it would have a scaled, weathered look.
- If the mold or plug is imperfect, you can fix imperfections by sanding and repairing with a thick mix of Cab-O-Sil and resin.
- Usually parts can be painted without further work, using Sig dope that matches the model. I mix pigments into Sig Lite-Coat clear to get authentic scale colors. If you want to do this, use pigments from a body-shop supplier (automotive lacquer pigments only). Mix these pigments into thinner first, then into the Sig dope. This gives many more color choices, especially for scale paint schemes.
The key point is that you would have had to make detailed doors either way; by molding you can make additional sets in minutes and replace damaged parts far faster than re-detailing new wooden parts.
Storage, sharing, and results
Now you can pour spare sets of gear doors to keep or to share with other modelers building the same kit. For example, if two modelers are making identical P-51s, one can mold the cowl and the other the gear doors, and each can pour extra parts for their partner.
I have enjoyed molding many unique parts for my Spitfire and Seafire, but even more enjoyable are the friendships and exchanges of technology that have developed since I started using this medium of modeling. Ed Gallagher deserves a special thanks for all his help with this project.
I was extremely pleased when my fellow modelers voted my Spitfire winner of the 1996 Concours award at the 1996 Nats. The Seafire won the 1997 Concours award—one of only five models ever to be awarded a perfect score of 20 points—and I'm sure that the molded gear doors and other molded parts helped.
I am always happy to share any information I have with fellow modelers. If I can help, drop me a line. I also videotaped the making of these parts; you can get a copy of the tape for $15 + $3 S&H.
Windy Urtnowski 96 Elliot Pl. Rutherford, NJ 07070 (201) 896-8740
Sources
- Resin, E-Glass, Cab-O-Sil, Dow-Corning RTV III, tech help:
Florida Glue Products 4015 Georgia Ave. West Palm Beach, FL 33405 (407) 833-1863 (800) 771-1863
- Satin-weave cloth, resin, carbon fiber, tech help:
Aerospace Composites George Sparr 14210 Doolittle Dr. San Leandro, CA 94577 (510) 352-2022
- Resin; tech manual & catalog (free!):
West System / Gougeon Brothers Box 908 Bay City, MI 48707-0908 (517) 684-7286
- Great catalog, with tips and how-to videos:
Fiberglass 1944 Neva Dr. Dayton, OH 45414
- Info, tech help, and advice:
Experimental Aircraft Assn. Box 3086 Oshkosh, WI 54903-3086
Transcribed from original scans by AI. Minor OCR errors may remain.

