
Man Alone Foam Cutter
WOULD you believe that it is practical for one man alone to cut good foam cores consistently? It can easily be done with the M.A. (Man Alone) Cutter.
From time to time, techniques have been made known that permit one man to cut foam cores. Those techniques that involve fairly complicated, difficult-to-construct machinery do the job well and are applicable to most shapes and configurations. Until now, the simpler one-man techniques were limited to simple configurations, some producing poor-quality cut cores.
This new technique is simple to make, set up, and operate. It is applicable to all airfoils and wing configurations, including taper. The method described is a simplification of the author’s more complicated automatic equipment.
Designed by Bill Evans ALL COMMERCIAL RIGHTS RESERVED.
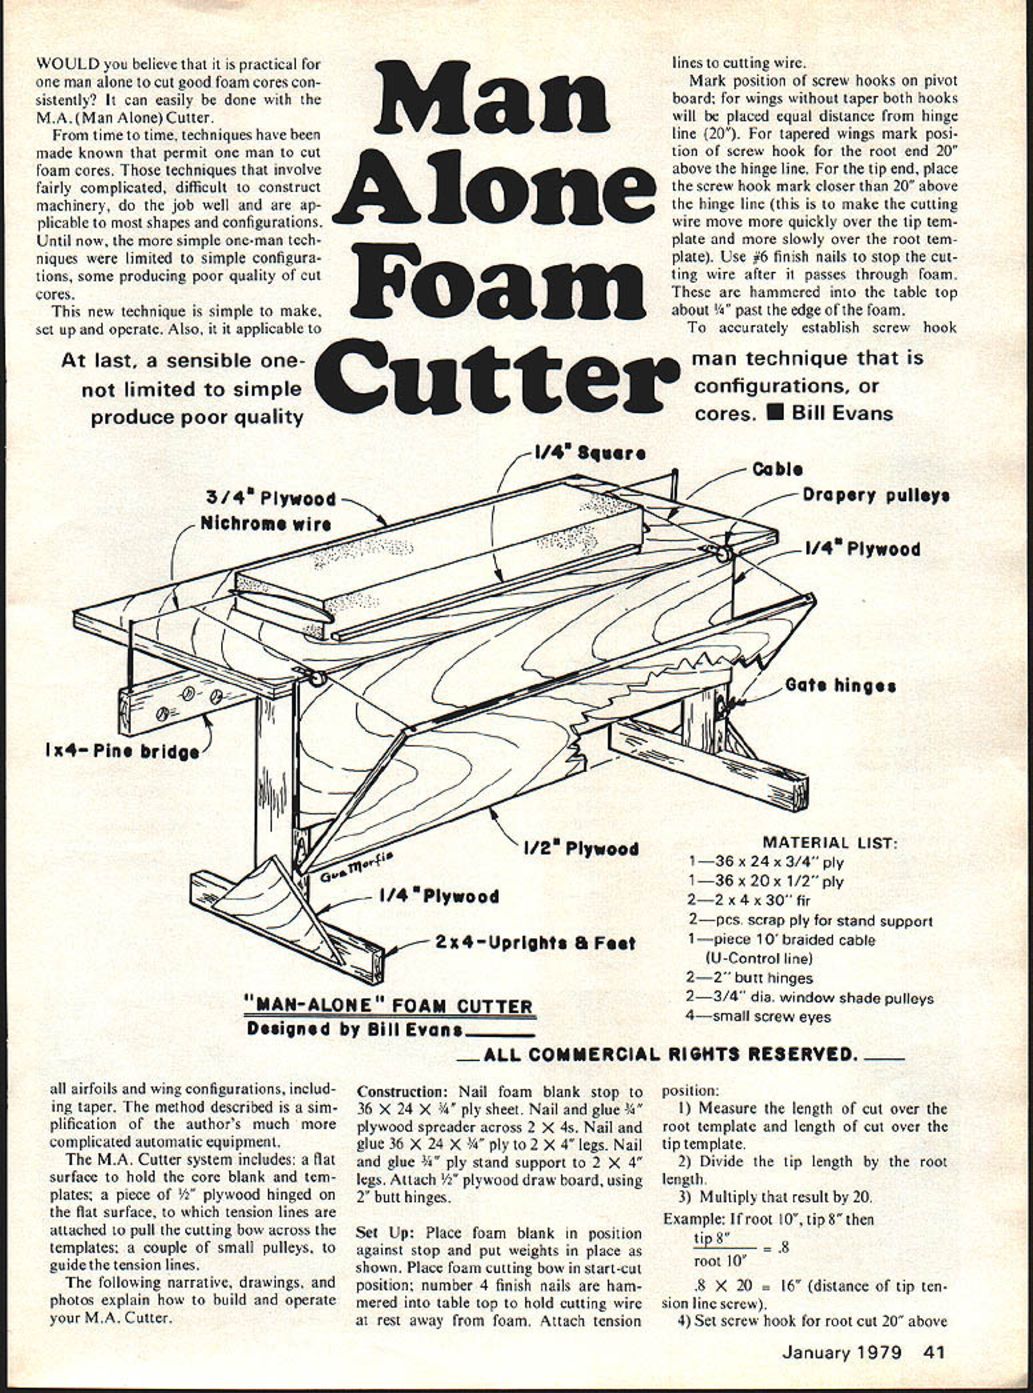
Material List
- 1 — 36 x 24 x 3/4" plywood (table top)
- 1 — 36 x 20 x 1/2" plywood (draw board)
- 2 — 2 x 4 x 30" fir (legs)
- 2 — pieces scrap plywood (stand support)
- 1 — piece 10' braided cable (U-Control line)
- 2 — 2" butt hinges
- 2 — 3/4" dia. window shade pulleys
- 4 — small screw eyes
- #4 finish nails (for holding templates and wire at rest)
- #6 finish nails (to stop the cutting wire after it passes through foam)
Construction
- Nail the foam blank stop to the 36 x 24 x 3/4" plywood sheet (table top).
- Nail and glue a 3/4" plywood spreader across the 2 x 4s.
- Nail and glue the 36 x 20 x 1/2" plywood draw board to the 2 x 4 legs.
- Nail and glue the scrap plywood stand supports to the 2 x 4 legs.
- Attach the 1/2" plywood draw board to the table top using the 2" butt hinges.
Set Up
- Place the foam blank in position against the stop and put weights in place on the trailing edge.
- Place the foam cutting bow in the start-cut position. Number 4 finish nails are hammered into the tabletop to hold the cutting wire at rest away from the foam.
- Attach the tension lines (braided cable) to the cutting wire and run them over the small pulleys to the screw eyes (screw hooks) on the pivot (draw) board.
- Use #6 finish nails as wire stops hammered into the tabletop about 1/4" past the edge of the foam to catch the wire after it exits the foam.
- For wings without taper, place both screw eyes the same distance from the hinge line (20"). For tapered wings, set the root screw eye 20" above the hinge line and place the tip screw eye closer than 20" so the wire moves more quickly over the tip template and more slowly over the root template.
Establishing screw eye position (accurate method)
- Measure the length of cut over the root template and the length of cut over the tip template.
- Divide the tip length by the root length.
- Multiply that result by 20.
- Example: If root = 10", tip = 8" then 8 ÷ 10 = 0.8; 0.8 × 20 = 16" (distance of tip tension line screw).
- Set the screw eye for the root cut 20" above the hinge line.
- Set the screw eye for the tip cut at the calculated distance (16" in the example).
- Attach the tension lines to their respective screw eyes.
- With the cutting bow in ready position and tension lines attached, let the pivot board pull the wire over the templates to check the setup. The wire should enter at the trailing edge and exit at the leading edge. If it does not:
- Change the length of the tension lines (to adjust the start point), or
- Adjust the distance of the screw eye from the hinge line. Increasing the screw eye distance from the hinge increases the speed/travel of the wire.
The technique of setting tension wire length and screw eye position is largely experimental; practice makes it easy to master. If you prefer, skip the formula and use trial-and-error by moving the screw eyes up or down until the correct travel is produced. Always run the wire over the templates before making the actual cut to save foam.
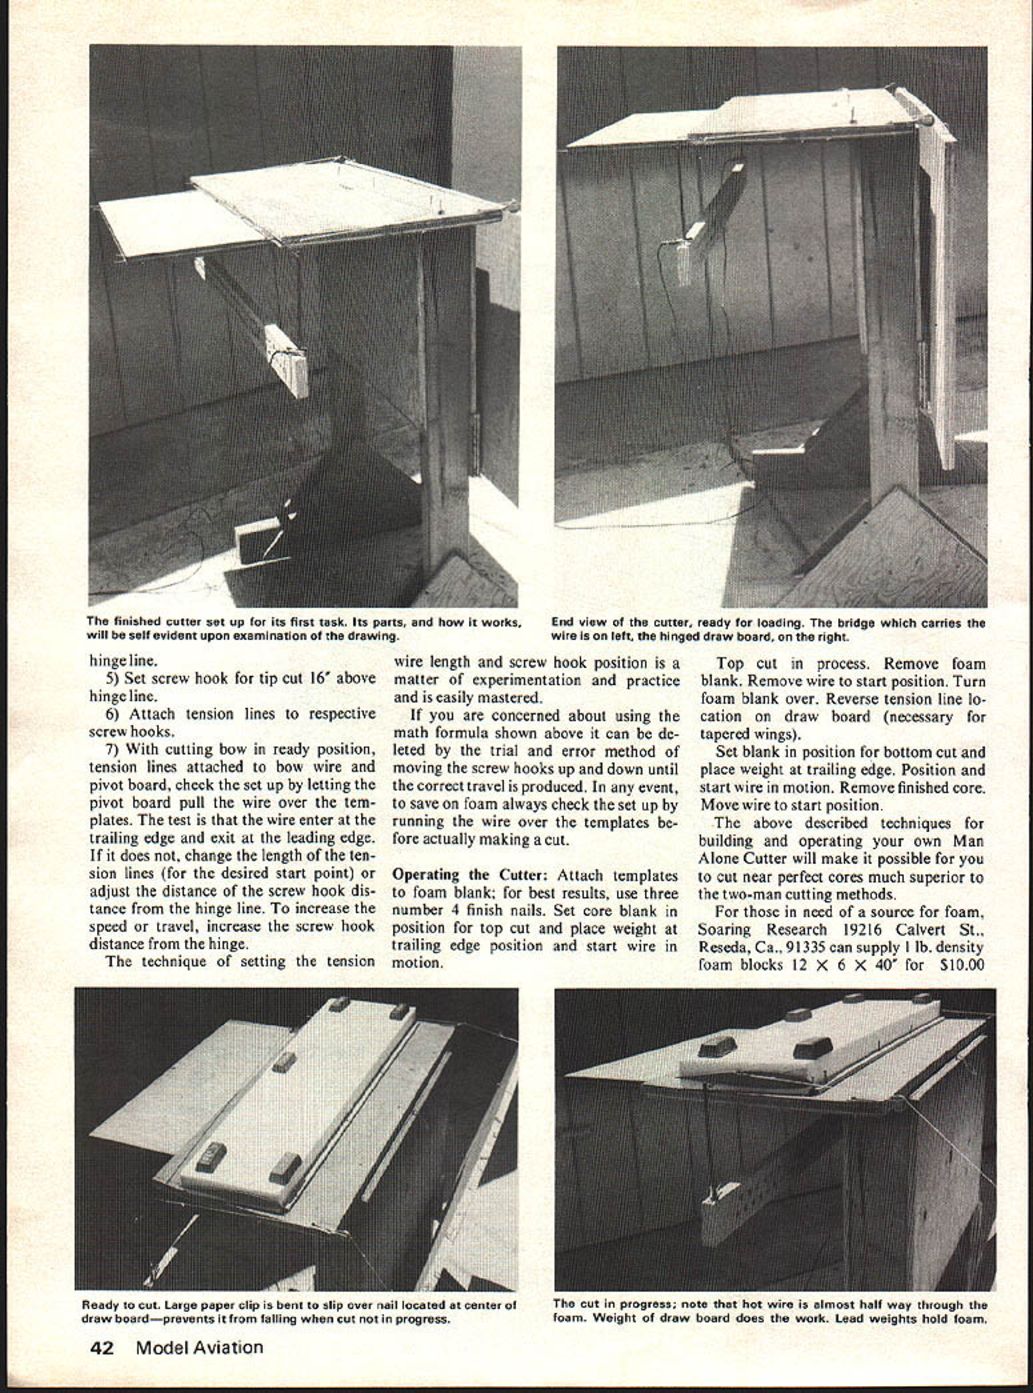
Operating Cutter
- Attach templates to the foam blank; for best results use three #4 finish nails to hold templates in place.
- Set the core blank position for the top cut. Place weight on the trailing edge and position the start wire motion.
- Start the cut and let the wire run over the templates until the top cut is complete.
- Remove the foam blank and move the wire back to the start position.
- Turn the foam blank over. For tapered wings, reverse the tension line locations on the draw board if necessary.
- Set the blank for the bottom cut, place weight on the trailing edge, and start the wire motion.
- Remove the finished core and reposition the wire to start the next core.
Following these techniques will allow one person using the Man Alone Cutter to cut near-perfect cores that are often superior to cores cut by two-man methods.
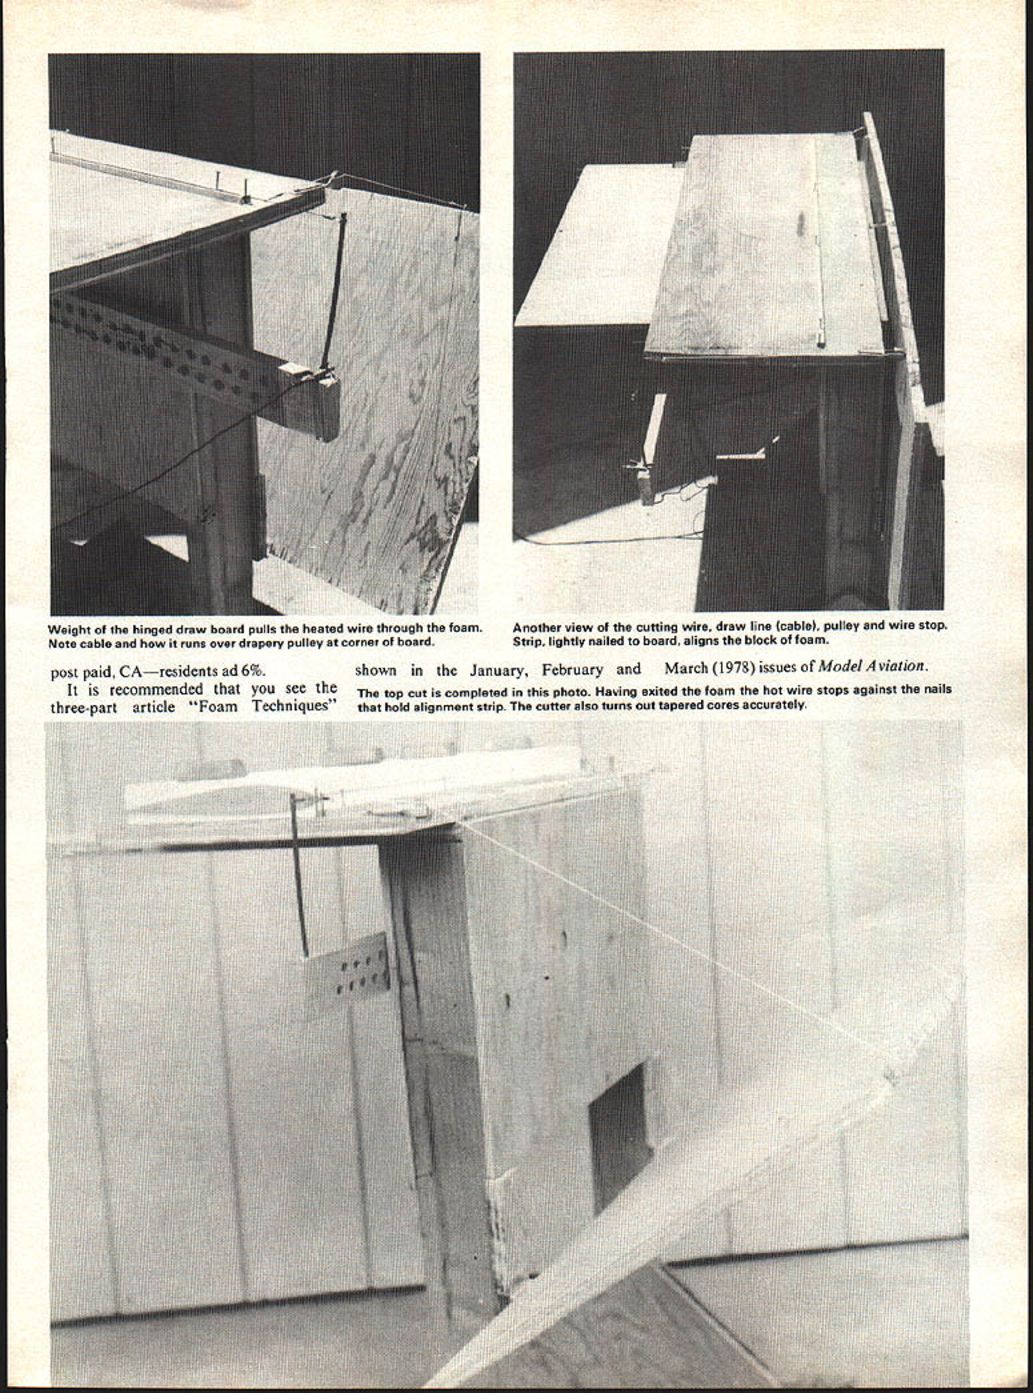
Tips and Notes
- To save foam, always test the wire travel over templates before cutting.
- The weight of the hinged draw board pulls the heated wire through the foam; the braided cable runs over a drapery pulley at the corner of the board.
- A lightly nailed alignment strip on the board helps align the foam block; after the top cut, the hot wire exits the foam and stops against the nails holding the alignment strip.
- The cutter turns out tapered cores accurately when set up properly.
Source for foam:
- Soaring Research, 19216 Calvert St., Reseda, CA 91335. They can supply 1 lb density foam blocks 12 x 6 x 40" for $10.00.
Recommended reading:
- See the three-part article "Foam Techniques" in the January, February, and March 1978 issues of Model Aviation.
Transcribed from original scans by AI. Minor OCR errors may remain.

