
Master Modeler's Workshop
Larry Kruse
It's possible to change your modeling work area from an eyesore to a place you can show with pride, and for a modest expenditure. This is one example.
SOMETIMES we get so wrapped up in our current building projects that we overlook ways of making the building task simpler, easier to accomplish, or less time consuming. One area we often neglect is our work area or workshop. Affectionately referred to as the "boar's nest" or that "disaster downstairs," the work area doesn't have to fit either of those descriptions. With a little time, some scrounging for odds and ends, and a bit of ingenuity, the workshop can become an attractive and efficient place rather than an eyesore hidden away.
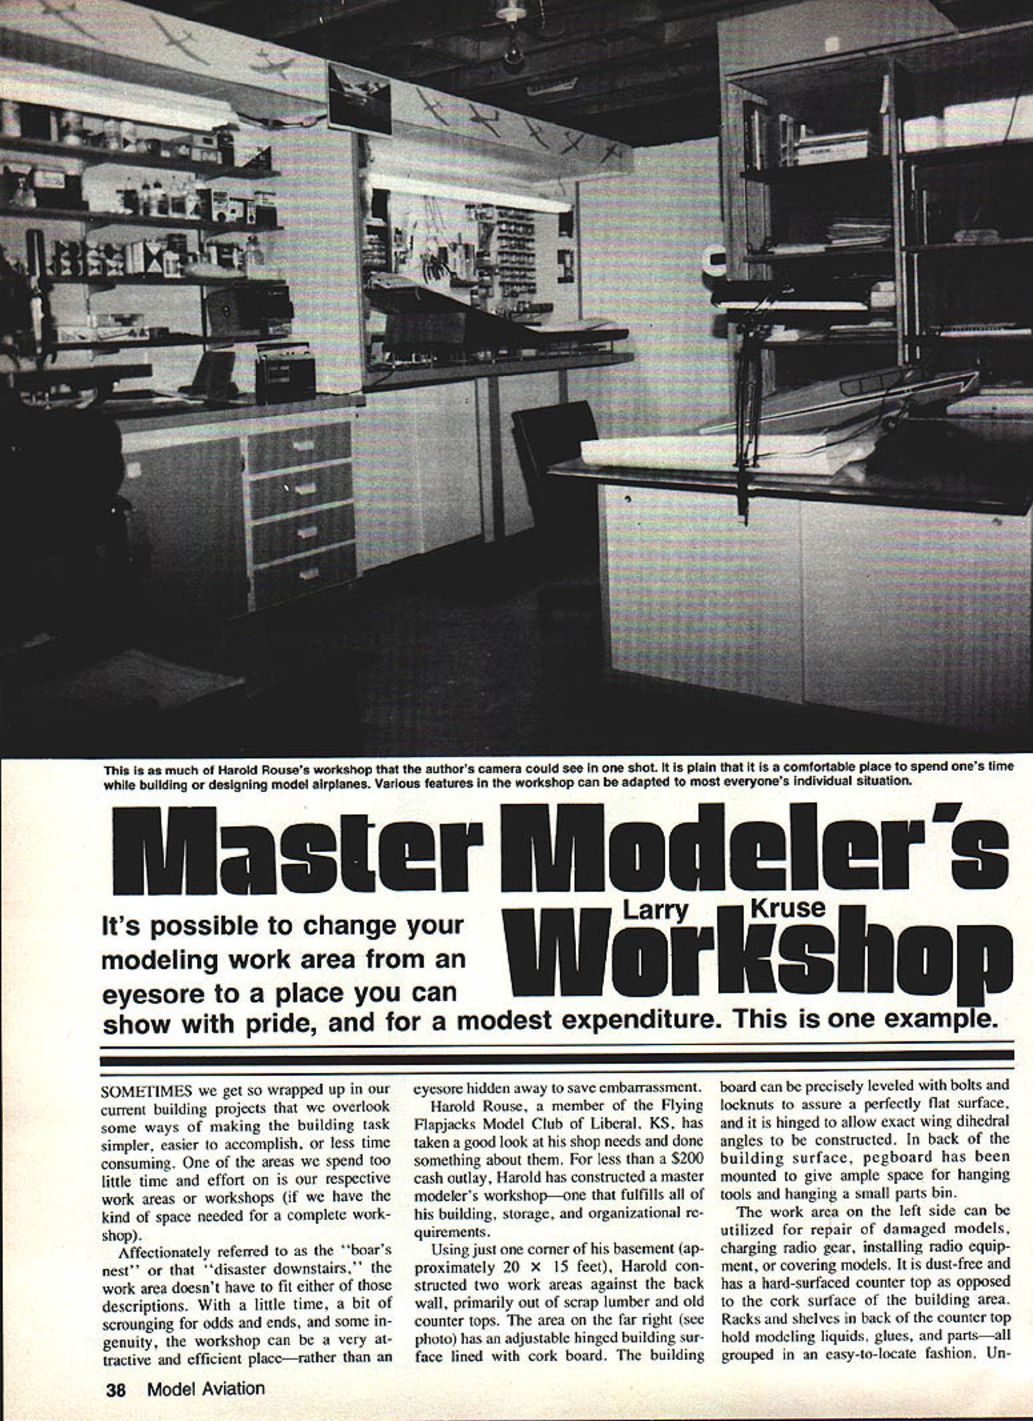
Harold Rouse, a member of the Flying Flapjacks Model Club of Liberal, KS, has taken a good look at his shop needs and done something about them. For less than a $200 cash outlay, Harold constructed a master modeler's workshop that fulfills his building, storage, and organizational requirements.
Workshop layout
Using one corner of his basement (approximately 20 x 15 feet), Harold constructed two work areas against the back wall, primarily out of scrap lumber and old countertops.
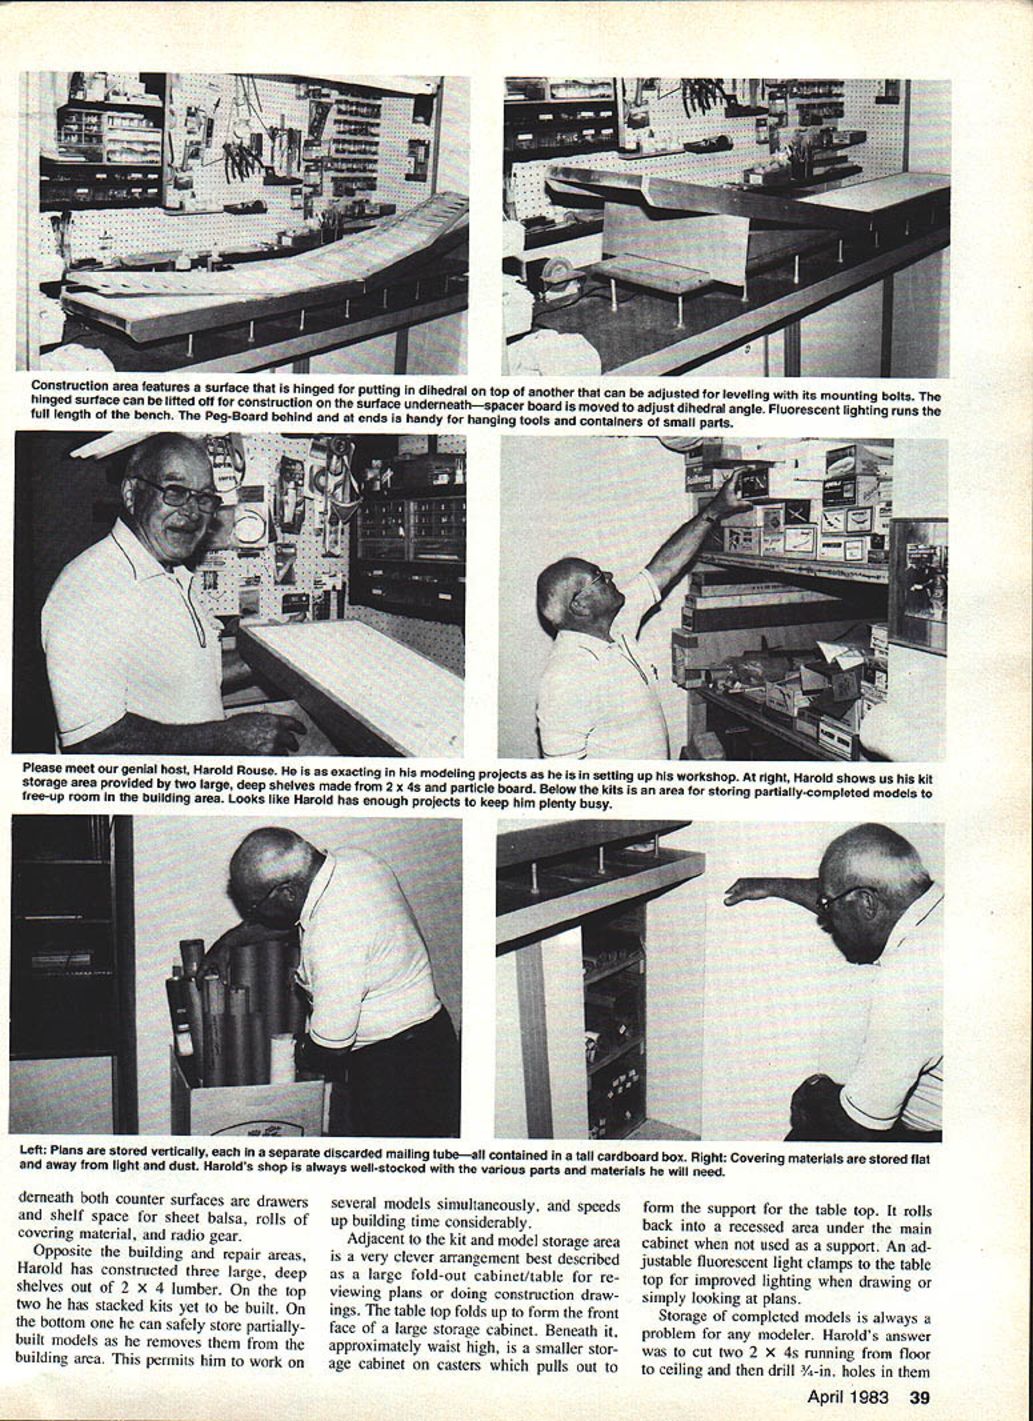
- The area on the right is the primary building area. It features an adjustable hinged building surface lined with corkboard. The building board can be precisely leveled with bolts and locknuts to assure a perfectly flat surface, and it is hinged to allow exact wing dihedral angles to be constructed. Pegboard mounted behind the building surface provides ample space for hanging tools and a small parts bin.
- The area on the left is used for repairs, charging radio gear, installing radio equipment, or covering models. It is dust-free and has a hard-surfaced countertop as opposed to the cork surface of the building area. Racks and shelves behind the countertop hold modeling liquids, glues, and parts—grouped for easy locating.
Underneath both counter surfaces are drawers and shelf space for sheet balsa, rolls of covering material, and radio gear.
Kit and model storage
Opposite the building and repair areas, Harold constructed three large, deep shelves out of 2 x 4 lumber.
- The top two shelves hold stacked kits yet to be built.
- The bottom shelf safely stores partially built models removed from the building area.
This arrangement permits him to work on several models simultaneously, which speeds up building time considerably.
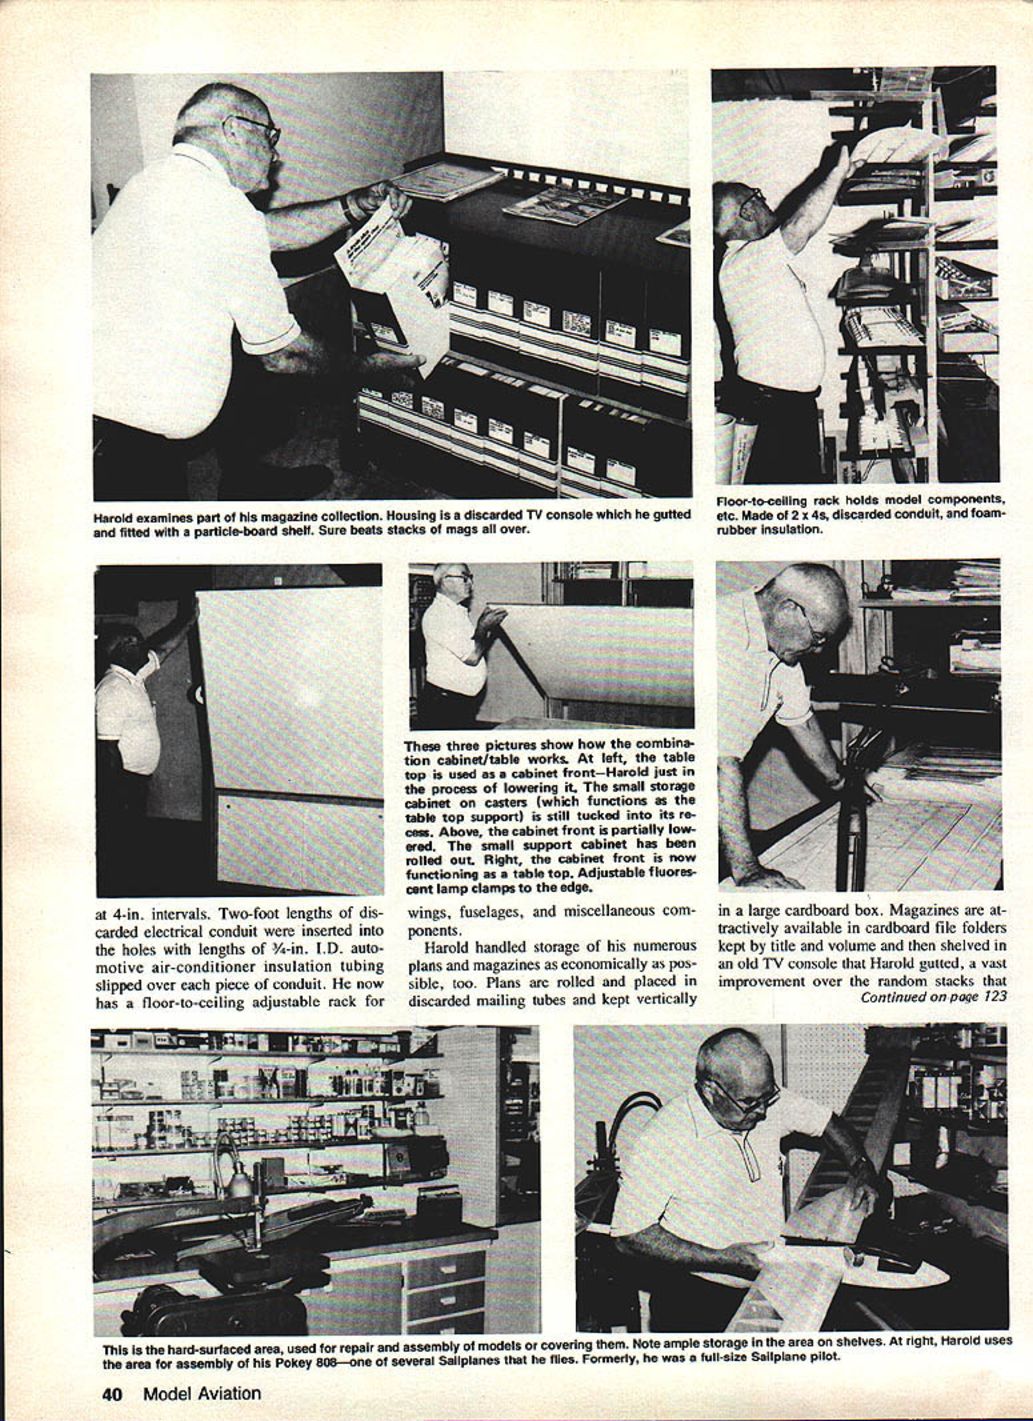
Adjacent to the kit/model storage is a clever fold-out cabinet/table for viewing plans and doing construction drawings. The tabletop folds up to form the front face of a large storage cabinet. Beneath it, a smaller storage cabinet on casters pulls out to support the tabletop and rolls back into a recessed area under the main cabinet when not in use. An adjustable fluorescent light clamps to the tabletop for improved lighting when drawing or studying plans.
Storage of completed models and plans
Storage of completed models is always a problem for modelers. Harold's solution was to install two 2 x 4s running from floor to ceiling, drill 3/4-inch holes in them, and slip in two-foot lengths of discarded electrical conduit at 4-inch intervals. The two-foot conduit lengths serve as racks for wings, fuselages, and miscellaneous components.
Harold handled storage of his numerous plans and magazines economically as well. Plans are rolled and placed in discarded mailing tubes and stored vertically in a large cardboard box. Magazines are organized in cardboard file folders kept by title and volume, then shelved in an old TV console that Harold gutted—a vast improvement over the random stacks most of us keep.
Overall impression
The overall impression of the shop is that its neat, well-organized appearance would make it a comfortable and relaxed place to spend time. Through a very small outlay of money, combined with ingenuity and planning, Harold Rouse has made his hobby an integral part of his lifestyle and his workshop a showplace in his home.
Transcribed from original scans by AI. Minor OCR errors may remain.

