
McDonald's Stiletto 660
Winner of the World Championships at Utrecht, Netherlands, Les discusses his approach to design, flying, and a host of other important factors.
The first Stiletto and the ones that followed through 1974 were .35 size and all were powered by the popular O.S. Max. Quite often stunt fliers will save a new plane for a major meet to get a competitive edge. The big Southeasterns at Winston-Salem, N.C., saw both Les and New Yorker Gene Schaffer bring out new planes. Les had the new Stiletto 700 powered by an S.T. .46 with a foam wing and molded balsa stab. The contest weather was a bit unsettled and Les had to fly one round in gusty condition while his second round was in steady wind. Both his flights were filmed and it is almost impossible to tell what the wind conditions were. The big Stiletto upset Schaffer for the win. As a matter of fact, of four Stilettos flown at the Southeasterns, three won trophies.
Introduction by Kent Rogers
Interview by Wynn Paul and Vince Schnetzer
SINCE LES McDONALD designed the first Stiletto in 1970, it has become one of the most popular competition stunters in recent years. Where once the most heard question at a contest was "Hey buddy, is that a Nobler?" now you hear "Is that a Stiletto?" about as often.
The Stiletto came at a time when stunt was being flown with slightly-bulky jet types on tricycle gear or as semi-scale World War II fighters. Of course, there were Noblers and Ares flying also, but almost none of the 70's airplanes are still around except the Stiletto. Its sleek, sanitary appearance set it apart and may be the reason for the plane's popularity. It has been campaigned by others such as Remel Cooper, Dennis Duval, Kenny Stevens and Randy Smith.
The Stiletto 700 was at the 1975 Lake Charles Nats. Les placed second to the old master, Bob Gieseke, by one point. Not bad considering Gieseke was the reigning world champ at that time.
Nineteen seventy-five was also the year for selection of the FAI team. The site was Dayton, Ohio, and the weather was horrible. The big powerful Stiletto flew four smooth, accurate patterns and just missed third place, but did have the most consistently high scores in all four rounds.
In the following weeks Les returned home and started building two new models — a lighter, sleeker version of the 700 and a somewhat smaller 660 sq. in. airplane. The remainder is history. With the decision of Bob Gieseke to compete as a defending champ, Les would be allotted the number three team spot. On July 11, 1976, after three days of hard-fought competition. Les McDonald, flying his Stiletto 660, was crowned Control Line Aerobatics World Champion.
Two stunt fliers that have spent considerable time talking with Les are Wynn Paul and Vince Schnetzer. Wynn certainly needs no introduction as anyone even remotely interested in precision aerobatics knows he's a top flier and the moving force behind PAMPA. Vince, on the other hand, is just getting started in competition aerobatics and has just completed the first Stiletto 660 from Model Aviation plans.
STILETTO 660
Recently both Wynn and Vince discussed many items of interest with Les and the following interview evolved. It answers some questions never before published and contains some good information for the fledgling contest flier.
Wynn: Up until the 1975 season, your Stilettos were for .35 engines. What prompted the switch to the larger airplane and what were the big factors in design?
Les: I think I made the decision to give the .46 model a try during the second finals round at the '74 Nats. I can still remember watching my little 10-in. prop spinning its brain out trying to crawl across the top portion of the square eight in dead calm. Driving back to Miami, I reasoned a larger motor will turn a larger prop; a bigger prop pushes more air; pushing more air makes the airplane go forward better and constantly going forward is kinda neat in the square eight. Working with this logic, I started thinking about enlarging my current design about 15% and installing a .46. It didn't take long to realize this wasn't such a hot idea and the new model would have to start from scratch.
On paper I really lose my head sometimes and the next several weeks were spent drawing the neatest looking thing you ever saw—two Veco 19's in a ship that was longer than an 11-in. prop. I struggled all spring and finally reached a compromise. I felt confident with the big Stiletto but I knew I could build something better.
Wynn: What was the reason for going to a smaller plane still in the .46 size?
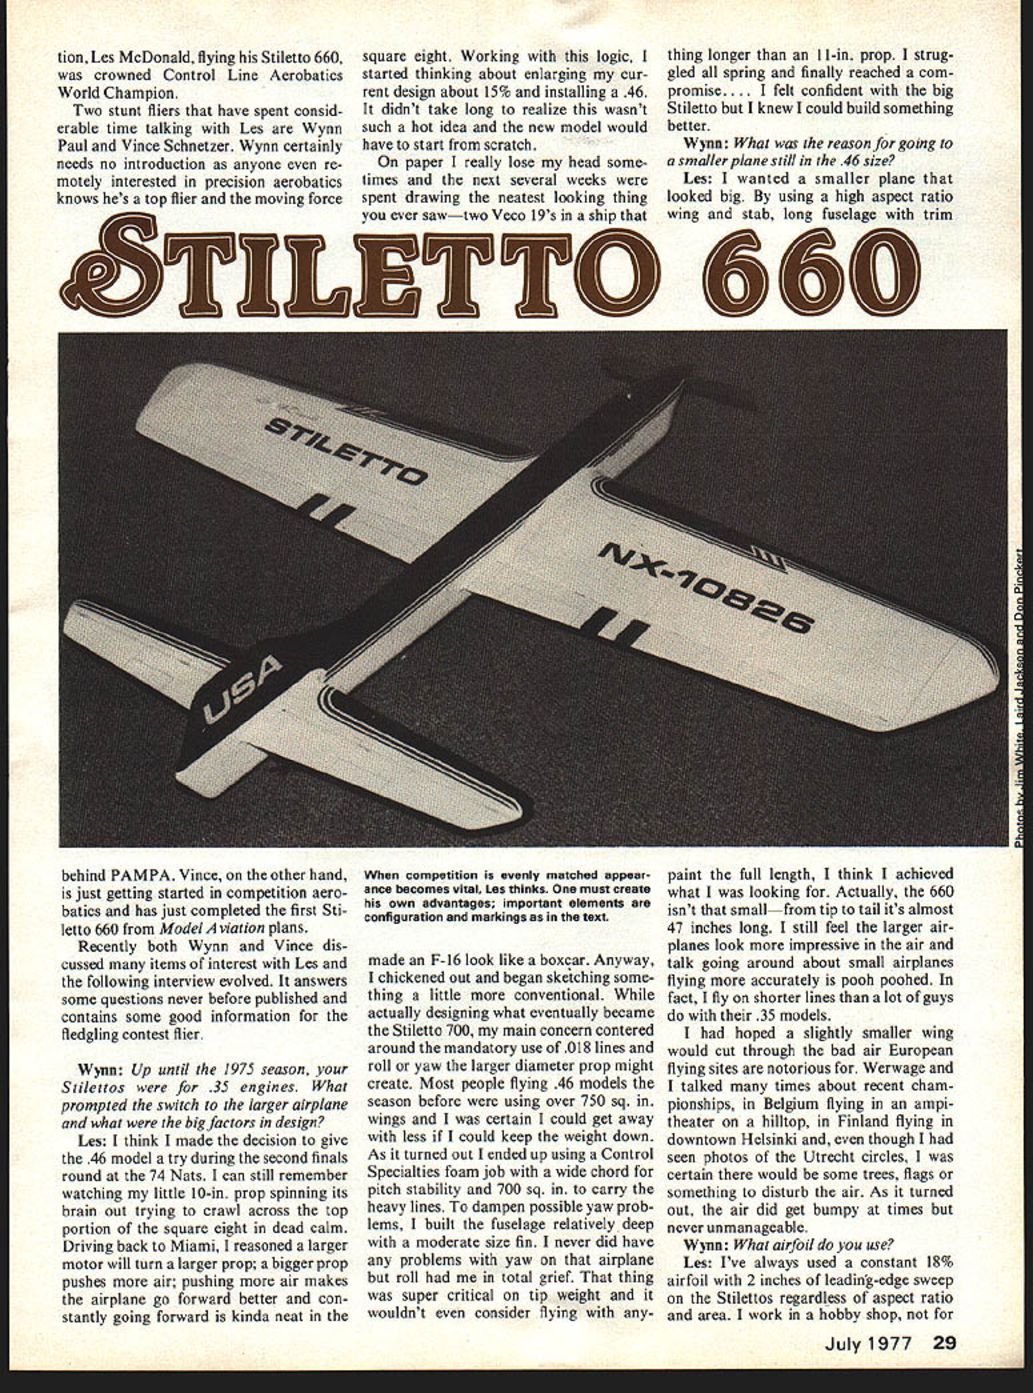
Les: I wanted a smaller plane that looked big. By using a high aspect ratio wing and stab, long fuselage with trim paint the full length, I think I achieved what I was looking for. Actually, the 660 isn't that small—from tip to tail it's almost 47 inches long. I still feel the larger airplanes look more impressive in the air and talk going around about small airplanes flying more accurately is pooh-poohed. In fact, I fly on shorter lines than a lot of guys do with their .35 models.
I had hoped a slightly smaller wing would cut through the bad air European flying sites are notorious for. Werwage and I talked many times about recent championships, in Belgium flying in an amphitheater on a hilltop, in Finland flying in downtown Helsinki and, even though I had seen photos of the Utrecht circles, I was certain there would be some trees, flags or something to disturb the air. As it turned out, the air did get bumpy at times but never unmanageable.
Wynn: What airfoil do you use?
Les: I've always used a constant 18% airfoil with 2 inches of leading-edge sweep on the Stilettos regardless of aspect ratio and area. I work in a hobby shop, not for NASA, so I just fiddle around sketching until it looks like it will work. If it does, I'll stick with it.
On the 660 I changed to an 18% root, 20% tip for two reasons. First, I wanted to carry more tip weight with less wing for added line tension and, second, I hoped to gain some small boost in lift without enlarging the flaps at the tip.
Wynn: Why do you favor the type control hookup you use?
Les: Get ready for a surprise, then look at the plans. It only took me 20 gallons of fuel to figure out the 2/3-to-1 setup isn't the trick way to go on a high aspect ratio wing. I can really get into this control thing, so let me explain why. Seven of 10 Stilettos I've built in the past six years have used the 2/3-to-1 control hookup—the first was my 1973 version published in the June '74 issue of Model Airplane News. Until the '73 model, I had been flying O.S. 35 powered jobs in the 44-48 oz., 600 sq. in. range and using the standard Nobler pushrod/control-horn hookup.
They all flew reasonably well except, in a square corner at 45 degrees, the models seemed to pivot on a point about halfway between the hinge line. I could learn to live with the funny corner but it had a bad side effect, a loss of speed which was intolerable. I had always been impressed by Werwage's USA 1's ability to fly smoothly at a constant speed and in Trinidad in 1972 Bill explained to me his theory behind the 2/3-to-1 controls. After trying it on my '73 ship, I became aware of what he meant when he called it "power steering." Bill had stressed the importance of lightweight for the full benefit and two advantages were apparent. My new model would now pivot on a point closer to the CG and by moving the flaps less, a lot of drag was eliminated. I finally had my constant speed through all the maneuvers.
In many years of flying stunt models I've learned one thing for sure: You must compromise and the 2/3-to-1 system is no exception. It just doesn't work well on the 660. The culprit is the long skinny wing. Any minute correction in the controls caused the ship to change direction, kinda like driving your Chevy backwards at 60 mph. I've tried everything—nose weight, thin elevators, closer line spacing at the handle—but I'm not going to be satisfied until I cut into the aft fuselage and slow down the elevator movement. Anyway, the plans show the corrected system I'm using on my '77 airplane. It takes a harder twist of the wrist but it goes where you point it and drag from the added flap deflection is easily overcome by a good .46.
Wynn: Is the airplane's appearance really that important?
Les: No other toy airplane event lets the builder/flyer express himself more than precision aerobatics. At any contest attended by fliers of equal ability, you must create your own advantages, and a good looking ship certainly helps. Quite possibly, had Werwage flown his big USA 1
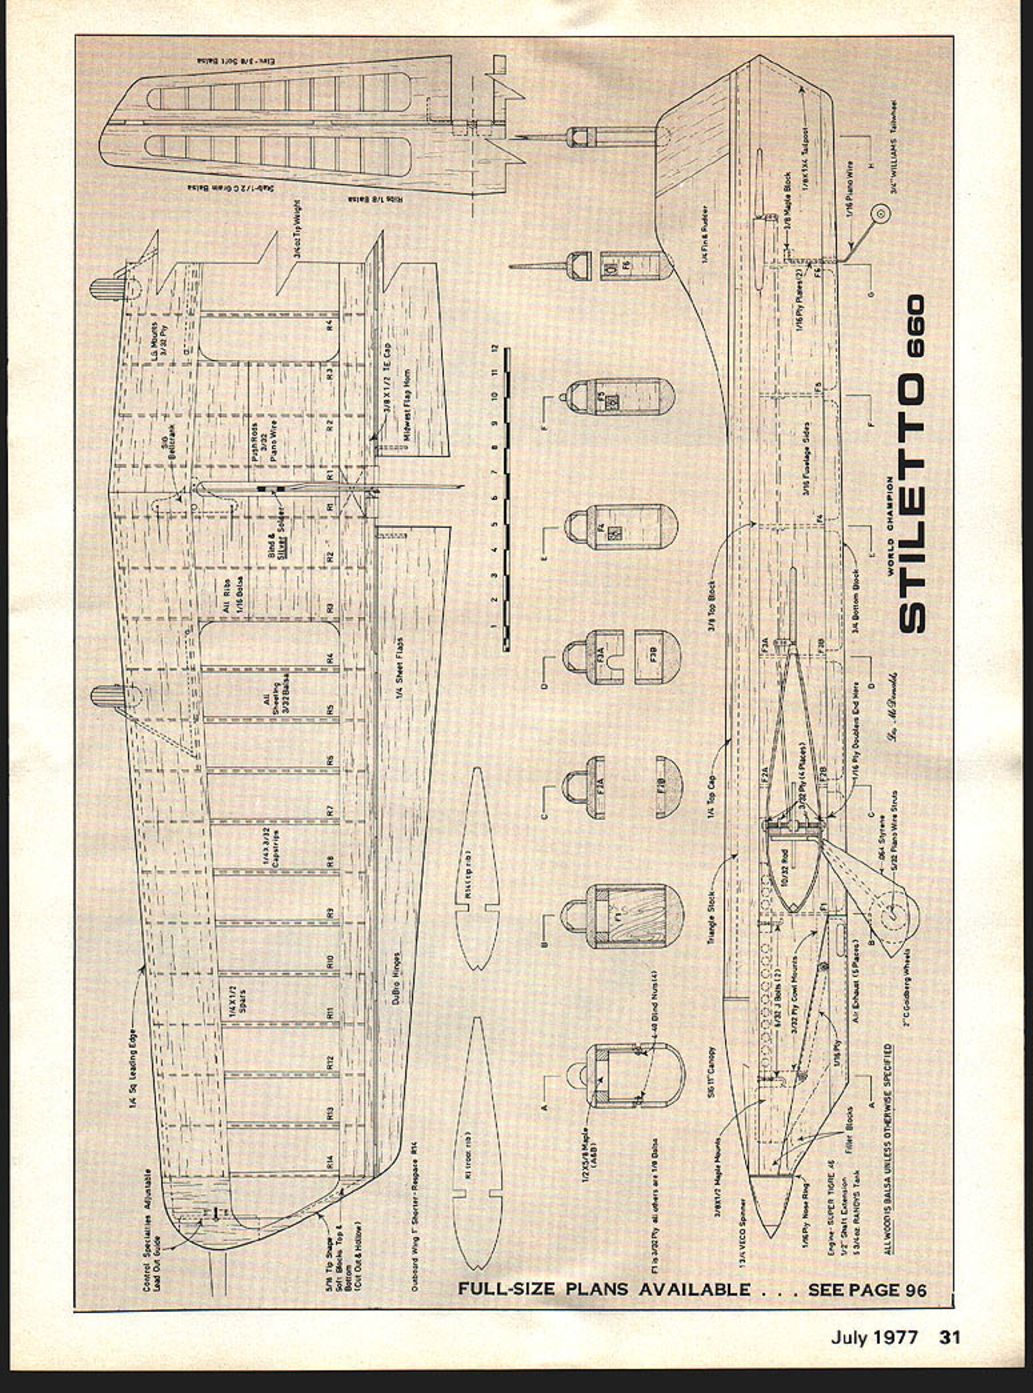
STILETTO 660
WORLD CHAMPION
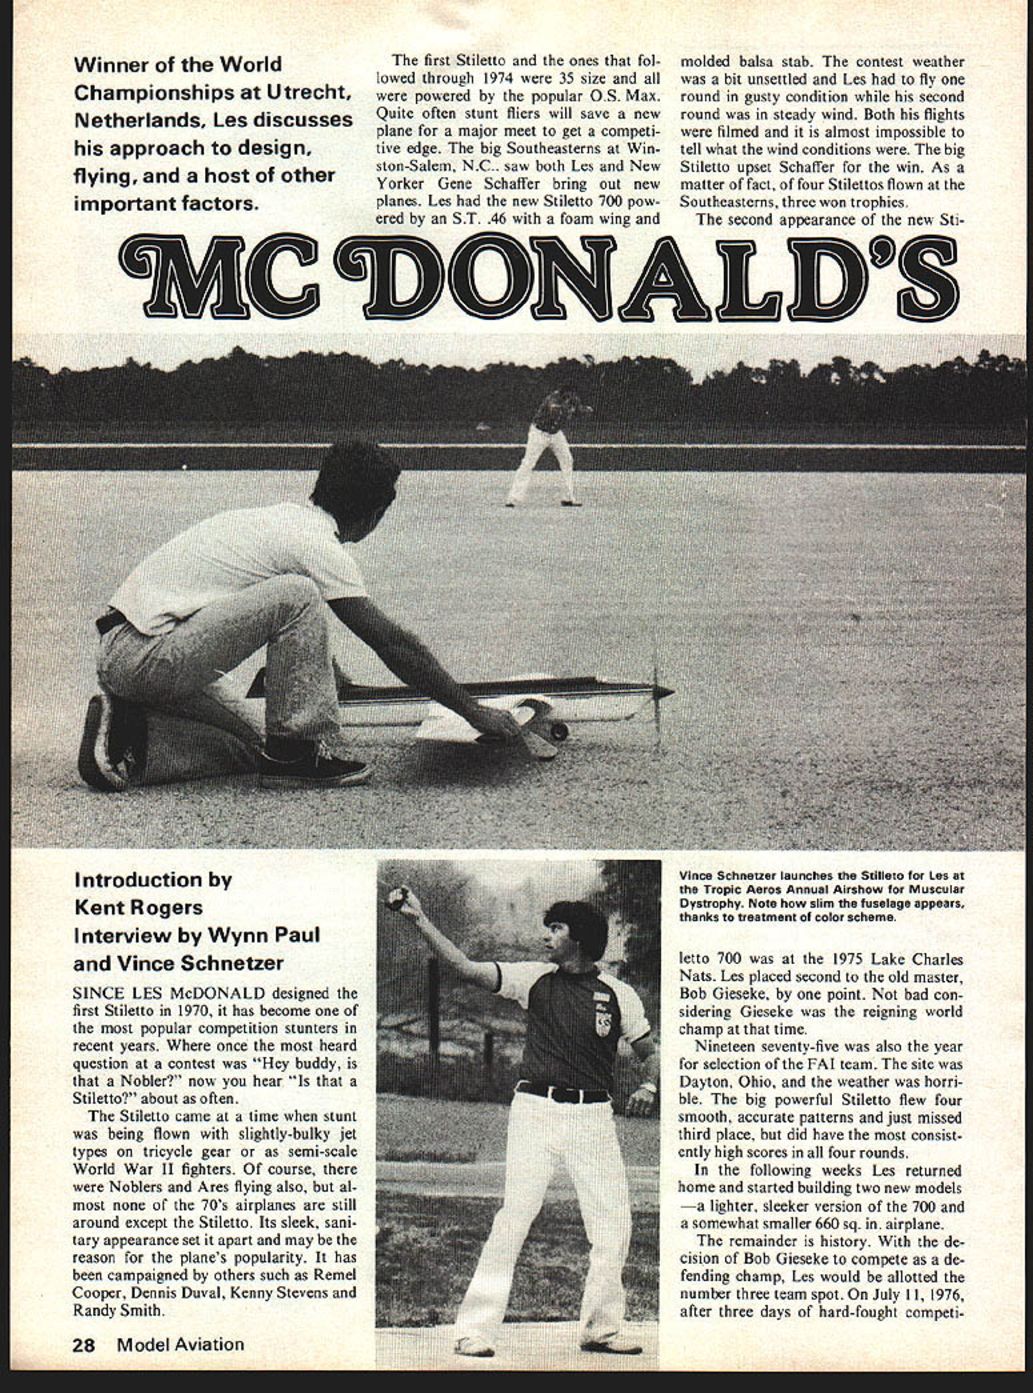
FULL-SIZE PLANS AVAILABLE . . . SEE PAGE 96 In Holland, he would, once again, be the current world champion. In Switzerland, the week following the WC, we talked at great length about how a model should look for the Internats. For several days a lot of the conversation was incoherent because, after months of hard work, we decided some fun and rest were in order. Anyway, if I remember correctly, we both agreed the 660 fit the bill, so let me point out some features.
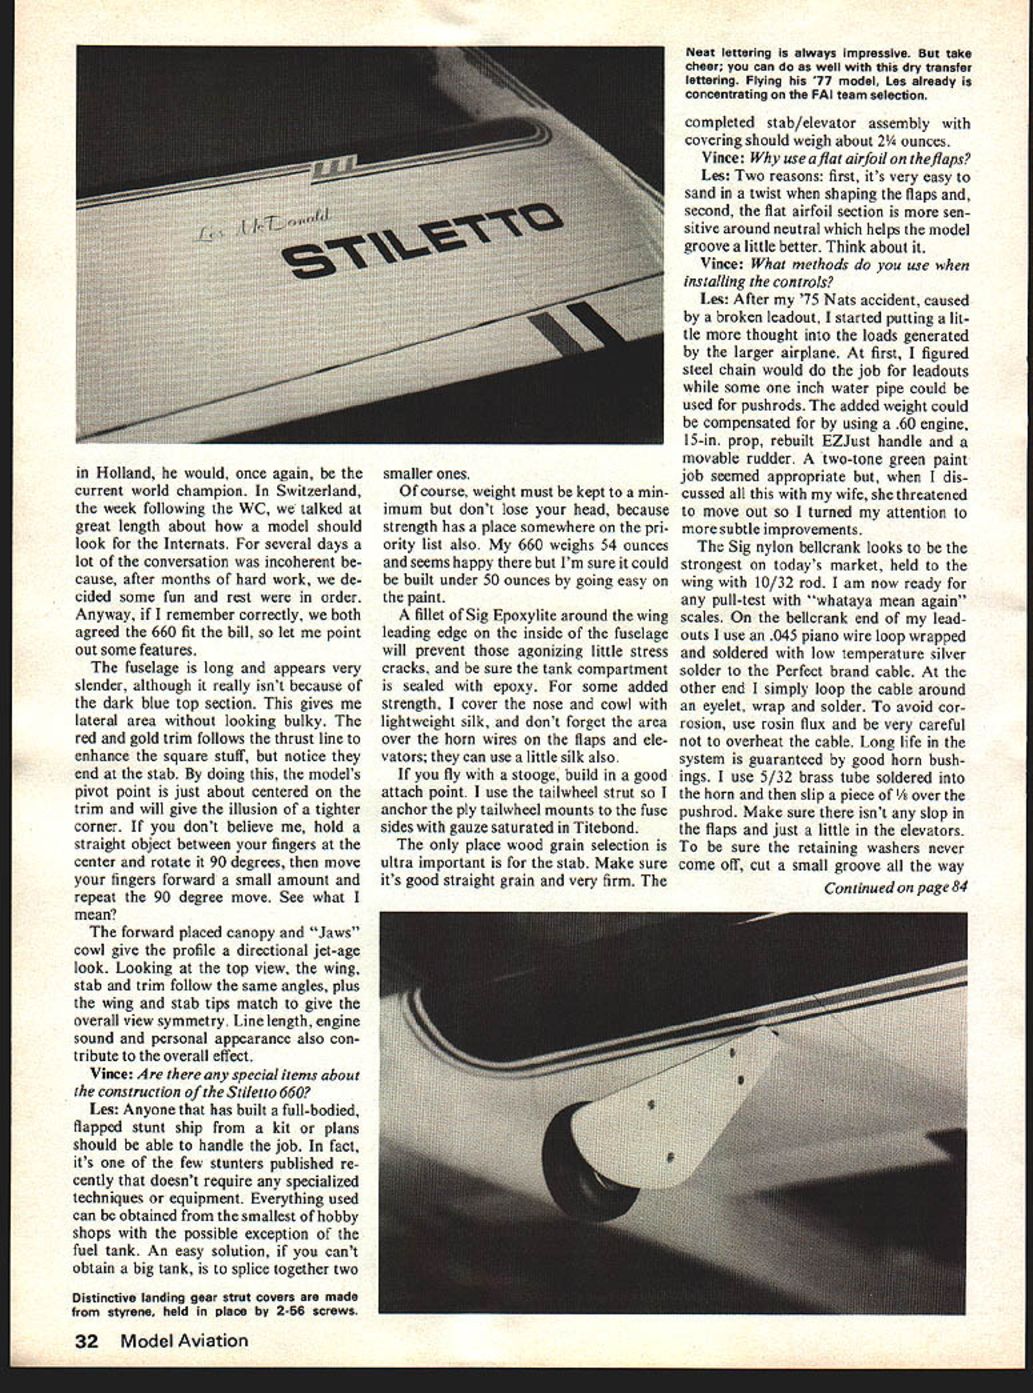
The fuselage is long and appears very slender, although it really isn't because of the dark blue top section. This gives me lateral area without looking bulky. The red and gold trim follows the thrust line to enhance the square stuff, but notice the end at the stab. By doing this, the model's pivot point is just about centered on the trim and will give the illusion of a tighter corner. If you don't believe me, hold a straight object between your fingers at the center and rotate it 90 degrees, then move your fingers forward a small amount and repeat the 90 degree move. See what I mean?
The forward placed canopy and "Jaws" cowl give the profile a directional jet-age look. Looking at the top view, the wing, stab and trim follow the same angles, plus the wing and stab tips match to give the overall view symmetry. Line length, engine sound and personal appearance also contribute to the overall effect.
Vince: Are there any special items about the construction of the Stiletto 660?
Les: Anyone that has built a full-bodied, flapped stunt ship from a kit or plans should be able to handle the job. In fact, it's one of the few stunters published recently that doesn't require any specialized techniques or equipment. Everything used can be obtained from the smallest of hobby shops with the possible exception of the fuel tank. An easy solution, if you can't obtain a big tank, is to splice together two smaller ones.
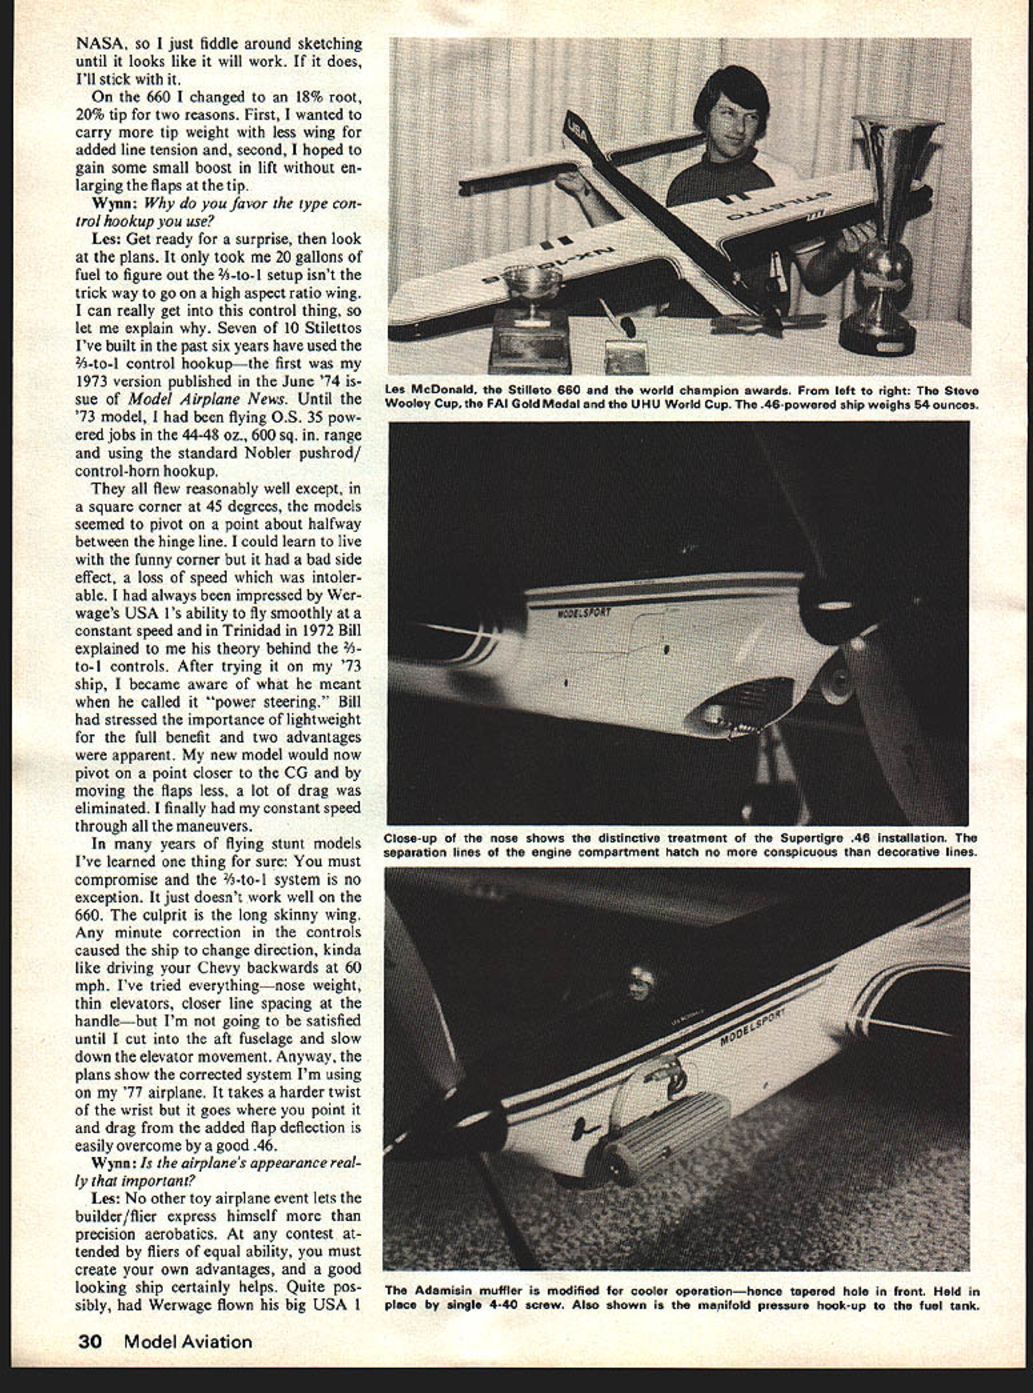
Of course, weight must be kept to a minimum but don't lose your head, because strength has a place somewhere on the priority list also. My 660 weighs 54 ounces and seems happy there but I'm sure it could be built under 50 ounces by going easy on the paint.
A fillet of Sig Epoxylite around the wing leading edge on the inside of the fuselage will prevent those agonizing little stress cracks, and be sure the tank compartment is sealed with epoxy. For some added strength, I cover the nose and cowl with lightweight silk, and don't forget the area over the horn wires on the flaps and elevators; they can use a little silk also.
If you fly with a stooge, build in a good attach point. I use the tailwheel strut so I anchor the ply tailwheel mounts to the fuselage sides with gauze saturated in Titebond.
The only place wood grain selection is ultra important is for the stab. Make sure it's good straight grain and very firm. The completed stab/elevator assembly with covering should weigh about 2-1/4 ounces.
Vince: Why use a flat airfoil on the flaps?
Les: Two reasons: first, it's very easy to sand in a twist when shaping the flaps and, second, the flat airfoil section is more sensitive around neutral which helps the model groove a little better. Think about it.
Vince: What methods do you use when installing the controls?
Les: After my '75 Nats accident, caused by a broken leadout, I started putting a little more thought into the loads generated by the larger airplane. At first, I figured steel chain would do the job for leadouts while some one inch water pipe could be used for pushrods. The added weight could be compensated for by using a .60 engine, 15-in. prop, rebuilt EZJust handle and a movable rudder. A two-tone green paint job seemed appropriate but, when I discussed all this with my wife, she threatened to move out so I turned my attention to more subtle improvements.
The Sig nylon bellcrank looks to be the strongest on today's market, held to the wing with 10/32 rod. I am now ready for any pull-test with "whata ya mean again" scales. On the bellcrank end of my leadouts I use an .045 piano wire loop wrapped and soldered with low temperature silver solder to the Perfect brand cable. At the other end I simply loop the cable around an eyelet, wrap and solder. To avoid corrosion, use rosin flux and be very careful not to overheat the cable. Long life in the system is guaranteed by good horn bushings. I use 5/32 brass tube soldered into the horn and then slip a piece of 1/8 over the pushrod. Make sure there isn't any slop in the flaps and just a little in the elevators. To be sure the retaining washers never come off, cut a small groove all the way around the pushrod where the washer will be applied. Next, cut a small section from the washer and, with pliers, gently compress the washer into the groove and then blend with an Xacto knife.
The pushrod fairleads should be made from plywood and just loose enough so the pushrod can move freely. Allowing too much freedom in the fairlead, the pushrod will rattle. This isn't good because it's hard to look cool when the airplane sounds like it's falling apart.
Vince: How do you set up your engines?
Les: Building the engine is simple. Getting it to run exactly the way you want it to is another story. One of the best running engines I ever had was never even disassembled for cleaning so I build motors "maybe yes, maybe no" style.
After the engine is disassembled, I wet sand the inside of the case with 320 so the sleeve will slide easily into position. Drilling the spray bar hole, tapping for a muffler mount and other changes to the outside should be done at this point. I relocate the needle valve just ahead of the stock arrangement so it passes through the center of the venturi about 3/32 in. above the centerline. This allows the motor to run a bit faster inverted. I'll explain this later. For venturis, obtain a set from Bob Wilder, 2010 Boston Street, Irving, Texas 75061. One each of .260, .270, .275 and .280 will be a good variety.
I drill out the mount holes and file the lugs so I can shift the engine around for offset, if I need it while I'm trimming. I have a really space age method for fitting the ring. Push it into the sleeve, square it up with the piston, remove the piston and start looking. If, when you hold it in front of a bright light, you can see any gaps between the ring and sleeve, rotate the ring a few degrees at a time and keep checking. If you can't detect any "light leaks" carefully box up the parts and send them to me because you've got a first class fit. Anyway, I just keep going through rings until I find one that fits well. Always bear in mind the sleeve might not be perfectly round so if different rings are used, keep showing a gap in one position of the sleeve, try another sleeve. The end gap should be about .006, which isn't much considering a sheet of paper is usually about .003. After deciding which ring and sleeve I'm going to use, I carefully deburr the inside of the ring and piston land with an Xacto knife.
The new Supertigres use a full circle crank with an aluminum stuffing band that has been known to fly off when the engine is grossly overheated. The only actual case of this I know of was a Sunday RC incident which I refuse to discuss further. The engine seems to run the same with it or without it so you decide. I remove the thing because of Murphy's Law. The only part I substitute is the front bearing. I replace it with a Consolidated EL-7-ZZ with the rear shield removed. Last year I had an engine that just wouldn't run long enough. On a test stand I noticed what seemed to be quite a bit of fuel coming out from under the drive washer and, by simply installing a plastic shield in the bearing, I picked up 15 seconds running time.
Just to make sure everything is okay, I run my engine about 15 or 20 minutes on the bench. This also allows me to tighten the head and backplate screws while the motor is warm.
It should take about 20 flights to decide if the engine is worthwhile. When it's right, you'll know it.
Wynn: What procedures do you follow when trimming a new airplane?
Les: Trying to get a new model trimmed is a hassle. The degree of hassle depends on
Transcribed from original scans by AI. Minor OCR errors may remain.

