
Mini-Voyager
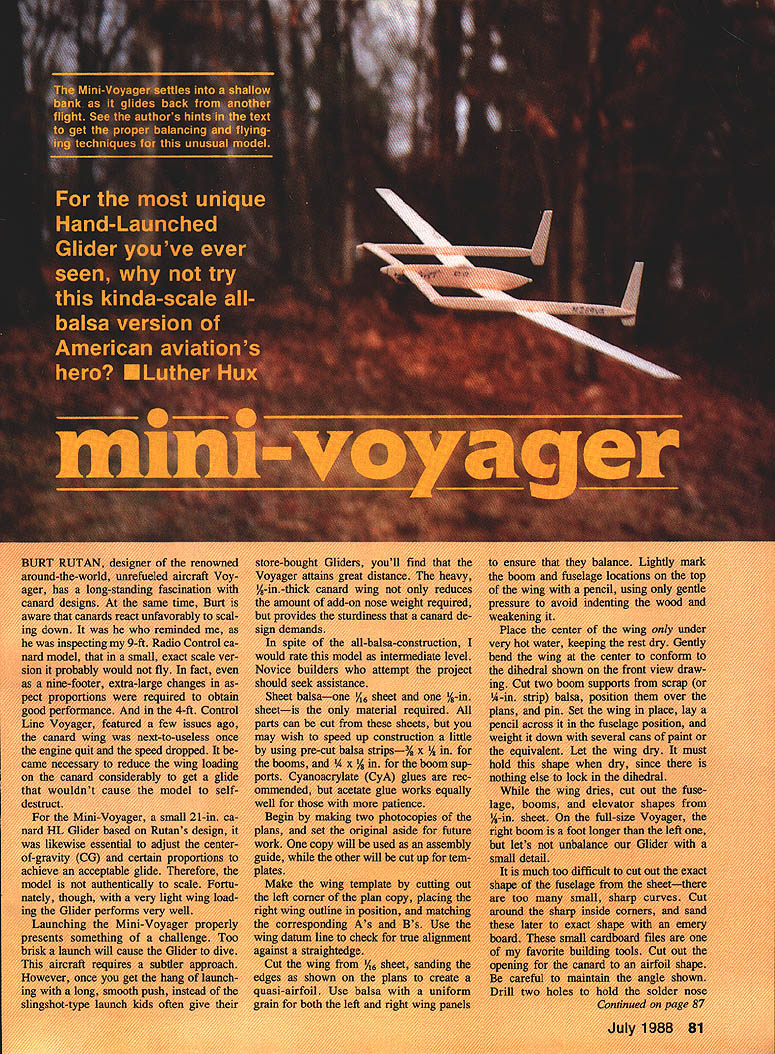
For a unique hand-launched glider, try this kind-of-scale, all-balsa version of Burt Rutan’s Voyager. Burt Rutan, designer of the famed around-the-world, unrefueled Voyager, has long been fascinated with canard designs. He pointed out that canards react unfavorably to scaling down, and small, exact-scale versions often will not fly well without proportional changes. Even a nine-foot radio-control canard model required significant adjustments to obtain good performance. In smaller models, such as a four-foot control-line Voyager, the canard wing became nearly ineffective once power was off and speed dropped, forcing much lower canard wing loading to obtain a safe glide.
The Mini-Voyager is a 21-inch canard hand-launched glider based on Rutan’s design. To achieve an acceptable glide it was necessary to adjust the center of gravity (CG) and certain proportions, so the model is not strictly to scale. With very light wing loading, however, the glider performs very well.
Skill level
- Intermediate. Novice builders should seek assistance.
Materials
- 1/16" sheet balsa (wing)
- 1/8" sheet balsa (fuselage, booms, elevator)
- Optional precut balsa strips to speed construction:
- 3/32" x 1/8" for booms
- 1/8" x 3/16" for boom supports
- 1/64" sheet for fins
- Cyanoacrylate (CyA) glue recommended; acetate glue acceptable with more drying time
- Approximately 3/8" of 18-gauge solder for nose weight (adjust for balance)
- Small cardboard emery board for fine sanding
- Pins, weight (cans), and a straightedge
Preparing plans and templates
- Make two photocopies of the plans; set the original aside.
- Use one copy as an assembly guide.
- Cut the other copy up for templates.
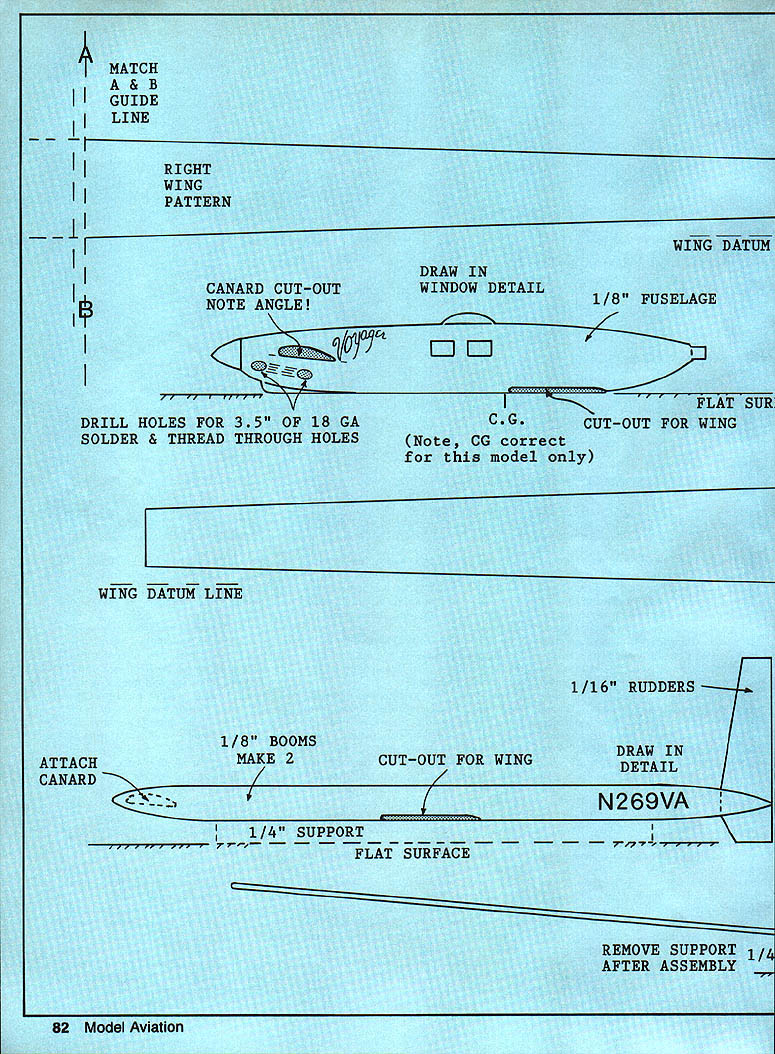
- Make the wing template by cutting out the left corner of the plan copy, placing the right wing outline in position, and matching the A and B guide marks. Use the wing datum line and a straightedge to ensure true alignment.
Wing construction
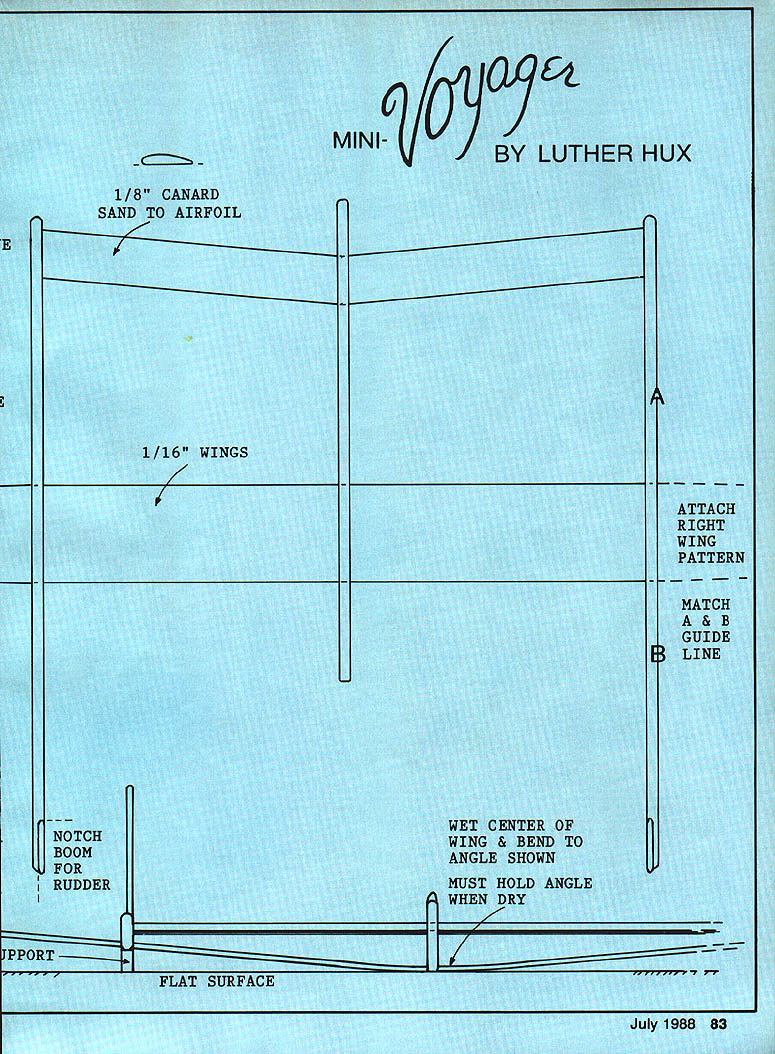
- Cut the wing from 1/16" sheet. Sand the edges as shown on the plans to form a quasi-airfoil.
- Use balsa with uniform grain for both left and right panels so they balance.
- Lightly mark boom and fuselage locations on the top of the wing with a pencil—use minimal pressure to avoid indenting the wood.
- Place only the center of the wing under very hot water (keep the rest dry). Gently bend the wing at the center to the dihedral shown on the plans.
- Cut two boom supports from scrap or 1/4" strip balsa. Position them over the plans and pin.
- Set the wing in place, lay a pencil across the fuselage position, and weight it down (several cans of paint or equivalent). Let the glue/dried shape set. The wing must hold this dihedral when dry, since nothing else locks it in.
Cutting fuselage, booms, and control surfaces
- While the wing dries, cut out the fuselage, booms, and elevator from 1/8" sheet.
- The full-size Voyager has the right boom a foot longer than the left; do not replicate that detail—keep the glider balanced.
- Cut around the fuselage plan in simple corners and sand to the exact shape with an emery board (small cardboard files are very helpful).
- Cut the canard opening to an airfoil shape and maintain the angle indicated on the plans.
- Drill holes for the nose weight and thread as shown on the plan.
- Sand edges round. Sand the booms round and notch the rear of each for the 1/16" rudders. Sand the canard to duplicate the airfoil shown (or closely resemble it). Round off edges of fins and wing.
Assembly
- When the wing is dry, place the fuselage over the plans and glue the wing in place, checking vertical alignment and fit of the wing cutout.
- Slide the canard into its slot and position it level on the table.
- Place the booms over their supports, ensuring they are parallel and touch the ends of the canard and wing. Check the wing cutouts in the booms.
- Position and glue the first boom to the wing, watching that the canard still contacts the boom and remains aligned. Repeat for the other boom.
- Check alignment of the canard and glue it to the booms (and to the fuselage as required). A small gusset at the canard-to-boom joint can extend the gluing surface.
- Place the 1/64" sheet fins in their notches, check vertical alignment, and glue in place.
- Remove the model from the plans and remove boom supports once glue has set.
Weighting and trimming
- Cut approximately 3/8" of 18-gauge solder for the nose weight. Minisize solder used for printed-circuit work might be used, but you’ll have to determine amount by test balance.
- The CG for this model is much farther back than on the full-scale Voyager or the RC model; follow the plan CG location for this particular model.
- Check side-to-side balance. If one wing tip is lighter, add a drop of glue to that tip to correct lateral balance.
- Check wing warps and remove any twisting by corrective twisting or sanding as needed.
Launching
- Launching technique is critical. Too vigorous a launch will cause the glider to dive. Use a gentle, smooth, long-arm follow-through rather than a slingshot-type snap.
- With practice the Mini-Voyager attains great distance. Expect some poor launches during development—don’t confuse a bad launch with faulty construction.
- The glider is rugged and will withstand plenty of contact with trees and terrain.
Finishing and details
- Add details with a blue ballpoint pen if desired.
- Painting is optional: the author recommends painting only if you want the model as a desk decoration; otherwise, minimal finish is fine—add enough wood finish to achieve your desired appearance.
Notes and future work
- The designer has written about the RC Voyager model and is working on an .049 version that will be easier to build and fun to fly.
- Enjoy the Mini-Voyager and the canard design interpretations inspired by Burt Rutan.
Transcribed from original scans by AI. Minor OCR errors may remain.

