
Model Photography Q&A II
Dave Garwood & Jim Haught
MODELS IN FLIGHT
Q. How can I get a great in-flight shot of my airplane?
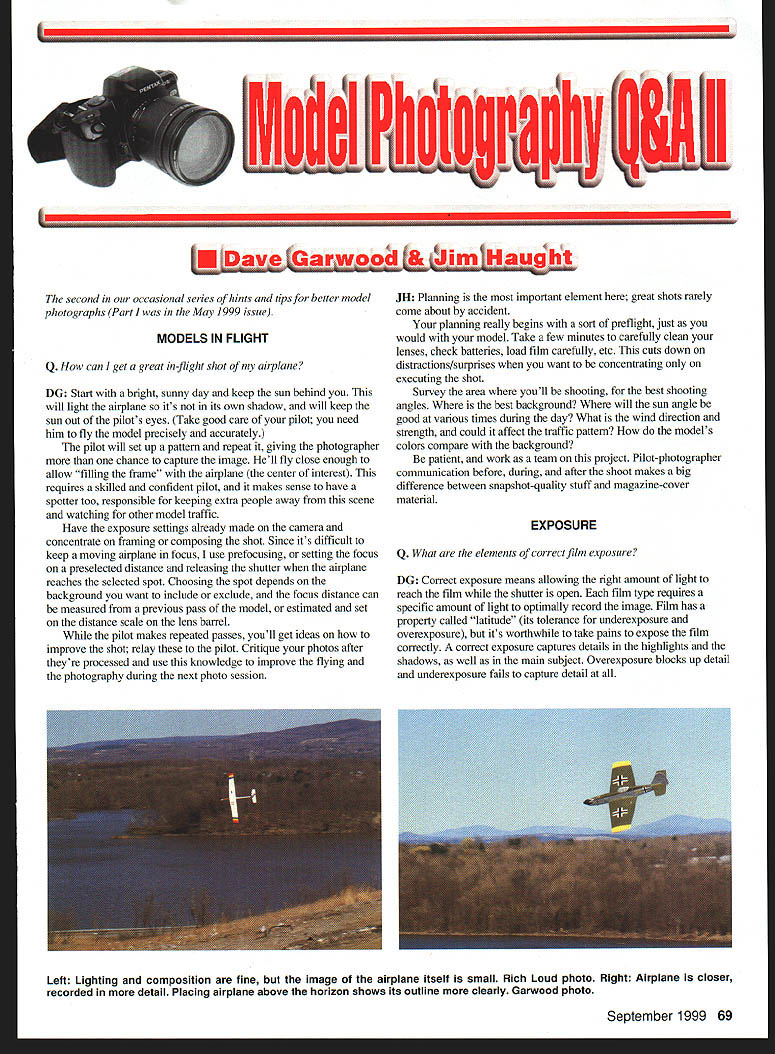
DG: Start with a bright, sunny day and keep the sun behind you. This lights the airplane so it isn't in its own shadow and keeps the sun out of the pilot's eyes. (Take good care of your pilot; you need him to fly the model precisely and accurately.)
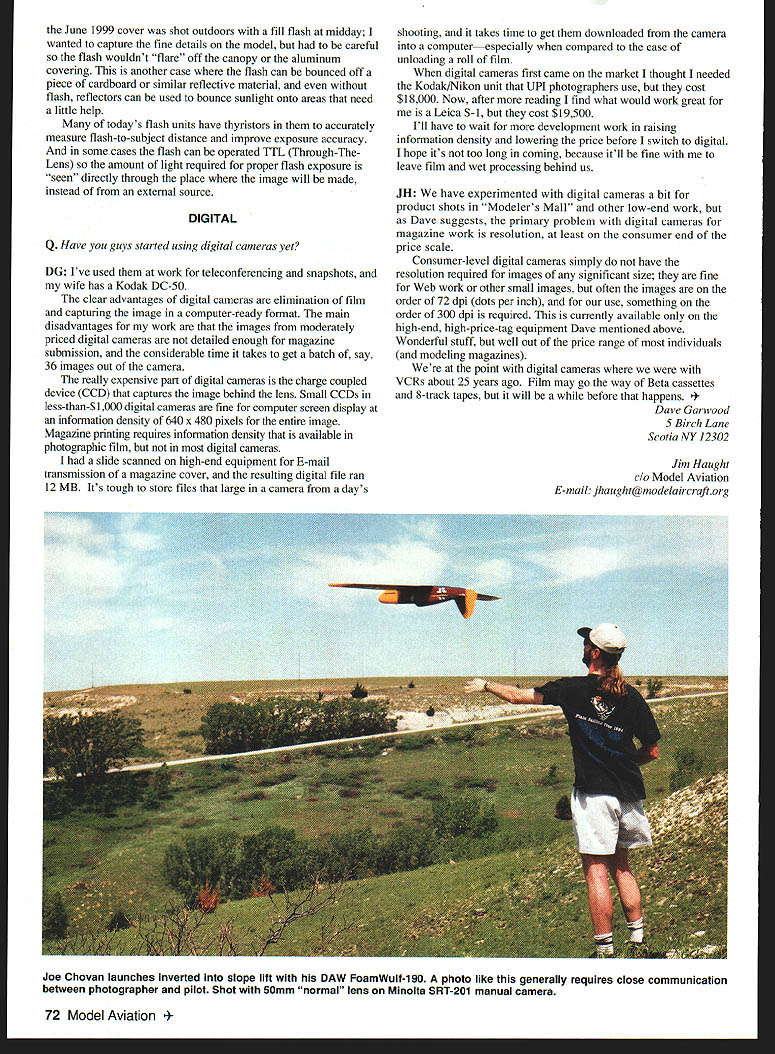
Have the pilot set up a repeatable pattern so you get multiple chances to capture the image. He should fly close enough to "fill the frame" with the airplane (the center of interest). This requires a skilled, confident pilot and it makes sense to have a spotter to keep extra people away and watch for other model traffic.
Have exposure settings made on the camera and concentrate on framing and composing the shot. Because it's hard to keep a moving airplane in focus, I use prefocusing—set focus at a preselected distance and release the shutter when the airplane reaches that spot. Choose the spot depending on the background you want to include or exclude. The focus distance can be measured from a previous pass of the model or estimated and set on the distance scale of the lens barrel.
While the pilot makes repeated passes, you'll get ideas on how to improve the shot—relay these to the pilot. Critique your photos after they're processed and use that knowledge to improve flying and photography at the next session.
JH: Planning is the most important element; great shots rarely come by accident.
Start with a preflight: clean your lenses, check batteries, load film, etc. This cuts down on distractions when you're concentrating on the shot.
Survey the shooting area for the best angles and backgrounds. Consider:
- where the sun will be at various times,
- wind direction and strength and how it might affect the traffic pattern,
- how the model's colors compare with the background.
Be patient and work as a team. Pilot-photographer communication before, during, and after the shoot makes a big difference between snapshot-quality pictures and magazine-cover material.
EXPOSURE
Q. What are the elements of correct film exposure?
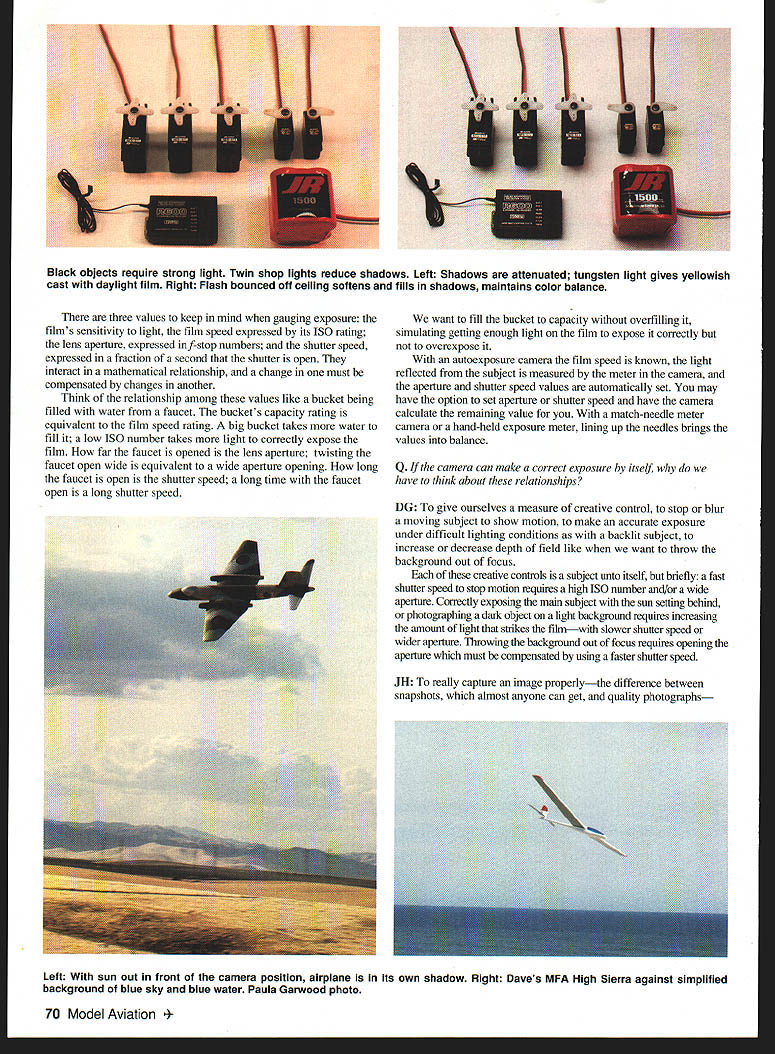
DG: Correct exposure means letting the right amount of light reach the film while the shutter is open. A correct exposure preserves detail in highlights, shadows, and the main subject. Overexposure blocks detail; underexposure fails to capture detail.
Three key values to keep in mind:
- Film sensitivity (film speed), expressed by its ISO rating.
- Lens aperture, expressed in f-stop numbers.
- Shutter speed, expressed as a fraction of a second (how long the shutter is open).
These three interact mathematically—when one changes you must compensate with another. Think of it like filling a bucket with a faucet: the bucket's capacity is the film speed (low ISO = big bucket, needs more light), how far the faucet is opened is the aperture, and how long the faucet is open is the shutter speed. You want to "fill the bucket" without overfilling.
With autoexposure, the camera knows the film speed and measures reflected light. It then sets aperture and shutter speed automatically; some cameras let you select aperture or shutter and compute the other. Match-needle meters in cameras or hand-held meters help balance the values.
Q. Can the camera make the correct exposure itself?
DG: Yes—modern autoexposure systems can set appropriate aperture and shutter speed for correct exposure by measuring light reflected from the subject. Many cameras also offer modes where you set the aperture or shutter speed and the camera calculates the other value. Match-needle meters and hand-held exposure meters can also be used to bring values into balance.
Q. If the camera can make a correct exposure by itself, why do we have to think about these relationships?
DG: To give ourselves creative control. Thinking about aperture, shutter speed, and ISO lets you:
- stop motion or show motion blur,
- make accurate exposures under difficult lighting (backlit subjects),
- increase or decrease depth of field (throwing the background out of focus).
Briefly: stopping motion needs a fast shutter, which requires a higher ISO and/or wider aperture; exposing a subject against a bright background may require slower shutter or wider aperture; throwing the background out of focus requires a wide aperture, compensated by a faster shutter.
JH: To move from snapshots to quality photographs you must evaluate shooting conditions and realize your options and limitations. Then you can "visualize" the final image and use creative controls to get what you want instead of just firing away and hoping.
FLASH PHOTOGRAPHY
Q. When do you use a flash?
DG: Use a flash when ambient light is insufficient to correctly expose the film, or when you need more control over the light than outdoor lighting provides.
Notes and practical points:
- Autoexposure cameras may lock the shutter or fire the internal flash when light is low—this yields many snapshot-style images.
- On a manual camera, if the meter indicates a shutter speed too long to hand-hold (for me, 1/125 second), mount the camera on a tripod or attach a flashgun.
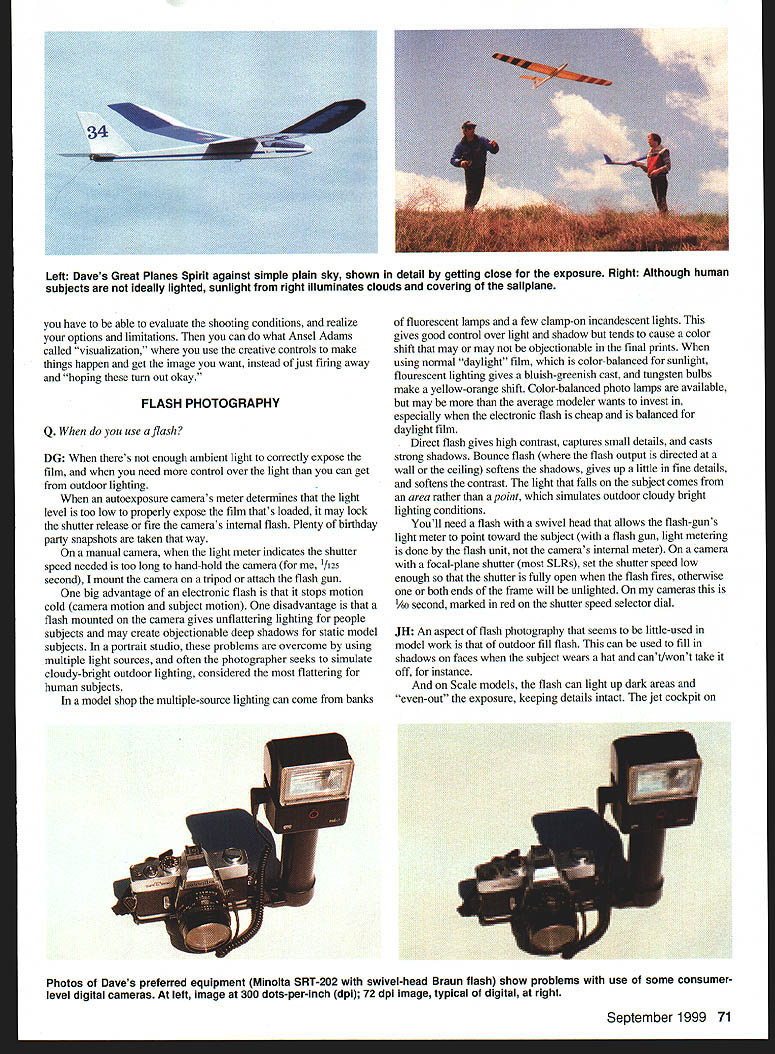
- An electronic flash stops motion (both camera and subject motion). A downside is that on-camera flash can give unflattering lighting and strong shadows for people or model subjects.
- In studios or model shops, multiple light sources (fluorescent banks, clamp-on incandescents) control shadows but may cause color shifts. Daylight-balanced lamps are available but can be expensive; electronic flash is often a cheaper daylight-balanced option.
- Direct flash gives high contrast, captures fine detail, and casts strong shadows. Bounce flash (aimed at a wall or ceiling) softens shadows and contrast by creating a larger apparent light source.
- Use a flash with a swivel head so you can aim the flash for bounce lighting. When using focal-plane shutters (most SLRs), set the shutter speed at or below the camera's flash sync speed so the shutter is fully open when the flash fires—otherwise parts of the frame will be unlit. On my cameras the sync speed is 1/60 second (marked in red on the dial).
JH: Outdoor fill flash is underused in model work. It can fill shadows (for example, faces shaded by a hat) and, on scale models, light dark areas to preserve detail. The jet cockpit on the June 1999 cover was shot outdoors with fill flash at midday to capture fine details without excessive flare off the canopy. You can bounce flash off cardboard or use reflectors to bounce sunlight onto areas that need help.
Many modern flash units use thyristors to measure flash-to-subject distance and improve exposure. Some support TTL (through-the-lens) metering so exposure is judged through the lens where the image will be made.
DIGITAL
Q. Have you guys started using digital cameras yet?
DG: I use them for teleconferencing and snapshots; my wife has a Kodak DC-50. Digital's clear advantages are no film and images already in a computer-ready format. The main disadvantages for magazine work:
- Consumer-level digital cameras lack resolution for magazine-quality printing.
- Large file sizes and the time required to download batches of images can be cumbersome.
The expensive part is the charge-coupled device (CCD). Small CCDs in sub-$1,000 cameras are fine for web or screen display (e.g., 640 x 480 pixels) but not for print. High-end scans or digital files for print can be very large (I once had a slide scanned for a magazine cover and the file was 12 MB). High-resolution digital capture and storage in a camera remain costly and cumbersome.
When digital cameras first appeared I thought I needed the Kodak/Nikon unit used by wire-service photographers (around $18,000). Later I found a Leica S-1 that would work for me, but it costs about $19,500. I'll wait for higher resolution at lower prices before switching completely to digital. I do look forward to leaving film and wet processing behind.
JH: We've experimented with digital for product shots and low-end work. As Dave says, consumer digital cameras lack the resolution required for significant print sizes. They often produce images around 72 dpi, while magazine work typically needs roughly 300 dpi. That resolution is currently available only on very high-end equipment, which is out of reach for most individuals and many magazines.
We're at a stage with digital cameras similar to where VCRs were about 25 years ago. Film may eventually be supplanted, but it will take time.
Dave Garwood 5 Birch Lane Scotia, NY 12302
Jim Haught c/o Model Aviation E-mail: jhaught@modelaircraft.org
Transcribed from original scans by AI. Minor OCR errors may remain.

