

Ms. Peach
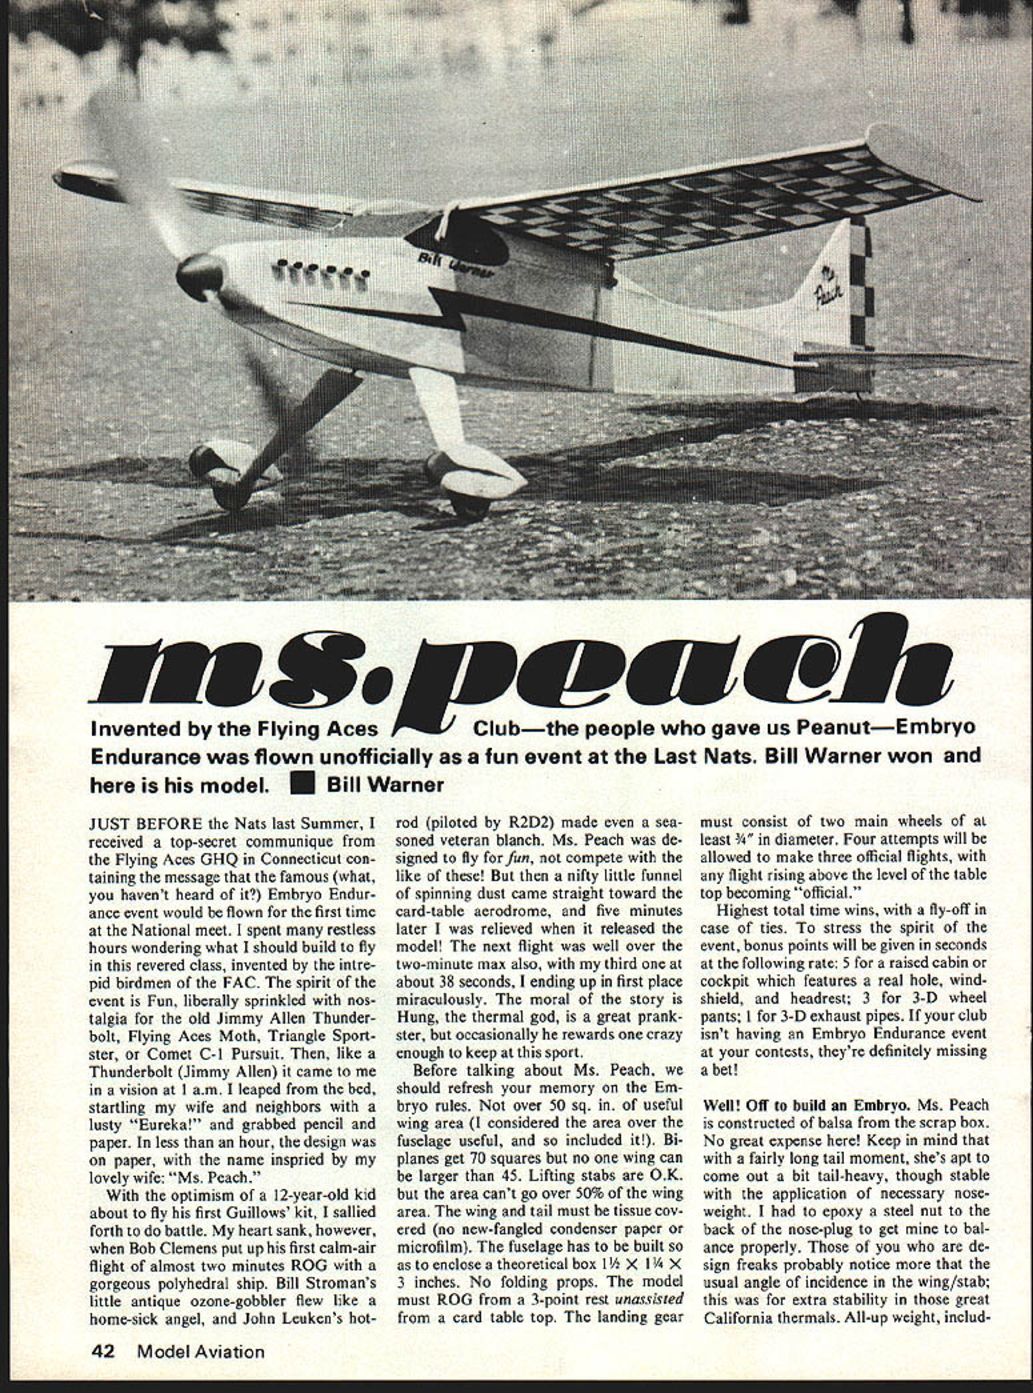
Invented by the Flying Aces Club—the people who gave us Peanut—Embryo Endurance was flown unofficially as a fun event at the Last Nats. Bill Warner won and here is his model. ■ Bill Warner
JUST BEFORE the Nats last Summer, I received a top-secret communique from the Flying Aces GHQ in Connecticut containing the message that the famous (what, you haven't heard of it?) Embryo Endurance event would be flown for the first time at the National meet. I spent many restless hours wondering what I should build to fly in this revered class, invented by the intrepid birdmen of the FAC. The spirit of the event is Fun, liberally sprinkled with nostalgia for the old Jimmy Allen Thunderbolt, Flying Aces Moth, Triangle Sportster, or Comet C-1 Pursuit. Then, like a Thunderbolt (Jimmy Allen) it came to me in a vision at 1 a.m. I leaped from the bed, startling my wife and neighbors with a lusty "Eureka!" and grabbed pencil and paper. In less than an hour, the design was on paper, with the name inspired by my lovely wife, "Ms. Peach."
With the optimism of a 12-year-old kid about to fly his first Guillows' kit, I sallied forth to do battle. My heart sank, however, when Bob Clemens put up his first calm-air flight of almost two minutes ROG with a gorgeous polyhedral ship. Bill Stroman's little antique ozone-gobbler flew like a homesick angel, and John Leukens' hotrod (piloted by R2D2) made even a seasoned veteran blanch. Ms. Peach was designed to fly for fun, not compete with the like of these! But then a nifty little funnel of spinning dust came straight toward the card-table aerodrome, and five minutes later I was relieved when it released the model! The next flight was well over the two-minute max also, with my third one at about 38 seconds, ending up in first place, miraculously. The moral of the story is Hung, the thermal god, is a great prankster, but occasionally he rewards one crazy enough to keep at this sport.
Before talking about Ms. Peach, we should refresh your memory on the Embryo rules. Not over 50 sq. in. of useful wing area (I considered the area over the fuselage useful, and so included it!). Biplanes get 70 squares but no one wing can be larger than 45. Lifting stabs are O.K. but the area can't go over 50% of the wing area. The wing and tail must be tissue covered (no new-fangled condenser paper or microfilm). The fuselage has to be built so as to enclose a theoretical box 1 1/2 X 1 1/2 X 3 inches. No folding props. The model must ROG from a 3-point rest unassisted from a card table top. The landing gear must consist of two main wheels of at least 3/4" in diameter. Four attempts will be allowed to make three official flights, with any flight rising above the level of the table top becoming "official." Highest total time wins, with a fly-off in case of ties. To stress the spirit of the event, bonus points will be given in seconds at the following rate: 5 for a raised cabin or cockpit which features a real hole, windshield, and headrest; 3 for 3-D wheel pants; 1 for 3-D exhaust pipes. If your club isn't having an Embryo Endurance event at your contests, they're definitely missing a bet!
Well! Off to build an Embryo. Ms. Peach is constructed of balsa from the scrap box. No great expense here! Keep in mind that with a fairly long tail moment, she's apt to come out a bit tail-heavy, though stable with the application of necessary nose-weight. I had to epoxy a steel nut to the back of the nose-plug to get mine to balance properly. Those of you who are design freaks probably notice more than the usual angle of incidence in the wing/stab; this was for extra stability in those great California thermals. All-up weight, includ- ing the nut, is about one ounce, which could easily be cut in half by judiciously selecting wood and decreasing the angle of attack.
Wing:
I built it by putting in all the ribs as rectangles and sanding the lot down with a long sanding block. How's that grab those of you who like to drop airfoil names like NACA 2042 or RAF 32? The plan shows about what I came up with.
Start by laying down the bottom 1/16 sq. spars and sand the ends of long ribs to make the L.E. and T.E. match up. Being lazy, I laminated the T.E. from 1/16-sq. strips, two to be exact. The 1/32 tip plates were added after covering. Use the root-rib dihedral gage when gluing on the root ribs (wing is made in halves, covered, then joined up.) If the dihedral doesn't come out exactly 7/8, so what?
Stab:
The original stab was 1/16 thick, which worked fine except that I notice it is beginning to warp. I suggest going to 3/32 square, and light 3/32 sheet, to eliminate warping. The stab is glued in tight after the first test flights. Leave some space around to shove in a few wedges to change its angle if necessary. When final trim is arrived at, glue the stab solid, and then fill in space below with soft 1/16 sheet, or tissue, if you wish.
Rudder:
As per stab, I think lighter wood and thicker sizes will help prevent warping. The dorsal fin could be light 1/32 sheet. It's mainly for looks.
Fuselage:
Starting with hard 1/16 or 3/32 sq. longerons is just the ticket, though if you use 3/32, be prepared to apply the sanding block to the rearward part of the structure to cut down on weight (tapering). Build one side, put down a layer of Saran Wrap, and build the other right on top of it. If you can't find light 3/32 for uprights, use harder 1/16 as I did.
Bend up the landing gear, making it just wide enough at the top to slip up between the longerons, then epoxy it to the uprights. A notched spreader strut between the legs at the bottom of the fuselage completes the job nicely.
The gussets shown are a good idea, though not absolutely essential if you think you can avoid a crash or two. Once the "box" of the fuselage is done, construct the cabin of light 1/32 or 1/16 sheet. The C1, 2, and 3 parts are the wing rest; try the wing on for size, making sure it snuggles nicely into those little V-shaped beds (the reason will be apparent once you try for consistent flights).
The wing is held on with Q-tip or birch dowels. Don't make them so long that the No. 16 rubberbands crossed over the wing to hold it on cannot pop off in the event of a crash.
Build up the nose block from 1/8 laminations, or as you wish, solid hardwood. You will need nose weight anyway. The nose plug should be a snug fit into the hole in the front of the fuselage. Sand the NA and NB part of the nose plug. Glue on shims if loose, because loose nose plugs make for unreliable thrust adjustments. Note that the nose plug has built-in right- and down-thrust. Bend up a 1/32 MW prop shaft, then add two brass washers, or a bead, or a ball-bearing washer between the Peck nose-button and the prop.
Landing gear:
Make the wheel pants from soft balsa (L1, L2) and sand to streamlined shape. A couple of roundels cut from a sheet of 3/32 ply make good wheels, if you don't have any ready-mades. Make sure they turn, because ROG is part of the game. Epoxy the pants to the landing gear wire, making sure to keep the epoxy out of the part that turns! Add the fairings as shown on the plan (I had them on the original model prior to a tree disaster).
Covering and Decorating:
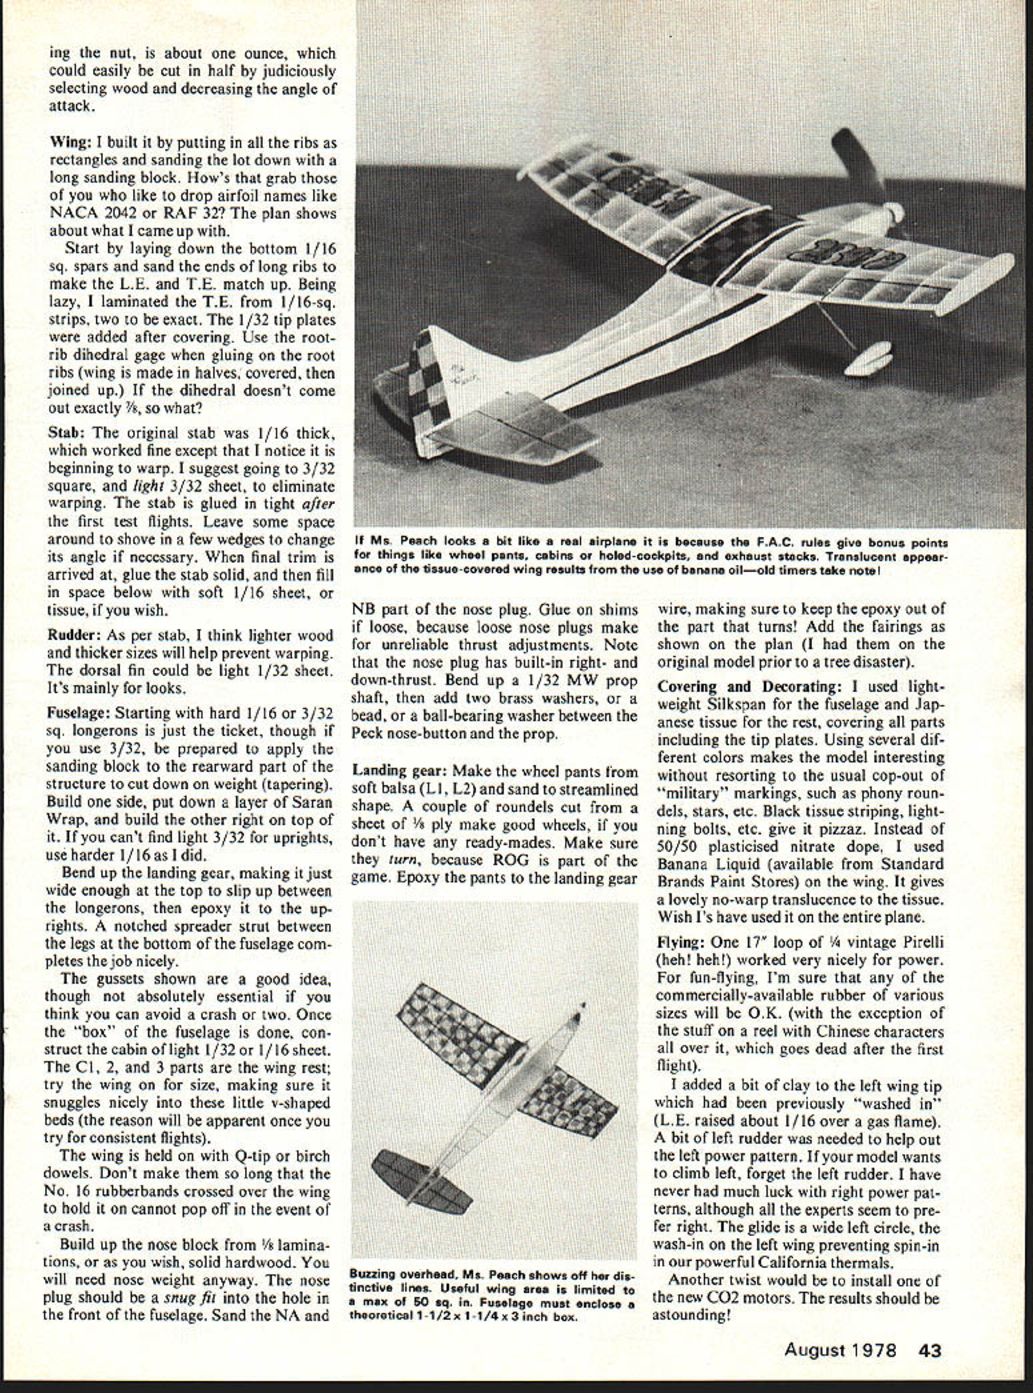
I used lightweight Silkspar for the fuselage and Japanese tissue for the rest, covering all parts including the tip plates. Using several different colors makes the model interesting without resorting to the usual cop-out of "military" markings, such as phony roundels, stars, etc. Black tissue striping, lightning bolts, etc. give it pizazz. Instead of 50/50 plasticised nitrate dope, I used Banana Liquid (available from Standard Brands Paint Stores) on the wing. It gives a lovely no-warp translucence to the tissue. Wish I'd used it on the entire plane.
Flying:
One 17" loop of 1/4" vintage Pirelli (heh! heh!) worked very nicely for power. For fun-flying, I'm sure that any of the commercially-available rubber of various sizes will be O.K. (with the exception of the stuff on a reel with Chinese characters all over it, which goes dead after the first flight).
I added a bit of clay to the left wing tip which had been previously "washed in" (L.E. raised about 1/16 over a gas flame). A bit of left rudder was needed to help out the left power pattern. If your model wants to climb left, forget the left rudder. I have never had much luck with right power patterns, although all the experts seem to prefer right. The glide is a wide left circle, the wash-in on the left wing preventing spin-in in our powerful California thermals.
Another twist would be to install one of the new CO2 motors. The results should be astounding! Here in model U, Bill Warner, just before Nats last summer, received a top‑secret communique from Flying Aces GHQ, Connecticut, containing the message that the famous Embryo Endurance event would be flown for the first time at the National meet. I spent restless hours wondering what I should build to fly the revered class invented by the intrepid birdmen of the FAC. The spirit of the event — fun liberally sprinkled with nostalgia — brought back visions of old Jimmy Allen, Thunderbolt, Flying Aces Moth, Triangle Sportster, Comet, C‑I Pursuit and the like.
Like Thunderbolt, Jimmy Allen came to me in a vision. I leaped out of bed, startling my wife and neighbors, and with a lusty "Eureka!" grabbed pencil and paper. In less than an hour the design was on paper; the name was inspired by my lovely wife — Ms. Peach. With the optimism of a 12‑year‑old kid about to fly his first Guillows kit, I sallied forth to battle. My heart sank, however, when Bob Clemens put up the first calm‑air ROG flight of almost two minutes with his gorgeous polyhedral ship. Bill Stroman's little antique ozone‑gobbler flew like a homesick angel. John Leuken's hot‑rod piloted R2D2 made seasoned veterans blanch. Ms. Peach was designed to fly for fun and to compete.
Like a nifty little funnel, she spun dust and came straight toward the card‑table aerodrome. Five minutes later, relieved, I released the model and the next flight was well over the two‑minute max; the third was about 38 seconds, ending up first place — miraculously. The moral: the thermal god, that great prankster, occasionally rewards the crazy enough to keep at the sport.
Before talking about Ms. Peach, a refresher on Embryo rules: over 50 sq. in. of useful wing area is considered (area over fuselage is not considered useful). Biplanes get 70 sq. in. No wing panel may be larger than 45 sq. in. Lifting stabs are OK but their area can't exceed 50% of the wing area. Wings and tail must be tissue covered — no new‑fangled condenser paper or microfilm. The fuselage has to be built to enclose the theoretical box 1" x 1" x 3". No folding props. Models must ROG from a 3‑point rest, unassisted, from a card‑table top. Landing gear must consist of two main wheels at least 1/2" diameter. Four attempts are allowed; make three official flights. A flight must rise above the level of the table top to become official. Highest total time wins; in fly‑offs, in case of ties stress the spirit of the event. Bonus points will be given for seconds over the following rates: 5 seconds for raised cabin/cockpit features, real hole windshields, headrests, 3‑D wheel pants, 3‑D exhaust pipes, etc. If your club isn't having Embryo Endurance events, they're definitely missing a hoot.
Well, to build an Embryo: Ms. Peach was constructed from balsa scrap — no great expense. Keep in mind she has a fairly long tail moment, so she's apt to come out a bit tail‑heavy; though that tends to make her stable, some noseweight is necessary. Epoxy a steel nut into the back of the nose plug to get balance properly. Design freaks will probably notice the usual angle of incidence between wing and stab for extra stability in great California thermals. All‑up weight included, she came in about 2 oz.
Wing: build the wing by putting ribs (rectangles) on the spars and sanding a lot down on a long sanding block to get the desired airfoil. Names like NACA 2042 or RAF 32 describe the sort of airfoil the plan shows. Start laying down the bottom 1/16" square spars; sand the ends of the long ribs to make LE and TE match up. Being lazy, I laminated the TE from 1/16"‑sq strips; two exact 1/32" tip plates were added after covering. Use a root‑rib dihedral gauge when gluing the root ribs. The wing was made in halves, covered, then joined up. The dihedral doesn't come out exactly like the plan sometimes; adjust as needed.
Stab: the original stab, 1/16" thick, worked fine except I noticed it beginning to warp. I suggest going to 3/32" square light or 3/32" sheet to eliminate warping. Glue the stab tight after the first test flights. Leave some space around it to shove in a few wedges to change its angle when necessary; after the final trim, arrive and glue the stab solid, then fill the space below with soft 1/16" sheet and tissue if you wish.
Rudder: as per the stab, think lighter wood in thicker sizes will help prevent warping. A dorsal fin could be of light 1/32" sheet — it's mainly for looks.
Fuselage: start with hard 1/16" and 3/32" square longerons — just the ticket — though you can use 3/32" prepared uprights; if you can't find light 3/32" uprights use harder 1/16". Apply a sanding block to the rearward parts of the structure to cut down weight while tapering. Build one side over a layer of Saran Wrap so the other side will peel free when done.
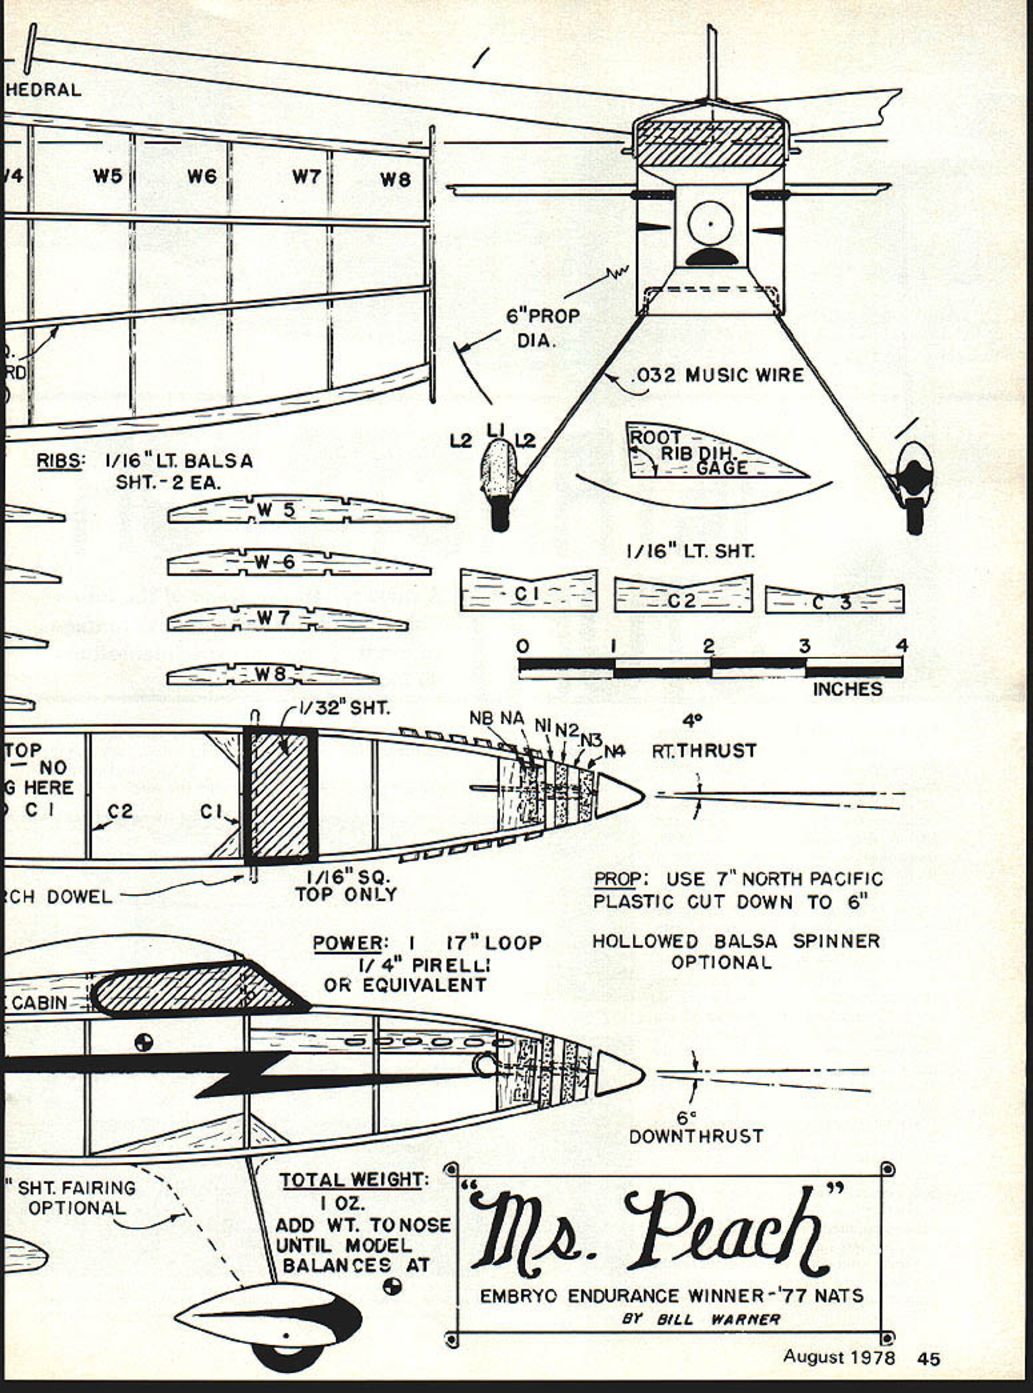
Landing gear: bend up the landing gear making it just wide enough at the top to slip up between the longerons. Use a nose plug with the steel nut as noted; fit and trim to get the correct balance. RIBS: 1/16" LT. BALSA SHT. - 2 EA.
1/32" SHT.
1/16" LT. SHT. C1 C2 C3
0 1 2 3 4 INCHES
1/16" SQ. TOP ONLY
RT. THRUST 4°
PROP: USE 7" NORTH PACIFIC PLASTIC CUT DOWN TO 6" HOLLOWED BALSA SPINNER OPTIONAL
POWER: 1 - 17" LOOP 1/4" PIRELLI OR EQUIVALENT
6° DOWNTHRUST
TOTAL WEIGHT: 1 OZ. ADD WT. TO NOSE UNTIL MODEL BALANCE AT
"Ms. Peach" EMBRYO ENDURANCE WINNER - '77 NATS BY BILL WARNER
Transcribed from original scans by AI. Minor OCR errors may remain.

