
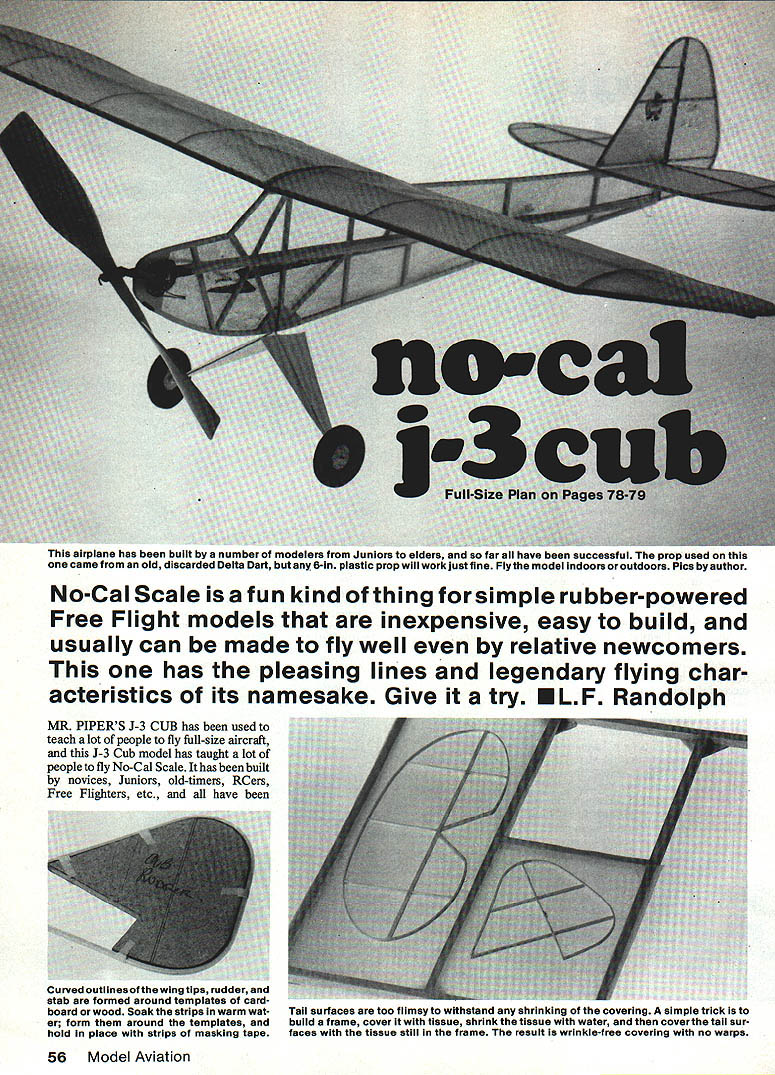

No-cal J-3 Cub
No-Cal Scale is a fun class for simple rubber-powered free-flight models that are inexpensive, easy to build, and usually can be made to fly well even by relative newcomers. This one has the pleasing lines and legendary flying characteristics of its namesake. Give it a try. L.L.F. Randolph
Mr. Piper's J-3 Cub has been used to teach many people to fly full-size aircraft, and this J-3 Cub model has taught many people to fly No-Cal Scale. It has been built by novices, juniors, old-timers, RCers, free-flighters, etc., and all have been successful. It can be flown outdoors when the wind is calm—or even in the living room when the weather doesn't cooperate. School gyms and auditoriums are excellent sites, and most can be obtained for flying this type of model by just asking.
Although intended as a simple fun machine, it has already become a contest winner several times. During a recent local indoor contest at Bedford Boys Ranch, airplanes built from these plans won both the Junior and Open age divisions in the No-Cal class. The Bedford site is the home of many national indoor records; the folks who fly there know their stuff, and it takes a good airplane to win.
If No-Cal Scale is new to you, it is a product of the Flying Aces Club (FAC). The rules are simple: the model must be a recognizable reproduction of a full-size airplane with as close to accurate color and markings as possible, and it must have no more than a 16-in. wingspan.
Materials, tools, and templates
- 1/16 x 1/32 balsa strips
- 1/32 sheet balsa
- 1/8 x 1/4 balsa (for frame)
- 1/16 sq. balsa (for dihedral spar)
- 1/16 sheet balsa (for wheels)
- Yellow tissue and tissue for covering
- Rub-on glue stick (available at drugstores/office supply/fabric/hobby shops)
- 50/50 mixture of white glue and water (for fuselage covering)
- Clear dope (one coat for fuselage sides)
- Ambroid cement or Testors cement, and Super Jet cyanoacrylate (CyA) if available
- Wax paper (to cover plan while building)
- Masking tape, pins, tweezers
- .030 aluminum or flattened 1/16 aluminum tubing (for nose bearing)
- 1/32-in. music wire (for prop shaft)
- .020 wire (for landing gear)
- Glass beads or small brass washers (for wheel hubs)
- Delta Dart or any 6-in. plastic prop
- Center-gate rubber loop (ideal 22-in., .043 x .060 in) or four No. 18 rubber bands looped together and lubed (Armor-All)
- Modeling clay (for trimming balance)
- Sharpie pen (for trim)
- Small sewing thread (to sew nose bearing)
- Tools: hobby knife, drill for small holes, sanding block, small pliers
Make templates:
- Trace the inside outline of the wing tip, rudder, and stabilizer onto 1/16 balsa or cardboard and cut out the shapes for use as templates.
- Make a cardboard template of the wing rib and slice eight ribs, each 1/16 in. wide, from 1/32 sheet balsa.
Construction
- Wing tips and ribs
- Soak strips of 1/16 x 1/32 balsa in warm water for a few minutes and form them around the wing tip templates. Hold the wood in place with strips of masking tape until dry. Make two wing tips.
- Using the rib template, cut eight ribs (each 1/16 in. wide) from 1/32 sheet balsa.
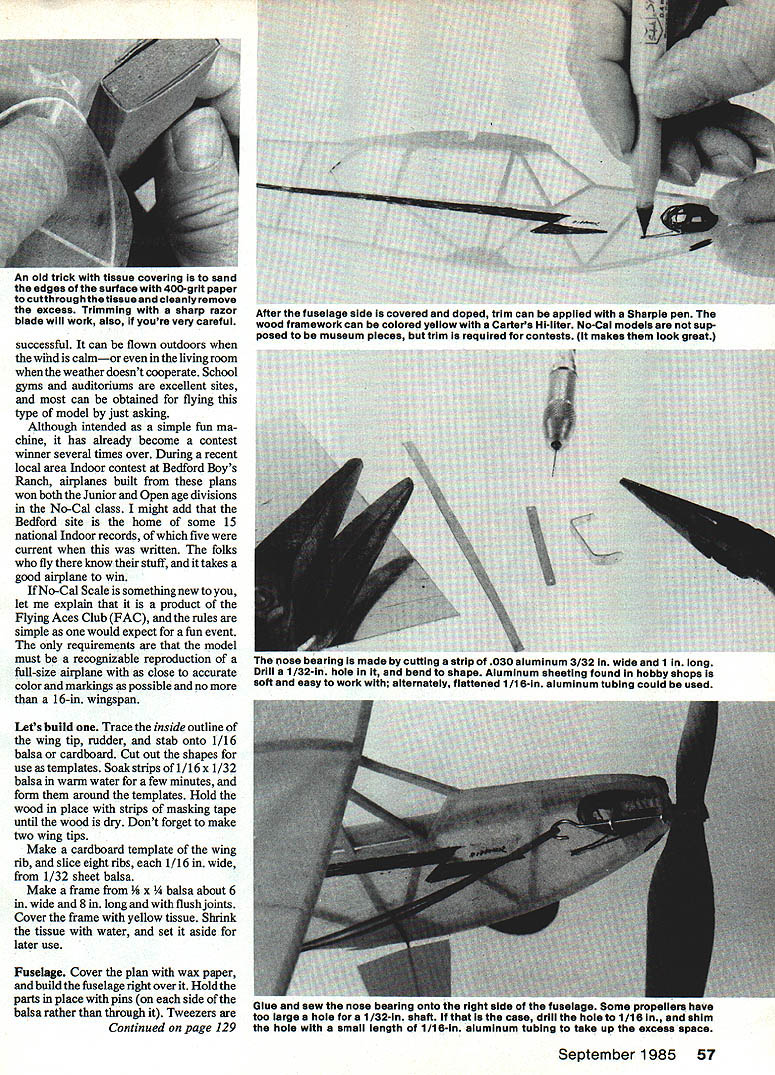
- Frame and covering
- Make a frame from 1/8 x 1/4 balsa about 6 in. wide and 8 in. long with flush joints.
- Cover the frame with yellow tissue. Shrink the tissue with water and set it aside for later use.
- Fuselage
- Cover the plan with wax paper and build the fuselage right over it. Hold parts in place with pins (place the pins on each side of the balsa rather than through it). Tweezers are handy for installing uprights in the cabin area.
- Use Ambroid cement or Super Jet CyA for adhesive. Remove the fuselage from the plan when the glue has set.
- Flying surfaces (wing, stab, rudder)
- Build the wing over the plan by holding the leading and trailing edges in place and gluing the ribs and previously formed tips in place. When the glue has dried, remove the wing from the plan.
- Crack the leading and trailing edges at the center for dihedral. Give the cracked areas a coat of glue. Crack the center of a length of 1/16 sq. balsa and glue it to the ribs in the location shown on the plan. Give all joints at the dihedral break another coat of glue.
- Hold the outlines of the rudder and stabilizer in place over the plan and glue the spars and ribs to them. Tweezers can be helpful.
Covering
- Use a rub-on-type glue stick to cover the flying surfaces (this is the easiest method at home).
- Cover the tail surfaces first: apply the glue stick around the top edges of the stabilizer and the right side of the rudder, then lay the tissue on the frame.
- Cover the wing in two halves: apply the glue stick to the spars, leading and trailing edges, and the tip. Position the tissue over the top and rub gently to seal the edges. When dry, trim excess tissue from all surfaces.
- For the fuselage left/right sides:
- Use a 50/50 mixture of white glue and water as adhesive for covering the fuselage on the right side. When the glue is dry, the tissue will be water-shrunk; give it one coat of clear dope.
- Glue cellophane cabin windows to the left side. Draw the trim on the fuselage side at this time with a Sharpie pen.
Final assembly
- Motor hook and motor stick
- Glue the rear motor hook to the motor stick and hold the motor stick in position on the left side of the fuselage. Note where the motor hook touches the tissue and slit the tissue in this area. Slip the hook through the slit and glue the motor stick to the fuselage. Apply glue to the covering where the motor hook comes through.
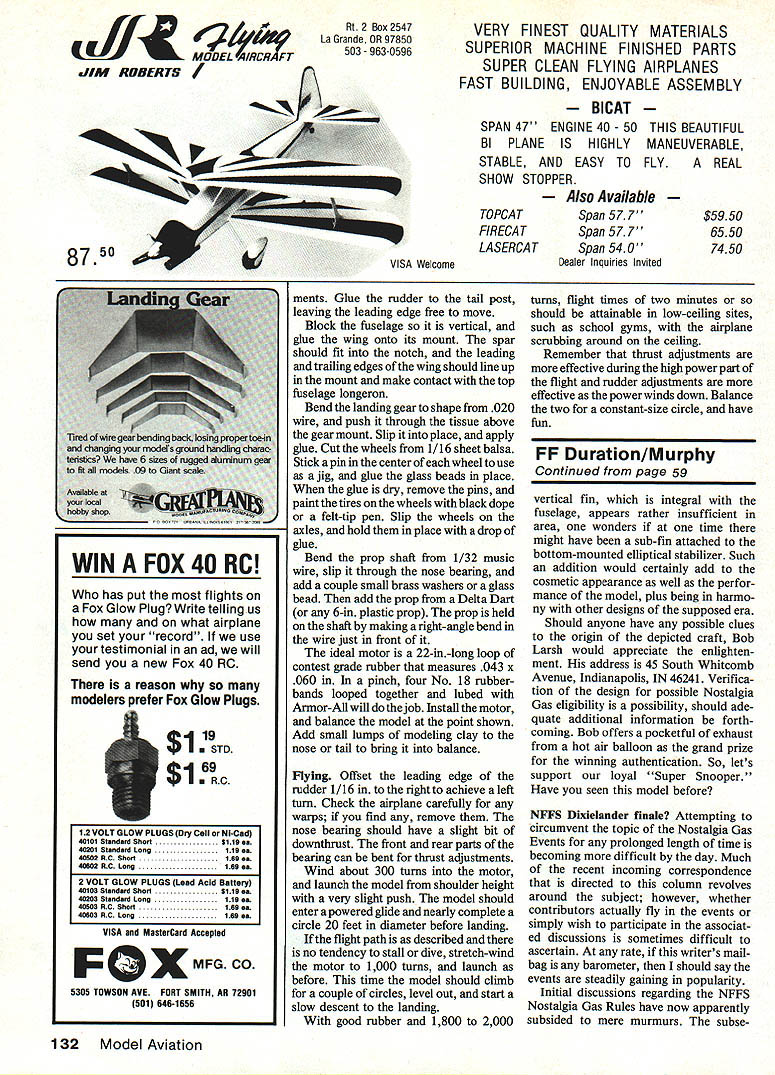
- Nose bearing
- Make the nose bearing from .030 aluminum or from a piece of flattened 1/16 aluminum tubing. Drill the hole for a 1/32-in. prop shaft.
- Glue the nose bearing to the right side of the fuselage (opposite the motor stick) and sew it in with thread through the nose sheet and around the motor stick. Give everything another coat of glue.
- Install the nose bearing with a little down thrust (about a degree or two). The nose bearing should have a slight upthrust overall; the front and rear parts of the bearing can be bent for thrust adjustments.
- Stab and rudder
- Glue the stabilizer in place using Ambroid or Testors cement, but only put glue at the leading and trailing edges. Later, if adjustment is necessary, a drop of acetone will soften the glue for easy removal.
- Glue the rudder to the tail post, leaving the leading edge free to move.
- Wing mounting
- Block the fuselage so it is vertical and glue the wing onto its mount. The spar should fit into the notch, and the leading and trailing edges of the wing should line up in the mount and make contact with the top fuselage longeron.
- Landing gear and wheels
- Bend the landing gear to shape from .020 wire and push it through the tissue above the gear mount. Slip it into place and apply glue.
- Cut the wheels from 1/16 sheet balsa. Stick a pin in the center of each wheel to use as a jig and glue the glass beads in place. When the glue is dry, remove the pins and paint the tires on the wheels with black dope or a felt-tip pen. Slip the wheels on the axles and hold them in place with a drop of glue.
- Prop shaft and prop
- Bend the prop shaft from 1/32 music wire, slip it through the nose bearing, and add a couple of small brass washers or a glass bead. Add the prop (Delta Dart or any 6-in. plastic prop). The prop is held on the shaft by making a right-angle bend in the wire just in front of it.
- Motor and balance
- The ideal motor is a 22-in. loop of center-gate rubber that measures .043 x .060 in. In a pinch, four No. 18 rubber bands looped together and lubed with Armor-All will do.
- Install the motor and balance the model at the point shown on the plan. Add small lumps of modeling clay to the nose or tail to achieve proper balance.
Flying
- Offset the leading edge of the rudder 1/16 in. to the right to achieve a left turn.
- Check the airplane carefully for any warps; remove any found.
- Wind about 300 turns into the motor and launch the model from shoulder height with a very slight push. The model should enter a powered glide and nearly complete a circle about 20 feet in diameter before landing.
- If the flight path is as described and there is no tendency to stall or dive, stretch-wind the motor to 1,000 turns and launch as before. The model should climb for a couple of circles, level out, and start a slow descent to the landing.
- With good rubber and 1,800 to 2,000 turns, flight times of two minutes or so should be attainable in low-ceiling sites (such as school gyms), with the airplane scrubbing around on the ceiling.
Remember: thrust adjustments are more effective during the high-power part of the flight and rudder adjustments are more effective as the power winds down. Balance the two for a constant-size circle, and have fun.
Transcribed from original scans by AI. Minor OCR errors may remain.

