
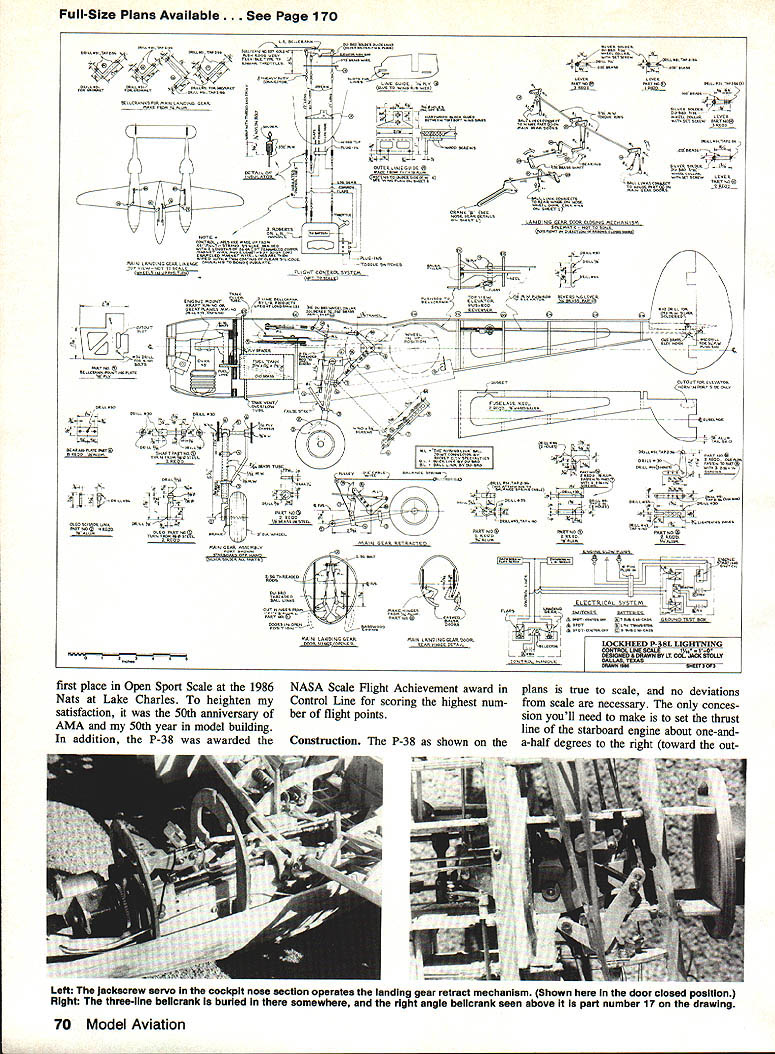
P-38 Lightning
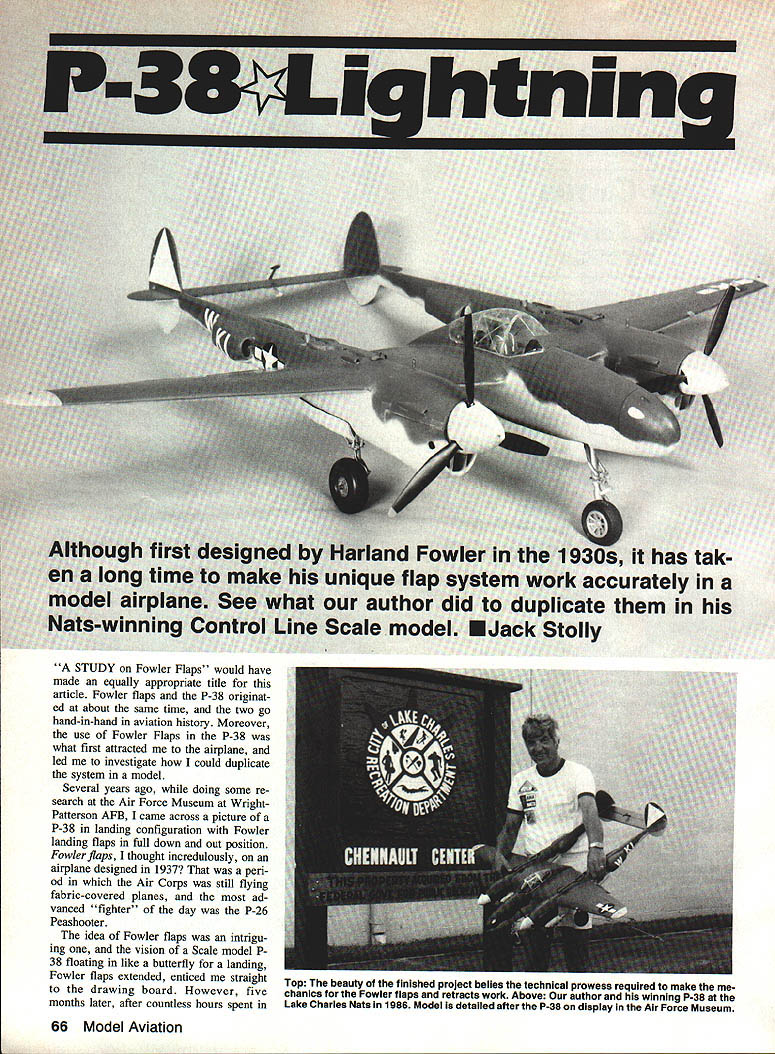
Although first designed by Harlan Fowler in the 1930s, it took a long time to make his unique flap system work accurately in a model airplane. See what the author did to duplicate them in his Nats-winning control-line scale model. — Jack Stolly
Introduction
"A Study on Fowler Flaps" would have made an equally appropriate title for this article. Fowler flaps and the P-38 originated at about the same time, and the two go hand-in-hand in aviation history. The use of Fowler flaps in the P-38 was what first attracted me to the airplane and led me to investigate how I could duplicate the system in a model.
Several years ago, while doing research at the Air Force Museum at Wright-Patterson AFB, I came across a picture of a P-38 in landing configuration with Fowler landing flaps in full down-and-out position. Fowler flaps, I thought incredulously, on an airplane designed in 1937? That was a period in which the Air Corps was still flying fabric-covered planes, and the most advanced "fighter" of the day was the P-26 Peashooter.
The vision of a scale model P-38 floating in like a butterfly for a landing, Fowler flaps extended, enticed me straight to the drawing board. However, five months later, after countless hours spent sketching, drawing, constructing mock-ups and general conceptualizing, I was back to square one.
The problem was that the Fowler flap installation on the P-38 was clean: all of the working mechanisms and linkages were inside the wing. Unlike modern jets with external pods and protuberances to cover jackscrews and linkages, the P-38 designers managed to enclose everything within the wing, cutting down drag and increasing overall efficiency.
Who was Fowler?
I learned there was indeed a man named Harlan Fowler. He was a designer who came to Lockheed from the Stearman-Hammond Airplane Company in the autumn of 1935. Lockheed's chief engineer at the time, Hall Hibbard, liked Fowler's flap idea so well that he convinced Lockheed's patent counsel to underwrite a patent on it.
The Lockheed Model 14 Super Electra transport was selected as the test bed for Fowler's flap system. The first flight of the Model 14 with Fowler flaps was made in January 1937 — the same month, coincidentally, that the Air Corps put out its specifications for a new type of pursuit plane. Up to that time Lockheed had not been involved in military pursuit/combat planes, but the company jumped into this one with both feet. The result was its Model 38, designated XP-38. Fowler flap innovations were incorporated into the new design.
The XP-38 and its innovations
Construction of the XP-38 began in July 1938 and progressed rapidly, even though the new plane was loaded with many "firsts." These included:
- Butt-jointed, flush-riveted exterior surfaces
- Turbo superchargers
- Extensive use of stainless steel
- Twin engines with counter-rotating propellers
It was completed within seven months and taken to March Field in Riverside, CA for its first flight in January 1939. A few weeks later, on February 11, the overanxious Air Corps sent the new machine on a record-breaking cross-country flight from March Field to Mitchell Field on Long Island, NY — unfortunately, it crashed on landing. Despite this awkward beginning, the P-38 went on to become one of World War II's most versatile fighter planes.
The Fowler flap was licensed to other aircraft companies and was used on famous planes such as the Consolidated B-24 and the Lockheed Constellation (the "Connie").
Model development and solution
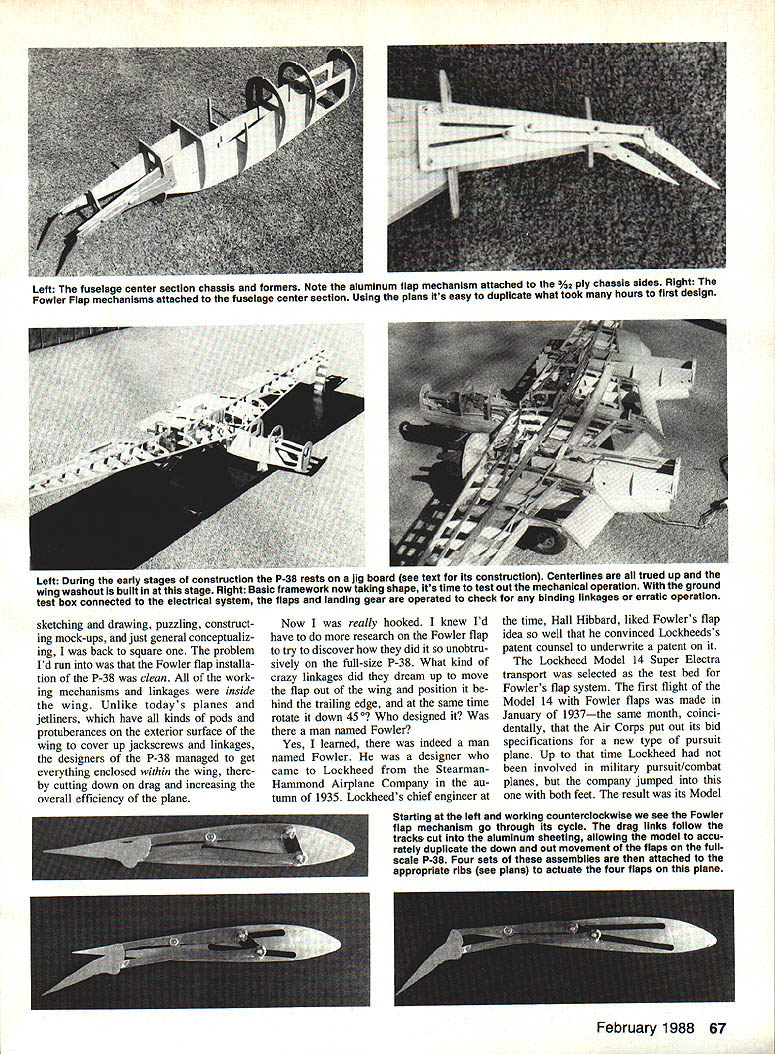
Getting back to the problem of a clean installation of Fowler flaps on a model P-38, I eventually came up with a solution (shown in detail on the plans and accompanying photos) that, ironically, was identical in principle to the system devised by the Lockheed engineers so many years before. The full-size P-38 had tracks and drag links at the ends of each of the four flaps (two inboard and two outboard) to extend and rotate the flaps — just as my model does. The full-size flaps were powered by a jackscrew and cable/pulley system almost the same as on my model. This system not only works in scale fashion but has the added advantage of eliminating flutter because the flaps are locked in whatever position they occupy.
All the work that goes into designing and scratch-building a model such as this seemed well worth it when my P-38 won first place in Open Sport Scale at the 1986 Nats at Lake Charles. To heighten my satisfaction, it was the 50th anniversary of the AMA and my 50th year in model building. In addition, the P-38 was awarded the NASA Scale Flight Achievement award in Control Line for scoring the highest number of flight points.
Construction
The P-38 as shown on the plans is true to scale, and no deviations from scale are necessary. The only concession you'll need to make is to set the thrust line of the starboard engine about 1.5° to the right (toward the outboard side of the flying circle) to compensate for possible engine failure of the left engine. No offset of the rudders is necessary, and the plane balances perfectly without added weights. The two degrees of washout in the outer wing panels are to scale and work perfectly on the model. I have yet to make a bad landing with this airplane, and I'm sure it's because the washout gives such good stall characteristics.
Jig and general assembly
The only way to build this airplane right is to build it on a jig board. I used a piece of 3-in. wood, cut 12 x 54 in. It must be absolutely flat and without warps. Leave the structure on the jig throughout the construction process. This keeps everything lined up properly and allows you to move the jig board out of the way if you want to use your workbench for other tasks.
I did not build the tail booms aft of former E-11 until the front part of the plane was pretty well completed. This saves bench space and allows easy access to the model while the innards are assembled. It also allows you to work the landing gear and make necessary adjustments with the plane on the jig.
Mark all formers, ribs and chassis parts with centerlines as shown on the plans. Assemble the cockpit center-pod chassis and formers, making sure all centerlines match. Assemble the two engine nacelle chassis parts and formers.
Set these three units up about six inches above the jig board, using 1/4-in. plywood supports tack-glued to the board and clamped to the formers. Using a ruler, adjust everything to the proper height by measuring from the top of the jig board to the centerline on the parts.
Wings
Insert and support the 1/8 x 3/4-in. spruce main wing spars, wing ribs (aluminum flap tracks should already be attached to their respective ribs), and the 1/4 x 1/4-in. wing leading edge. Note that the wing tip centerlines have two degrees of positive incidence relative to the master aircraft centerline. Starting near the midpoint of the outer wing panels, this positive incidence is reduced to 0°, which is where the washout is built into the wing.
Once the wing ribs are lined up, add the 3/8 x 3/16-in. and 1/16 x 1/4-in. spruce leading edges and the 1/4 x 1/8-in. trailing edges. Glue and pin as required to hold everything in place while the glue dries.
Fowler flap system
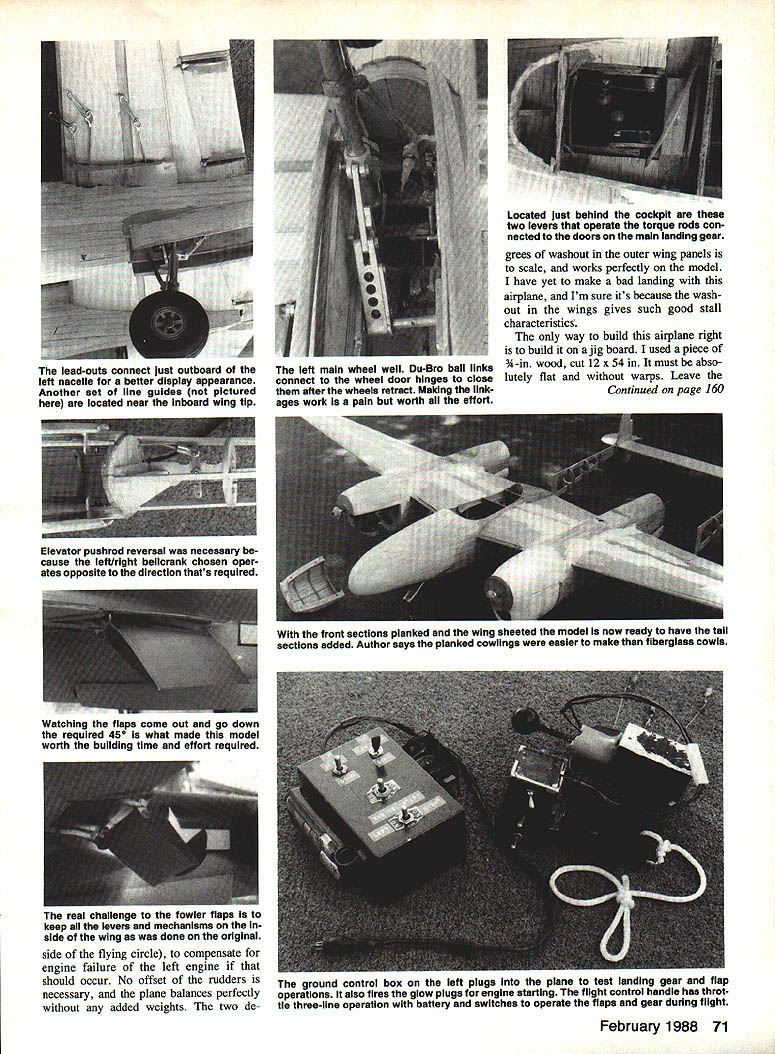
Build in the flap system following the plans and photos, making sure there is no binding and that each of the four flaps works true and easy. Multi-strand .012-in. control-line cable was used to connect the flaps to the jackscrew servo. The flaps will go from full up to full down position in seven or eight seconds, which is close to scale operating time.
Landing gear
Machine the parts for the landing gear system as accurately as possible, using a drill press for most operations. A jigsaw and a small lathe also come in handy. I removed the limit switches from the landing gear jackscrew servo and relocated them to a spot where they could be easily adjusted to precisely control the up-and-down limits of the landing gear travel.
The door-closing mechanism is guaranteed to drive you a little crazy; but when you see the doors open and close as on the full-scale plane you'll be glad you went to the trouble. Be sure to use a balance spring on the main wheels, as shown on the plans, to take most of the load off the jackscrew servo and save wear.
The main landing gear wheels are fitted with drum brakes which are activated by applying full down elevator while the plane is taxiing.
Tail section
The rest of the project is routine model building and is covered in detail in the drawings. The tail section is added by again leveling up the centerlines on the engine nacelles with the centerlines on the tail booms.
Controls and ground testing
For flying the P-38, I modified a J. Roberts three-line handle by adding toggle switches for flap and landing gear control. The center switch selects between the flap and landing gear functions and also acts as an off switch for the whole system.
The .021-in. multi-strand control lines are braided with enameled copper magnet wire to carry current, because the lines themselves have high resistance and would require 30–40 volts to get enough current through to operate the servos. Although the magnet wire is insulated, I wiped on a thin coating of clear silicone caulking to further insulate and bond the wire to the lines.
Locate the plane's ground test box jack at a convenient place of your choice. My box plugs into the starboard supercharger, which neatly hides the six-pin plugholes. With the box plugged into the plane you can operate the landing gear and flaps without having the control lines hooked up. The box also has a switch that activates each glow plug for engine starting — just throw the switch to the proper engine and hit it with the electric starter.
Flying characteristics
Taken as a whole, this is a complicated model that reproduces some of the intricate systems on the full-scale P-38. To duplicate the retractable landing gear and Fowler flap systems faithfully is no easy task, but in scale modeling it's the results that count. Not only is this project worth the effort in itself, but it's an exercise in problem solving that may yield insights applicable to other modeling problems.
When, by dint of skilled and patient effort, you've brought her to life, the P-38 rewards you with a lot of fun in the air. At eight pounds-plus, it's definitely not a looper, but it does fly like a full-scale heavy fighter. Feed in the power steadily on takeoff; after three-quarters of a circle she's built up enough speed to come off the ground with just a slight nudge of up elevator. Hit the gear switch and you can feel her become less nose-heavy as the wheels retract to the rear, and then you're really off and running as the doors close. For landing, throttle back to half power, get the flaps down, and just let her ease on down. As soon as the main gear touches down, the nose lowers and you've stopped flying—no bounce, nothing to fuss with. That's the way it's supposed to be. Keep 'em flying.
Documentation
Scale documentation for the P-38 is easily obtained from most hobby shops, aviation sections of bookstores, libraries, and other scale-documentation sources. My P-38 is modeled after the one on display at the Air Force Museum in Dayton, Ohio.
Transcribed from original scans by AI. Minor OCR errors may remain.

