
Paracraft: The Powered Parafoil
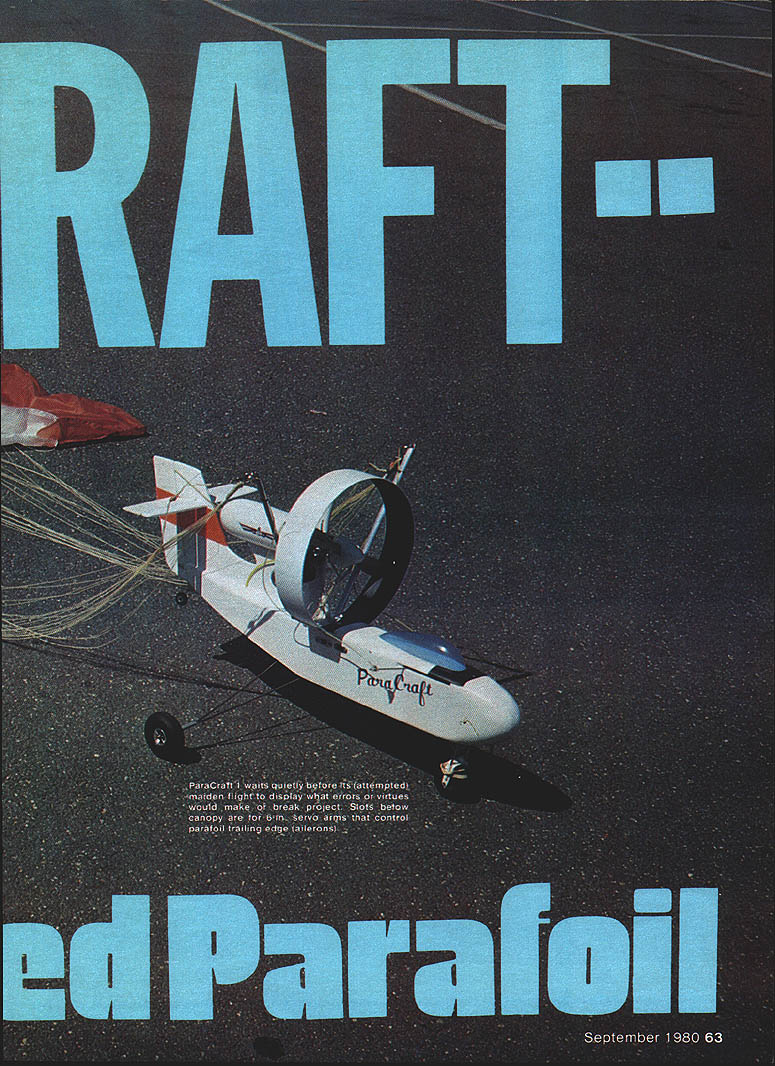
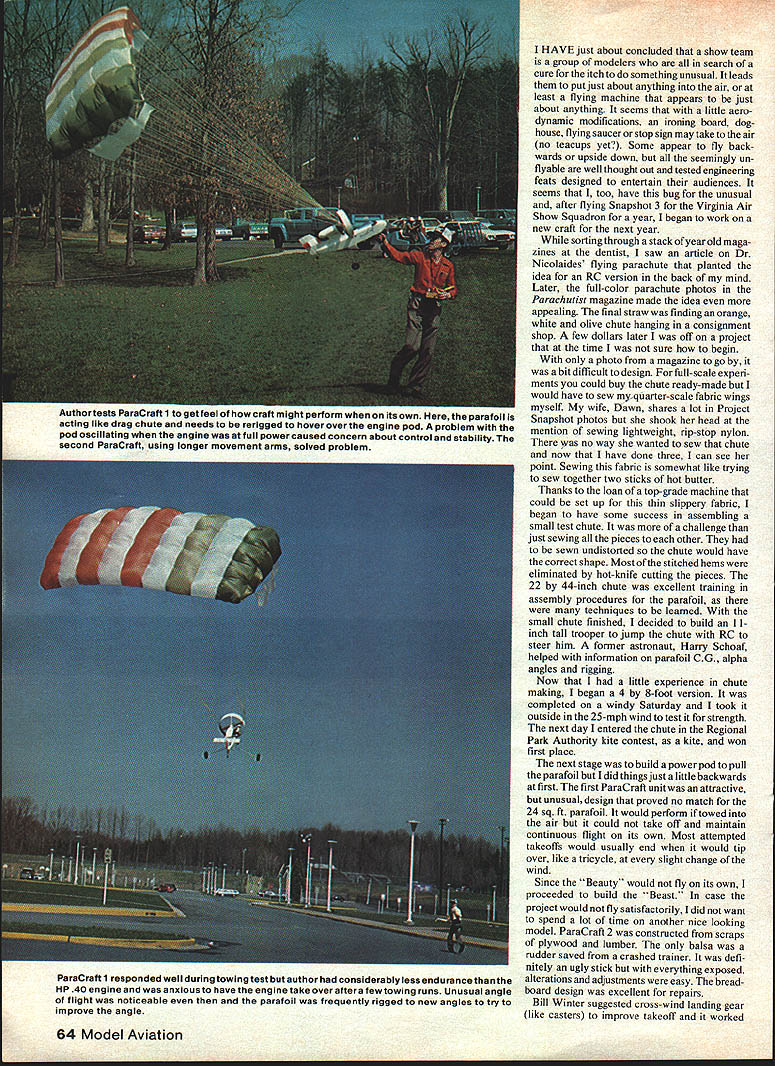
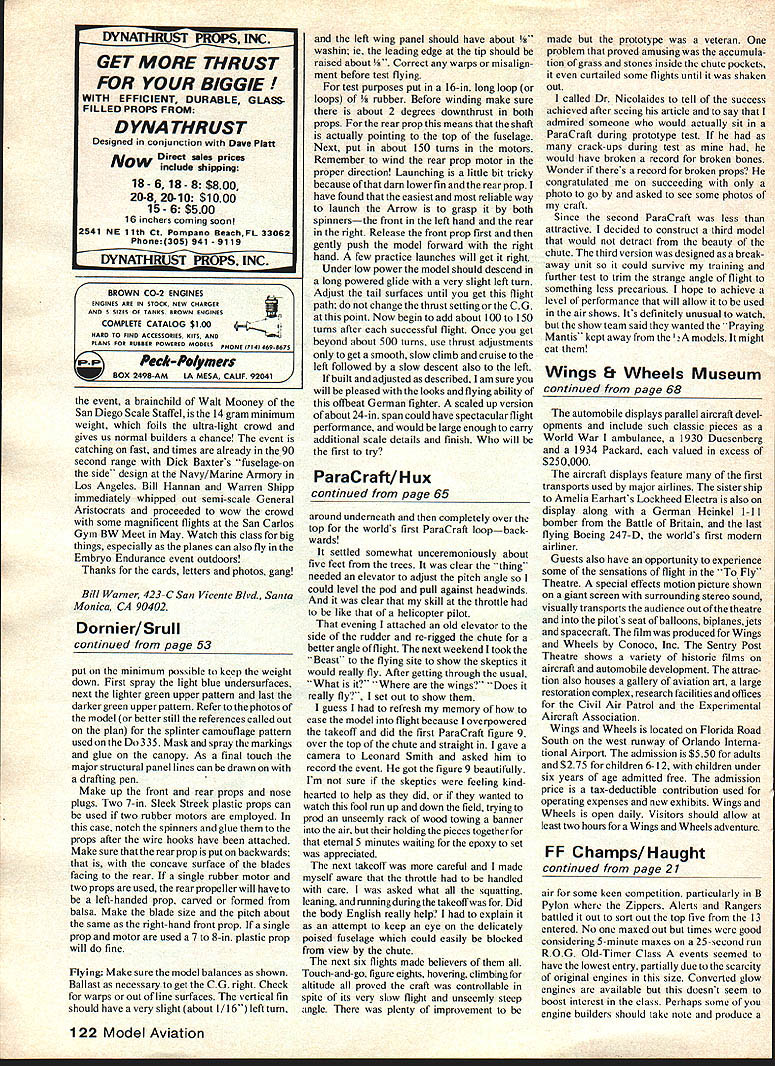
ParaCraft 1 waits quietly before its (attempted) maiden flight to display what errors or virtues would make or break the project. Slots below the canopy are for 6-in. servo arms that control the parafoil trailing edge (ailerons).
Early inspiration
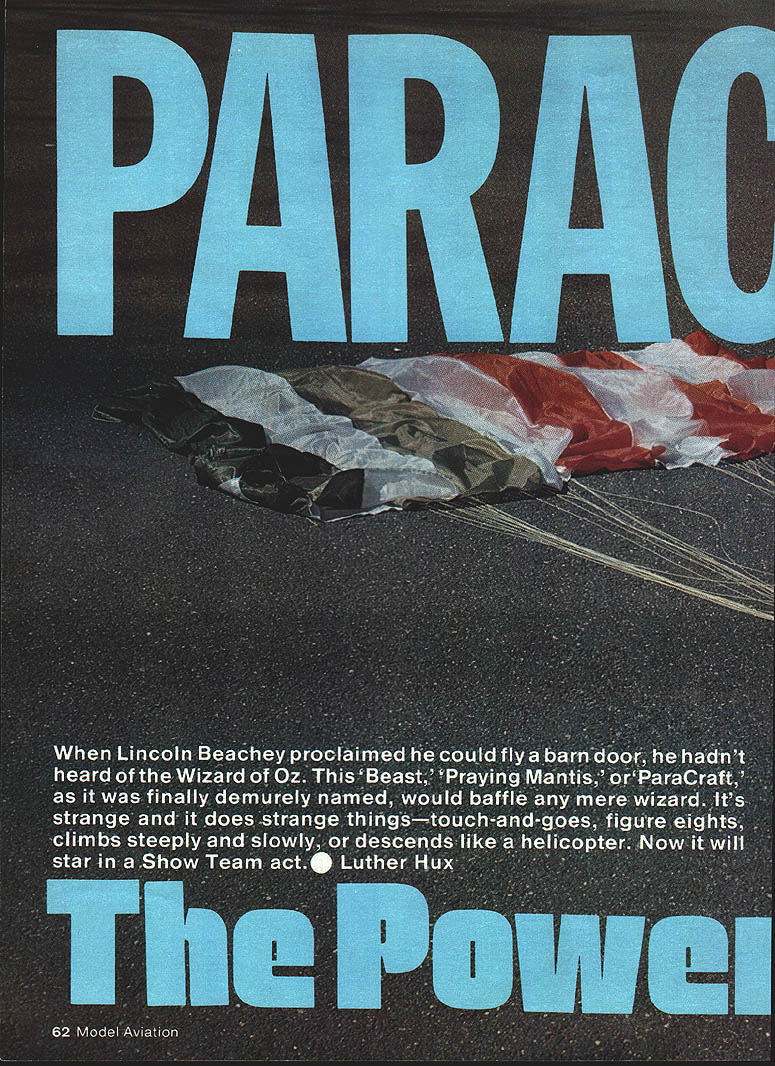
When Lincoln Beachey proclaimed he could fly a barn door, he hadn't heard of the Wizard of Oz. This "Beast," "Praying Mantis," or "ParaCraft," as it was finally demurely named, would baffle any mere wizard. It's strange and it does strange things—touch-and-goes, figure eights, climbs steeply and slowly, or descends like a helicopter. Now it will star in a Show Team act.
I have just about concluded that a show team is a group of modelers who are all in search of a cure for the itch to do something unusual. It leads them to put just about anything into the air, or at least a flying machine that appears to be just about anything. With a little aerodynamic modification, an ironing board, doghouse, flying saucer or stop sign may take to the air (no teacups yet?). Some appear to fly backwards or upside down, but all the seemingly unflyable are well thought out and tested engineering feats designed to entertain their audiences. After flying Snapshot 3 for the Virginia Air Show Squadron for a year, I began to work on a new craft for the next year.
While sorting through a stack of year-old magazines at the dentist, I saw an article on Dr. Nicolaides' flying parachute that planted the idea for an RC version in the back of my mind. Later, the full-color parachute photos in Parachutist magazine made the idea even more appealing. The final straw was finding an orange, white and olive chute hanging in a consignment shop. A few dollars later I was off on a project that at the time I was not sure how to begin.
Sewing the parafoil
With only a photo from a magazine to go by, it was a bit difficult to design. For full-scale experiments you could buy the chute ready-made, but I would have to sew my quarter-scale fabric wings myself. My wife, Dawn, shares a lot in Project Snapshot photos but shook her head at the mention of sewing lightweight rip-stop nylon. "No way," she said. "It is like trying to sew together two sticks of hot butter."
Thanks to the loan of a top-grade sewing machine that could be set up for this thin slippery fabric, I began to have some success in assembling a small test chute. It was more of a challenge than just sewing all the pieces to each other: they had to be sewn undistorted so the chute would have the correct shape. Most of the stitched hems were eliminated by hot-knife cutting the pieces. The 22 by 44-inch chute was excellent training in assembly procedures for the parafoil, as there are many techniques to be learned.
With the small chute finished, I decided to build an 11-inch-tall trooper to jump the chute with RC to steer him. A former astronaut, Harry Schoaf, helped with information on parafoil C.G., alpha angles and rigging.
Scaling up and initial tests
Now that I had a little experience in chute making, I began a 4 by 8-foot version. It was completed on a windy Saturday and I took it outside in a 25-mph wind to test it for strength. The next day I entered the chute in the Regional Park Authority kite contest, as a kite, and won first place.
The next stage was to build a power pod to pull the parafoil, but I did things a little backwards at first. The first ParaCraft unit was an attractive, unusual design that proved no match for the 24 sq. ft. parafoil. It would perform if towed into the air but it could not take off and maintain continuous flight on its own. Most attempted takeoffs usually ended when it would tip over, like a tricycle, at every slight change of the wind.
Since the "Beauty" would not fly on its own, I proceeded to build the "Beast." In case the project would not fly satisfactorily, I did not want to spend a lot of time on another nice-looking model. ParaCraft 2 was constructed from scraps of plywood and lumber. The only balsa was a rudder saved from a crashed trainer. It was definitely an ugly stick, but with everything exposed, alterations and adjustments were easy. The breadboard design was excellent for repairs. Bill Winter suggested cross-wind landing gear (like casters) to improve takeoff and it worked beautifully—no more tipping over. However, it would often taxi sideways and on turns would sometimes swing completely around.
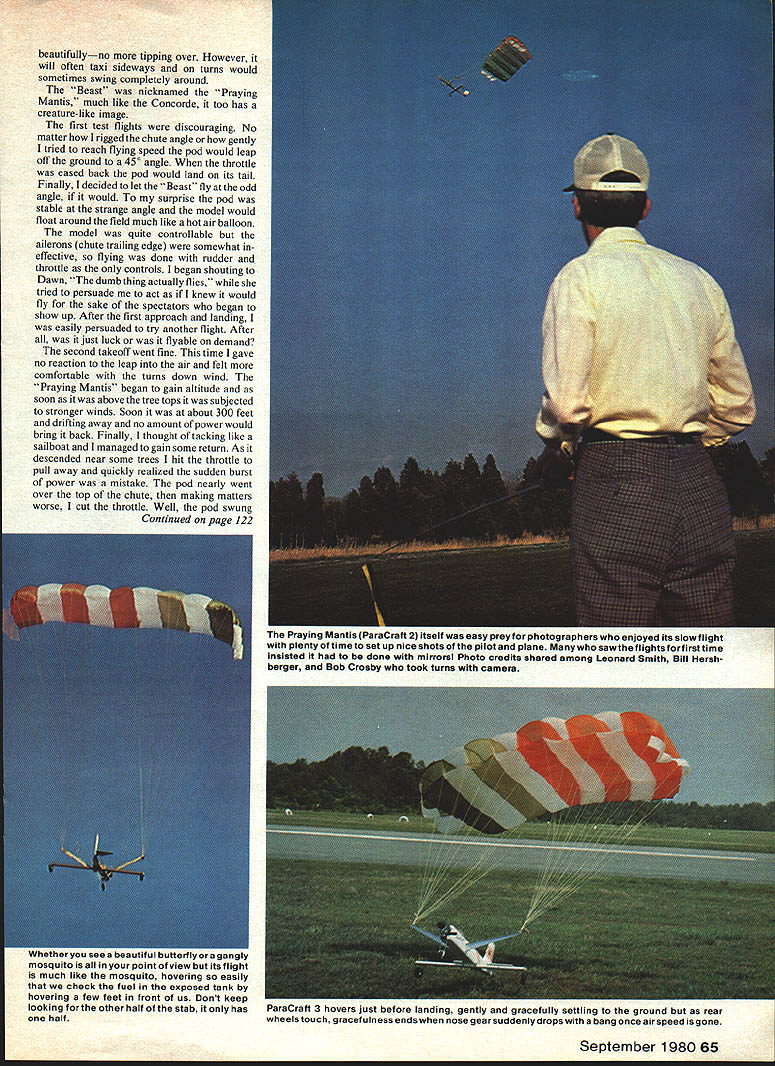
The "Beast" was nicknamed the "Praying Mantis"; much like the Concorde, it too had a creature-like image.
Flight testing
The first test flights were discouraging. No matter how I rigged the chute angle or how gently I tried to reach flying speed, the pod would leap off the ground to a 45° angle. When the throttle was eased back the pod would land on its tail. Finally, I decided to let the "Beast" fly at the odd angle, if it would. To my surprise the pod was stable at the strange angle and the model would float around the field much like a hot air balloon.
The model was quite controllable, but the ailerons (chute trailing edge) were somewhat ineffective, so flying was done with rudder and throttle as the only controls. I began shouting to Dawn, "The dumb thing actually flies," while she tried to persuade me to act as if I knew it would fly for the sake of the spectators who began to show up. After the first approach and landing, I was easily persuaded to try another flight. After all, was it just luck or was it flyable on demand?
The second takeoff went fine. This time I gave no reaction to the leap into the air and felt more comfortable with the turns downwind. The "Praying Mantis" began to gain altitude and as soon as it was above the tree tops it was subjected to stronger winds. Soon it was about 300 feet and drifting away and no amount of power would bring it back. Finally, I thought of tacking like a sailboat and I managed to gain some return.
As it descended near some trees I hit the throttle to pull away and quickly realized the sudden burst of power was a mistake. The pod nearly went over the top of the chute; then, making matters worse, I cut the throttle. The pod swung around and wrapped the chute lines around the engine. It came down and, except for a few ripped balsa pieces and a bent prop, the pod survived.
The prototype had proved its toughness, and I found it amusing that one problem was the accumulation of grass and stones inside the chute pockets; it even curtailed some flights until it was shaken out.
I called Dr. Nicolaides to tell him of the success I had achieved after reading his article and to say that I admired someone who would actually sit in a ParaCraft during prototype tests. If he had as many crack-ups during testing as mine had, he would have broken a record for broken bones. (Wonder if there's a record for broken props?) He congratulated me on succeeding with only a photo to go by and asked to see some photos of my craft.
Final model and performance
Since the second ParaCraft was less than attractive, I decided to construct a third model that would not detract from the beauty of the chute. The third version was sewn as a breakaway unit so it could survive my training and further tests. I hoped to achieve a level of performance that would allow it to be used in the air shows. It's definitely unusual to watch, but the show team said they wanted the "Praying Mantis" kept away from the infield. It might upset the crowd.
If built and adjusted as described, I am sure you will be pleased with the looks and flying ability of this offbeat German flier. A scaled-up version of about 24-in. span could have spectacular flight performance, and would be large enough to carry additional scale details and finish.
Lessons learned and suggestions
- Sewing lightweight rip-stop nylon requires special equipment and techniques: use a good machine, hot-knife cutting to eliminate bulky hems, and take care to keep pieces undistorted so the chute holds the correct shape.
- Small test chutes and trooper jumps are valuable training before scaling up.
- A simple breadboard pod made from scraps is useful for initial testing and easy repairs.
- Cross-wind landing gear (casters) greatly improves takeoff behavior.
- Watch for debris (grass, stones) collecting in chute pockets and shake the chute out regularly.
- Avoid sudden throttle bursts near trees or when lines are taut; they can wrap lines around the engine.
Who will be the first to try?
Transcribed from original scans by AI. Minor OCR errors may remain.

