
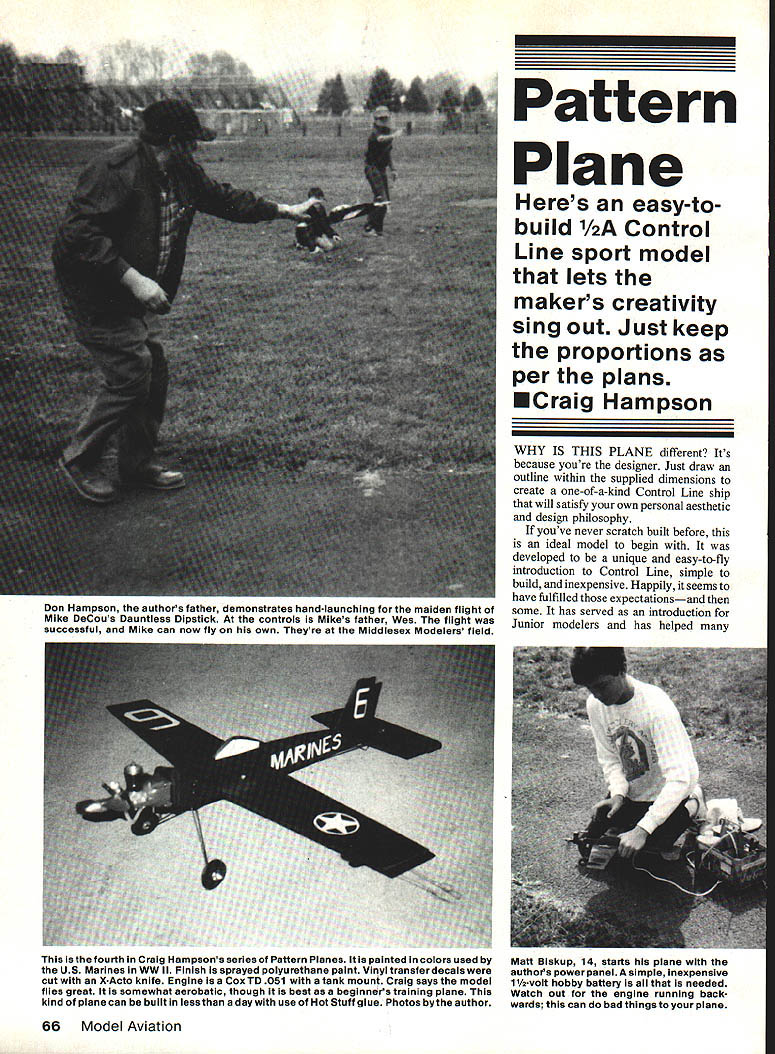
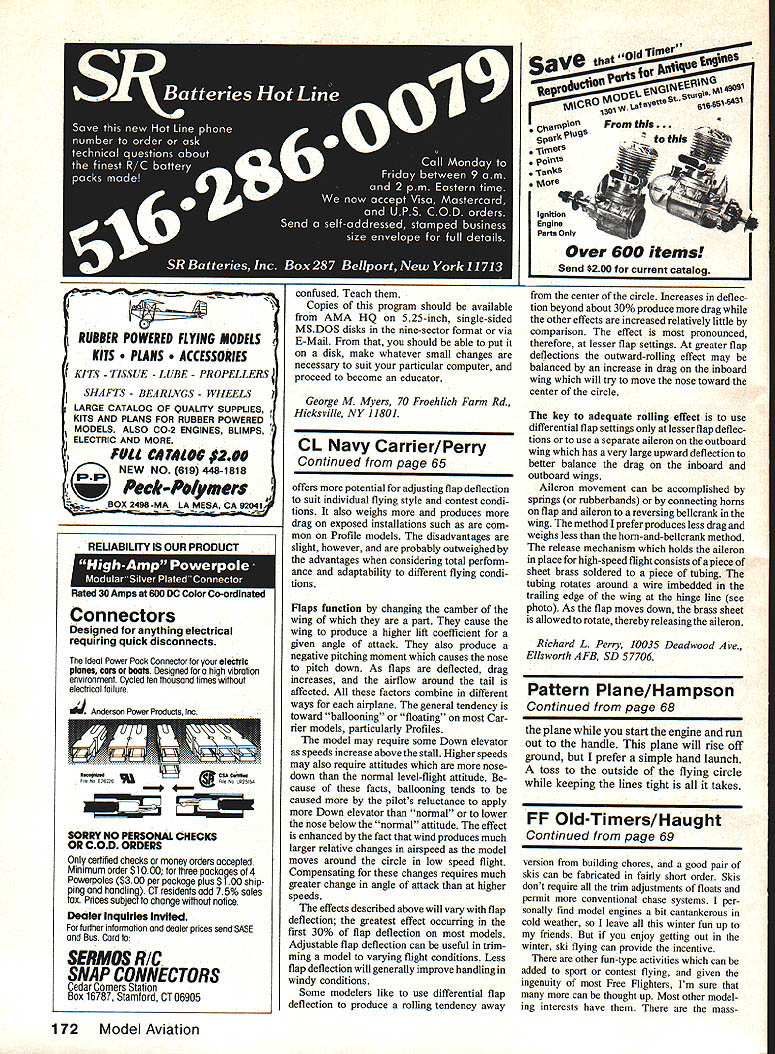
Pattern Plane
By Craig Hampson
Here's an easy-to-build 1/2A control-line sport model that lets the maker's creativity sing out. Just keep the proportions as per the plans.
Why is this plane different? It's because you're the designer. Draw an outline within the supplied dimensions to create a one-of-a-kind control-line ship that will satisfy your own personal aesthetic and design philosophy.
If you've never scratch-built before, this is an ideal model to begin with. It was developed to be a unique and easy-to-fly introduction to control line, simple to build, and inexpensive. It has served as an introduction for junior modelers and has helped many beginners learn to fly. It will perform mild aerobatics and even fly inverted (somewhat). It can be used in primitive forms of combat and in races, too, and you can build one for under $10.
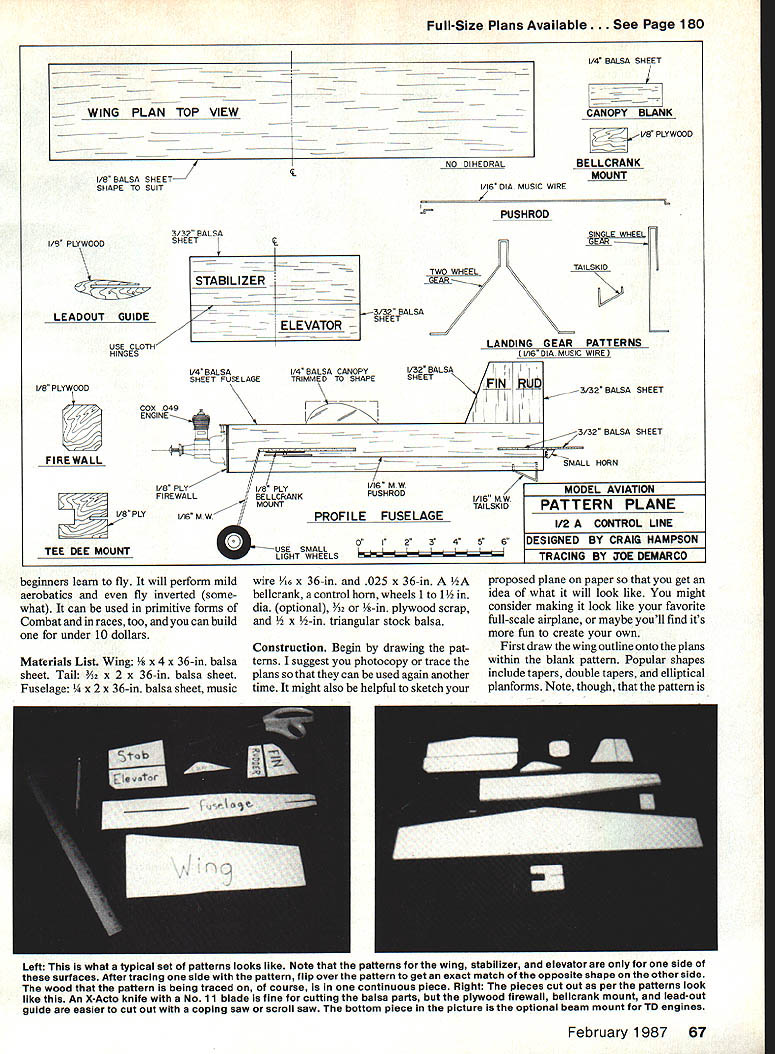
Materials List
- Wing: 1/8 x 4 x 36 in. balsa sheet
- Tail: 3/32 x 2 x 36 in. balsa sheet
- Fuselage: 1/4 x 2 x 36 in. balsa sheet
- Music wire: 1/16 x 36 in. and .025 x 36 in.
- Bellcrank: 1/4 in.
- Control horn
- Wheels: 1 to 1-1/2 in. diameter (optional)
- Plywood scrap: 3/8 or 5/8 in.
- Triangular stock balsa: 1/2 x 1/2 in.
Construction
Patterns and Design
- Begin by drawing the patterns. Photocopy or trace the plans so you can reuse them. Sketch your proposed plane on paper to visualize the final design.
- First draw the wing outline onto the plans within the blank pattern. Popular shapes include tapered, double-tapered, and elliptical planforms. Note that the pattern is one-half wing — it must be turned over for the other half.
- Two restrictions must be kept: 4‑in. chord at the centerline and 20‑in. wingspan.
- Follow the same procedure for the elevator and stabilizer patterns. Draw fin and rudder outlines. Stab and elevator blanks are made in two pieces (denoted by arrows on the plans). Keep the base of the fin flat; you can round or taper the other edges.
- Next draw the fuselage outline. Keep the wing and stabilizer cutout positions where the plans denote. Maintain the tail height and nose length shown. If you want a cockpit, draw it within the proper blank pattern. Canopy types and open cockpits are fine; you might add a pilot figure.
Cutting Parts
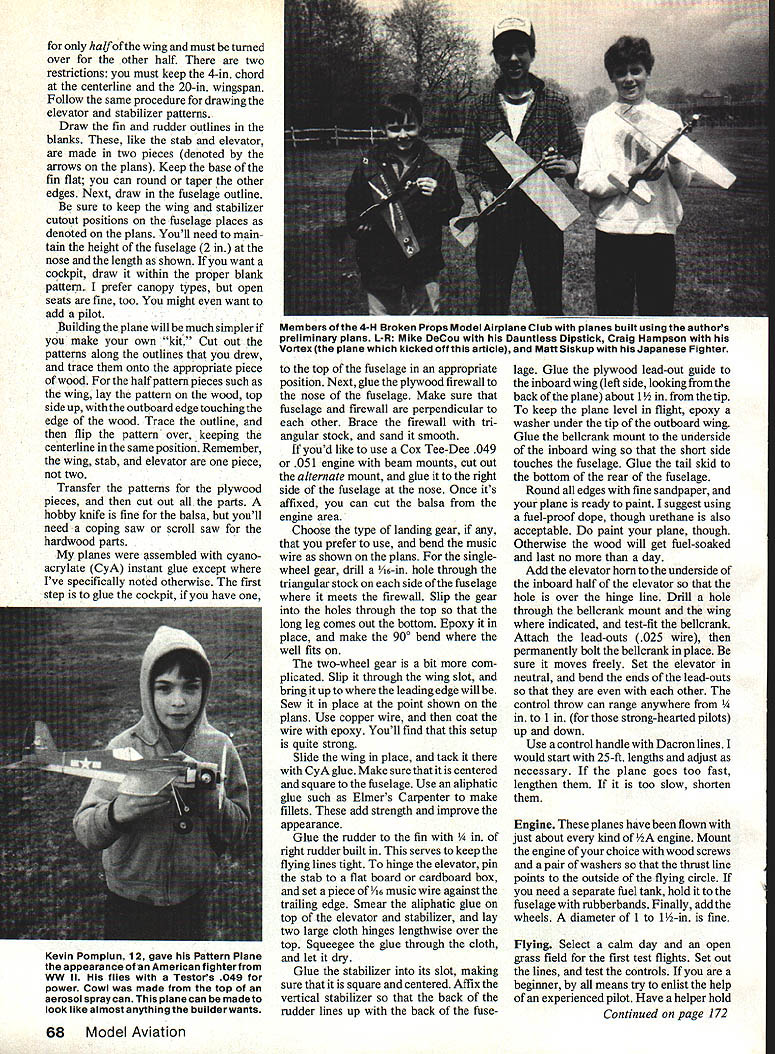
- Cut out patterns along the outlines you drew and trace them onto the appropriate wood.
- For half-pattern pieces (such as the wing), lay the pattern on the wood top side up with the outboard edge touching the wood edge. Trace, then flip the pattern over keeping the centerline in the same position. Remember: the wing, stab, and elevator are one piece, not two.
- Transfer patterns for plywood parts, then cut all parts. A hobby knife is fine for balsa; use a coping saw or scroll saw for hardwood parts.
Assembly
- Most assemblies were done with cyanoacrylate (CyA) instant glue except where noted.
- Glue the cockpit (if used) to the top of the fuselage in the appropriate position.
- Glue the plywood firewall to the nose of the fuselage. Ensure fuselage and firewall are perpendicular. Brace the firewall with triangular stock and sand smooth.
- If using a Cox Tee-Dee .049 or .051 engine with beam mounts, cut out the alternate mount and glue it to the right side of the fuselage at the nose. Once affixed, cut the balsa from the engine area as needed.
Landing Gear
- Choose the type of landing gear you prefer and bend the music wire as shown on the plans.
- Single-wheel gear: drill a 1/16-in. hole through the triangular stock on each side of the fuselage where it meets the firewall. Slip the gear into the holes through the top so the long legs come out the bottom. Epoxy in place and make the 90° bend where the wheel fits on.
- Two-wheel gear: slip it through the wing slot and bring it up to where the leading edge will be. Sew it in place at the point shown on the plans using copper wire, then coat the wire with epoxy for strength.
Final Wing and Tail Assembly
- Slide the wing in place and tack it with CyA glue. Make sure it is centered and square to the fuselage.
- Use an aliphatic glue (such as Elmer's Carpenter's) to make fillets—these add strength and improve appearance.
- Glue the rudder to the fin with 1/4 in. of right rudder built in; this helps keep the flying lines tight.
- To hinge the elevator: pin the stab to a flat board or cardboard box and set a piece of 1/16-in. music wire against the trailing edge. Smear aliphatic glue on top of the elevator and stabilizer, lay two large cloth hinges lengthwise over the top, squeeze glue through the cloth, and let dry.
- Glue the stabilizer into its slot, ensuring it is square and centered. Affix the vertical stabilizer so the back of the rudder lines up with the back of the fuselage.
- Glue the plywood lead-out guide to the inboard wing (left side, looking from the cockpit) about 1/2 in. from the tip.
- To keep the plane level in flight, epoxy a washer under the tip of the outboard wing.
- Glue the bellcrank mount to the underside of the inboard wing so the short side touches the fuselage.
- Glue the tail skid to the bottom rear of the fuselage.
Controls and Final Touches
- Round all edges with fine sandpaper and prepare the plane for finishing.
- Add the elevator horn to the underside of the inboard half of the elevator so the horn is over the hinge line.
- Drill a hole through the bellcrank mount and the wing where indicated, and test-fit the bellcrank. Attach the lead-outs (.025-in. wire), then permanently bolt the bellcrank in place. Ensure it moves freely.
- Set the elevator in neutral and bend the ends of the lead-outs so they are even with each other. Control throw can range anywhere from 1/4 in. to 1 in. up and down.
- Use a control handle with Dacron lines. Start with 25-ft. lengths and adjust as necessary: if the plane goes too fast, lengthen them; if too slow, shorten them.
- Finish by painting with a fuel-proof dope; urethane is also acceptable. Do not pour fuel on the plane, or the wood will be fuel-soaked and quickly ruined.
Engine
- These planes have flown with a wide variety of 1/2A engines.
- Mount the engine of your choice with wood screws and a pair of washers so the thrust line points to the outside of the flying circle.
- If you need a separate fuel tank, hold it to the fuselage with rubber bands.
- Add wheels—1 to 1-1/2 in. diameter works fine.
Flying
- Select a calm day and an open grass field for the first tests.
- Set out the lines and test the controls. If you are a beginner, enlist the help of an experienced pilot.
- Have a helper hold the plane while you start the engine and run out to the handle.
- This plane will rise off the ground, but a simple hand launch works well: toss to the outside of the flying circle while keeping the lines tight.
Notes and Tips
- Photocopy or trace plans before use so you can experiment with different outlines and re-use the templates.
- Keep the wing chord and wingspan limits to preserve handling characteristics.
- Small changes in geometry (tail height, nose length) can significantly affect flight; maintain the dimensions shown on the plans unless you understand the consequences.
- Use common sense with adhesives and finishes—fuel-proofing and secure mechanical joints improve durability and safety.
Transcribed from original scans by AI. Minor OCR errors may remain.

