
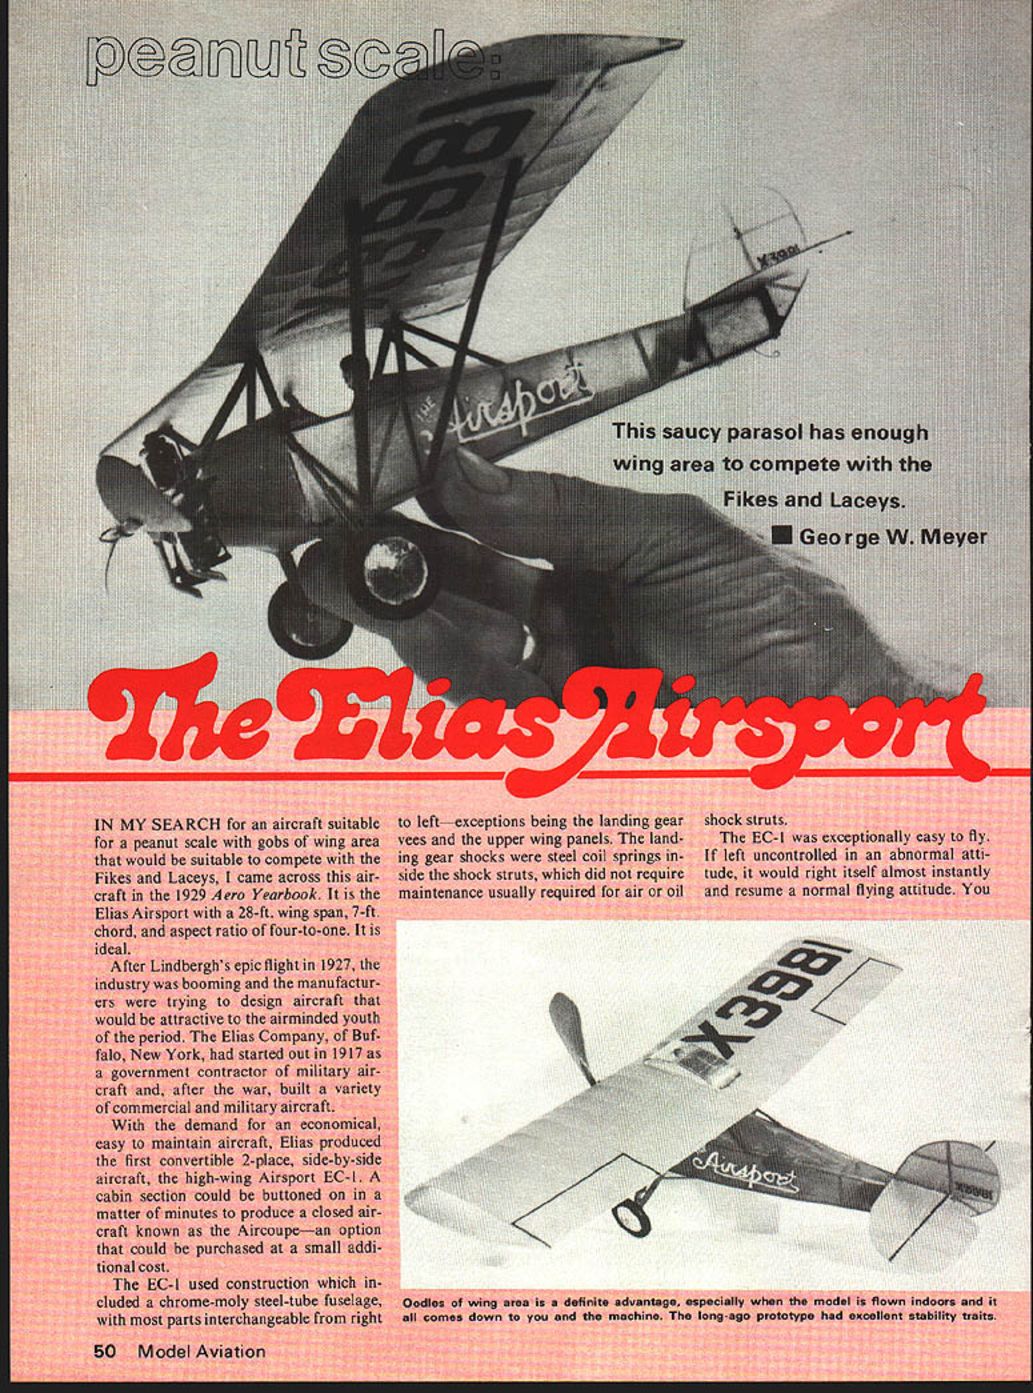

Peanut Scale: The Elias Airsport
George W. Meyer
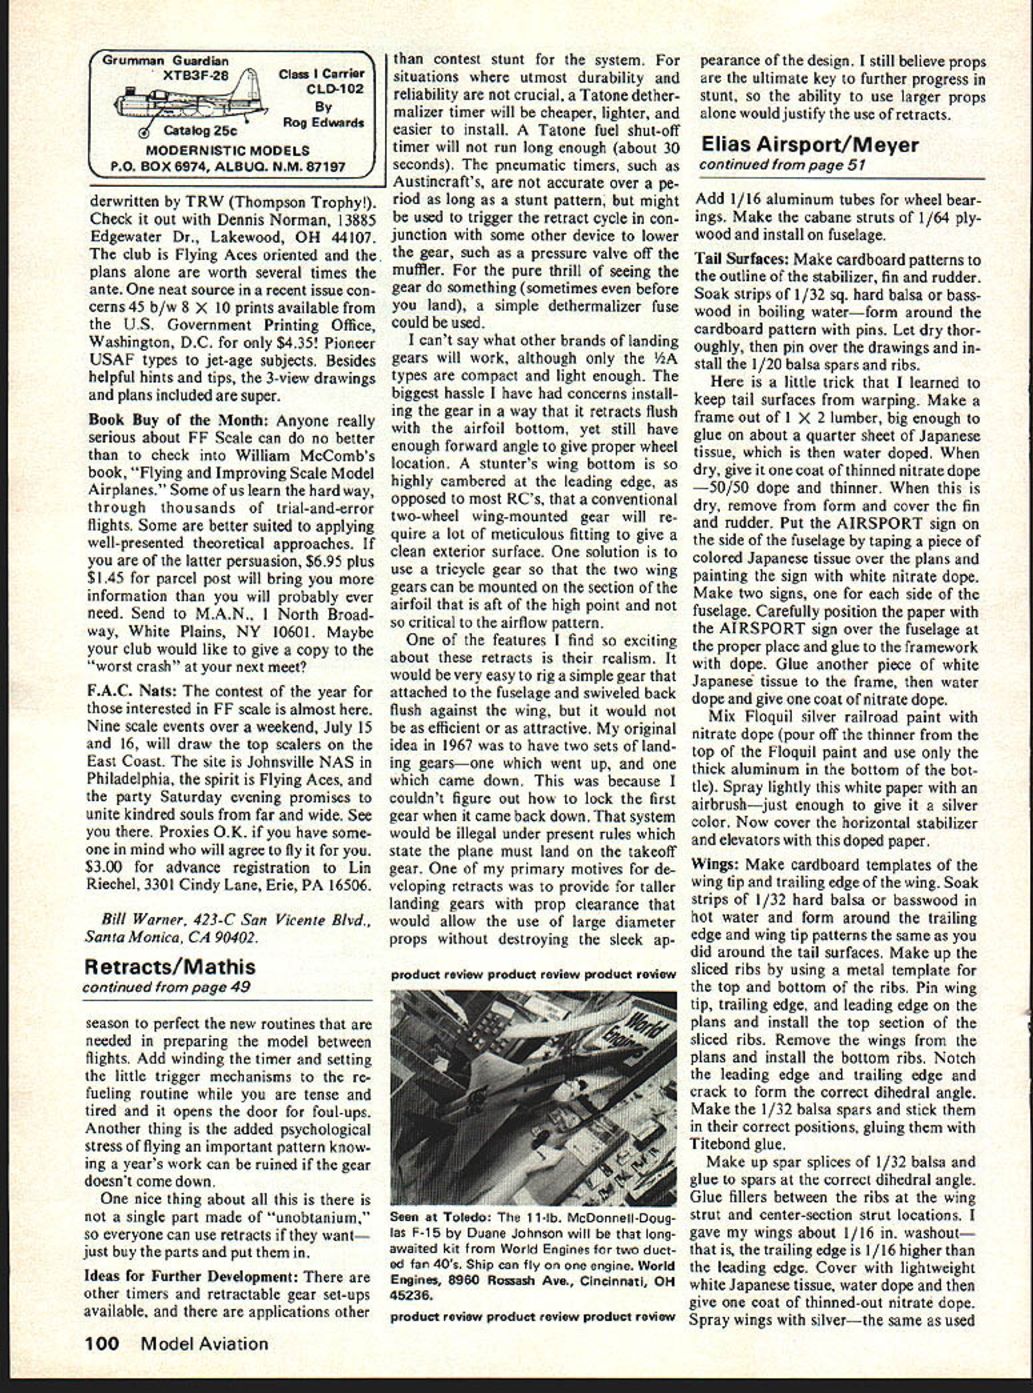
IN MY SEARCH for an aircraft suitable for a peanut scale with gobs of wing area that would be suitable to compete with the Fikes and Laceys, I came across this aircraft in the 1929 Aero Yearbook. It is the Elias Airsport with a 28-ft. wing span, 7-ft. chord, and aspect ratio of four-to-one. It is ideal.
After Lindbergh's epic flight in 1927, the industry was booming and the manufacturers were trying to design aircraft that would be attractive to the airminded youth of the period. The Elias Company, of Buffalo, New York, had started out in 1917 as a government contractor of military aircraft and, after the war, built a variety of commercial and military aircraft.
With the demand for an economical, easy to maintain aircraft, Elias produced the first convertible 2-place, side-by-side aircraft, the high-wing Airsport EC-1. A cabin section could be buttoned on in a matter of minutes to produce a closed aircraft known as the Aircoupe—an option that could be purchased at a small additional cost.
The EC-1 used construction which included a chrome-moly steel-tube fuselage, with most parts interchangeable from right to left—exceptions being the landing gear vees and the upper wing panels. The landing gear shocks were steel coil springs inside the shock struts, which did not require maintenance usually required for air or oil shock struts.
The EC-1 was exceptionally easy to fly. If left uncontrolled in an abnormal attitude, it would right itself almost instantly and resume a normal flying attitude. You could put the machine in stall with full power, remove your hands from the controls, close the throttle, and the EC-1 would gently settle flat and go into a glide. The EC-1 could be forced into a steep dive with full power, hands removed from the controls, and would come out into a normal flying attitude.
Fuselage: Make two fuselage sides from 1/20" contest-grade balsa, one on top of the other, then separate them back to the tail post with a razor blade. Add the cross braces and be sure to keep the fuselage straight and square as you go along. Bend the landing gear out of .025 music wire and sandwich it between two pieces of 1/16 balsa, then install in the fuselage. Make up the landing gear struts from 1/64 plywood. Make the shock strut from 1/16 round balsa with a piece of paper wrapped around the strut to simulate the shock. Glue the landing gear to the fuselage, but do not glue it to the wire landing gear. This takes up the landing shocks and will not break the landing gear or fuselage.
Make the rear rubber hook and tail skid from .020 music wire; bend and glue it to the tail post and the rear of the top longerons. Form a small loop at the end of the tail skid, so you can install the pin in your winding stooge when using a rubber winder. Leave open the area on the bottom of the fuselage so you can install the rubber motor. This rear hook is the design of Dr. John Martin, of the Miami Indoor Model Club.
Add the bulkheads to the top of the fuselage and cover the front section with 1/64 soft balsa sheet. Now cover the top of the fuselage from the cockpit back with light-weight Japanese tissue (I use light blue) and give it one coat of thinned nitrate dope. Add the 1/64 balsa sheet fairing behind the cockpit; glue to the bulkhead behind the cockpit and to the paper on top of the fuselage.
Make up a dummy 6-cylinder (2-row, 3-cylinder) Anzani engine. Make the laminated balsa crankcase from 1/8 soft balsa. Make the cylinders out of the corrugated section of 1/4" flexible plastic elbow straws. Make the intake and exhausts of paper tubing by wrapping paper around a 1/16 rod. Glue and slide off the rod. Put 1/16 balsa disks on top of the cylinders. Make the rockers from scrap balsa and the single pushrod from tiny flower stems available at art and hobby stores. Glue with Hot Stuff all parts of the engine that attach to the cylinders. This is the only glue I have found that will stick to the plastic soda-straw cylinders.
Use a hardwood nose button with a 1/16 aluminum tube bearing. Drill the hole in the button so that the prop has 2° right- and 2° down-thrust. Make the wheels from 1/16 balsa laminations on an 1/8" dowel about two inches long. Turn the wheels on this 1/8" mandrel on a lathe or drill press with sandpaper, then cut off the dowel flush with the wheels and drill 1/16 holes.
Elias Airsport/Meyer continued from page 51
Add 1/16 aluminum tubes for wheel bearings. Make the cabane struts of 1/64 plywood and install on fuselage.
Tail Surfaces: Make cardboard patterns to the outline of the stabilizer, fin and rudder. Soak strips of 1/32 sq. hard balsa or basswood in boiling water—form around the cardboard pattern with pins. Let dry thoroughly, then pin over the drawings and install the 1/20 balsa spars and ribs.
Here is a little trick that I learned to keep tail surfaces from warping. Make a frame out of 1 X 2 lumber, big enough to glue on about a quarter sheet of Japanese tissue, which is then water-doped. When dry, give it one coat of thinned nitrate dope—50/50 dope and thinner. When this is dry, remove form and cover the fin and rudder. Put the AIRSPORT sign on the side of the fuselage by taping a piece of colored Japanese tissue over the plans and painting the sign with white nitrate dope. Make two signs, one for each side of the fuselage. Carefully position the paper with the AIRSPORT sign over the fuselage at the proper place and glue to the framework with dope. Glue another piece of white Japanese tissue to the frame, then water-dope and give one coat of nitrate dope.
Mix Floquil silver railroad paint with nitrate dope (pour off the thinner from the top of the Floquil paint and use only the thick aluminum in the bottom of the bottle). Spray lightly this white paper with an airbrush—just enough to give it a silver color. Now cover the horizontal stabilizer and elevators with this doped paper.
Wings: Make cardboard templates of the wing tip and trailing edge of the wing. Soak strips of 1/32 hard balsa or basswood in hot water and form around the trailing edge and wing tip patterns the same as you did around the tail surfaces. Make up the sliced ribs by using a metal template for the top and bottom of the ribs. Pin wing tip, trailing edge, and leading edge on the plans and install the top section of the sliced ribs. Remove the wings from the plans and install the bottom ribs. Notch the leading edge and trailing edge and crack to form the correct dihedral angle. Make the 1/32 balsa spars and stick them in their correct positions, gluing them with Titebond glue.
Make up spar splices of 1/32 balsa and glue to spars at the correct dihedral angle. Glue fillers between the ribs at the wing strut and center-section strut locations. I gave my wings about 1/16 in. washout—that is, the trailing edge is 1/16 higher than the leading edge. Cover with lightweight white Japanese tissue, water-dope and then give one coat of thinned nitrate dope. Spray wings with silver—the same as used on the fuselage. Install the wing and tail surfaces on the fuselage and install the 1/32 balsa wing struts.
Adjusting for Flight: Use a 6-in. Peck Polymers plastic prop. Scrape the blades to reduce the weight as much as possible and balance; or make up a prop with a 1/4 dowel hub and 1/32 balsa or 1/64 plywood blades. Soak and form over a 3-in. can, offset 15° to the left. Bake in the oven at 200° for 30 minutes. Slot the hub 1/2 at 45° to the prop shaft on each end and glue in the blades.
Install the propeller and a 12-in. loop of 3/32 rubber. Balance the model level at the C.G. shown on the plans. Add weight to the nose or tail (modeling clay) until it balances correctly. Mine balanced without additional weight.
Hand-wind with about 200 turns and hand launch to check the trim. For indoor flying, most modelers prefer a right-hand circle so that as power runs out the circle will become smaller and it is less likely to hit the walls in most indoor areas. Outdoors, however, I prefer a left-hand turn so the torque keeps the nose up. The model is much easier to fly this way in gusty conditions. After you have the model trimmed, wind with a winder. Be sure to use a winding tube so that, if the rubber breaks, you will not tear up the fuselage. Always lube your rubber motor. I find it is a good idea to make up a couple of motors and to wind one that is broken in until it breaks, then install the other in the airplane and wind it in the model with about 100 less turns than in the broken one.
My model proved to be a good flier, with no trimming problems. A lot of weight can be saved by eliminating half the ribs and by using very lightweight indoor wood. This will increase the flight performance.
I do not do this because I don't like ghost planes. I like scale models to look like the real thing, not just a skeleton shape that sort of resembles the real plane.
Transcribed from original scans by AI. Minor OCR errors may remain.

