
Pilatus PC-9
Overview
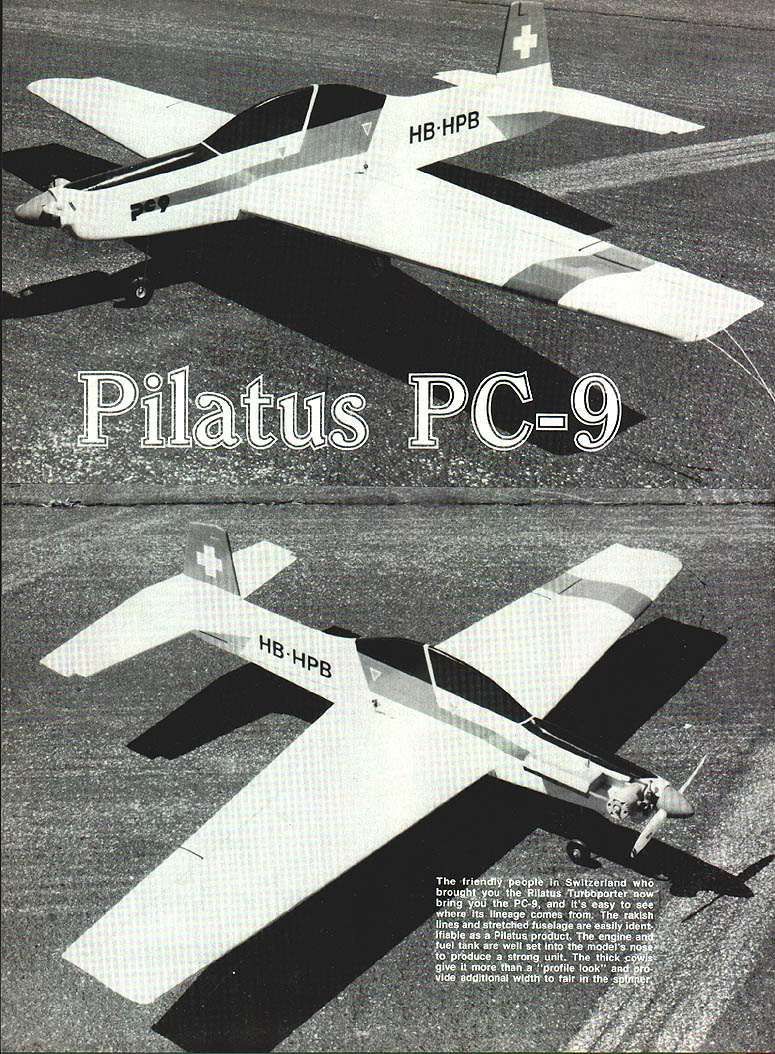
The Pilatus PC-9 follows in the lineage of Swiss designs such as the Pilatus Turboporter. Its rakish lines and stretched fuselage are immediately identifiable as Pilatus. The engine and fuel tank are set well into the nose to form a strong unit. A thick cowl gives the aircraft more than a profile look and provides additional width to fair in the spinner.
Role and heritage
As one of the new generation of small fighter trainers, the PC-9 was designed to bridge the transition from a basic airplane to a fighter airplane. Earlier intermediate fighter trainers—such as the PT-19, PT-22, and the De Havilland Chipmunk—were low-wing, two-place aircraft tuned for nimble handling and for teaching the mechanics and feel of combat maneuvers. Those aircraft set a standard for military training types; the PC-9 adds modern technology to fill in some of the missing pieces of its predecessors.
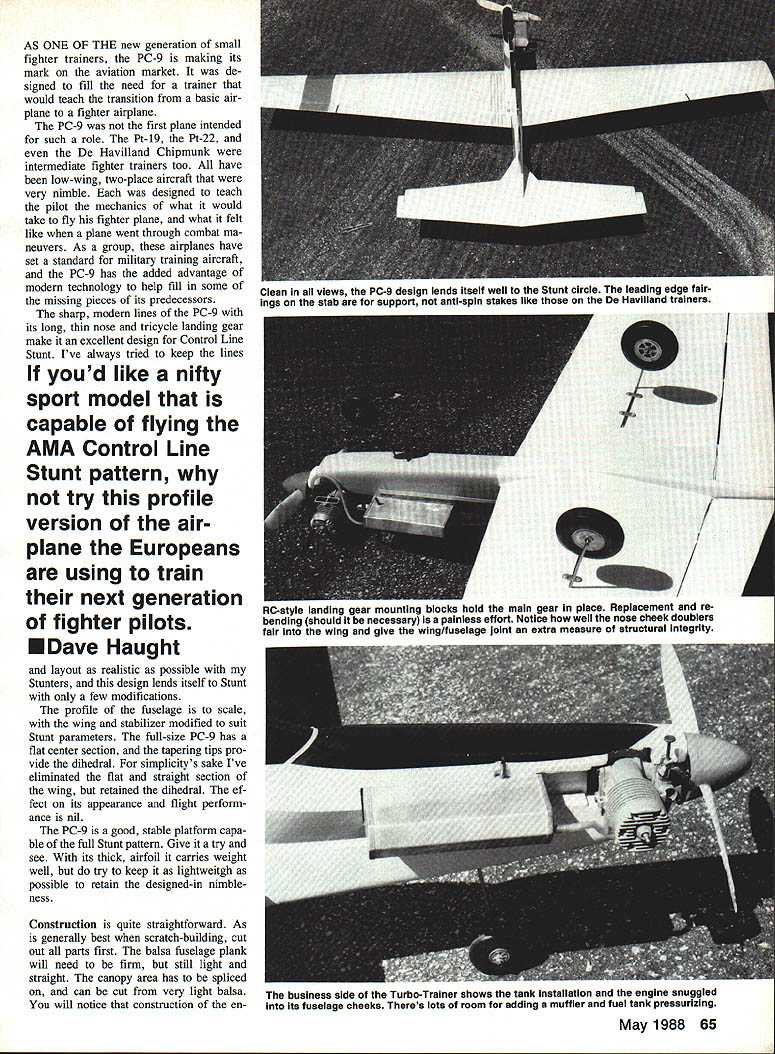
The sharp, modern lines of the PC-9, with its long thin nose and tricycle landing gear, also make it an excellent design for Control Line Stunt. I’ve always tried to keep the lines and layout as realistic as possible with my Stunters, and this design lends itself to Stunt with only a few modifications.
—Dave Haught
Model adaptation for Control Line Stunt
The profile of the fuselage is to scale, with the wing and stabilizer modified to suit Stunt parameters. The full-size PC-9 has a flat center section with tapering tips that provide dihedral. For simplicity I eliminated the flat center section of the wing but retained the dihedral; the effect on appearance and flight performance is negligible.
The PC-9 is a good, stable platform capable of the full Stunt pattern. Its thick airfoil carries weight well, but keep the model as lightweight as possible to retain nimbleness.
Construction
#### Fuselage and nose
- Cut out all parts before beginning—this is generally best practice when scratch-building.
- Use a firm, straight balsa fuselage plank that is still light. The canopy area must be spliced on and can be cut from very light balsa.
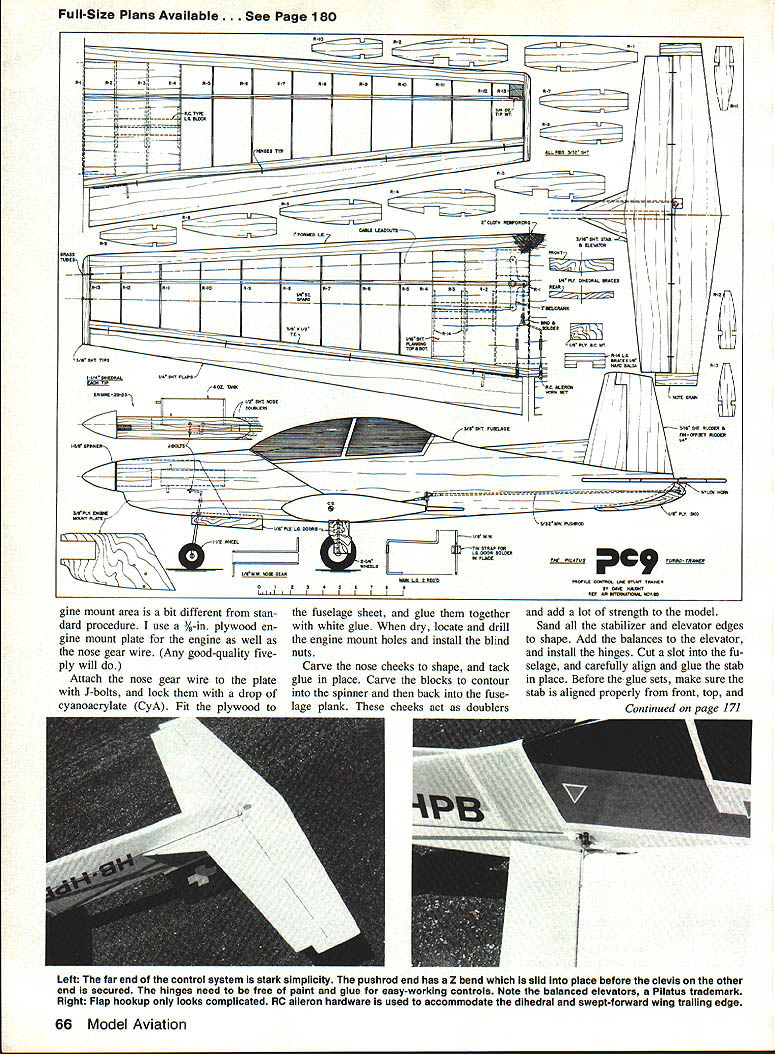
- Use a 3/32-in. plywood engine-mount plate and a nose-gear wire plate (any good-quality five-ply will do). Attach the nose-gear wire plate with J-bolts and lock with a drop of cyanoacrylate (CA).
- Fit nose-gear parts to the fuselage sheet and glue together with white glue.
- Dry-locate and drill engine-mount holes, then install blind nuts.
- Carve the nose cheeks to shape and tack-glue them in place. Carve blocks and contour the spinner back; the fuselage plank cheeks act as doublers and add considerable strength.
- Sand stabilizer and elevator edges to shape. Add balances to the elevator and install hinges.
- Cut the slot in the fuselage, carefully align and glue the stabilizer (stab) in place. Before the glue sets, make sure the stab is properly aligned.
- When dry, add leading-edge fairings—they look neat and add strength.
- While fairings dry, sand the fin and rudder, glue them together with the offsets shown on the plans, and glue the assembled fin and rudder to the fuselage top. Use a trailing triangle to ensure everything is square. Add the dorsal fin.
#### Wing
- The wing is built in two halves, joined with plywood dihedral braces, then sheeted.
- Lay out all ribs and wing parts. Mark rib locations on the spars and slip ribs into place on the bottom spar. Once all ribs are in place, insert the top spar.
- Mark rib locations on the leading and trailing edges. Pin the leading and trailing edges in place.
- Cover the plans with wax paper, set the completed wing assembly on the plans, and align all parts. With everything pinned, apply glue to all joints. White glue is recommended because it allows final adjustments before setting. Repeat for the other panel.
- When the wings are setting, cut out a bellcrank mount and install a good 3-in. metal or nylon bellcrank. Install the lead-outs. Attach landing gear braces and hardwood mounts with ample bracing.
- Fit the two wing panels together and sand as required for the dihedral angle. Pin one panel to the bench and block the other up. Add the plywood braces, center rib, bellcrank mount, and any extra bracing you feel necessary.
- Once dry, remove the wing from the board and drill holes for the lead-outs and lead-out guides. Bend flap pushrods to shape and install flap horns. RC aileron linkages work well for this application.
- Connect pushrods and adjust them to give neutral flap when the bellcrank is centered. Finish lead-out ends and sheet the center section.
- Add a wrap of reinforcing tape around the center break and around both flap bushings.
- Cut flaps from sheet balsa (one 3-in. sheet can make both if staggered correctly). Sand flaps to an airfoil shape and hinge them to the wing trailing edge.
Covering and final assembly
- If using plastic covering, proceed with full assembly before covering. If using tissue on the wing, seal the wood with a couple coats of thinned dope, sand smooth, apply tissue, shrink it, and apply five coats of clear dope.
- The fuselage-to-wing joint is important—fit it carefully to ensure adequate strength. Once fitted, epoxy the wing in place.
- While epoxy sets, bend the main landing gear struts and cut out/install wheel covers. Bend and install the main pushrod and install the elevator control horn.
- Give the wood a few coats of thinned dope, then sand and fill any rough spots.
Finishing, rigging, and flight preparation
- Choose a color scheme. The PC-9 has appeared in various bright colors in aviation magazines; military schemes also suit the model. Apply color and trim to taste. Automotive trim tape can add fine aileron lines and cockpit details.
- Add engine, wheels, tank, fuel lines, and other details.
- Check balance and wing warps; correct as necessary.
- Test-run the engine to ensure the tank feeds well.
- At the flying field, expect comments comparing its appearance to more common models—but remember: it's a Pilatus.
Flying impressions
In the air the PC-9 performs very well. The high-aspect-ratio wing compensates for the seemingly small wing area and gives the model an interesting look. The dihedral may attract comments, but it has not been a problem on Stunters. Both upright and inverted, the PC-9 grooves and flies level.
Enjoy your PC-9. It's more than just a high-tech trainer—it's fun to fly, and that's what it's all about.
Transcribed from original scans by AI. Minor OCR errors may remain.

