
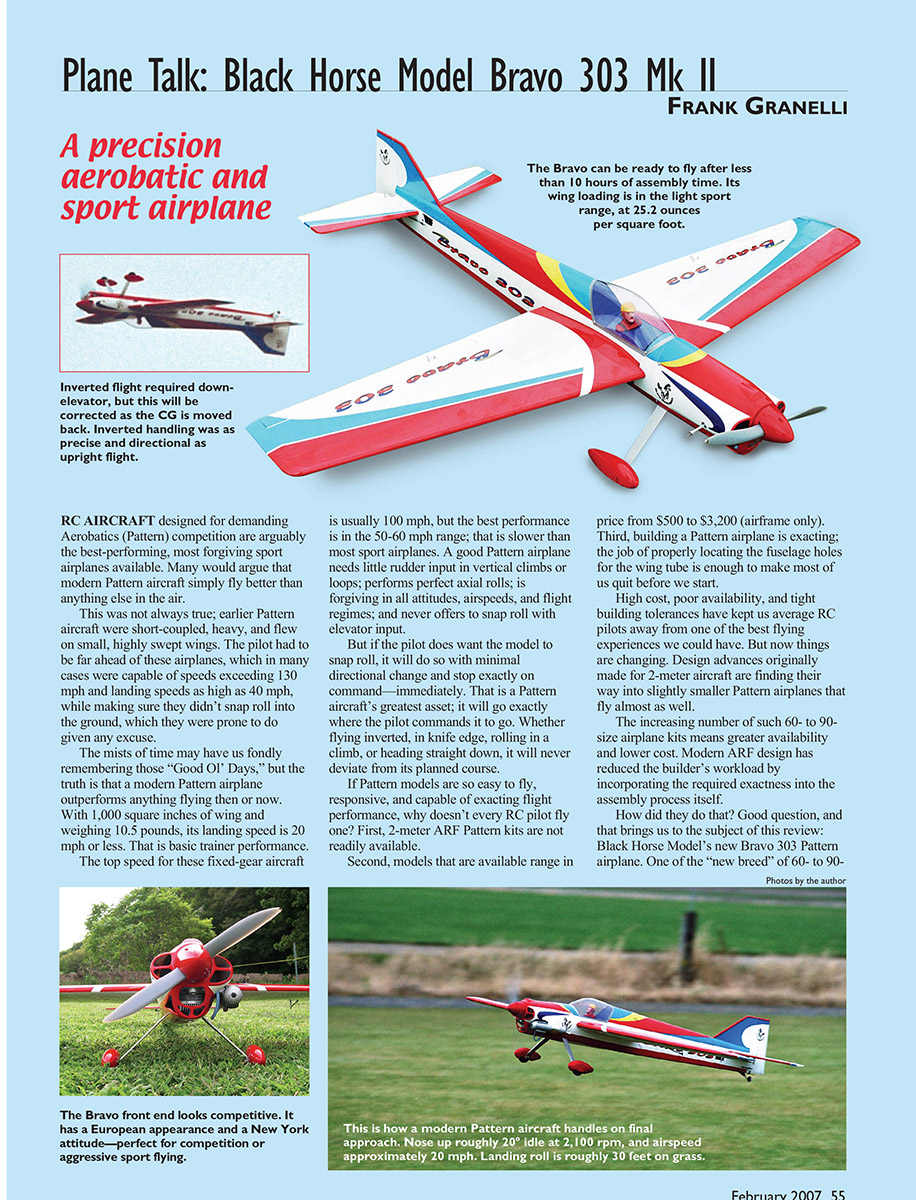
Plane Talk: Black Horse Model Bravo 303 Mk II
Frank Granelli
A precision aerobatic and sport airplane
RC aircraft designed for demanding aerobatics (Pattern) competition are arguably the best-performing, most forgiving sport airplanes available. Many would argue that modern Pattern aircraft simply fly better than anything else in the air.
This was not always true; earlier Pattern aircraft were short-coupled, heavy, and flew on small, highly swept wings. The pilot had to be far ahead of these airplanes, which in many cases were capable of speeds exceeding 130 mph and landing speeds as high as 40 mph, while making sure they didn’t snap roll into the ground, to which they were prone given any excuse.
The mists of time may have us fondly remembering those “Good Ol’ Days,” but the truth is that a modern Pattern airplane outperforms anything flying then or now. With 1,000 square inches of wing and weighing 10.5 pounds, its landing speed is 20 mph or less — basic trainer performance.
Top speed for these fixed-gear aircraft is usually about 100 mph, but the best performance is in the 50–60 mph range; that is slower than most sport airplanes. A good Pattern airplane needs little rudder input in vertical climbs or loops; performs perfect axial rolls; is forgiving in all attitudes, airspeeds, and flight regimes; and never offers to snap roll with elevator input.
But if the pilot does want the model to snap roll, it will do so with minimal directional change and stop exactly on command — immediately. That is a Pattern aircraft’s greatest asset; it will go exactly where the pilot commands it to go. Whether flying inverted, in knife edge, rolling in a climb, or heading straight down, it will never deviate from its planned course.
If Pattern models are so easy to fly, responsive, and capable of exacting flight performance, why doesn’t every RC pilot fly one? First, 2-meter ARF Pattern kits are not readily available. Second, models that are available range in price from $500 to $3,200 (airframe only). Third, building a Pattern airplane is exacting; the job of properly locating the fuselage holes for the wing tube is enough to make most of us quit before we start. High cost, poor availability, and tight building tolerances have kept many average RC pilots away from one of the best flying experiences they could have.
But now things are changing. Design advances originally made for 2-meter aircraft are finding their way into slightly smaller Pattern airplanes that fly almost as well. The increasing number of 60- to 90-size airplane kits means greater availability and lower cost. Modern ARF design has reduced the builder’s workload by incorporating the required exactness into the assembly process itself.
How did they do that? Good question, and that brings us to the subject of this review: Black Horse Model’s new Bravo 303 Pattern airplane. One of the “new breed” of 60- to 90-size precision aerobatics machines, the Bravo 303 is designed for the beginning Pattern pilot and the sport flier who wants outstanding performance without building hassles.
There is some good engineering here; the way the Bravo incorporates the required building accuracy into the airplane’s construction is impressive. Construction is lightweight and straight. The covering, a form of Oracover, is tight and wrinkle resistant and the cowling’s paint job is stunning. As you read the short building review, keep in mind that there are a few differences between building a Pattern airplane and a good sport aircraft. For instance, Pattern aircraft are built for durability. If used in competition, a Pattern airplane will fly 200–400 flights per season. Structure, control surfaces, and all moving parts must be able to survive constant use.
Pattern airplanes must be properly aligned and balanced; building tolerances approach 1/64 inch. And most important of all, Pattern airplanes are built as light as possible without sacrificing durability.
The Design
The Bravo 303 is a midwing aircraft. This helps make the rolls truly axial. The 714-square-inch wing supports just 7.81 pounds. The resultant 25.2 ounces per square foot of wing loading is in the light class for sport models, providing excellent slow-flight performance, maneuver accuracy, and slow landing speeds.
The symmetrical airfoil makes inverted flight and maneuvers consistent. However, the stabilizer and vertical fin are flat rather than having an airfoil shape. Airfoil-shaped tail surfaces are always more effective, but the pilot will notice the difference most during low-speed maneuvers. Most of the new low-cost Pattern airplanes use this simple tail design. In theory the performance of these aircraft should suffer, but in reality the difference is not that meaningful.
The Bravo 303 is designed for a .61 two-stroke or .91 four-stroke glow engine, but most Bravos seen at contests use a .91 two-stroke engine. This model handles that engine well and has nearly unlimited vertical performance with that powerplant.
The Bravo uses independent servos for each aileron and each elevator half for fine-tuning trim; few other low-cost Pattern airplanes have this ability. The wing design permits further fine tuning since the halves can be set at individual incidences.
Construction
The kit is complete, with all the hardware and some extras. There is a great deal of prefabrication that is seldom found in most ARF kits. For instance, all control surfaces are hinged and pinned. The wing-mounting system and upper canopy/deck/pilot are preinstalled. The fuel tank is supplied preassembled, and the engine mount and landing-gear bolts are factory installed.
The cutouts for the horizontal stabilizer and vertical fin are preshaped and accurate. All the servo mounts, including the ailerons, are completely ready for servo installation and sized to fit modern standard-case servos.
The wing uses an aluminum tube spar and dowel-rod alignment pins; there's no spar glue and the wing need not be glued together. As a bonus, the pull-pull rudder cables are factory installed.
Wing assembly begins with the aileron servos, which install directly onto cover plates in the wing. If you want to employ spoilers (which allow accurate landing placement and prevent "bounced" landings), remember output-arm placement.
- JR radios are easier to program in aileron/spoiler installations if the aileron servo output shaft points outward toward the wingtip.
- Futaba radios are easier to program if the servo's output shaft points to the inside, toward the wing root.
Position the servo upright on the wing, mark the correct side of the output shaft, and make sure that side is oriented out the servo hatch slot when the servo is laid on its side. Temporarily place a thin cardboard spacer between the servo and the hatch during installation so that it's correctly isolated from vibration. A 12-inch servo extension is required.
For durability and strength, all the adjustable control horns mount with three screws completely through the control surface and have two lock nuts. Make sure the aileron control rods run in a straight line from the servo output arms to the control horns.
Use clear tape or clear plastic model covering to seal the aileron gaps. This makes the ailerons more effective, allowing the proper roll rate without excessive surface movement that can cause nonaxial rolls. Sealing also helps equalize each aileron's effectiveness.
On most ARFs this is the time to construct the main spar and glue the wing halves together, but the Bravo's main spar is an aluminum tube for extra rigidity and durability. The wing alignment is determined by a thick wooden dowel at the TE; the front of the wing is held down by equal-size wooden dowels. You probably don't have to glue the wing halves together. The rear mounting bolts (all factory drilled and the fuselage blind nuts installed) and the front dowels hold the wing in place. The photo-illustrated instruction manual doesn't mention gluing the wing halves.
I took this as a trimming opportunity. Two-meter Pattern aircraft wing halves are individually adjustable for incidence. The Bravo accomplishes almost the same effect by allowing a few trim flights and then sanding a pair to adjust the incidence. The idea is to adjust the wing incidence so both ailerons are neutral during level flight.
This Bravo needed no wing adjustment. After the first two flights I glued the wing halves together using slow epoxy. Why? Because the front dowels and the rear alignment pin will gradually shear, and that will result in changing wing incidences. Remember: durability plus more durability.
The centering marks are factory drawn on the front and rear fuselage formers — making alignment very easy. Center the wing and measure the distance from each wingtip to a pin located in the center of the rear fuselage. Both distances must be equal. This Bravo was equal to within 0.01 inch.
When removing the covering from the areas that receive epoxy, try using the Hobbico Hot Knife with the blade made dull with a file. The idea is to use the heat to melt the covering without tearing the wood. The knife works quickly and easily and will spare your patience. For scoring the wood, a dull blade works best.
The Bravo uses two elevator servos and 18-inch servo extensions. Their mounts are cleverly positioned so that a servo reverser is not required, yet the linkage geometry remains identical. Equal geometry means that each elevator half moves exactly the same amount. Mixing the two elevator servos allows the pilot to fine-tune movement for straight long segments. Seal the elevator gaps as you did the aileron gaps. Make sure the stabilizer is parallel to the wing.
The rudder pull-pull cables, required for precision centering, are factory installed leading up to the front-mounted rudder servo. There is a minor problem here: since rudder centering is critical, I used a precision Pattern servo (JR DS8231). But that meant the rudder cables did not clear a standard-size throttle servo.
Options:
- Lower the throttle servo by cutting out the servo tray's mounting area and mounting short 1/8 x 1/2 birch beams on the underside of the tray.
- Use a lower-profile throttle servo (the option I used).
If this is your first rudder/cable installation, remember one key point: exact rudder centering is critical for making straight maneuvers. Both cables must run in a straight line from the servo to the rudder, without deviation, for exact centering.
The Bravo is 1.45 inches wide where the rudder cables exit the rear fuselage. Therefore, the twin rudder control horns must be 1.45 inches apart. Use the two-sided Du-Bro Super Strength Servo Arm, standard size (parts 673 and 675), and hook the cables to the holes second from the end. Noted Pattern builder George Asteris taught me this trick; it works wonders on sticky rudders.
The engine mount is the two-beam variety and is installed into the factory blind nuts. The mount is made from a soft nylon that seems to reduce sound levels — important since Pattern airplanes must be quieter than 96 decibels at 3 meters. The mount's material resists tapping; use the machine screws that come with the Bravo. The material locks the screws in place and the engine remained tightly secured even after 34 flights.
Position the thrust washer 4 3/8 inches from the firewall, mount the engine, hook up the throttle, and then cut all the holes into that beautifully painted cowling. Mount the cowling first so it clears the spinner backplate by 1/8 inch. Use a cardboard template to find where the cutouts need to be located. If you are using a four-stroke engine, cut the inlet area of the top "air scoop" to allow cool air to enter the carburetor for increased power.
There is ample cooling inlet air, but not much outlet area. Cut a 2-inch-wide exit hole in the bottom of the cowl. The manual instructs removing the entire cowling over the gear-leg area. Instead, cut only two slots for the legs. Use thread-locking compound on the gear bolts since they will not be visible once covered.
Instead of cutting holes in the outside of the wheel pants, shorten the axles by 5/16 inch. Cut away the thin cowling post that would otherwise cover the engine's air intake area for maximum airflow.
The listed CG in the manual is 0.5 inch (14 mm) in from the LE at the fuselage — way too far forward. The diagram is confusing and the 14 mm may refer to the wingtip. The best starting CG is at 4 7/8 inches back from the LE at the fuselage. The first flights may be made with the CG farther forward, but only knife-edge flight will suffer. No weights were needed to obtain this CG with the O.S. .91 FX up front.
Lateral balance is an extremely important but often overlooked step. Since the wing has no true dihedral, level flight and centrifugal loops are impossible without good lateral balance. Run nylon fishing line under the bottom rudder hinge and under the crankshaft (remove the propeller), and lift the aircraft. One wingtip, usually on the muffler side, will drop. Drive thin finishing nails into the lighter wingtip until the aircraft remains level.
Control-surface movement recommendations:
- Elevators: 7/8 inch up and down (mix the two elevator servos instead of using a Y harness if possible).
- Ailerons: 1/2 inch of movement; no differential needed. Spoilers worked best when the ailerons were raised 1/4 inch.
- Rudder: The book lists 3/4 inch, but that seemed insufficient. There is room for up to 2 inches of rudder movement, so use it.
There are two schools of thought about low/high rates vs. a single high rate with exponential. I think IMAC pilots have proven the latter works best. Using only one rate simplifies things under stress. My preferred JR exponential settings were:
- Elevator: 25%
- Ailerons: 30%
- Rudder: 50%
After trying many propellers from 14 to 16 inches, I picked the APC 15 x 8 Sport. The 16-inch props produced too much torque for the Bravo’s vertical side area, resulting in excess rudder input. The 14-inch props were too fast. The 15 x 8 prop produces nearly unlimited vertical, is quieter, reduces engine torque, and provides good “downhill” braking. The best idle speed I could get was 2,100 rpm.
Except for the rudder, this Bravo uses standard sport servos (except on the throttle). If you intend to compete, use newer digital sport servos for more positive control. The Bravo does not need $100 “gee-whiz” servos, except on the rudder.
Pluses and Minuses
- Factory-painted fiberglass cowling, wheel pants.
- Detachable wing halves secured with aluminum tubing.
- Prepainted, preformed pilot and canopy.
- Preglued, pinned hinges on all control surfaces.
- Preinstalled pull-pull rudder control cables.
- Terrific flier.
- Small fuel tank when equipped with a .91 engine.
- Rudder cables can interfere with a standard throttle servo.
- Cutouts required for proper engine cooling.
Test-Model Details
- Engine used: O.S. Engines .91 FX
- Propeller: APC 15 x 8
- Fuel: 450 cc (13 ounces), S&W 15% nitromethane
- Radio system: JR 8103 transmitter; R770 PCM receiver; NES 517 servos on ailerons, elevators, and throttle; DSB231 on rudder; 1100 mAh 4.8-volt battery; two 18-inch, two 12-inch, and two 6-inch extensions
- Ready-to-fly weight: 7.81 pounds
- Flight duration: 11 minutes
Specifications
- Model type: F3A sport aerobatics ARF
- Pilot skill level: Intermediate
- Wingspan: 64.4 inches
- Wing area: 714 square inches
- Length: 65.4 inches
- Weight: 7.7 pounds
- Wing loading: 24.8 ounces per square foot
- Engine: .61 (two-stroke), .91 (four-stroke)
- Radio: Four channels (minimum), six servos
- Construction: Balsa and plywood
- Covering/finish: Covered with iron-on Oracover film
- Price: $179.99
Flying
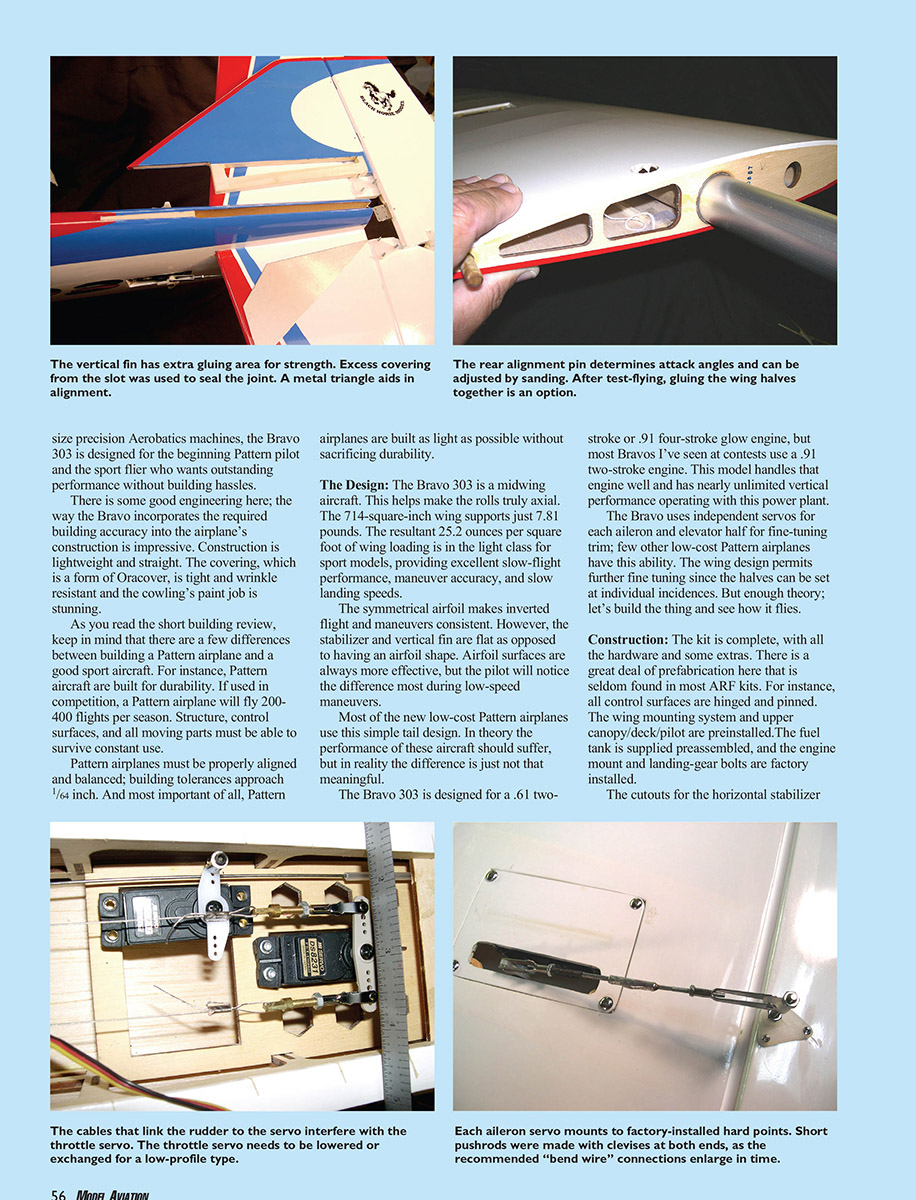
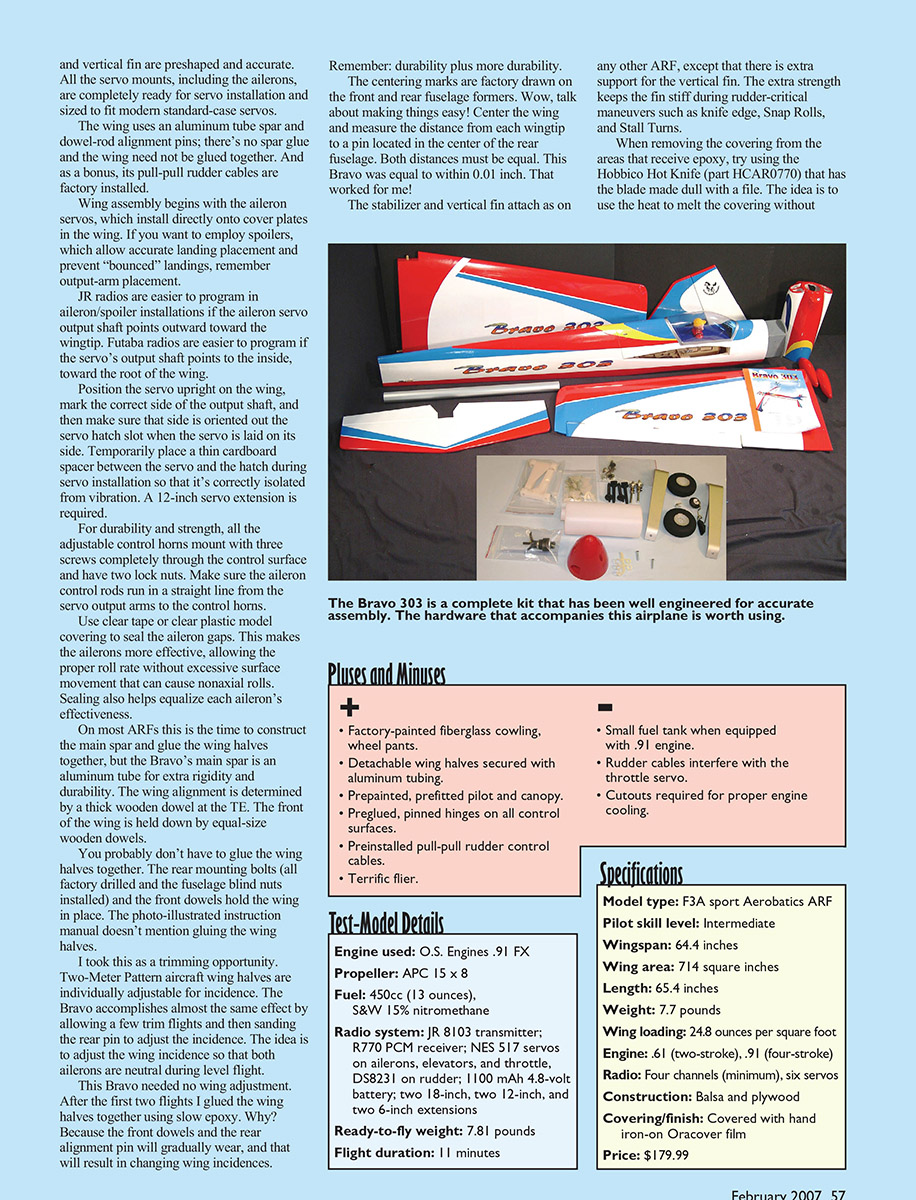
With the engine ticking over just right, the Bravo 303 could be taxied out and stopped approximately 120 feet from midpoint. Ground steering was positive and immediately effective. The takeoff was initiated on the grass runway as throttle was applied. The ground roll was straight and the model lifted off at about 80% throttle. Initial climbout was straight and gentle with a 45° climb angle.
The Bravo quickly climbed and showed no lack of vertical performance. After a few clicks of up-trim, the flying commenced. The model rolled at the correct speed — roughly three rolls in five seconds — with the nose never varying from the flight path.
The model did a full-power vertical climb, tall turn at the top, a half roll down, and back into center inverted with only some down-elevator needed. The Bravo pushed vertical without dropping a wing and started rolling all the way up; the nose remained straight with no need for aileron differential.
At approximately 500 feet high I threw all the controls into the right corner. The Bravo did several snaps and began to spin down at about 1½ turns per second. Reversing the spin yielded roughly the same rotational speed. Centering the ailerons slowed the rotation to about one turn per second. Centering rudder and elevator immediately stopped the spin. I added throttle and headed for the other corner.
The Four Point Roll showed the need for some elevator trim as the airplane pulled to the canopy on both knife edges and the slow roll was sloppy. Photo passes are easy and precise — flying photo passes with this aircraft is like driving a NASCAR racer in commuter traffic.
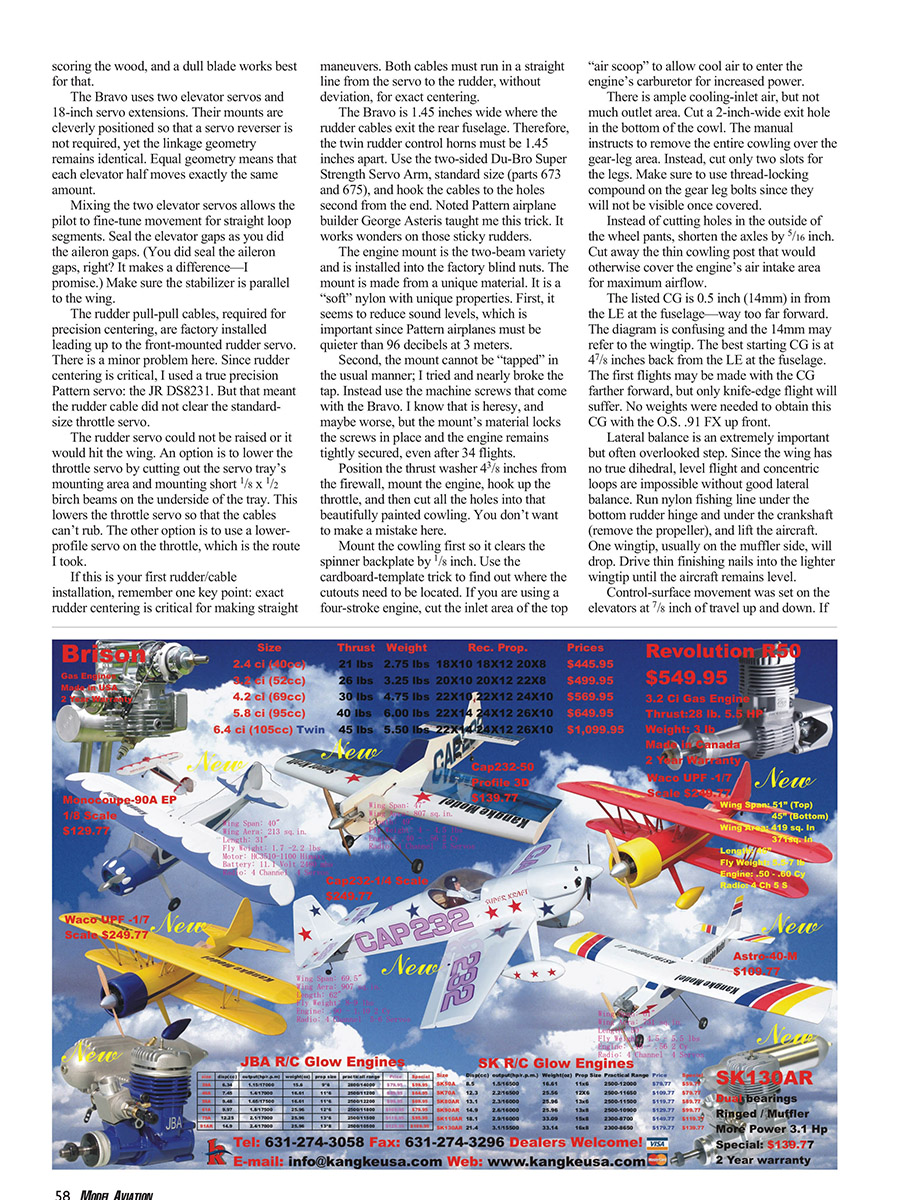
Landings: Two-meter Pattern airplanes land like feathers; they float down, nose high, without needing to flare to a three-point landing. The Bravo did exactly that. It needed 12% (JR settings) down-elevator for left-rudder knife edge and 9% for right. There was minor rudder/bank coupling; 7% opposite aileron eliminated coupling on both sides.
I moved the CG slightly aft by adding small tail weights to reduce inverted down-elevator, which quickened the roll rate, so I added an extra 5% exponential. Complete trimming how-to information is posted on the National Society of Radio Controlled Aerobatics website: www.nsrca.org.
Snap rolls remained on line and stopped at the right point with no wandering. Slow rolls were horizon to horizon. Concentric inside and outside loops were effortless. Repeated Avalanches, inside and outside, and alternating snap rolls during low passes drew positive comments. Four Point, Eight Point, and opposite slow rolls began to remind me of my Temptation 2-meter Pattern airplane — yet the Bravo’s all-up cost was less than 15% of that 2-meter model.
The second landing was slower and final ground roll was less than 20 feet. Refueling highlighted the Bravo’s one weak point: the small stock tank. The O.S. .91 FX will run approximately 11 minutes on the stock tank. Although that is enough to fly a full FAI pattern and some maneuvers, a 15-minute tank would be preferable for extended practice.
There are now 34 flights on my Bravo, including several trips through the Masters pattern and the Sportsman and Intermediate sequences. The Bravo flies Sportsman and Intermediate great, but the workload is higher for Masters than with a 2-meter airplane. Still, I plan to practice with the Bravo during the winter, even using skis if need be. The airplane is that good.
If you plan to compete, consider these changes:
- Use a Lithium-Ion battery with a Mil Spec resistor switch.
- Install a lightweight aluminum spinner.
- Use carbon-fiber aileron linkages with ball bearings.
- Use sport digital servos.
- Install a larger fuel tank.
These modifications lighten the Bravo while increasing control response.
Considering all the engineering, precision construction, prefabrication, and excellent flying abilities, the $180 price tag seems on the low side. This is a chance for every RC pilot to experience what a precision aircraft can do without breaking the bank. Take the opportunity — you might not fly any better, but you will definitely enjoy flying more.
MA
Frank Granelli GranelliF@aol.com
Manufacturer / Distributor
Black Horse Model Distributed exclusively by American Pioneer Hobbies Inc. 7 Dana St. Springfield, MA 01104 (413) 781-2036 www.americanpioneerhobbies.com
Products Used in Review
- O.S. .91 FX engine — www.osengines.com
- JR Propo radio — www.horizonhobby.com
- Hobbico Hot Knife — www.hobbico.com
- Du-Bro — http://dubro.com/hobby/
Transcribed from original scans by AI. Minor OCR errors may remain.

