
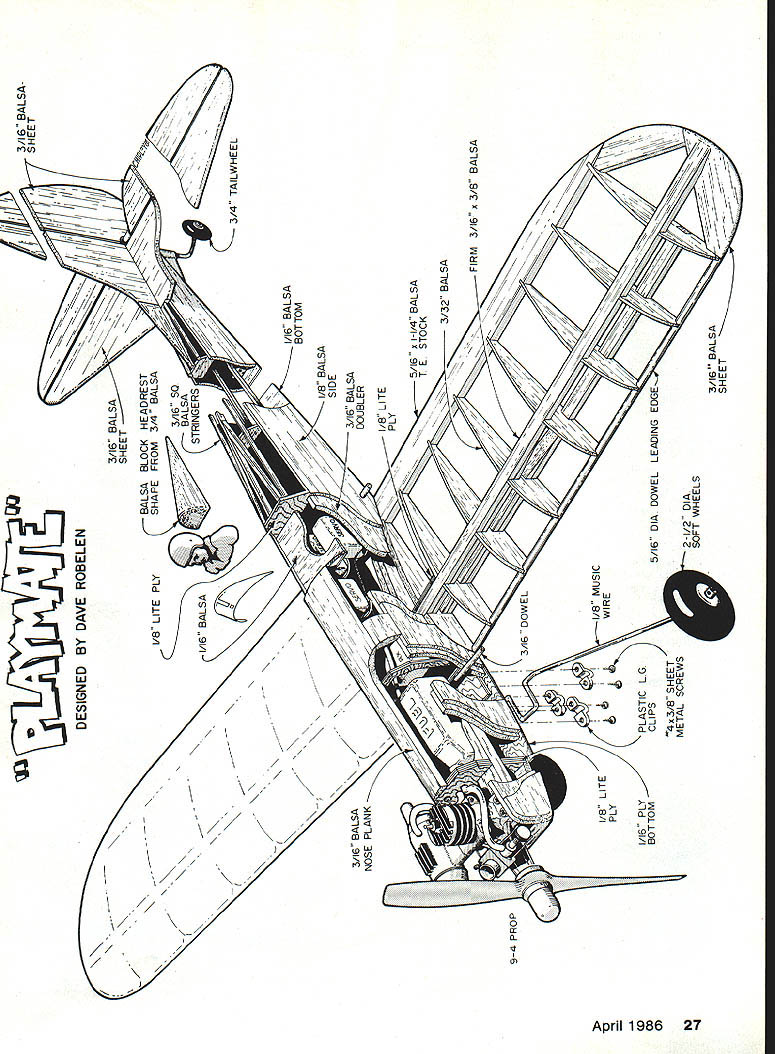
Playmate
Designed by Dave Robelen
Have you been searching for that "just right" new model project? How about a spiffy-looking sport model with scale-like lines that is quick to build? Are you attracted to compact models that transport easily and use little fuel? How about true school-yard performance with minimum noise? Or complete aerobatics ability for the hotshot with gentle behavior for the novice? Of course any new design should also be compatible with the popular four-stroke engines.
Quite a shopping list, wouldn't you say? Obviously, it seems like way too many features for any one design. That may have been true in the past, but now there is the Playmate. This model was designed and developed purely for recreation, using modern technology and blended with a nostalgic flavor—both in appearance and materials. It is suitable for both advanced and novice pilots depending mainly on choice of engine.
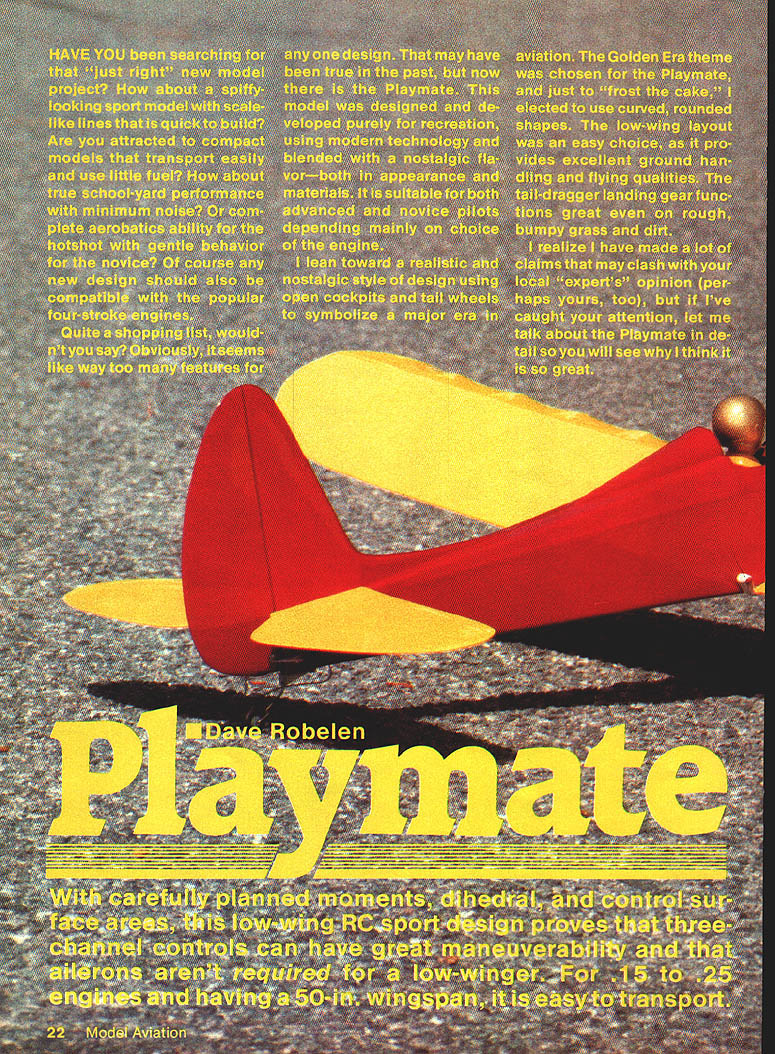
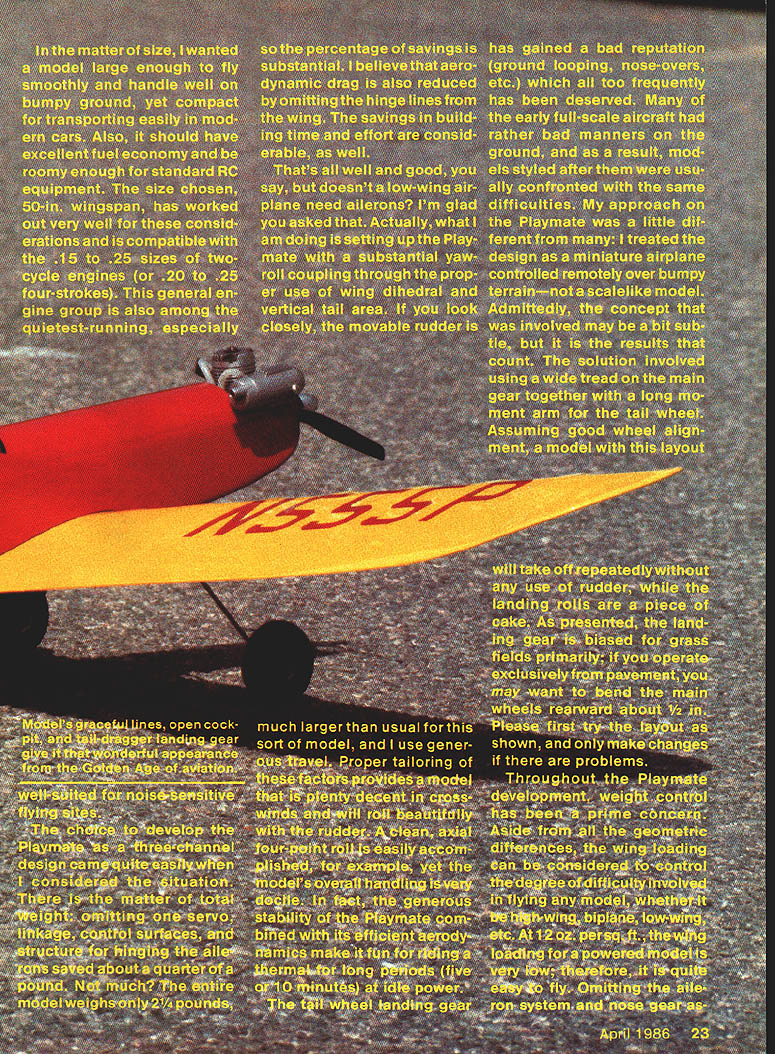
I lean toward a realistic and nostalgic style of design using open cockpits and tail wheels to symbolize a major era in aviation. The Golden Era theme was chosen for the Playmate, and just to "frost the cake," I elected to use curved, rounded shapes. The low-wing layout was an easy choice, as it provides excellent ground handling and flying qualities. The tail-dragger landing gear functions great even on rough, bumpy grass and dirt.
With carefully planned moments, dihedral, and control surface areas, this low-wing RC sport design proves that three-channel controls can have great maneuverability and that ailerons aren't required for a low-winger. For .15 to .25 engines and having a 50-in. wingspan, it is easy to transport.
You might ask: doesn't a low-wing airplane need ailerons? What I am doing is setting up the Playmate with substantial yaw-roll coupling through the proper use of wing dihedral and vertical tail area. The movable rudder is much larger than usual for this sort of model, and I use generous travel. Proper tailoring of these factors provides a model that is plenty decent in crosswinds and will roll beautifully with the rudder. A clean, axial four-point roll is easily accomplished, for example, yet the model's overall handling is very docile. In fact, the generous stability of the Playmate combined with its efficient aerodynamics makes it fun for riding a thermal for long periods (five to 10 minutes) at idle power.
The tailwheel landing gear has gained a bad reputation (ground looping, nose-overs, etc.) which often has been deserved on early full-scale designs and scale-like models. My approach on the Playmate was a little different: I treated the design as a miniature airplane controlled remotely over bumpy terrain—not a scale-like replication of problematic full-scale handling. The solution involved using a wide tread on the main gear together with a long moment arm for the tail wheel. Assuming good wheel alignment, a model with this layout will take off repeatedly without any use of rudder, while the landing rolls are a piece of cake. As presented, the landing gear is biased for grass fields primarily; if you operate exclusively from pavement, you may want to bend the main wheels rearward about 1/2 in. Please first try the layout as shown, and only make changes if there are problems.
Throughout the Playmate development, weight control has been a prime concern. Aside from geometric differences, wing loading largely controls the degree of difficulty in flying any model. At about 12 oz. per sq. ft., the wing loading for a powered Playmate is very low; therefore, it is quite easy to fly. Omitting the aileron system and nose gear as well as light-weighting other parts helped keep the weight down.
The choice to develop the Playmate as a three-channel design came easily when I considered the situation. Omitting one servo, linkage, control surfaces, and structure for hinging the ailerons saved roughly a quarter of a pound — a substantial percentage when the entire model weighs only about 2-1/4 pounds. Aerodynamic drag is also reduced by omitting hinge lines from the wing, and the savings in building time and effort are considerable.
Much of the success of the Playmate also lies in the wing. Elliptical tips help minimize drag. The airfoil chosen exhibits a very wide speed range. Don't let the simplistic flat-bottom appearance put you off—the airfoil was developed specifically for this size and type of model. Its open-frame construction and high-lift qualities, together with the low wing loading, provide extremely low landing speeds and excellent stall behavior. Yet inverted performance is excellent.
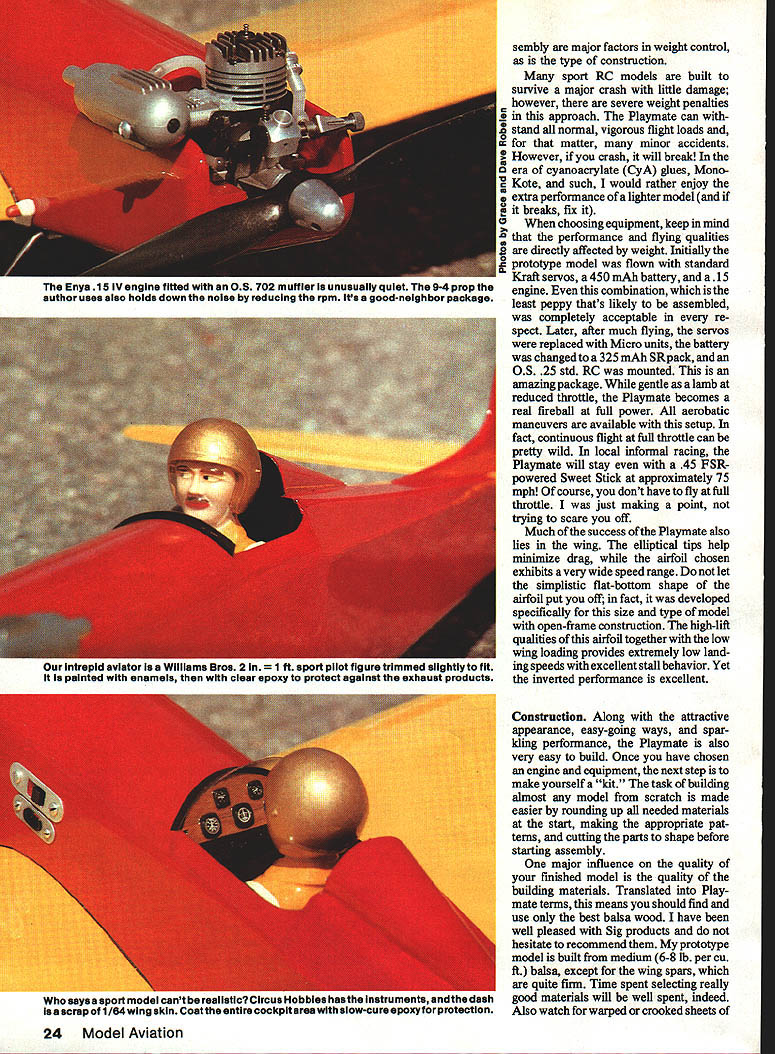
Initially the prototype was flown with standard Kraft servos, a 450 mAh battery, and a .15 engine combination—the least peppy that's likely. This was completely acceptable. Later, after much flying, the servos were replaced with micro units, the battery changed to a 325 mAh S.R. pack, and a .25 two-stroke was mounted. With that setup the Playmate is an amazing package: gentle at reduced throttle, and a real fireball at full power. Full-power aerobatic maneuvers are available, and continuous full-throttle flight can be pretty wild. In local informal racing, the Playmate will stay with a .45 FSR-powered Sweet Stick at approximately 75 mph. Of course, you don't have to fly full throttle — I'm just making the point.
Construction
Along with attractive appearance and sparkling performance, the Playmate is very easy to build. Once you have chosen engine and equipment, the next step is to make yourself a kit. The task of building an almost scratch-made model is made easier by rounding up the needed materials, making appropriate patterns, and cutting parts to shape before starting assembly.
One major influence on the quality of the finished model is the quality of the building materials. For the Playmate, use the best balsa wood you can find. The prototype was built primarily from medium (6–8 lb/cu. ft.) balsa except for the wing spars, which should be quite firm. Time spent selecting really good materials will be well spent. Also watch for warped or crooked sheets.
If you have access to a jigsaw or small band saw the job goes much quicker; however, a small hand coping saw, razor saw and a basic X-Acto set are completely sufficient. I made extensive use of modern CyA glues in building the prototype, along with 45-minute epoxy (HobbyPoxy II) and some Titebond wood glue.
Fuselage
I prefer to start construction with the wing first, but starting the fuselage first is also acceptable. If you choose the fuselage, begin by bonding doublers to the basic sides with slow CyA glue or contact cement. Mark off and install the forward bulkheads back to the rear doublers. Be very careful at this step to keep the fuselage in perfect alignment: place the assembly over the plan and check alignment from side and top views. If alignment is required, it is better to break and reglue a joint now instead of letting it go—having a crooked fuselage will cause problems later.
Install the engine mounts, watching alignment carefully. Pull the sides together and join the tail filler block. Again, be careful with alignment, as any twist introduced will push the tail assembly out of true. Continue installing tail-cone bulkheads, stringers, nose planks, bottom sheeting, and the landing gear mount plates.
Use a firm piece of 1/16" balsa for the cockpit floor and install it now. If you are going to use film covering for the cockpit interior (as in the prototype), do that now and also cover the inside surfaces of the cockpit side pieces. Carefully sand and trim the side pieces to fit, then glue them in place with CyA. Install any remaining balsa pieces in the fuselage except for the headrest, and inspect all glue joints for good bonding—add a little more glue where needed.
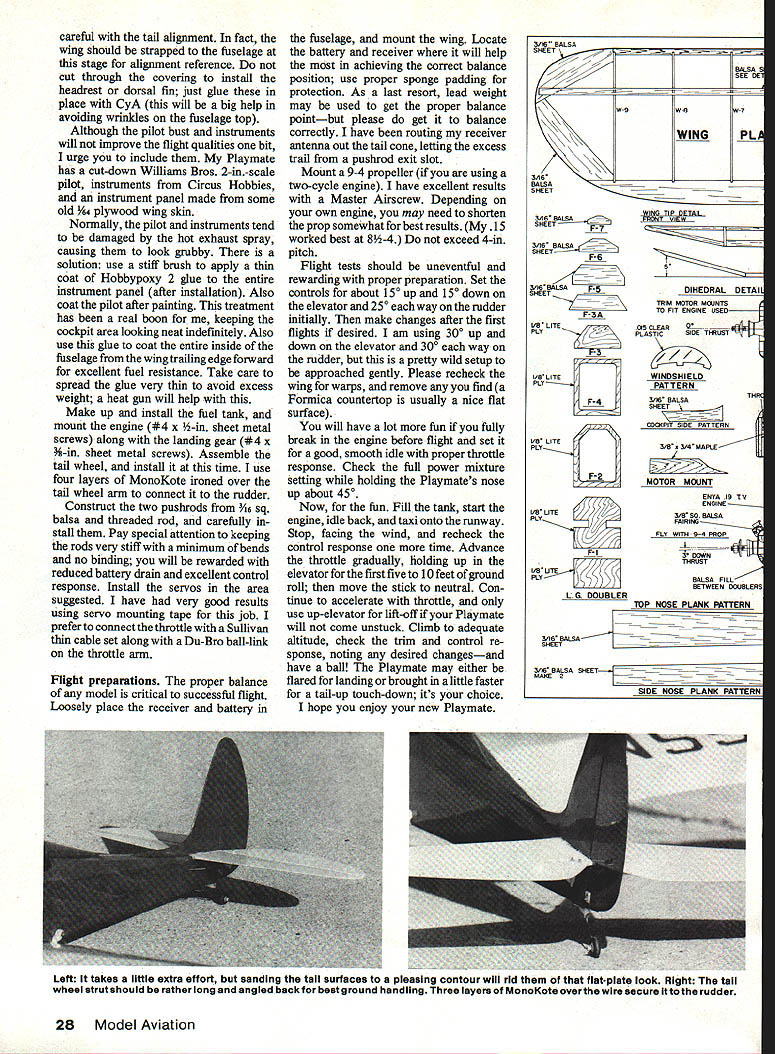
Shape and sand the fuselage to final contour. I use a whittler's blade (#54) in my X-Acto knife and #120-grit sandpaper on a flat wooden block (2 x 8 x 3/4 in.). While the tools are out, shape and sand the tail surfaces; pay special attention to the bevel on the leading edge of the tail surfaces.
Many sport RC models are built to survive major crashes with little damage, but there are severe weight penalties in that approach. The Playmate can withstand normal vigorous flight loads and many minor accidents, but a heavy crash will break it. In the era of CyA glues, MonoKote, etc., I prefer the extra performance of a lighter model and will fix it if it breaks.
Wing
With the fuselage and tail in a safe place, tackle the wing. Use a flat, warp-free work board (hollow-core door panel or drafting board with a basswood core). The success of your project depends on building flat, warp-free wings.
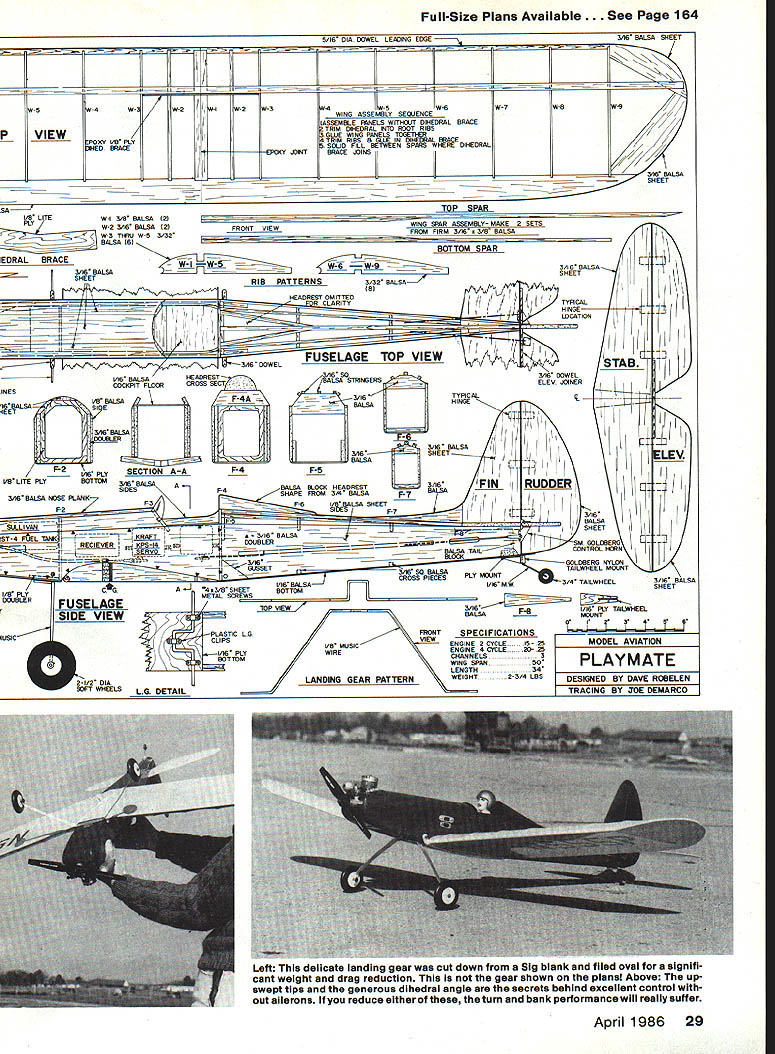
Start by laminating the spar assemblies and notching the trailing edges. Glue the wing-tip assemblies together and set them aside. Fasten the plan to the board and protect it from glue with a plastic film (Super MonoKote backing or kitchen clear plastic wrap; avoid wax paper). Start with the bottom spars and trailing edges, clamping down carefully. Install the ribs, noting proper thickness as you go, then glue in the spar fillers. Glue the leading edges and wing tips, blocking the tips to the proper angle. Carefully fit and install the top spars, paying special attention to glue joints around the center section.
Remove the panels from the plan, trim the center ribs to the dihedral angle shown on the plan, and glue the panels together. Using a razor saw, remove the portion of the center ribs necessary to install the dihedral brace. Glue the ply brace in place and check all glue joints for good bonding. At this point the wing should be capable of being bent like a long bow—with a tip in each hand and your knee in the middle. Do not omit this load test, as it will detect gluing problems. Prepare the wing for covering by sanding it smooth and rounding tip edges; do not sand the trailing edge round—leave square corners for best flight qualities.
Covering, installations, etc.
Follow the manufacturer's instructions for best results with plastic films, and consult published references (such as those by Harry Higley and Sons). I prefer Super MonoKote and highly recommend it for this type of wing construction.
Be careful with tail alignment. Strap the wing to the fuselage at this stage for alignment reference. Do not cut through the covering to install the headrest or dorsal fin; instead glue these in place with CyA to avoid wrinkles on the fuselage top.
Although the pilot bust and instruments do not improve flight qualities, I urge you to include them. My Playmate has a cut-down Williams Bros. 2-in. scale pilot, instruments from Circus Hobbies, and an instrument panel made from old 1/64 plywood wing skin. The pilot and instruments tend to be damaged by hot exhaust spray; to prevent this, use a stiff brush to apply a thin coat of HobbyPoxy II glue to the entire instrument panel (after installation) and to the pilot after painting. Also coat the entire inside of the fuselage from the wing trailing edge forward with a thin coat of HobbyPoxy II for excellent fuel resistance—spread the glue very thin to avoid excess weight; a heat gun will help.
Make and install the fuel tank, and mount the engine with #4 x 1/2-in. sheet metal screws and the landing gear with #4 x 3/8-in. sheet metal screws. Assemble the tail wheel and install it. I use four layers of MonoKote ironed over the tail wheel arm mount to connect it to the rudder.
Construct the two pushrods from 3/16 sq. balsa and threaded rod, and install them carefully. Keep the rods very stiff with a minimum of bends and no binding; you will be rewarded with reduced battery drain and excellent control response. Install the servos where suggested; servo mounting tape has worked well for me. I prefer to connect the throttle with a Sullivan thin cable set and a Du-Bro ball-link on the throttle arm.
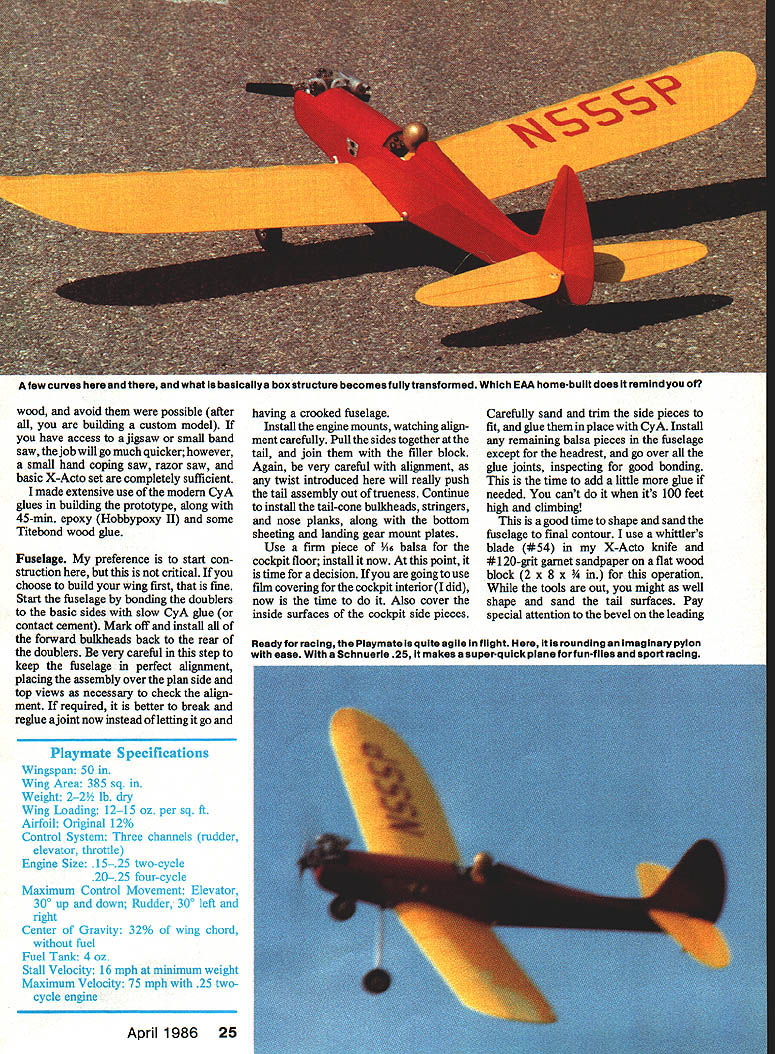
Playmate Specifications
- Wingspan: 50 in.
- Wing Area: 385 sq. in.
- Weight: 2–2 1/2 lb. dry
- Wing Loading: 12–15 oz. per sq. ft.
- Airfoil: Original, 12%
- Control System: Three channels (rudder, elevator, throttle)
- Engine Size: .15–.25 two-cycle; .20–.25 four-cycle
- Maximum Control Movement: Elevator 30° up and down; Rudder 30° left and right
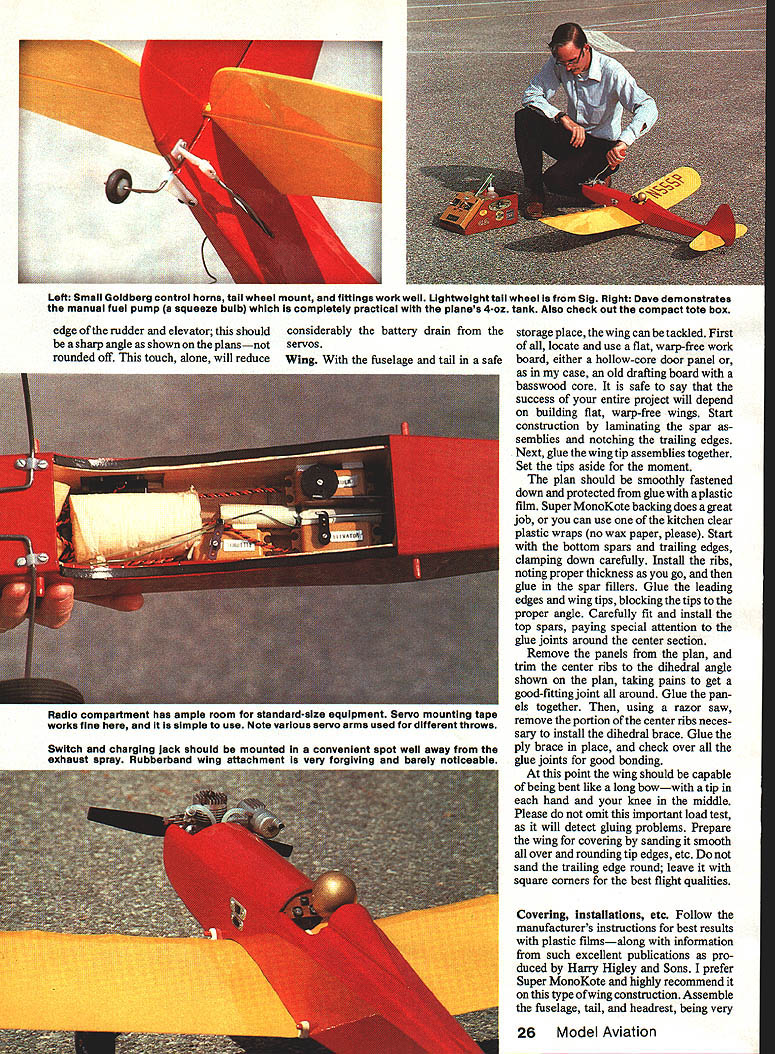
- Bevel: The leading edge of the rudder and elevator should be a sharp angle as shown on the plans—not rounded off. This alone will reduce battery drain from the servos.
- Center of Gravity: 32% of wing chord, without fuel
- Fuel Tank: 4 oz.
- Stall Velocity: 16 mph at minimum weight
- Maximum Velocity: 75 mph with .25 two-cycle engine
Assembly
Major factors are weight, control, type of construction, and sport. R/C models built to survive a major crash with little damage suffer severe weight penalties. My approach: the Playmate can stand normal vigorous flight loads and a few minor accidents, but a heavy crash will break it. If you prefer extra performance, fly a lighter model and repair it if it breaks.
Choosing equipment: Keep in mind performance and flying qualities are directly affected by weight. The prototype was initially flown with standard Kraft servos, a 450 mAh battery, and a .15 engine—an acceptable baseline setup. Later the servos were replaced with micro units, the battery changed to a 325 mAh S/R pack, and a .25 two-stroke was mounted. With gentle throttle the Playmate is docile; at full power it becomes a real fireball. All aerobatic maneuvers are available with this setup.
Much of the Playmate's success lies in the wing: elliptical tips minimize drag and the airfoil exhibits a very wide speed range. Its open-frame construction and the high-lift qualities of the airfoil, together with the low wing loading, provide extremely low landing speeds and excellent stall behavior while retaining good inverted performance.
Flight Preparations
- Balance: Loosely place the receiver and battery in the fuselage and mount the wing. Locate the battery and receiver to help achieve the correct balance position; use proper sponge padding for protection. As a last resort, lead weight may be used to get the proper balance point. I route the receiver antenna out the tail cone, letting the excess trail from a pushrod exit slot.
- Propeller: Mount a 9x4 propeller if using a two-cycle engine. I have excellent results with a Master Airscrew. Depending on your engine, you may need to shorten the prop for best results (my .15 worked best at 8-1/2 x 4). Do not exceed 4-in. pitch.
- Control throws: Set initial control throws to about 15° up and 15° down on the elevator and 25° each way on the rudder. After initial flights adjust as desired. The prototype uses up to 30° each way on elevator and rudder for aggressive flying, but approach such settings gently.
- Engine break-in: Fully break in the engine before flight and set it for a good, smooth idle with proper throttle response. Check the fuel/air mixture while holding the Playmate's nose up about 45°.
- Taxi and takeoff: Fill the tank, start the engine, idle back, and taxi onto the runway. Stop facing into the wind and recheck control response. Advance the throttle gradually, holding up on the elevator for the first five to 10 feet of ground roll; then move the stick to neutral. Continue to accelerate and use up-elevator for lift-off only if the Playmate will not come unstuck. Climb to adequate altitude, check trim and control response, and enjoy. The Playmate may be flared for landing or brought in a little faster for a tail-up touch-down—it’s your choice.
I hope you enjoy your new Playmate.
Transcribed from original scans by AI. Minor OCR errors may remain.

