
A Poor Man's Prop Pitch Gauge
By Don Hughes
Introduction
You won't know how much performance you're missing until you check your propellers with a pitch gauge—and fix them if necessary. A pitch gauge detects subtle differences in blade pitch that can cause vibration and reduced performance. Commercial pitch gauges work well, but a simple, inexpensive homemade instrument can get you started and help you decide whether a professional unit is worth buying.
Why measure pitch?
- Pitch (in inches or millimeters) is the distance a given point on the propeller will move forward in one revolution in a perfect, slip-free medium.
- Pitch distribution is the pitch at various points along the propeller radius. A helical-pitch propeller has the same pitch at any radial point; other designs vary pitch from root to tip for performance reasons.
- Two blades with different pitch, or a blade with improper pitch distribution, can cause vibration and reduced performance. A pitch gauge lets you detect these irregularities.
The simple gauge — overview
The basic gauge is very simple:
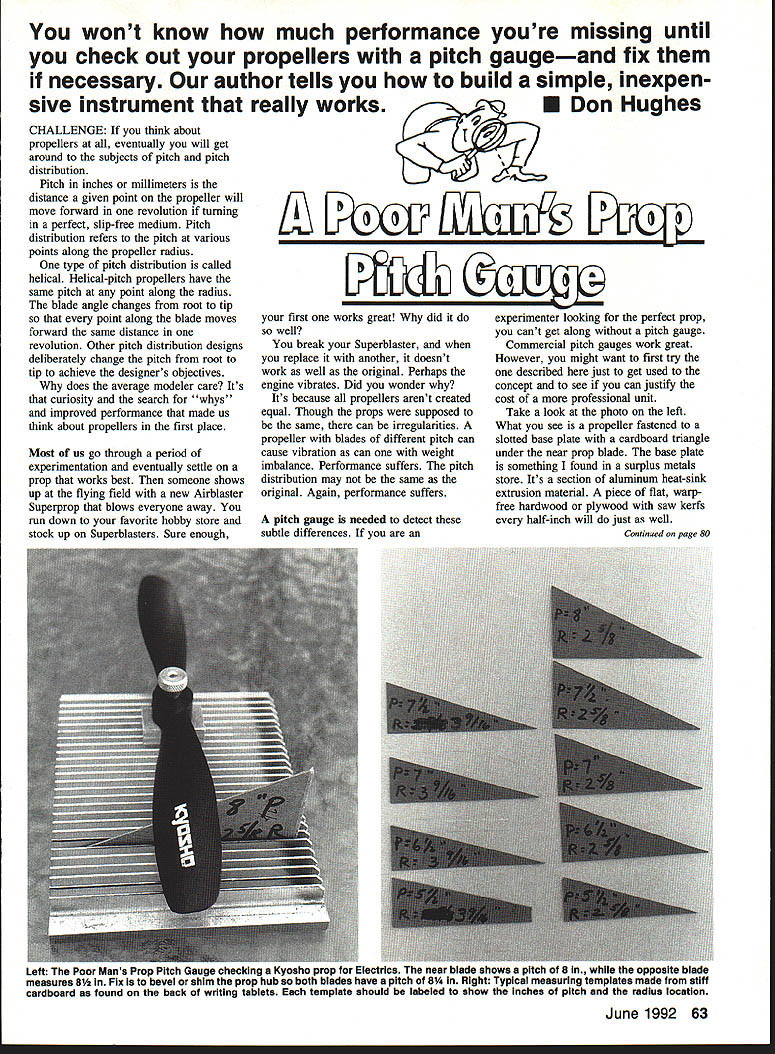
- A slotted base plate (aluminum heat-sink extrusion is convenient, but a flat, warp-free piece of hardwood or plywood with saw kerfs every 1/2 inch works fine).
- A small block at the prop hub raises the prop off the base so you can slip a triangle under the blade.
- The prop is held in place with a conical nut from a prop balancer (or similar fastening).
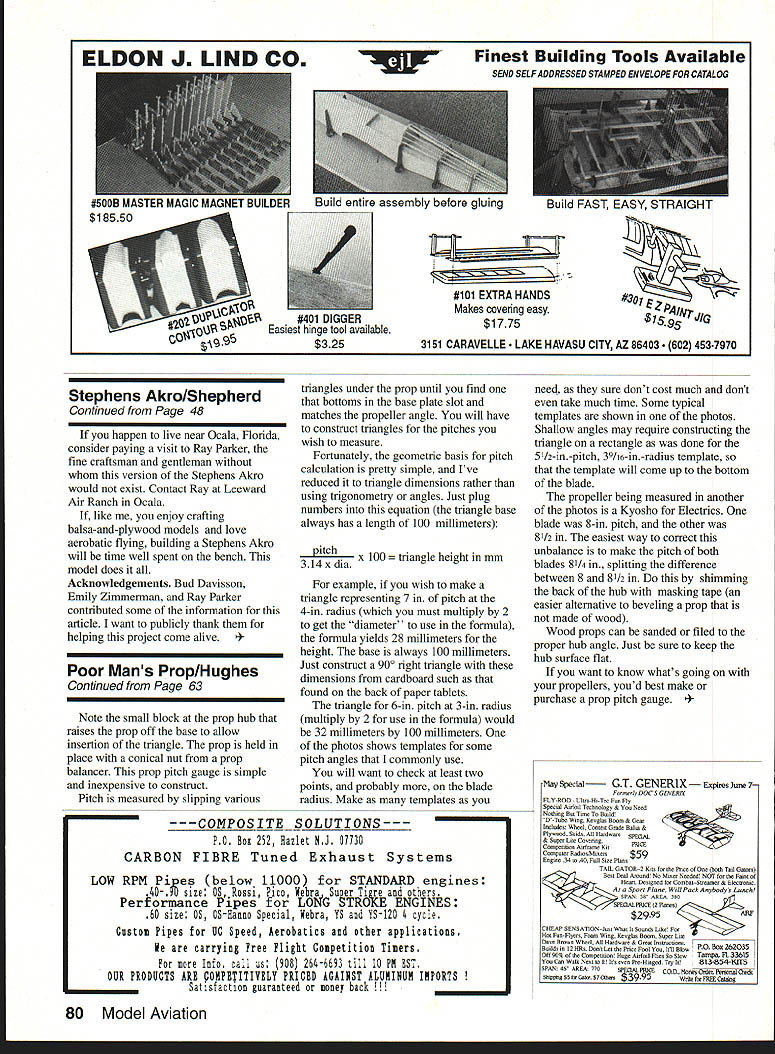
- Cardboard (e.g., from the back of paper tablets) is used to make right-triangle templates that represent various pitches.
To measure pitch, fasten the prop to the base, slip a triangle under the blade, and move it until it bottoms in the base slot and matches the propeller angle. You will need a set of triangles—one for each pitch you want to check.
Calculating triangle dimensions
The geometric basis is simple: construct 90° right triangles with a base length of 100 millimeters and a computed height that represents the propeller helix angle at the chosen radius.
Formula (using π ≈ 3.14): triangle height (mm) = (100 × pitch (in)) / (π × diameter (in))
Notes:
- Use the diameter (2 × radius) in inches in the formula.
- The base is always 100 mm; calculate the height in millimeters.
Examples:
- 7 in pitch at a 4 in radius (diameter = 8 in):
height = 100 × 7 / (3.14 × 8) ≈ 28 mm → triangle 28 mm × 100 mm
- 6 in pitch at a 3 in radius (diameter = 6 in):
height = 100 × 6 / (3.14 × 6) ≈ 32 mm → triangle 32 mm × 100 mm
Shallow angles: some templates (e.g., 5½ in pitch at 3/16 in radius) may require constructing the triangle on a rectangular backing so the template reaches the bottom of the blade.
Making and using templates
- Make as many cardboard triangles as you need—cheap and quick to produce.
- Check at least two radial points on each blade (root and nearer tip); more points give a clearer pitch distribution.
- Slip the appropriate triangle under each blade until it bottoms in the base slot and matches the blade angle. Compare blades and radial positions.
Correcting pitch imbalance
- If one blade measures 8 in and the other 8½ in, a simple fix is to split the difference: make both 8¼ in. For molded or plastic props, shim the back end of the hub with masking tape to alter the hub angle—easier than beveling a non-wood prop.
- For wooden props, sand or file the hub to the proper angle. Keep the hub surface flat while removing material.
Conclusion
If you want to understand and optimize your propellers, a pitch gauge is essential. This inexpensive, homemade gauge works well for experimentation and troubleshooting; if you find it useful, consider investing in a professional unit later.
Transcribed from original scans by AI. Minor OCR errors may remain.

