
Profile Smoothie
Larry Kruse
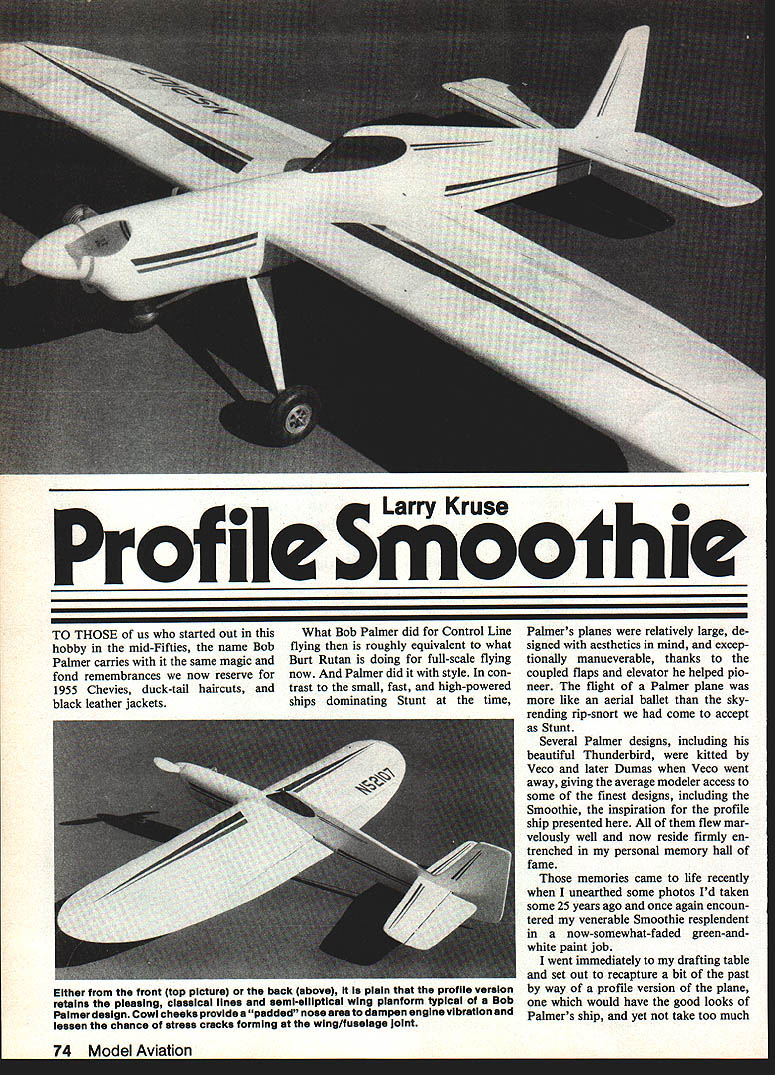
TO THOSE of us who started out in this hobby in the mid‑Fifties, the name Bob Palmer carries with it the same magic and fond remembrances we now reserve for 1955 Chevies, duck‑tail haircuts, and black leather jackets.
What Bob Palmer did for Control Line flying then is roughly equivalent to what Burt Rutan is doing for full‑scale flying now. And Palmer did it with style. In contrast to the small, fast, and high‑powered ships dominating Stunt at the time, Palmer's planes were relatively large, designed with aesthetics in mind, and exceptionally maneuverable, thanks to the coupled flaps and elevator he helped pioneer. The flight of a Palmer plane was more like an aerial ballet than the sky‑rending rip‑snort we had come to accept as Stunt.
Several Palmer designs, including his beautiful Thunderbird, were kitted by Veco and later Dumas when Veco went away, giving the average modeler access to some of the finest designs, including the Smoothie, the inspiration for the profile ship presented here. All of them flew marvelously well and now reside firmly entrenched in my personal memory hall of fame.
Those memories came to life recently when I unearthed some photos I'd taken some 25 years ago and once again encountered my venerable Smoothie resplendent in a now‑somewhat‑faded green‑and‑white paint job. I went immediately to my drafting table and set out to recapture a bit of the past by way of a profile version of the plane, one which would have the good looks of Palmer's ship, and yet not take too much time away from current scale projects.
Wing construction
The wing builds quickly if you stack‑saw the ribs and pre‑form the tips prior to actual construction. Pin down the bottom trailing edge (TE) piece and glue the ribs to it. Use a small cardboard triangle to make sure the ribs are at 90° to the TE piece. Considerable time can be saved by using Goldberg's Super Jet or Hot Stuff's Super T rather than a slower‑drying glue.
Glue on the top TE piece, and set the ribs in place over the pinned‑down bottom spar. Don't glue them yet. Put the top spar in position, and glue it in place. Turn the wing over, pin down what was originally the top spar (now obviously on the bottom), and glue what was originally the bottom spar in place. It really doesn't make any difference which spar is pinned down as long as one of them is pinned and the other is glued.
Add the TE cap strip and the leading edge (LE). Figure out some way to apply pressure evenly and consistently to the LE during the gluing process to make certain it remains butted into the rib notches at each rib location. On a wing like this, I typically cut six or eight 4‑in. sticks out of sturdy spruce stock (1/8 x 1/4 in. or bigger) and place each stick vertically behind the spars. Then I loop a rubber band or two from one end of each stick around the LE and back to the other end of the stick. Spaced evenly along the span, this technique creates even pressure at each rib/LE juncture, keeping wood‑to‑wood contact rather than having to try to fill an air gap with glue, sawdust, baking soda, or whatever.
The bellcrank mount, center sheeting and 1/8‑in. support rails can be added prior to gluing the wing tips in place. Make a real effort to fair the tips into the main wing panels; you want to emulate Palmer's semi‑elliptical planform as much as possible without unsightly joint lines or abrupt changes in airfoil shape. The 1/8‑in. vertical tip fill pieces should be sanded to a rounded contour, blending with the edge of the wing tip. The flaps can now be slotted for hinges, joined with the 2‑56 wire joiner, and set aside for final assembly.
Tail surfaces
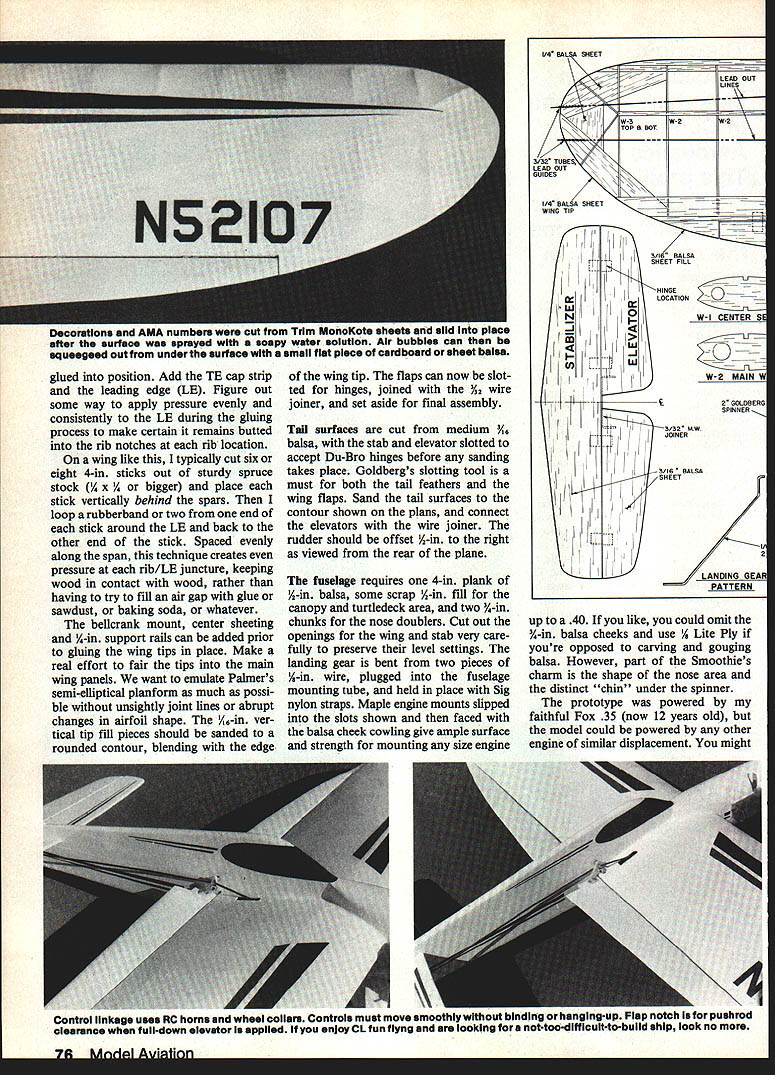
Tail surfaces are cut from medium 1/4‑in. balsa. Cut the stabilizer and elevator and slot them to accept Du‑Bro hinges before sanding takes place. Goldberg's slotting tool must be used on both tail feathers and wing flaps. Sand tail surfaces smooth and to the contour shown on the plans. Connect the elevators with the wire joiner. The rudder should be offset 1/2 in. to the right as viewed from the rear of the plane.
Fuselage
The fuselage requires one 4‑in. plank of 1/2‑in. balsa, some scrap 1/2‑in. fill for the canopy and turtledeck area, and two 1/2‑in. chunks for the nose doublers. Cut out the openings for the wing and stab very carefully to preserve their level settings.
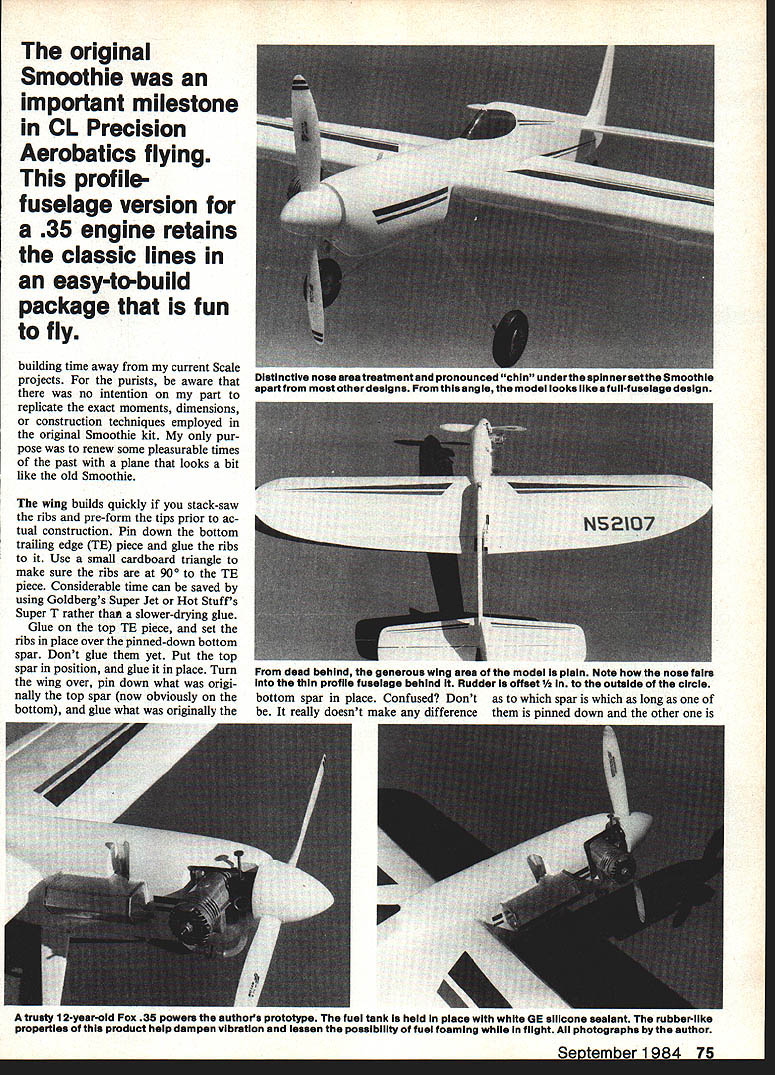
The landing gear is bent from two pieces of 3/32‑in. wire, plugged into the fuselage mounting tube, and held in place with Sig nylon straps. Maple engine mounts slipped into the slots shown and then faced with the balsa cheek cowling give ample surface and strength for mounting any size engine up to a .40. If you like, you could omit the 1/4‑in. balsa cheeks and use 1/8‑in. Lite Ply if you're opposed to carving and gouging balsa. However, part of the Smoothie's charm is the shape of the nose area and the distinct "chin" under the spinner.
Engine and final assembly
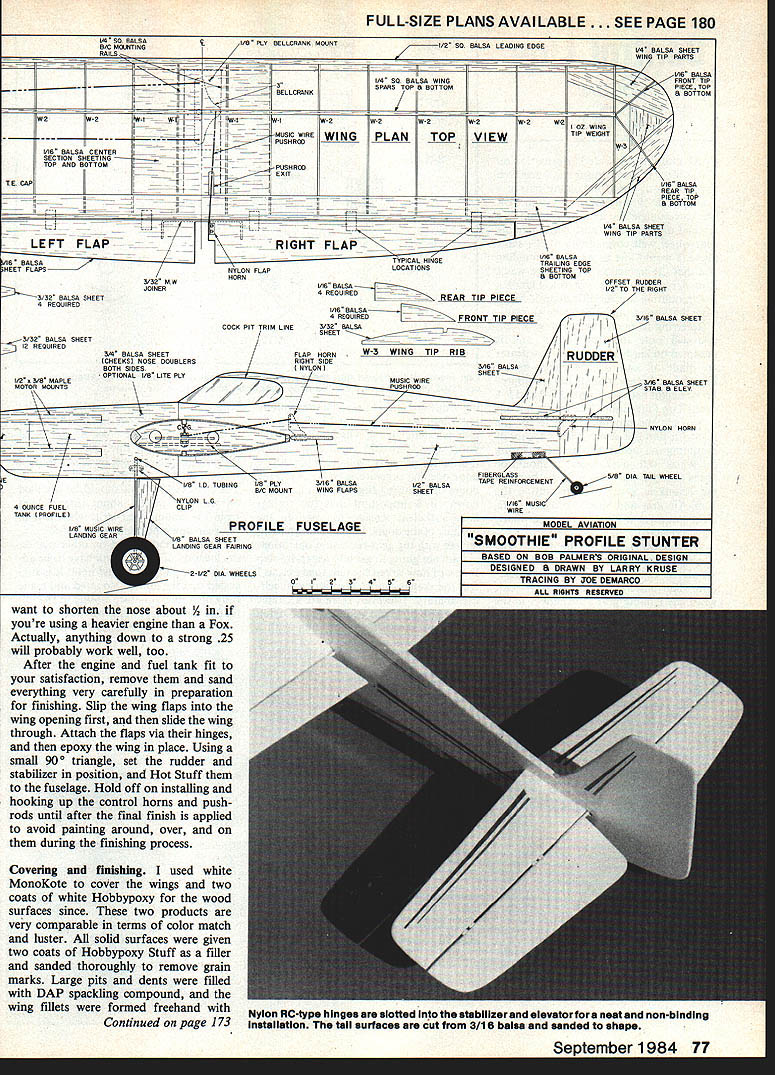
The prototype was powered by my faithful Fox .35 (now 12 years old), but the model could be powered by any other engine of similar displacement. You might want to shorten the nose about 1/2 in. if you're using a heavier engine than a Fox. Actually, anything down to a strong .25 will probably work well, too.
After the engine and fuel tank fit to your satisfaction, remove them and sand everything very carefully in preparation for finishing. Slip the wing flaps into the wing opening first, and then slide the wing through. Attach the flaps via their hinges, and then epoxy the wing in place. Using a small 90° triangle, set the rudder and stabilizer in position, and Hot Stuff them to the fuselage. Hold off on installing and hooking up the control horns and pushrods until after the final finish is applied to avoid painting around, over, and on them during the finishing process.
Decorations and AMA numbers were cut from Trim MonoKote sheets and slid into place after the surface was sprayed with a soapy water solution. Air bubbles can then be squeezed out from under the surface with a small flat piece of cardboard or sheet balsa.
Covering and finishing
I used white MonoKote to cover the wings and two coats of white Hobbypoxy for the wood surfaces since these two products are very comparable in terms of color match and luster. All solid surfaces were given two coats of Hobbypoxy Stuff as a filler and sanded thoroughly to remove grain marks. Large pits and dents were filled with DAP spackling compound, and the wing fillets were formed freehand with Epox‑o‑Lite and a wet index finger.
This quick‑and‑dirty finishing method would be totally unacceptable on a full‑blown competition Stunter, but it's a good way to go with an everyday fun‑type ship like the Profile Smoothie. I have an Ag‑Wagon nearly seven years old that still looks good and cleans up easily due to its epoxy/MonoKote finish.
Flying impressions
Flying the Smoothie is just what you expected it to be. All maneuvers are slow and almost stately as you move through the pattern. The plane bobbles just a bit on the corners, but so did the original, as I recall. Some theorists attribute that to the wing tip shape, but I've never delved into it to find out the exact "why" of the peculiarity. Mostly, I'm just content to enjoy flying the Smoothie, knowing its history and place in the evolution of design. I hope you enjoy it, too.
Transcribed from original scans by AI. Minor OCR errors may remain.

