
PUSHRODS FOR CL MODELS
Larry Barrickman
Low-tech tips and tricks to help your control system operate smoothly and effectively
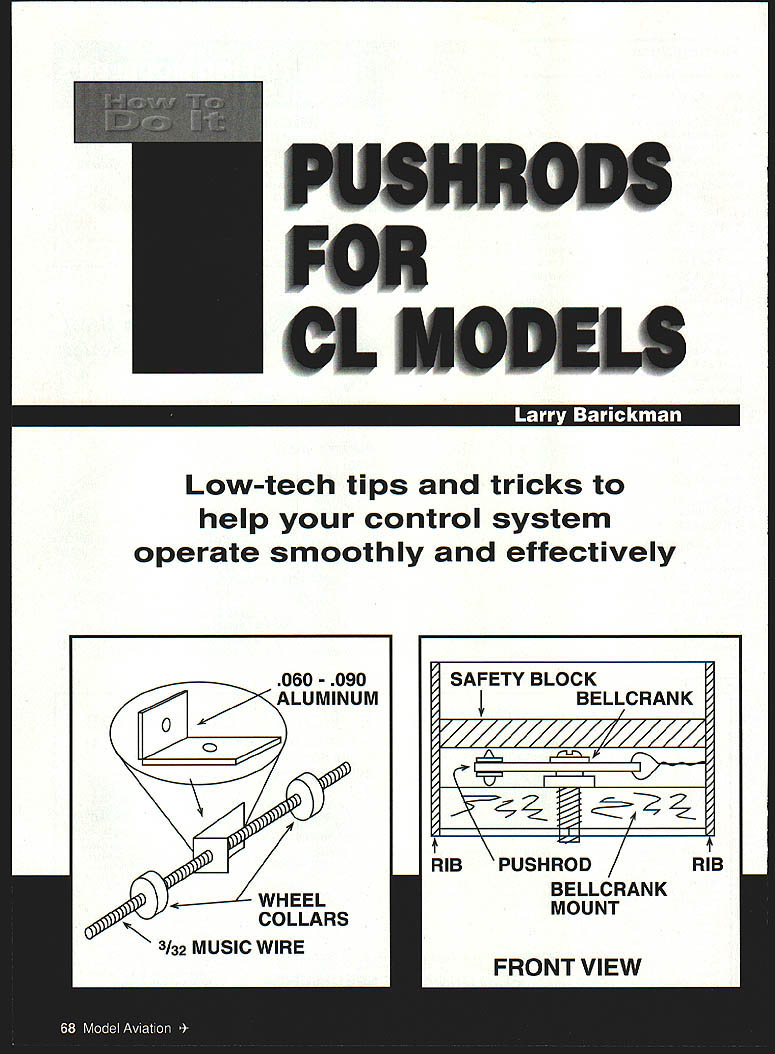
- .060 - .090 aluminum
- Wheel collars
- 3/32 music wire
Diagram labels:
- Safety block
- Bellcrank
- Rib
- Pushrod
- Bellcrank mount
- Front view
Many RC articles talk about control rods and related hardware; control systems for Control Line (CL) models are not discussed as much. Most RC hardware is not suitable for CL systems. The purpose of this article is to give those less-experienced modelers a practical guide. I won't cover high-tech applications, because most people involved already know what works for them.
Type I — Wire (for most .35–.40 profiles)
These could be used inside a built-up fuselage if desired.
- Use only 3/32" tempered piano wire — do not use smaller-diameter wire.
- Make a 90° bend at the bellcrank end.
A word about Z-bends: they are OK on, say, a trainer, but they will cause a sloppy feel because they must fit loosely. Try to avoid Z-bends in all but the most basic systems. Z-bends cannot come out, and the hole they go into must be a bit larger than the wire diameter; therefore they should not be considered the ultimate method to safely retain pushrods.
Make sure the pushrod and leadouts don't catch on anything as they move. Silver-solder a 3/32" washer above and below the bellcrank arm. On the long end of the wire slide a collar, an L brace, and another collar, in that order.
Make the bend for the elevator toward the outboard side and leave a little extra length (about 1/4"). Get the pushrod length as close as possible, even if you have to make another rod. With the pushrod installed, you should not be able to slide it out of the elevator horn because the fuselage gets in the way; that is why you leave it long. A collar can be used as a retainer.
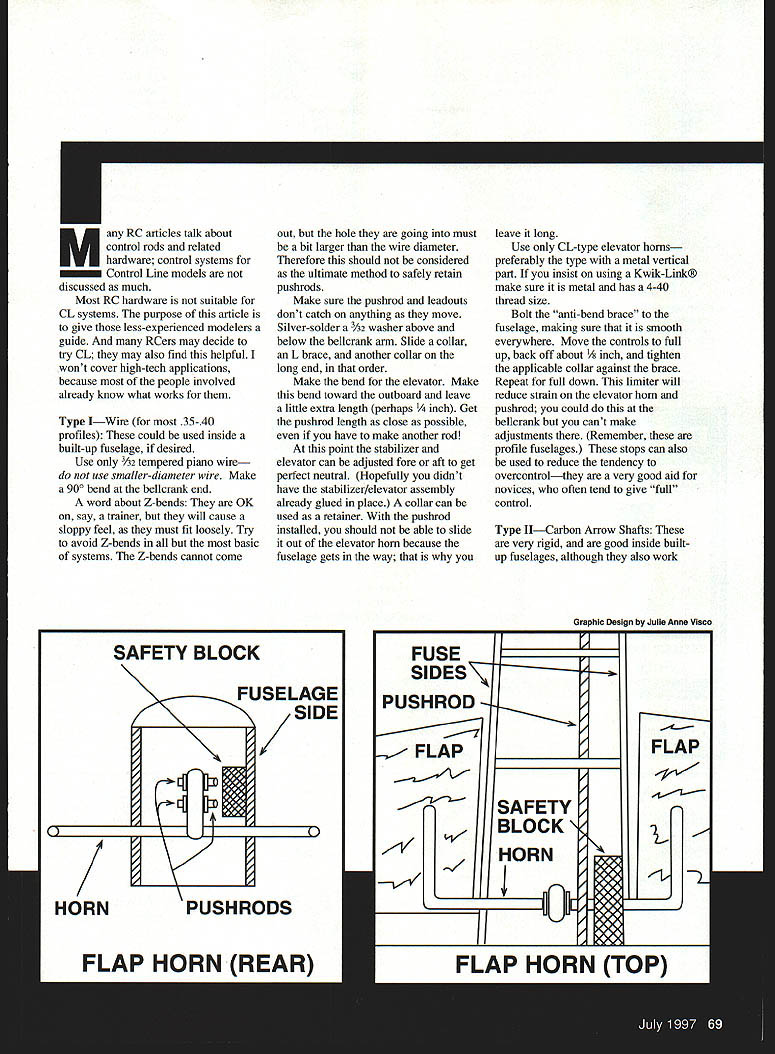
Use only CL-type elevator horns — preferably the type with a metal vertical part. If you insist on using a Kwik-Link®, make sure it is metal and has a 4-40 thread size.
Bolt the "anti-bend brace" to the fuselage, making sure it is smooth everywhere. Move the controls to full up, back off about 1/8", and tighten the applicable collar against the brace. Repeat for full down. These limiters reduce strain on the elevator horn and pushrod and also help reduce the tendency to overcontrol — a very good aid for novices who often tend to give "full" control.
Type II — Carbon Arrow Shafts
Carbon shafts are very rigid and work well inside built-up or profile fuselages. They can be a little harder to make up, but the effort is worth it.
- Cut the shaft about 1-1/2" short on each end using a cutoff wheel (Moto-Tool). Wear safety glasses — the cutoff wheel can fly apart.
- Cut a length of 3/32" piano wire for each end, make a 90° bend in one end, and cut the bent portion off very short.
- Drill a small hole (about 1/32") through the shaft wall about 1/8" back from each end. Slide the wire, bent end first, into the shaft and put the bend through the hole.
- Cut a lengthwise groove in a dowel until the shaft slides onto the wire with a snug but not forced fit. The fit here is critical — work until you get it perfect. Do not force the carbon or it will split.
- Remove the end and epoxy it back in place. Fast-setting cyanoacrylate can work if you are confident, but epoxy is more forgiving.
A Z-bend is a last choice. Preferred methods of retention are collars or Stay-Brite silver-soldered washers; I prefer the latter method. If you solder, always neutralize acid flux with baking soda and water.
Lubricate all wear points with white lithium grease (do not use Vaseline). Lubrication reduces wear and keeps the system moving smoothly.
Cut a piece of hard balsa or basswood to fit between the center ribs and glue it just above the pushrod at the bellcrank. This safety block prevents the wire from coming out of the bellcrank. The same blocks can be used at the flap horn. Leave about 1/32" clearance.
There you have it: a rigid, well-made pushrod that will hold up to the rigors of CL flying and should meet the needs of most modelers. Now you can practice with peace of mind, knowing that your control system is more reliable. Leadouts? That's another story — for another time.
Larry Barrickman 1518 Edmanshire Ln. Orlando, FL 32806
Transcribed from original scans by AI. Minor OCR errors may remain.

