
QED 500
Pat Johnston
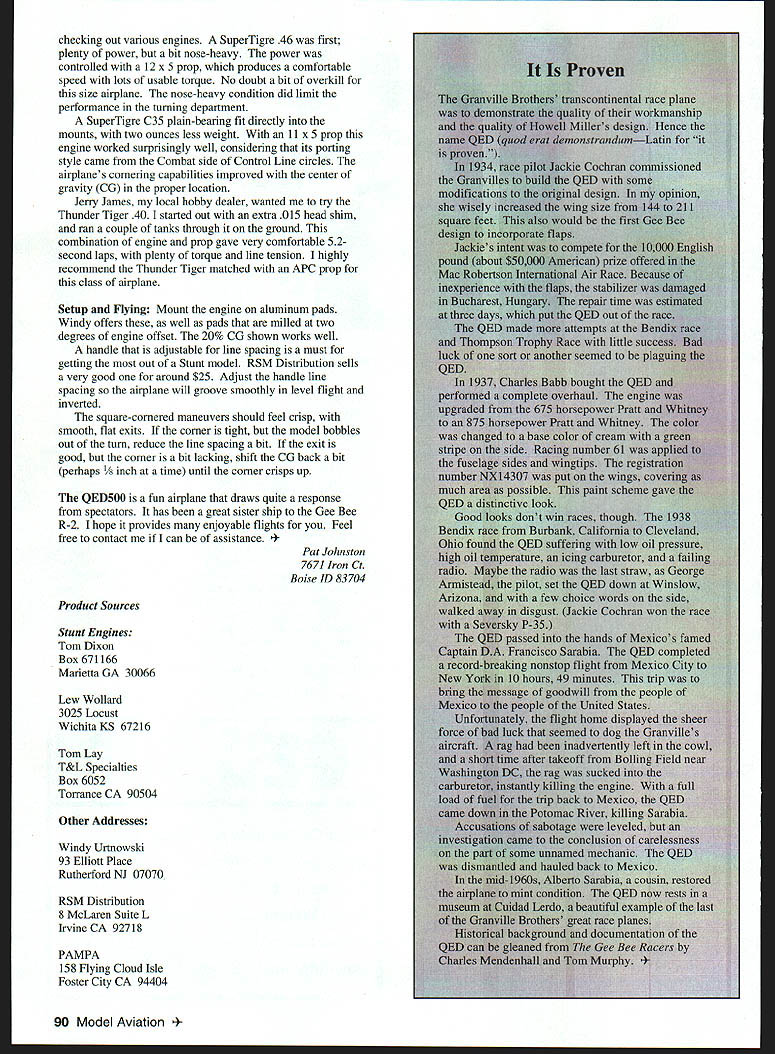
The QED 500 is designed as a dual-purpose model: to compete in Profile Scale and to be flown as an intermediate Stunt model. Its inspiration was derived while doing research on my Gee Bee R-2 (MA, May 1996).
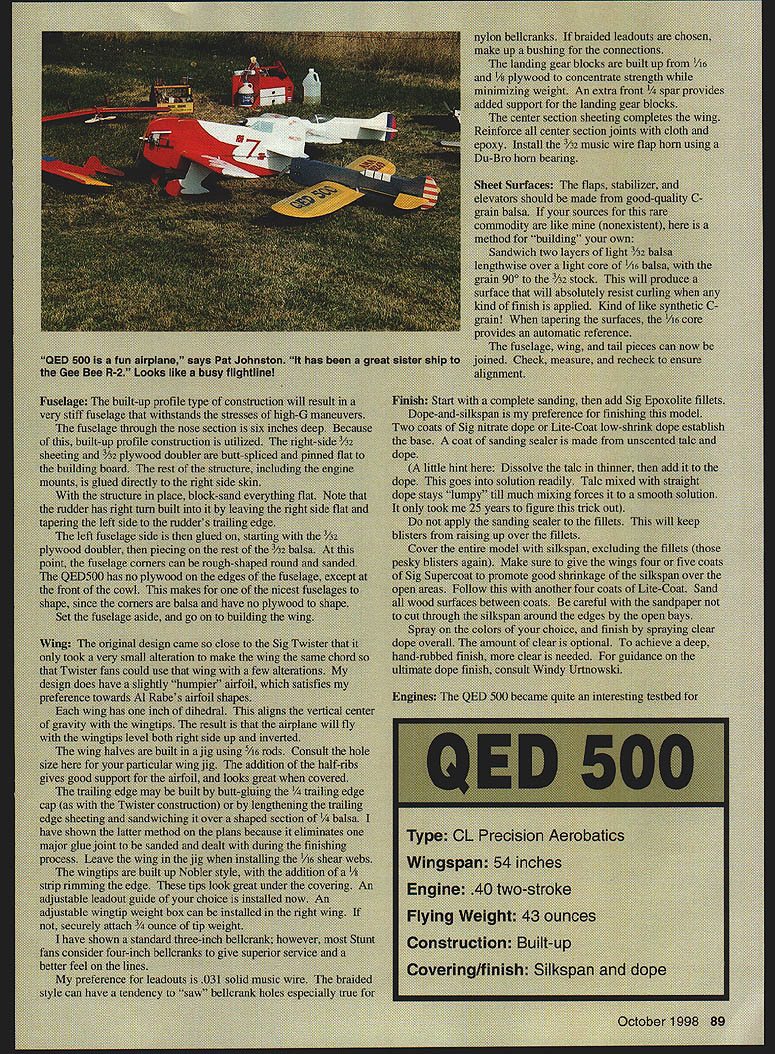
Jim Damerell of New York has successfully competed in Profile Scale with his version of Sarabia's QED. Jim installed a three-line throttle control system. Windy Urtnowski graciously provided me with videos of Jim flying his model in competition. How's that for a good friend? This is the kind of great people we have in the modeling community.
Construction
A word about glues is in order here.
Cyanoacrylate (CyA) adhesives work great on balsa, presuming that a tight joint is first established. Only use the thinnest CyA here. Do not use thick CyA to bridge a poor joint. If a piece does not fit correctly enough to ensure a good glue joint, throw the piece away and make a new one.
Accelerators used to get CyA to "kick" faster also degrade the strength of the glue. Use only epoxy or aliphatic-resin glue on hardwood and/or plywood joints.
Engine
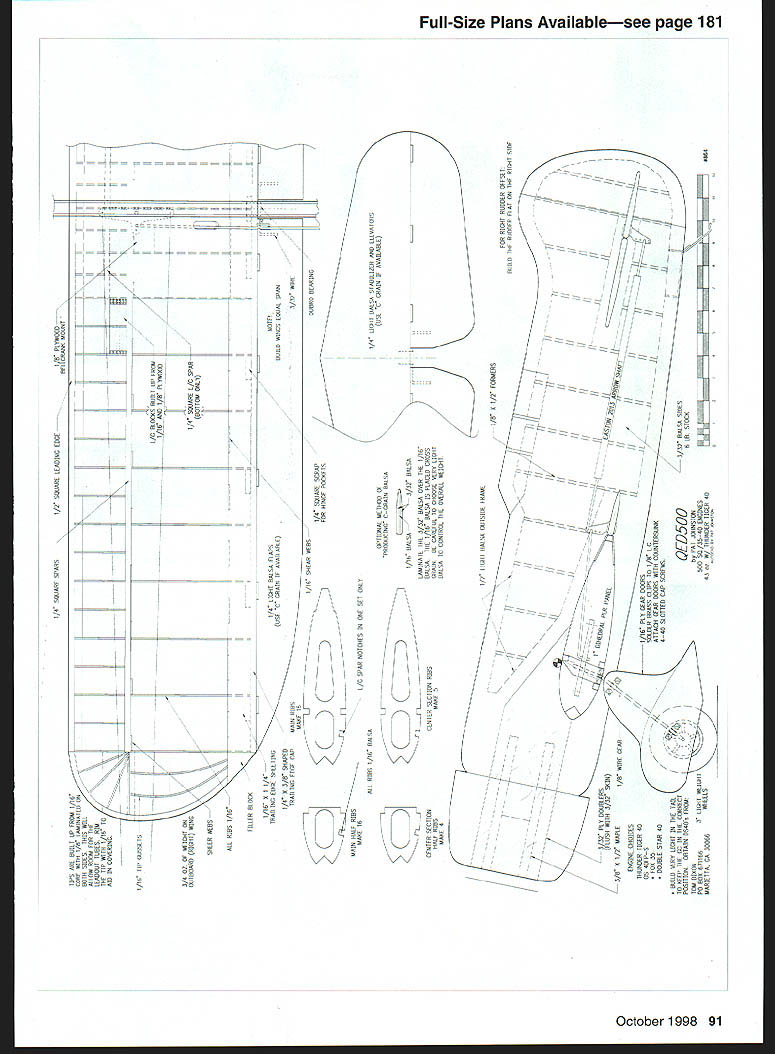
The first priority is to decide which engine to install. The design is intended to use an engine similar to the O.S. FP .40S. With this engine, and balsa chosen in the eight- to ten-pound density range, the center of gravity will come out approximately where called out on the plans.
The Lew Wollard-modified Silver Fox .40 would give exceptional power; if a Fox .35 or the excellent Russian Double Star .40 (from Tom Dixon) is considered, very light wood (not to exceed six-pound density) must be selected.
Weight behind the center of gravity must be watched closely. The advantage of this approach is that a light engine is coupled with a light airframe, producing a truly great flying machine. I'll address the different engines used in my model later in the flying impressions.
Fuselage
The built-up profile type of construction will result in a very stiff fuselage that withstands the stresses of high-G maneuvers.
The fuselage through the nose section is six inches deep. Because of this, built-up profile construction is utilized. The right-side 3/32" sheeting and 3/32" plywood doubler are butt-spliced and pinned flat to the building board. The rest of the structure, including the engine mounts, is glued directly to the right-side skin.
With the structure in place, block-sand everything flat. Note that the rudder has right turn built into it by leaving the right side flat and tapering the left side to the rudder's trailing edge.
The left fuselage side is then glued on, starting with the 3/32" plywood doubler, then piecing on the rest of the 3/32" balsa. At this point, the fuselage corners can be rough-shaped, rounded, and sanded. The QED 500 has no plywood on the edges of the fuselage, except at the front of the cowl. This makes for one of the nicest fuselages to shape, since the corners are balsa and have no plywood to shape.
Set the fuselage aside, and go on to building the wing.
Wing
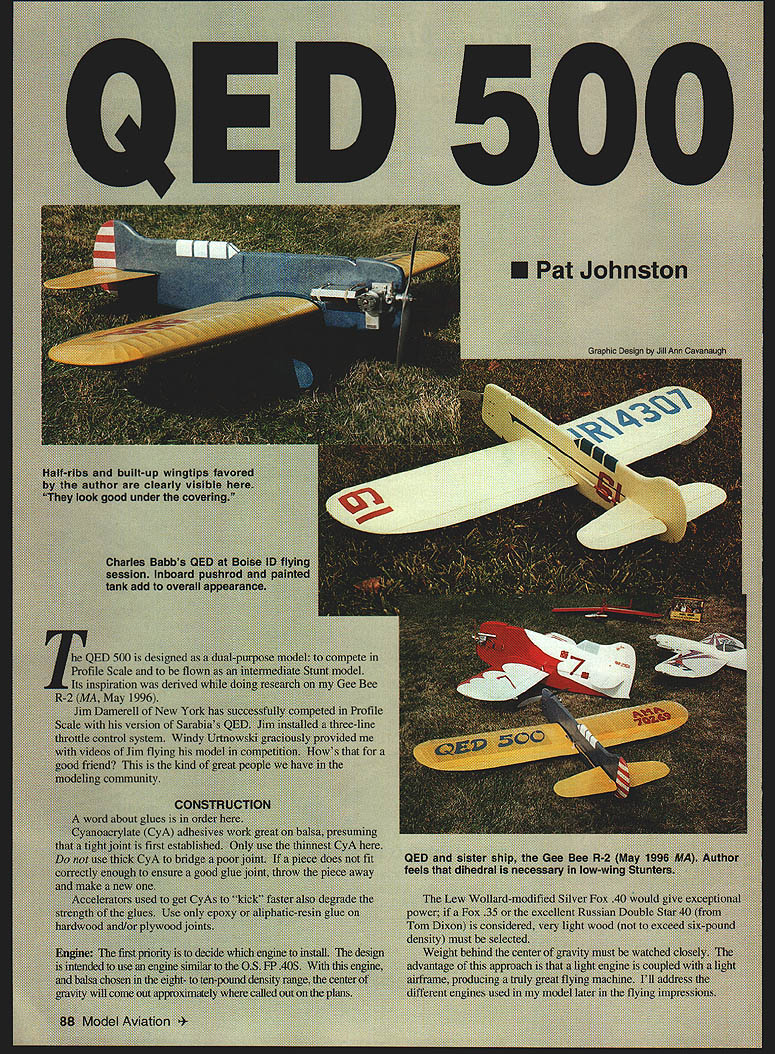
The original design came so close to the Sig Twister that it only took a very small alteration to make the wing the same chord so that Twister fans could use that wing with a few alterations. My design does have a slightly "humpier" airfoil, which satisfies my preference towards Al Rabe's airfoil shapes.
Each wing has one inch of dihedral. This aligns the vertical center of gravity with the wing tips. The result is that the airplane will fly with the wingtips level both right side up and inverted.
The wing halves are built in a jig using 3/8" spars. Consult the hole size here for your particular wing jig. The addition of the half-ribs gives good support for the airfoil, and looks great when covered.
The trailing edge may be built by butt-gluing the 1/4" trailing edge cap (as with the Twister construction) or by lengthening the trailing edge sheeting and sanding it over a shaped section of 1/4" balsa. I have shown the latter method on the plans because it eliminates one major glue joint to be sanded and dealt with during the finishing process. Leave the wing in the jig when installing the 1/16" shear webs.
The wingtips are built up Nobler style, with the addition of a 1/2" strip leading the edge. These tips look great after covering. An adjustable leadout guide of your choice is installed now. An adjustable wing nut/wing bolt box can be installed in the right wing. If not, securely attach 3/4 ounce of tip weight.
I have shown a standard three-inch bellcrank; however, most Stunt fans consider four-inch bellcranks to give superior service and a better feel on the lines.
My preference for leadouts is .031" solid music wire. The braided style can have a tendency to "saw" bellcrank holes, especially true for nylon bellcranks. If braided leadouts are chosen, make up a bushing for the connections.
The landing gear blocks are built up from 1/16" and 1/8" plywood to concentrate strength while minimizing weight. An extra front 1/4" spar provides added support for the landing gear blocks.
The center section sheeting completes the wing. Reinforce all center section joints with cloth and epoxy. Install the 3/32" music wire flap horn using a Du-Bro horn bearing.
Sheet Surfaces
The flaps, stabilizer, and elevators should be made from good-quality C-grain balsa. If your sources for this rare commodity are like mine (nonexistent), here is a method for "building" your own:
Sandwich two layers of light 3/32" balsa lengthwise over a light core of 1/16" balsa, with the grain 90° to the 3/32" stock. This will produce a surface that will absolutely resist curling when any kind of finish is applied. Kind of like synthetic C-grain! When sparing the surfaces, the 1/16" core provides an automatic reference.
The fuselage, wing, and tail pieces can now be joined. Check, measure, and recheck to ensure alignment.
Finish
Start with a complete sanding, then add Sig Epoxolite fillets. Dope-and-silkspan is my preference for finishing this model. Two coats of Sig nitrated dope or LCOAT low-shrink dope establish the base. A coat of sanding sealer is made from unscented auto dope.
A little hint here: dissolve the talc in thinner, then add it to the dope. This goes into solution readily. Talc mixed with straight dope stays lumpy till much mixing. Forcing it to a smooth solution — it only took me 25 years to figure this trick out.
Do not apply the sanding sealer to the fillets. This will keep blisters from raising up over the fillets.
Cover the entire model with silkspan, excluding the fillets (those pesky blisters again). Make sure to give the wings four or five coats of Sig Supercoat to promote good shrinkage of the silkspan over the open areas. Follow this with another four coats of Lite-Coat. Sand all wood surfaces between coats. Be careful with the sandpaper not to cut through the silkspan around the edges by the open bays.
Spray on the colors of your choice, and finish by spraying clear dope overall. The amount of clear is optional. To achieve a deep, hand-rubbed finish, more clear is needed. For guidance on the ultimate dope finish, consult Windy Urtnowski.
Engines
The QED 500 became quite an interesting testbed for checking out various engines. The Super Tigre .46 had plenty of power but was a bit nose-heavy. A power-oriented 12x5 prop produced comfortable speed and lots of usable torque. No doubt it was a bit overkill for this size airplane; the nose-heavy condition limited performance in the turning department.
The Super Tigre .35 plain-bearing fit directly and mounts two ounces less weight. An 11x5 prop worked surprisingly well considering its porting style.
Jerry James, a local hobby dealer, wanted to try the Thunder Tiger .40. He started out with an extra .015" head shim and ran a couple tanks through it on the ground. The engine/prop combination gave very comfortable 52-second laps, plenty of torque and line tension. I highly recommend the Thunder Tiger matched with an APC prop for this class airplane.
Setup / Flying
Mount the engine on aluminum pads. Windy offers weld pads milled two degrees. A 20% CC shown works well. Handle adjustable line spacing must be set for the stunt model. RSM Distribution sells a very good handle for around $25. Adjust handle line spacing and the airplane will groove smoothly. In level flight and inverted, square-cornered maneuvers should feel crisp, smooth, with flat exits. If the corner is tight and the model bobbles out of the turn, reduce line spacing a bit. If the exit is good but the corner is lacking, shift the C.G. back a bit — perhaps 1/8" — and more time on the lines will help until the corner crisps up.
QED 500 is a fun airplane and draws quite a response from spectators. It has a great sister ship, the Gee Bee R-2. I hope it provides you with many enjoyable flights. Feel free to contact me if I can be of assistance.
Pat Johnston 7671 Iron Ct. Boise, ID 83704
Product Sources:
- Stunt Engines: Tom Dixon, Box 671166, Marietta, GA 30066
- Lew Wollard, 3025 Locust, Wichita, KS 67216
- Tom Lay, T&L Specialties, Box 6052, Torrance, CA 90504
Other Addresses:
- Windy Urtnowski, 93 Elliott Place, Rutherford, NJ 07070
- RSM Distribution, 8 McLaren, Suite L, Irvine, CA 92718
- PAMPA, 158 Flying Cloud Isle, Foster City, CA 94404
It Is Proven
The Granville Brothers' transcontinental race plane was to demonstrate the quality of their workmanship and the quality of Howell Miller's design. Hence the name QED (quod erat demonstrandum — Latin for "it is proven").
In 1934, race pilot Jackie Cochran commissioned the Granvilles to build the QED with some modifications to the original design. In my opinion, she wisely increased the wing size from 144 to 211 square feet. This also would be the first Gee Bee design to incorporate flaps.
Jackie's intent was to compete for the 10,000 English pound (about $50,000 American) prize offered in the Mac Robertson International Air Race. Because of inexperience with the flaps, the stabilizer was damaged in Bucharest, Hungary. The repair time was estimated at three days, which put the QED out of the race.
The QED made more attempts at the Bendix race and Thompson Trophy Race with little success. Bad luck of one sort or another seemed to be plaguing the QED.
In 1937, Charles Babb bought the QED and performed a complete overhaul. The engine was upgraded from the 675-horsepower Pratt & Whitney to an 875-horsepower Pratt & Whitney. The color was changed to a base color of cream with a green stripe on the side. The racing number 61 was applied to the fuselage sides and wingtips. The registration number NX14307 was put on the wings, covering as much area as possible. This paint scheme gave the QED a distinctive look.
Good looks don't win races, though. The 1938 Bendix race from Burbank, California to Cleveland, Ohio found the QED suffering with low oil pressure, high oil temperature, an icing carburetor, and a failing radio. Maybe the radio was the last straw, as George Armistead, the pilot, set the QED down at Winslow, Arizona, and with a few choice words on the radio, walked away in disgust. (Jackie Cochran won the race with a Seversky P-35.)
The QED passed into the hands of Mexico's famed Captain D.A. Francisco Sarabia. The QED completed a record-breaking nonstop flight from Mexico City to New York in 10 hours, 49 minutes. This trip was to bring the message of goodwill from the people of Mexico to the people of the United States.
Unfortunately, the flight home displayed the sheer force of bad luck that seemed to dog the Granvilles' aircraft. A rag had been inadvertently left in the cowl, and a short time after takeoff from Bolling Field near Washington, D.C., the rag was sucked into the carburetor, instantly killing the engine. With a full load of fuel for the trip back to Mexico, the QED came down in the Potomac River, killing Sarabia. Accusations of sabotage were leveled, but an investigation came to the conclusion of carelessness on the part of some unnamed mechanic. The QED was dismantled and hauled back to Mexico.
In the mid-1960s, Alberto Sarabia, a cousin, restored the airplane to mint condition. The QED now rests in a museum at Ciudad Lerdo, a beautiful example of the last of the Granville Brothers' great race planes.
Historical background and documentation of the QED can be gleaned from The Gee Bee Racers by Charles Mendenhall and Tom Murphy.
Full-Size Plans Available — see page 181
Transcribed from original scans by AI. Minor OCR errors may remain.

