

Quick One P-30
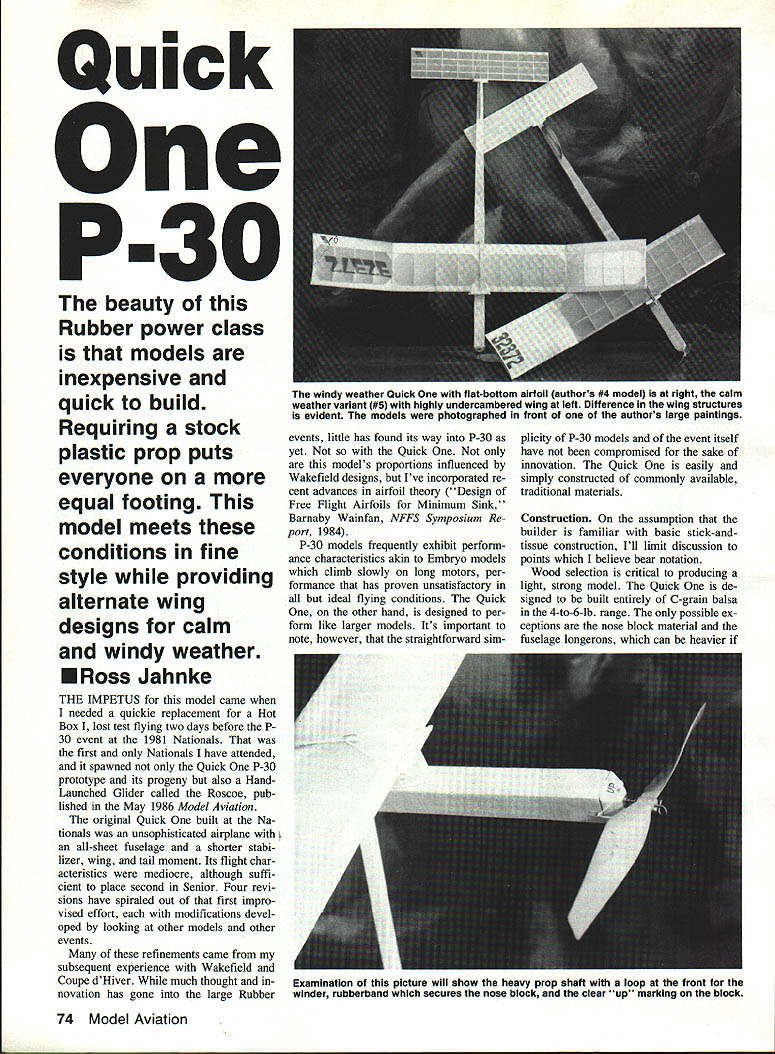
The beauty of this rubber-powered class is that models are inexpensive and quick to build. Requiring a stock plastic prop puts everyone on a more equal footing. This model meets those conditions in fine style while providing alternate wing designs for calm and windy weather.
Ross Jahnke
The impetus for this model came when I needed a quick replacement for a Hot Box I lost test flying two days before the P-30 event at the 1981 Nationals. That was the first and only Nationals I have attended, and it spawned not only the Quick One P-30 prototype and its progeny but also a hand-launched glider called the Roscoe (published in the May 1986 Model Aviation).
The original Quick One built at the Nationals was an unsophisticated airplane with an all-sheet fuselage and a shorter stabilizer, wing, and tail moment. Its flight characteristics were mediocre, although sufficient to place second in Senior. Four revisions have spiraled out of that first improvised effort, each with modifications developed by looking at other models and other events.
Many of these refinements came from my subsequent experience with Wakefield and Coupe d'Hiver. While much thought and innovation has gone into the large rubber events, little has found its way into P-30 as yet. Not so with the Quick One. Its proportions are influenced by Wakefield designs, and I incorporated recent advances in airfoil theory (see Barnaby Wainfan, "Design of Free Flight Airfoils; Minimum Sink," NFFS Symposium Report, 1984).
P-30 models frequently exhibit performance characteristics akin to Embryo models, which climb slowly on long motors — performance that has proven unsatisfactory except in ideal flying conditions. The Quick One, on the other hand, is designed to perform like larger models. The straightforward simplicity of P-30 models and of the event itself has not been compromised for the sake of innovation. The Quick One is easily and simply constructed of commonly available, traditional materials.
Construction
On the assumption that the builder is familiar with basic stick-and-tissue construction, I'll limit discussion to points which I believe bear notation.
Wood selection
Wood selection is critical to producing a light, strong model. The Quick One is designed to be built entirely of C-grain balsa in the 4- to 6-lb. range. The only possible exceptions are the nose block material and the fuselage longerons, which can be heavier if desired. I recommend Sig balsa for those who are inexperienced or insecure in selecting wood. Sig accurately grades its balsa according to density.
Airfoil
The particular airfoil section used is this model's most distinguishing feature. It's adapted specifically for P-30s using the design parameters outlined in the Barnaby Wainfan article mentioned earlier. I've incorporated such airfoils into models in the Coupe, Bostonian, and Embryo size categories and seen improved glide performance in each case.
The most crucial features of this airfoil are the leading-edge (LE) radius, upper camber, and lower camber. Increasing the leading-edge radius will significantly increase the drag of the wing. Sand the leading edge to a nearly sharp contour. Overlapping the tissue will provide the proper radius of approximately 1/32 in.
The upper camber is designed to provide maximum lift without inducing separation of the boundary layer of air, which causes drag. The lower camber also helps to retard separation, but is less critical. The compromise in structural integrity is an obvious defect of this wing, yet the sparless construction has performed flawlessly in 15–20 mph winds. For beginners or for a backup model, I recommend the flat-bottomed airfoil. With the latter, the leading edge and upper camber are the same as on the thin airfoil.
Building the wing
Building the wing is quite simple. Be sure to notch the leading and trailing edges prior to construction; doing so greatly increases the contact area of the glue joints, adding considerable strength. When you cut off the wingtips at the dihedral break, carefully sand the LE and TE so that they fit together to form the proper dihedral angle. Since the wing is 32 in. long, at least 4 in. of dihedral is required under each tip to bring the projected span down to 30 in.
Fuselage
In my judgment a good fuselage must satisfy four criteria:
- It must be sufficiently durable so both the structure and its components—nose, dethermalizer (DT), wing mounts, etc.—perform reliably and predictably for several seasons.
- Its weight must be distributed well to eliminate the need for ballast.
- The fuselage must have a tough motor tube, able to withstand motor breakage and torque.
- It must have a trustworthy dethermalizer that will work 100% of the time and bring the model down (my first official flight in P-30 at the Nats lasted over seven minutes with the stab DT'ed).
The fuselage in this model was designed to be nose-heavy to allow the wing to be positioned farther forward and the center of gravity to be near the center of the rubber motor. The cross-grained sheeting on the motor tube helps to shift the weight forward; it's also rigid and resistant to breakage if the motor should blow. This type of construction was standard for Wakefields before rolled tube came into use.
To make the sheeting, cut a sheet of 1/32 x 3-in. balsa into 4-in. lengths, and glue them side to side. After drying, carefully cut this assembly into four strips, two each of 1/16- and 1-in. widths. Make some extra sheeting from which to build the pylon.
Nose block and winding
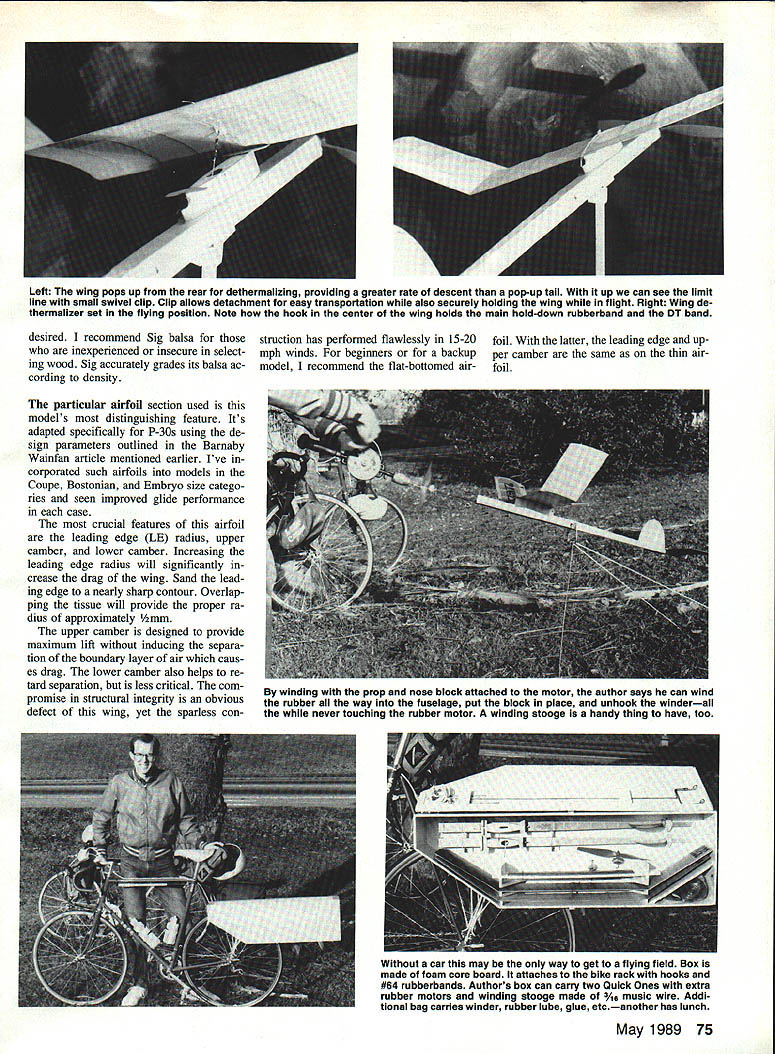
The nose block is critical to the mechanical soundness of the model. Too often, insufficient attention is paid to construction of the nose block, resulting in inconsistent flights and constant readjustment. To forestall these problems, use harder wood for the block to minimize wear. I chose 1/16-in. music wire to prevent bent prop shafts. A brass wire is soldered to the front of the bearing to keep it from pushing out of the block. The model comes down nose first when DT'ed, so a stout front end is warranted.
Since winding the model is often an awkward chore, particularly in the heat of competition, I used a winding loop on the front of the shaft. I also suggest clearly marking or keying the top of the nose block to ensure that it's always inserted right-side-up.
Dethermalizer
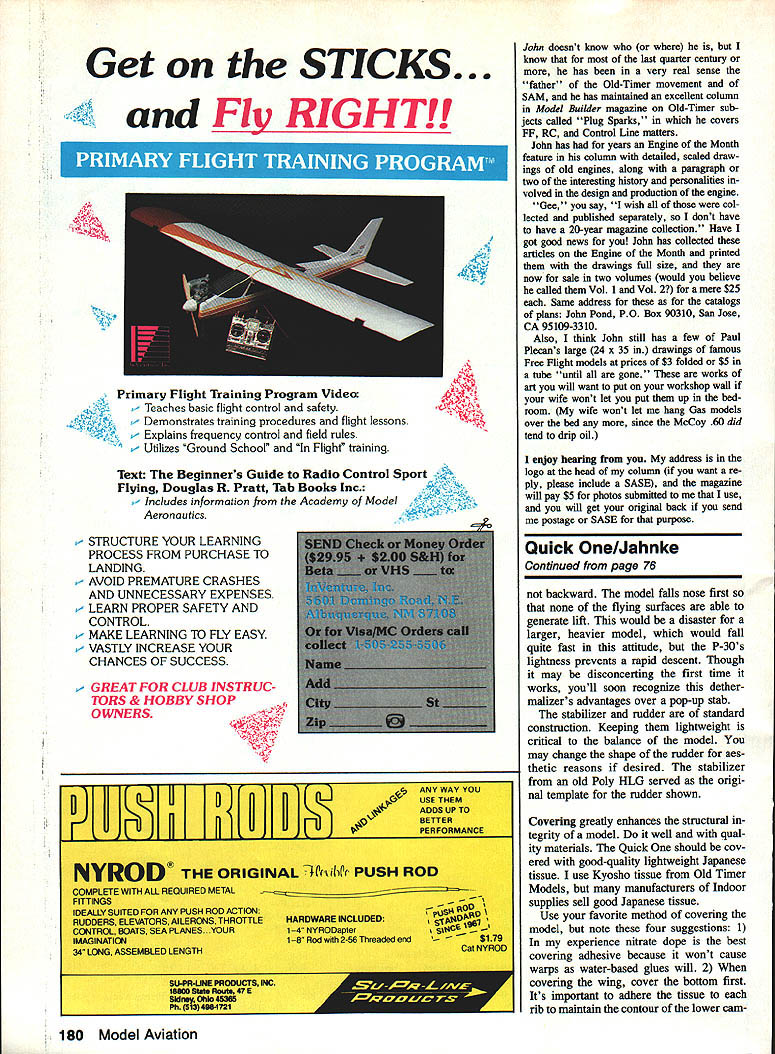
The dethermalizer might strike you as inappropriate at first, but it's 100% effective in bringing the model down. Having the wing dethermalize promotes a more positive reaction of the model during landing, and the weight of the mechanism is over the center of gravity rather than way out at the end of the tail moment. To make the DT even more positive, the wing pops forward, not backward. The model falls nose first so that none of the flying surfaces are able to generate lift. This would be a disaster for a larger, heavier model, which would fall quite fast in this attitude, but the P-30's lightness prevents a rapid descent. Though it may be disconcerting the first time it works, you'll soon recognize this dethermalizer's advantages over a pop-up stab.
Stabilizer and rudder
The stabilizer and rudder are of standard construction. Keeping them lightweight is critical to the balance of the model. You may change the shape of the rudder for aesthetic reasons if desired. The stabilizer and rudder shown were cut from 1/16-in. sheet and finished with light cap strips; the plan gives the proper dimensions.
Covering
Covering greatly enhances the structural integrity of a model. Do it well and with quality materials. The Quick One should be covered with good-quality lightweight Japanese tissue. I use Kyosho tissue from Old Timer Models, but many manufacturers of indoor-model supplies sell good Japanese tissue.
Use your favorite method of covering the model, but note these suggestions:
- In my experience, nitrate dope is the best covering adhesive because it won't cause warps as water-based glues will.
- When covering the wing, cover the top first, then the bottom.
- It's important to adhere the tissue to each rib to maintain the contour of the lower camber.
- Apply dope in thin coats and allow thorough drying between coats.
Final trimming and flying
Final trimming is straightforward. Start with the center of gravity as shown on the plan. Small amounts of nose or tail weight will correct climb attitude; add slight up-elevator for a gentler climb and a touch of right thrust to counter motor torque. Test-glide with a few turns of the motor and make small rudder and stab adjustments until you have a gentle left-turning glide and a smooth climb.
The Quick One is forgiving in a range of conditions. In calm air the undercambered wing gives excellent climb and float; in windier conditions the flat-bottom wing is more practical. With careful wood selection, accurate airfoil shaping, and proper covering, the Quick One will reward you with long, consistent flights and good contest performance. If the model underperforms, add power and make small adjustments to compensate.
At full power the model should climb rapidly and make two to three circles before the prop begins to freewheel. The transition at the apex from power to glide should be almost undetectable. With practice a javelin-style launch is possible, using the rubber access hole in the fuselage as a finger rest.
After the model is well trimmed, continue practice flying to familiarize yourself with the airplane and pertinent field procedures. By flying at least one night a week during summer vacation, I can set up efficiently and concentrate on finding thermal air when I go to a contest. Even if you aren't much interested in contests, being prepared will make flying more enjoyable.
I know you're going to like this model's outstanding performance envelope. Above all, the Quick One should be fun. Your questions or comments are welcome. Send them to Ross Jahnke, W65 N727 St. John Ave., Cedarburg, WI 53012.
Transcribed from original scans by AI. Minor OCR errors may remain.

