
Quickey 300
By Paul Denison
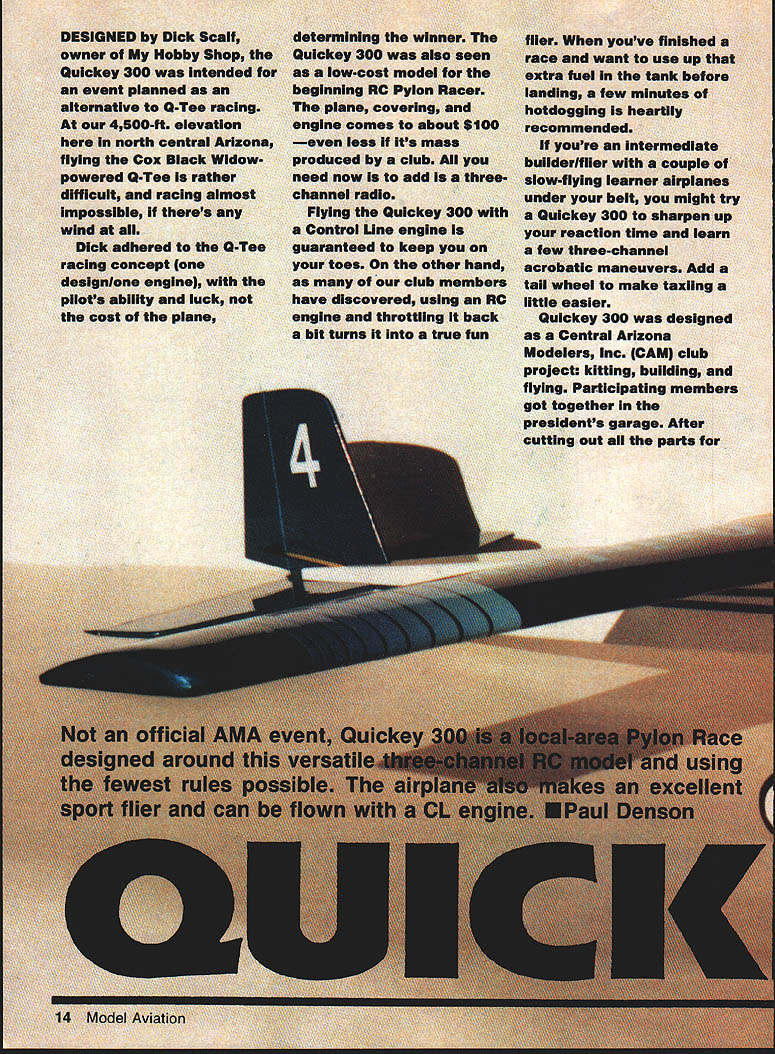
Designed by Dick Scalf, owner of My Hobby Shop, the Quickey 300 was intended for an event planned as an alternative to Q-Tee racing. At our 4,500-ft elevation in north-central Arizona, flying the Cox Black Widow–powered Q-Tee is difficult, and racing is almost impossible when there's any wind.
Dick adhered to the Q-Tee racing concept (one design/one engine), so pilot skill and luck, not the cost of the plane, determine the winner. The Quickey 300 was also intended as a low-cost model for beginning RC pylon racers. The plane, covering, and engine come to about $100—even less if mass produced by a club. All you need to add is a three-channel radio.
Flying the Quickey 300 with a control-line (CL) engine will keep you on your toes. Using an RC engine and throttling it back a bit turns it into a true fun flier. After a race, when you want to use up the remaining fuel before landing, a few minutes of hot-dogging is recommended.
If you're an intermediate builder/flier with a couple of slow-flying learner airplanes behind you, try a Quickey 300 to sharpen reaction time and learn three-channel acrobatic maneuvers. Add a tail wheel to make taxiing easier.
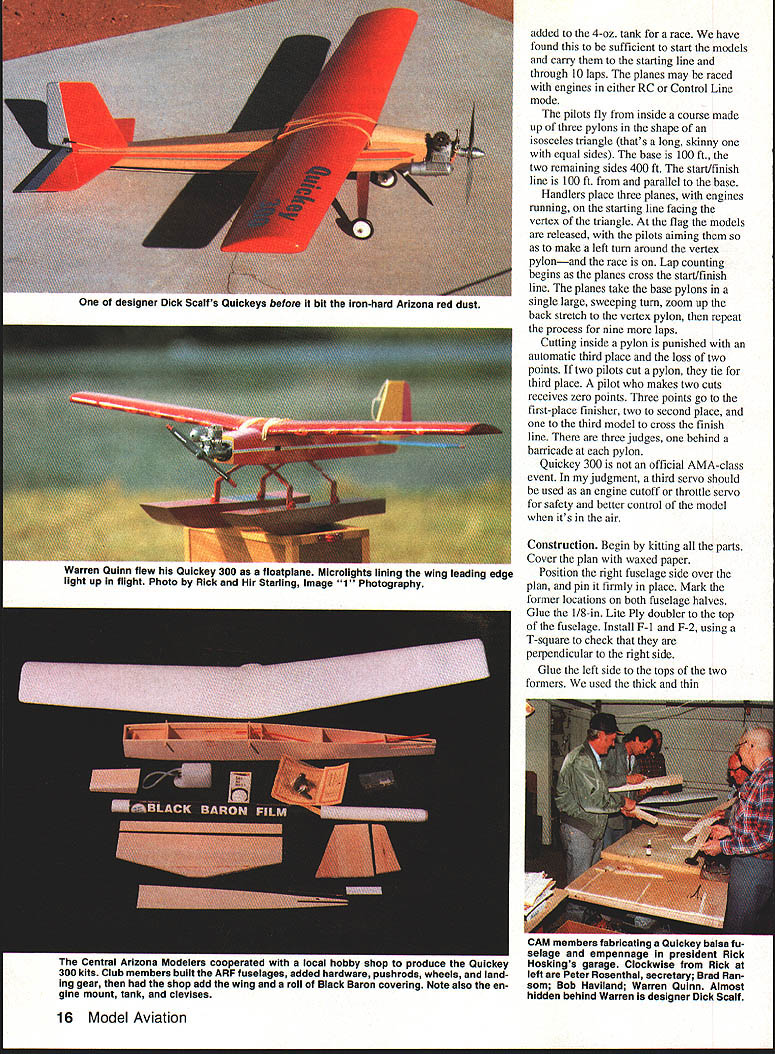
Quickey 300 was designed as a Central Arizona Modelers, Inc. (CAM) club project: kitting, building, and flying. Participating members worked in the president's garage. After cutting all parts for each plane using jigs designed by Dick, they formed an assembly line to build the fuselages. A fuselage was passed from worker to worker, each adding a part in turn. The thick- and thin-consistency varieties of UFO, set with Kick-It, provided instant gluing. At that point the fuselages were almost ready to fly—i.e., ARFs.
We packed hardware, pushrods, wheels, and landing gear inside the fuselages, then took the kits to My Hobby Shop. The shop completed them with a wing and a roll of Black Baron covering, then put them up for sale to club members.
A hobby shop is helpful but not necessary. Any club could make the ARF fuselages, cut out the empennage, and purchase wings and landing gear from Sig. Each member could purchase the remaining hardware as desired.
In planning the Quickey 300 event we held to the fewest rules possible. Only unmodified O.S. FP .20 RC or CL engines are used, and they must wear a muffler. Props are stock 8 x 6. Landing gear and wheels are required. Minimum weight is 2 1/4 lb. Standard 15% fuel is used, with 1 to 1 1/4 oz. of fuel added to the 4-oz. tank for a race. We have found this to be sufficient to start the models and carry them to the starting line and through 10 laps. The planes may be raced with engines in either RC or control-line mode.
Pilots fly from inside a course made up of three pylons in the shape of an isosceles triangle (a long, skinny triangle with equal sides). The base is 100 ft; the two remaining sides are 400 ft. The start/finish line is 100 ft from and parallel to the base.
Handlers place three planes, engines running, on the starting line facing the vertex of the triangle. At the flag the models are released, with pilots aiming them to make a left turn around the vertex pylon—and the race is on. Lap counting begins as the planes cross the start/finish line. The planes take the base pylons in a single large, sweeping turn, zoom up the back stretch to the vertex pylon, then repeat the process for nine more laps.
Cutting inside a pylon is punished with an automatic third place and the loss of two points. If two pilots cut a pylon, they tie for third place. A pilot who makes two cuts receives zero points. Scoring: three points for first place, two for second, and one for third. There are three judges, one behind a barricade at each pylon.
Quickey 300 is not an official AMA-class event. For safety and better control, a third servo should be used as an engine cutoff or throttle servo.
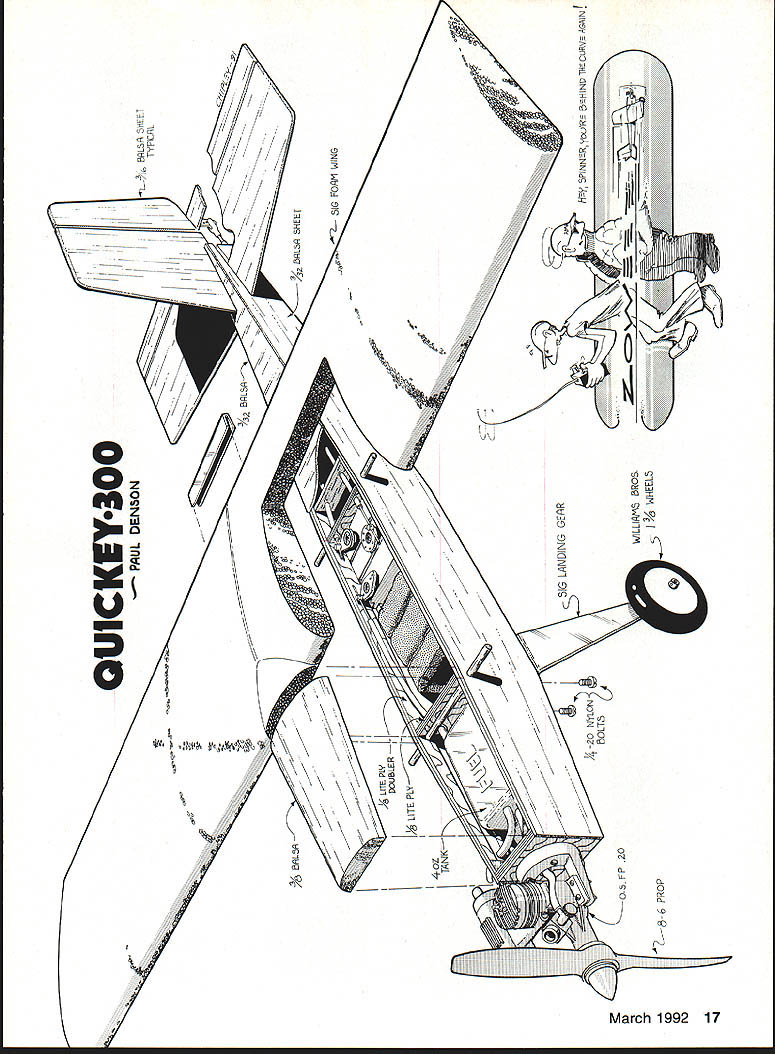
Materials / Specifications
- 3/32" balsa sheet
- 1/8" balsa sheet
- 1/8" lite ply doubler
- 1/16" lite ply
- 4-oz tank
- Sig landing gear
- Williams Bros. 1-3/8" wheels
- O.S. F.P. .20 engine
- 2 - 8 x 6 prop
Construction
- Kitting and preparation
- Cover the plan with waxed paper.
- Position the right fuselage side over the plan and pin it firmly in place. Mark former locations on both fuselage halves.
- Glue the 1/8" lite ply doubler to the top of the fuselage. Install formers F-1 and F-2, using a T-square to check that they are perpendicular to the right side.
- Fuselage assembly
- Glue the left side to the tops of the two formers.
- Insert formers F-3, F-4, F-5, and F-6. These formers are purposely made slightly wide to allow for any bow in the sides; trim their edges if necessary to fit between the sides.
- Have clamps or masking tape ready. Bring the front fuselage sides together, fit the firewall between them, and glue and clamp in place.
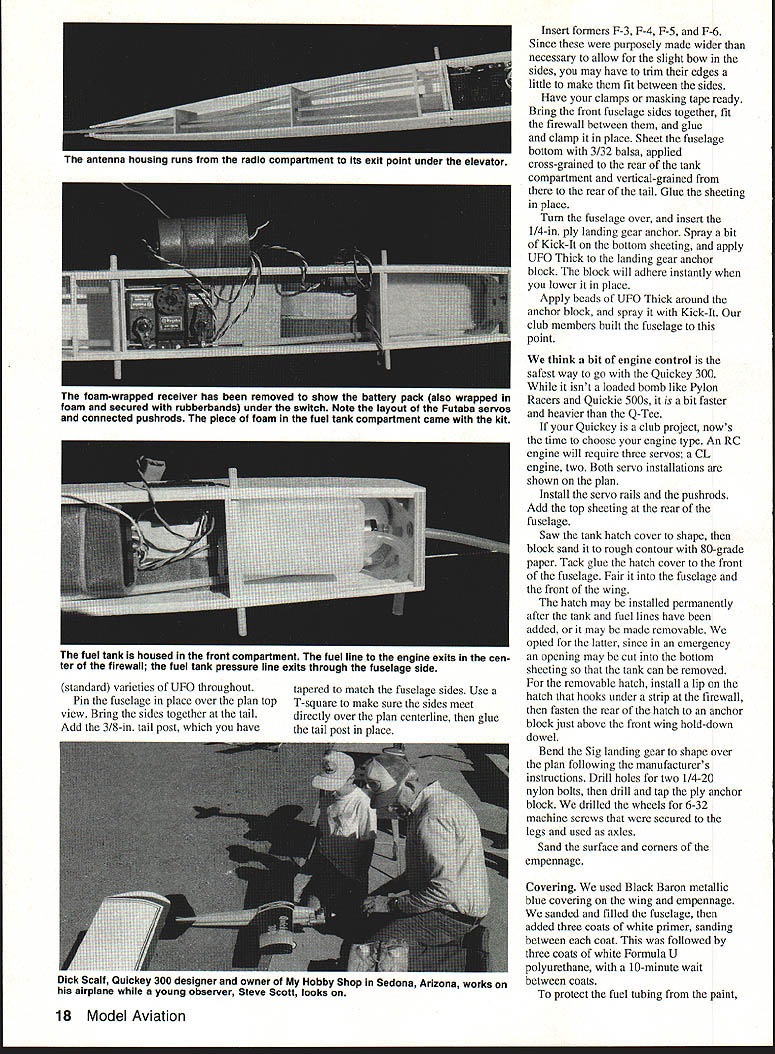
- Sheet the fuselage bottom with 3/32" balsa: apply cross-grained sheeting to the rear of the tank compartment and vertical-grained sheeting from there to the rear of the tail. Glue sheeting in place.
- Landing gear anchor
- Turn the fuselage over and insert the 1/4" ply landing gear anchor.
- Spray a bit of Kick-It on the bottom sheeting and apply UFO Thick to the landing gear anchor block. Lower in place—the block will adhere instantly.
- Apply beads of UFO Thick around the anchor block and spray with Kick-It.
- Servo and tank installation
- Decide on engine type: RC engines require three servos; CL engines require two. Both servo installations are shown on the plan.
- Install servo rails and pushrods. Add the top sheeting at the rear of the fuselage.
- Saw the tank hatch cover to shape, then block-sand it to rough contour with 80-grit paper. Tack-glue the hatch cover to the front of the fuselage and fair it into the fuselage and the front of the wing.
- The hatch may be installed permanently after the tank and fuel lines are added, or made removable. For a removable hatch, install a lip on the hatch that hooks under a strip at the firewall, then fasten the rear of the hatch to an anchor block just above the front wing hold-down dowel.
- Landing gear and wheels
- Bend the Sig landing gear to shape over the plan following the manufacturer's instructions.
- Drill holes for two 1/4-20 nylon bolts, then drill and tap the ply anchor block.
- We drilled the wheels for 6-32 machine screws secured to the legs and used as axles. Sand the surface and corners of the empennage.
- Covering and finishing
- Cover the wing and empennage with Black Baron metallic blue covering.
- Sand and fill the fuselage, then apply three coats of white primer, sanding between coats. Follow with three coats of white Formula U polyurethane, waiting 10 minutes between coats.
- Use slit milk-shake straws over tubing when painting trim details to protect openings.
- When gluing the empennage in place, remove part of the covering to achieve a wood-to-wood bonding surface.
- Add engine, landing gear, and tail skid. Install servos and connect them to the control surfaces. Rubber-band the wing in place.
We think a bit of engine control is the safest way to go with the Quickey 300. While it isn't as loaded as full-size Pylon Racers or Quickie 500s, it is a bit faster and heavier than the Q-Tee.
If your Quickey is a club project, now's the time to choose your engine type and finalize the installation.
Flying
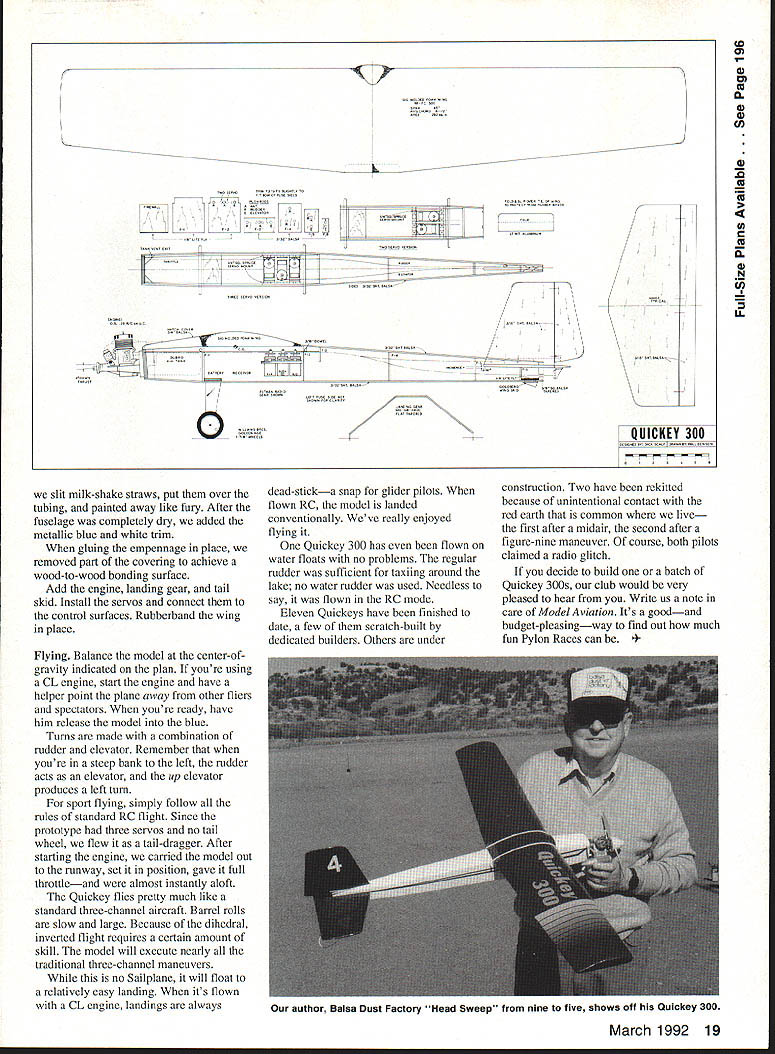
- Balance the model at the center-of-gravity indicated on the plan.
- If using a CL engine, start the engine and have a helper point the plane away from fliers and spectators. When ready, have the helper release the model into the breeze.
- Turns are made with a combination of rudder and elevator. When in a steep left bank, the rudder acts as an elevator and the up elevator produces a left turn.
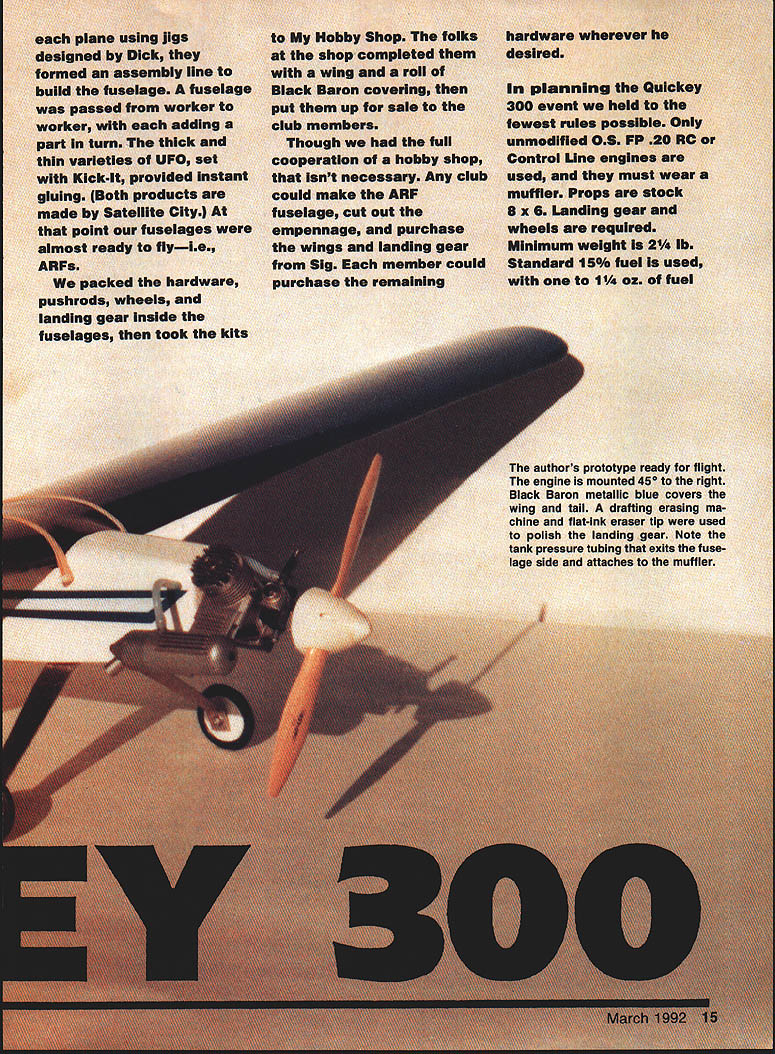
- For sport flying, follow standard RC flight rules. The prototype had three servos and no tail wheel and was flown as a tail-dragger. After starting the engine, carry the model out to the runway, set it in position, give full throttle—and it will be aloft almost instantly.
- The Quickey flies much like a standard three-channel aircraft. Barrel rolls are slow and large. Because of the dihedral, inverted flight requires skill. The model will execute nearly all traditional three-channel maneuvers.
- While not a sailplane, it will float to a relatively easy landing. With a CL engine, landings are dead-stick; with RC, land conventionally.
- One Quickey 300 has been flown on water floats with no problems; the regular rudder sufficed for taxiing around the lake (no water rudder was used). That example was flown in RC mode.
Eleven Quickeys have been finished to date; a few were scratch-built by dedicated builders and others are under construction. Two were re-kitted after contact with the red earth common in our area—the first after a midair, the second after a figure-nine maneuver. Both pilots claimed a radio glitch.
If you decide to build one or a batch of Quickey 300s, our club would be pleased to hear from you. Write to us in care of Model Aviation. It's a good—and budget-pleasing—way to find out how much fun pylon races can be.
Transcribed from original scans by AI. Minor OCR errors may remain.

